I guess I better say somethin'! Happy New Year everybody. I wish you all the best hope you all prosper in 2012.
The last couple of weeks have been a bit of a roller coaster ride. About 10 days before Xmas I get "The Letter" on Black Monday. Gov't cuts are starting to be rolled out across the country and my position has been offically eliminated. After 31+ yrs in the Coast Guard my future here is very limited. What it all means right now is not much will change right away. That's ok I understand how fast gov't works. I've sort of known this has been coming for awhile.
After thinking hard about this I'm really pushing for an early retirement (package) that won't see me penalized because of my age. They (Gov't) did it back in the 90's with something called an Early Retirement Initiative (ERI). If I can get the same benefits as they did back then I'll volunteer to go early.
I really don't think this is a bummer and would welcome the opportunity to retire early. More time for boat building but I'd have to be more careful with the $$$.
We had a pretty good wind storm come through night before last so I am looking to anchor the shed a little better. I got two of those screw in anchors farmers use for fences and a 20,000 lb ratchet strap. Once the ground thaws a bit I can get the anchors in. I've had this reoccuring nightmare of the shed being blown away in a storm and the other night it was a dream of the shed deflating like a weather baloon that's been shot down! :-) Have to quit eating jalapeno's before bedtime!
Later........

She:Kon, pronounced "Say-go" traditional Iroquois greeting meaning "Do you still have the Great Peace?"
Tuesday, January 3, 2012


Saturday, December 10, 2011
What's on your Xmas boatbuilding wish list?
Hmmmm?
15 gallons of epoxy
10 yds of multi-axial carbon fiber
Gridcooler (Keel Cooler)
After that, not much else. We've got pretty much everything we need to laminate the hull and flip it over. Once that's done there's a few other big ticket items we'll have to plan for, fridge, windows etc.
C'mon Spring! :-)
15 gallons of epoxy
10 yds of multi-axial carbon fiber
Gridcooler (Keel Cooler)
After that, not much else. We've got pretty much everything we need to laminate the hull and flip it over. Once that's done there's a few other big ticket items we'll have to plan for, fridge, windows etc.
C'mon Spring! :-)
Saturday, November 19, 2011
Can you believe
the wonderful fall weather? Sheez I've pissed away a few weeks of prime boat building time. Kickin' myself for that. Today I couldn't let the good weather slip by anymore and got back out to the shed. Temps inside were a nice 50+ degs F. Not too bad. If you keep moving, which I did, it's comfortable to work.
What I decided to do today was install the bow thruster tube. First challenge was to draw a straight line down the exact middle of a tube. A quick visit to Google brought me to this trick.

Pretty slick eh?
Second task was inside the boat locating the ideal spot for the tube. Instructions say it should be at least 100 mm (4") below the waterline. Ideally it should be 150 mm (it's a 150mm tube). The instructions also say it, the tube, should be no less than 100 mm from the bottom of the boat. The tube also has to be longer than 50 cm from side to side on the shortest (bottom) side. That presents me with a bit of a space issue.
Using my laser level and measuring from Frame A I located the water line and then drew out the parallel lines for 100 mm, 150 mm and 100 mm from the bottom. I had to compromise and move the tub up 25mm (1 in) so that it would end up the minimum 100 mmm from the waterline. I drew a base line and drilled two parallel holes to set my initial spot.
To draw the hole, which on an curved and inclined surface like the upside down hull of a boat you need to make up a device that'll follow the circumferance of a circle and also move along the contours. It looks something like this.

With this tool I could easily draw out the hole for the tube. The first position I chose the hole was pretty elongated due to the slope and curve of the hull.

I moved the centering hole 3" forward of my original position and drew another hole for the tube. This was much better. A quick run around the holes with the Jig Saw and they were ready for the tube initial fitting.

Using the template for the thruster housing I cut the holes with the tube on the bench. Much easier this way.

Another couple if fittings and I was ready to trim the ends. I marked the outside of the tub where it'd be cut off then put it back in the vice.

You have to use a High Speed Steel jig saw blade on this stuff. It wore the teeth right off of a plain wood blade in about 3' of cut! :-)
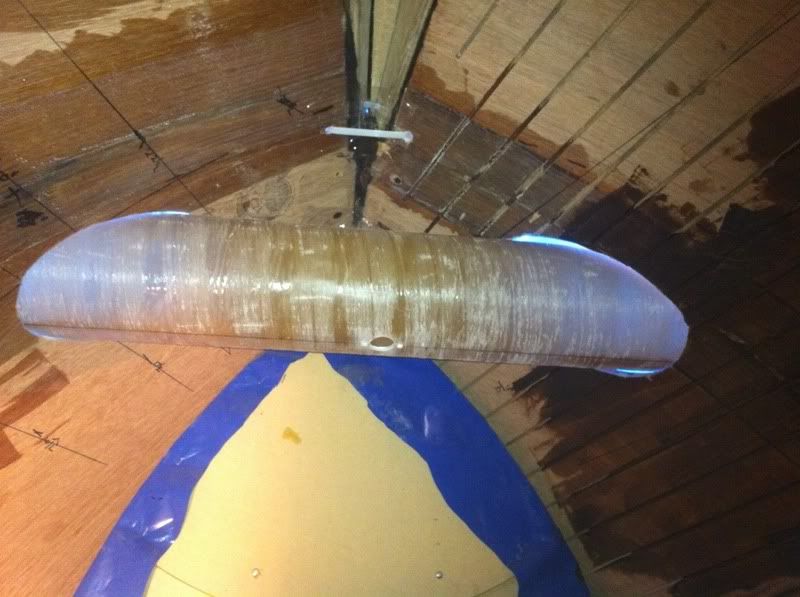
Last fitting for today. I'll probably glue it into place tomorrow if the weather permits.

Carry on.
What I decided to do today was install the bow thruster tube. First challenge was to draw a straight line down the exact middle of a tube. A quick visit to Google brought me to this trick.
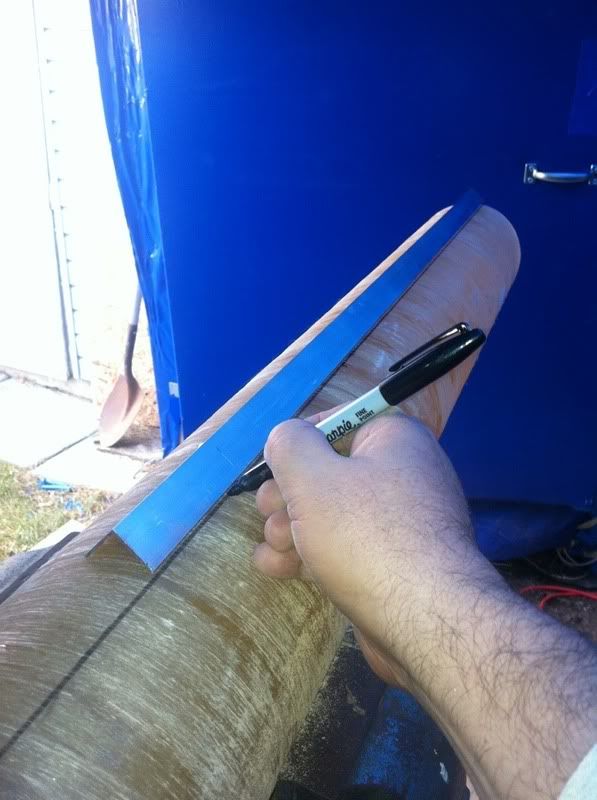
Pretty slick eh?
Second task was inside the boat locating the ideal spot for the tube. Instructions say it should be at least 100 mm (4") below the waterline. Ideally it should be 150 mm (it's a 150mm tube). The instructions also say it, the tube, should be no less than 100 mm from the bottom of the boat. The tube also has to be longer than 50 cm from side to side on the shortest (bottom) side. That presents me with a bit of a space issue.
Using my laser level and measuring from Frame A I located the water line and then drew out the parallel lines for 100 mm, 150 mm and 100 mm from the bottom. I had to compromise and move the tub up 25mm (1 in) so that it would end up the minimum 100 mmm from the waterline. I drew a base line and drilled two parallel holes to set my initial spot.
To draw the hole, which on an curved and inclined surface like the upside down hull of a boat you need to make up a device that'll follow the circumferance of a circle and also move along the contours. It looks something like this.
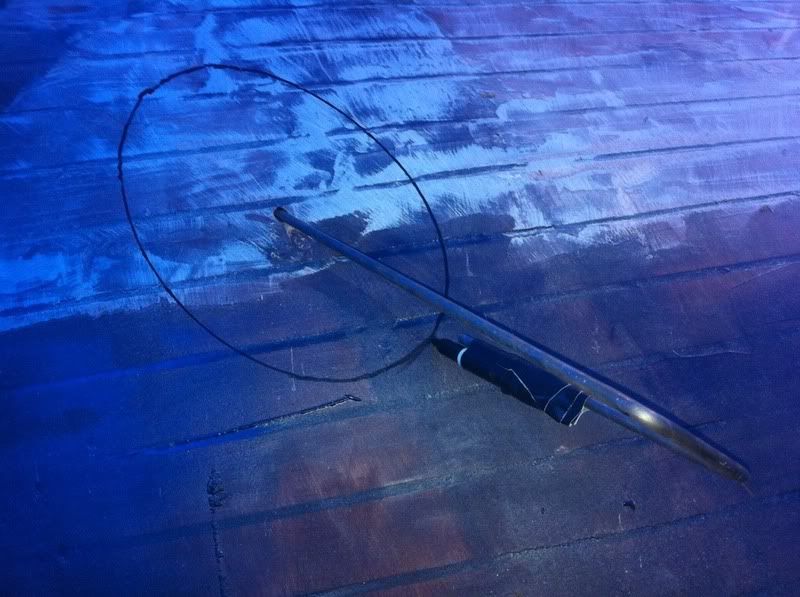
With this tool I could easily draw out the hole for the tube. The first position I chose the hole was pretty elongated due to the slope and curve of the hull.
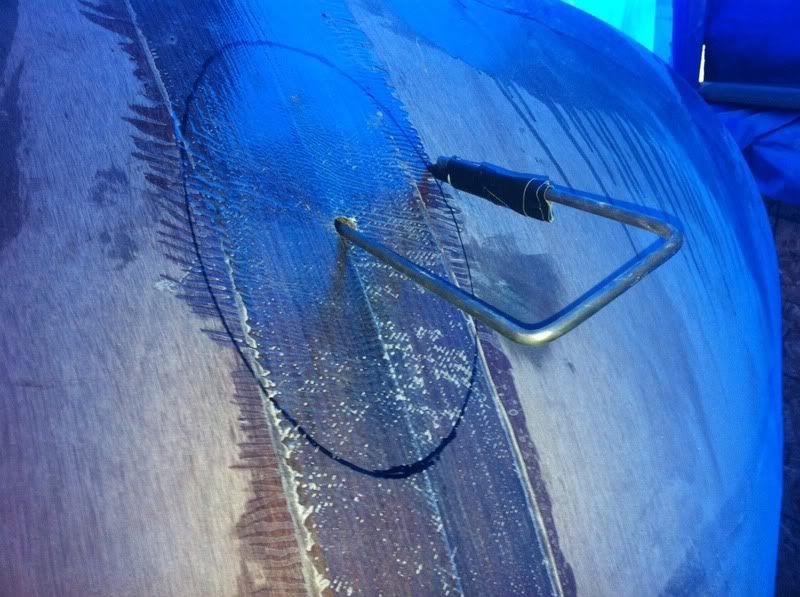
I moved the centering hole 3" forward of my original position and drew another hole for the tube. This was much better. A quick run around the holes with the Jig Saw and they were ready for the tube initial fitting.
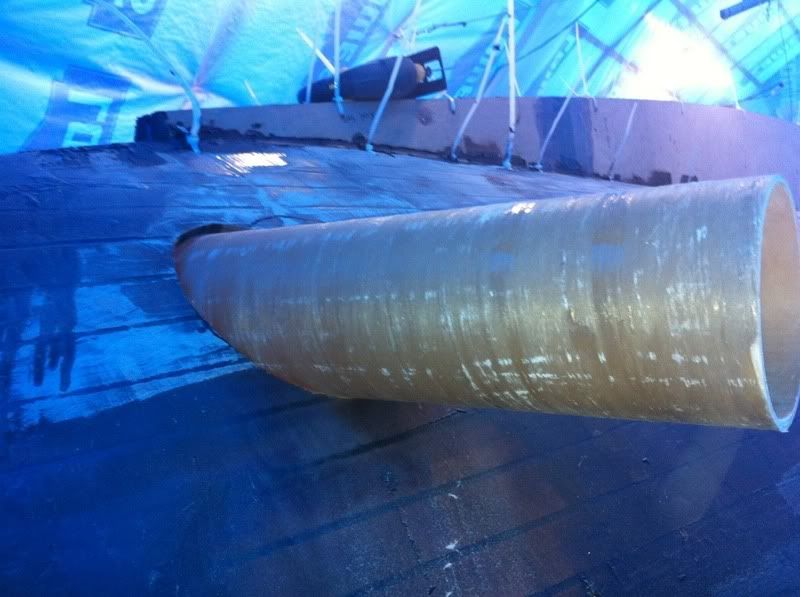
Using the template for the thruster housing I cut the holes with the tube on the bench. Much easier this way.
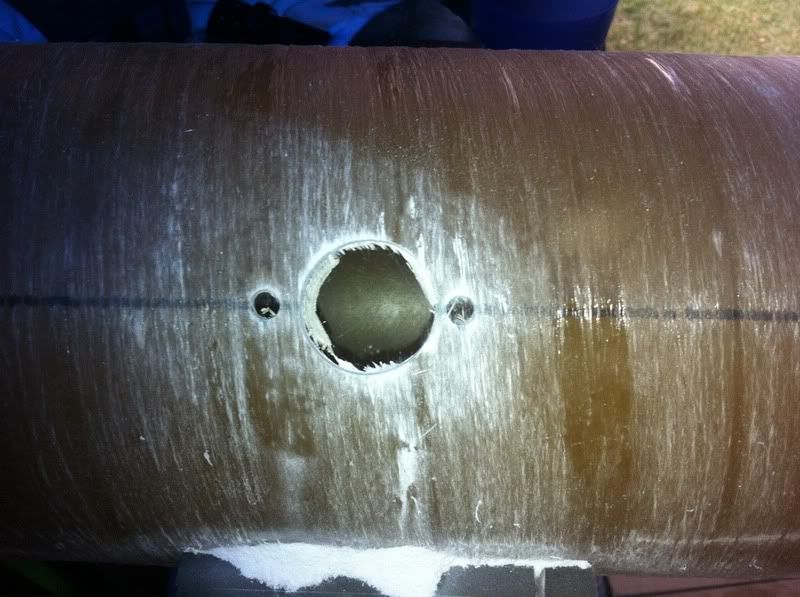
Another couple if fittings and I was ready to trim the ends. I marked the outside of the tub where it'd be cut off then put it back in the vice.
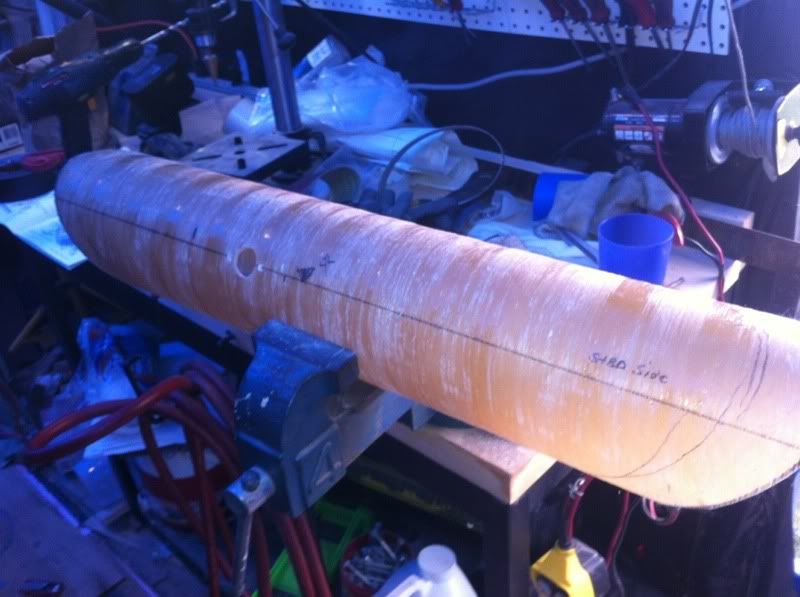
You have to use a High Speed Steel jig saw blade on this stuff. It wore the teeth right off of a plain wood blade in about 3' of cut! :-)
Last fitting for today. I'll probably glue it into place tomorrow if the weather permits.
Carry on.
Friday, October 28, 2011
That's pretty much it!
Had to bring the epoxy inside last night so it didn't freeze. Guess that's pretty much it except for some sanding till spring. :-(
Sunday, October 23, 2011
Not much to show
this week. Been lazier than ole' Bootsy Boy lately. Must be the change in seasons. Body is telling me it's soon time to hibernate. Tucked the car and boat away in barns for the winter. :-(
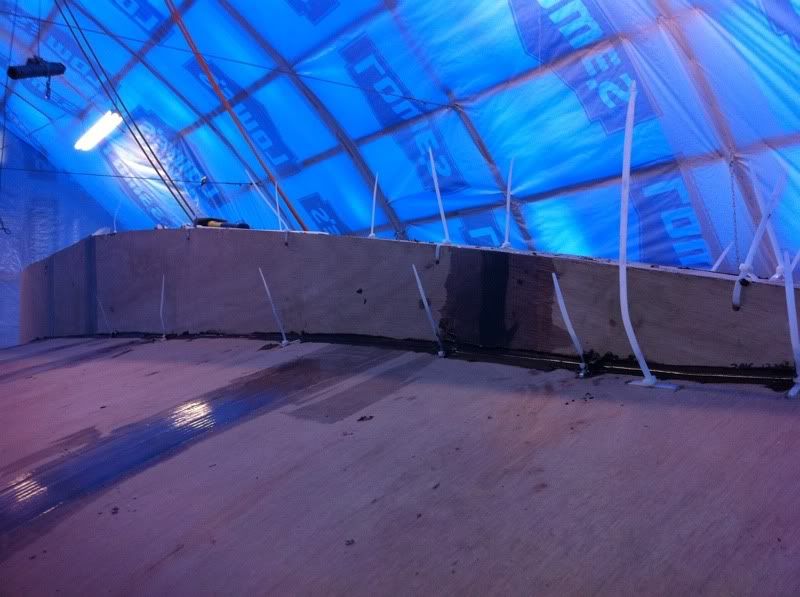
This weekend I did manage to get the bulwarks tacked into place to see what they look like.

Ran into a small problem with the flare of the bow being a little more than planned. The side panels are off the forms about 5/8" causing the bulwarks to leave a fair size gap. I pulled the side panels back in a bit to reduce the gap.

I'll glue these on next week weather permitting.
Today I got the keel lined up and shimmed and glued down. It's now part of the hull. Not much to show for 4 hrs work but there was a lot of futzin' around to get it all lined up.

This weekend I did manage to get the bulwarks tacked into place to see what they look like.
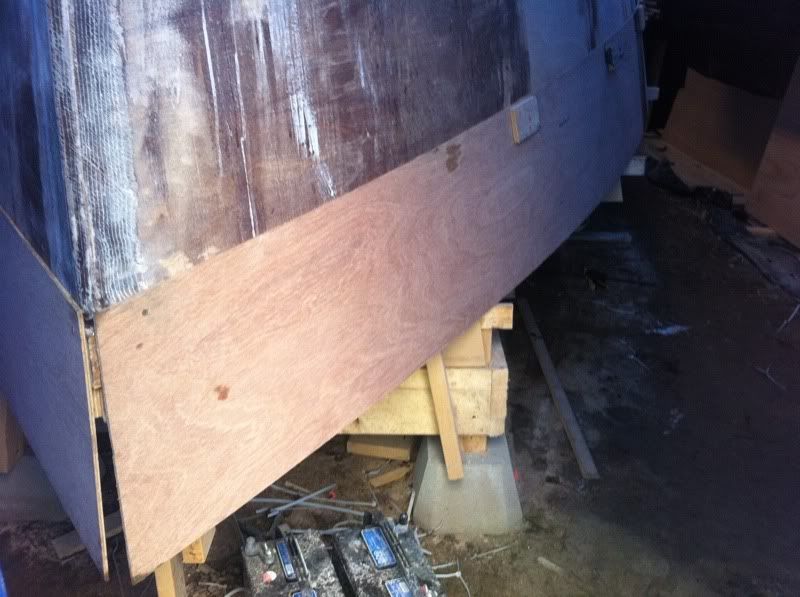
Ran into a small problem with the flare of the bow being a little more than planned. The side panels are off the forms about 5/8" causing the bulwarks to leave a fair size gap. I pulled the side panels back in a bit to reduce the gap.
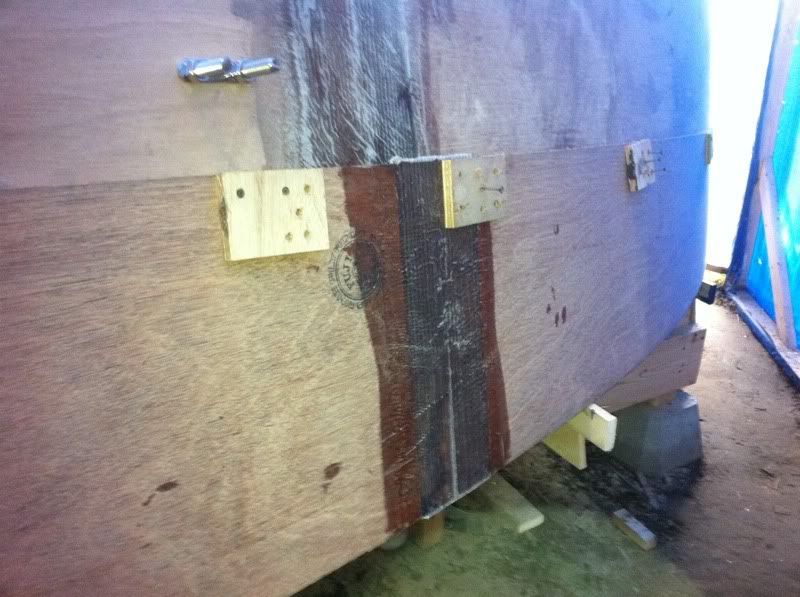
I'll glue these on next week weather permitting.
Today I got the keel lined up and shimmed and glued down. It's now part of the hull. Not much to show for 4 hrs work but there was a lot of futzin' around to get it all lined up.
Subscribe to:
Posts (Atom)