Thursday, June 25, 2015

Looky what I found

I had to dig into the garden shed to take stock of my fiberglass supplies. IIRC I should have 'nuff to do the keel, bottom & sides. After hauling a bunch o' crap out of the way I was able to locate the fiberglass!
33 oz Triax 38" wide
Assorted glass fabrics
So I'm basically short on 12 oz 0/90 for the keel, bottom & sides. Gotta look online and see how much that's going to set me back.

Well looky there! While digging around in the shed I found a diesel engine! Almost forgot it was there! :-)  Spun it over a few times with the ratchet. All's well. It'll come out of the shed next spring to be serviced before putting it in the boat.
Well looky there! Yanmar 4JH-TE 55 HP Turbo
This morning I finished up the sanding in the box keel. Thank the Sanding Gawdz! What an awful job. Peel ply next time!
Last of the sanding in the box keel
Whippy sandy thingy on die grinder
Once the sanding was done and cleaned up I hauled the big roll of 33 oz fiberglass up to the boat. Oh my aching back!
Laying out the fabric for the box keel
38" wide is pretty close to perfect for this application. At the deepest part it goes from one radius fillet to over the bottom panel about 6". I'll use two pieces of fabric to cover the sides of the box keel and the bottom will get a double layer.
33 oz fabric getting trimmed & darts to conform to box keel
This heavy fabric doesn't form well to the curve of the keel. If you tug too hard you'll stretch the shit out of it. You can see the darts I had to put in to get it to follow the gentle curve of the keel. It's really hard stuff to work with but well worth the extra effort I think.

Think that's it for today. Gotta go shopping for fiberglass.

Standby....

Wednesday, June 24, 2015

Playtime is over

Back to work! Took the weekend off mostly to just hang out with the Ole' Girl and go see a Rush concert! :-)  Stayed overnight in Montreal and was totally skroodled on Monday. Guess I can't Rock & Roll all night like I used to! *sigh*
Plenty of dust was made this day!

All vacuumed up ready to get messed up again!
Anywho, spent yesterday sanding the perimeter and box keel. That's pretty much done 'cept for a few tight spots. Needed something to get down into the back of the keel. Using my nugget for something other than a hat rack I decided to try to make my own long pole sander thingy.

Hacked up some of my Dura Block sanders, you've heard me mention those last year. Stuck it to the end of the dowel that holds the billiard ball constant radius fillet tool! :-)
Cut down to size Dura Block

Crazy Glued in the dowel
The billiard ball fillet tool on the other end
As you can see in this next pic the tool allows me to stand in the box keel and sand the extremities of the box keel without having to resort to standing on my head to do it.
Reaching way down into the box keel
80 grit paper works pretty good. I'd like to have 60 for this particular application but don't have any on hand. Just a few minor spots to hit with the hand sander and it'll be time to clean it all up for the big fabrics!
The business end
Thanks for looking in.

Standby....

Friday, June 19, 2015

Always details

Today was another half day spent on the arse end of various sanders. Something a lil' different though. Some detail sanding around the depth sounder hole & bow thruster tube. Did this so the fabric that'll get laid on the bottom will make a smoother transition with no bridging (I hope).
Sanded out a smooth transition from plywood to glass
The thruster tube is a bit trickier and requires some contortions to get into the right position to sand.
Thruster tube. Many layers of tape converge here.
Pictures don't show the slope very well but I start propped up on the side and gravity inevitably draws me down into the keel! :-)  I use hand sanding with a piece of the sandpaper for the Flexi-Cats backed up on a green Scotch Bright pad. It works really well at getting into the tight spots. You'll need good leather gloves though!

I've got about half the box keel sanded and half the tape joints done. Likely another couple days of sanding then I'll start laying out the big sheets of fabric for the box keel. Gotta do an inventory of fiberglass first to make sure I have enough.

That's all for today. Have to wash the car for cruise in night tonight. Between Lori's wacky work schedule and the weather we've only been able to make it twice so far this year.

Random pic of the Project Manager sunning himself on the back porch!
Solar Powered Cat!
Standby....

Wednesday, June 17, 2015

Dusty Fella

Just call me the 'Dusty Fella'! ;-)

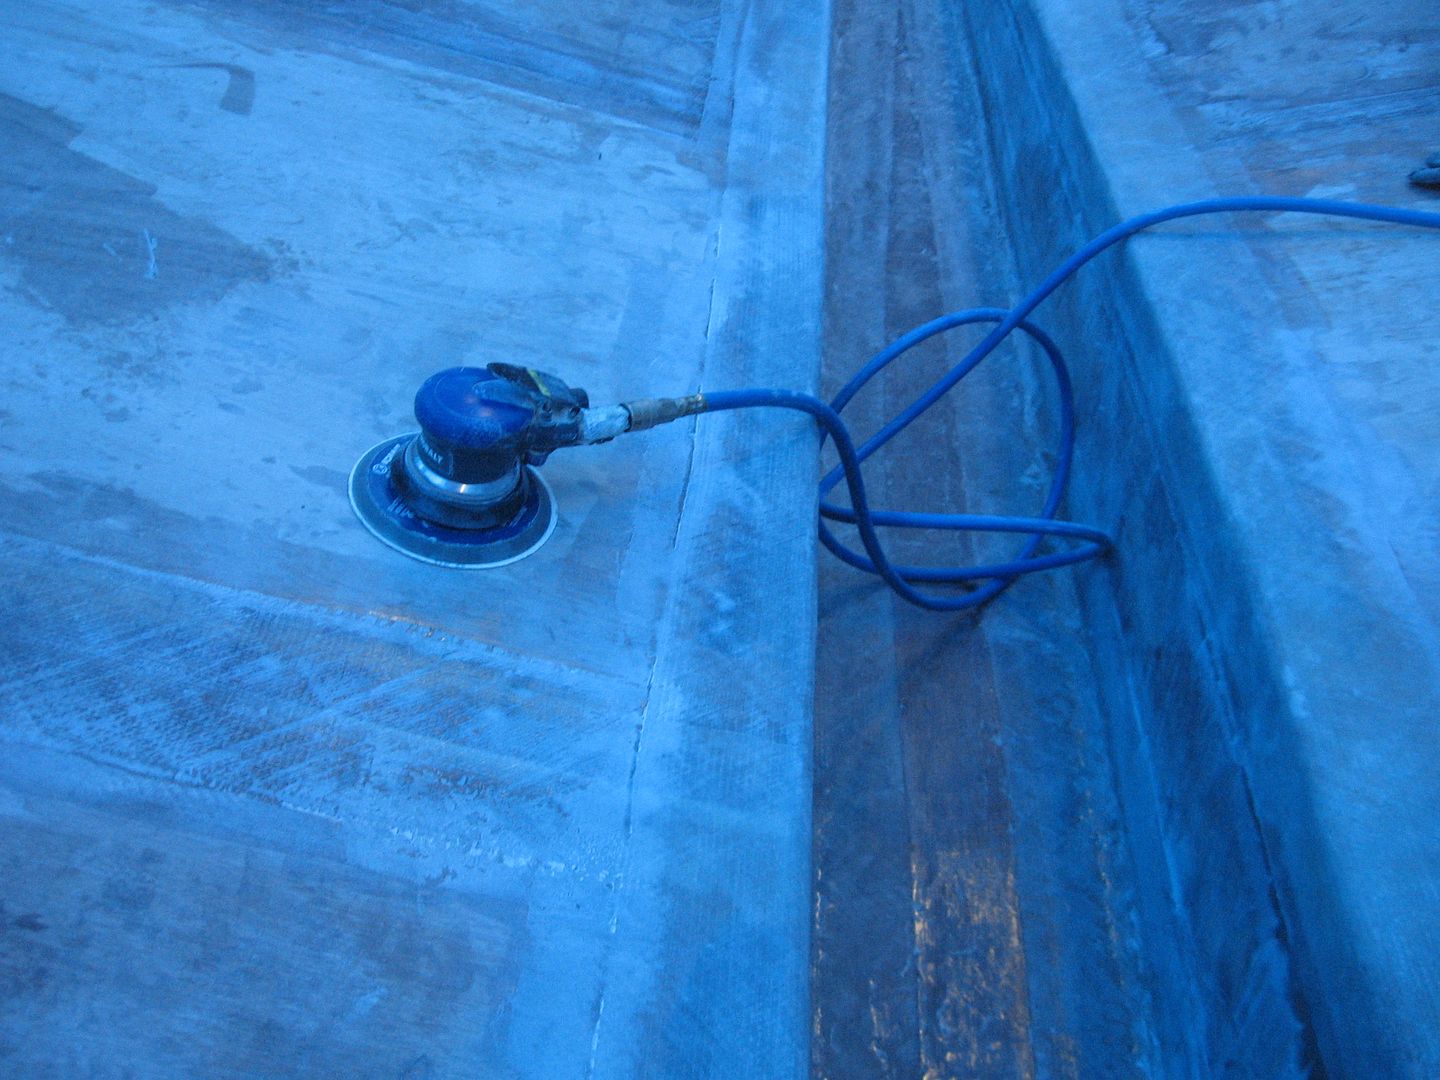
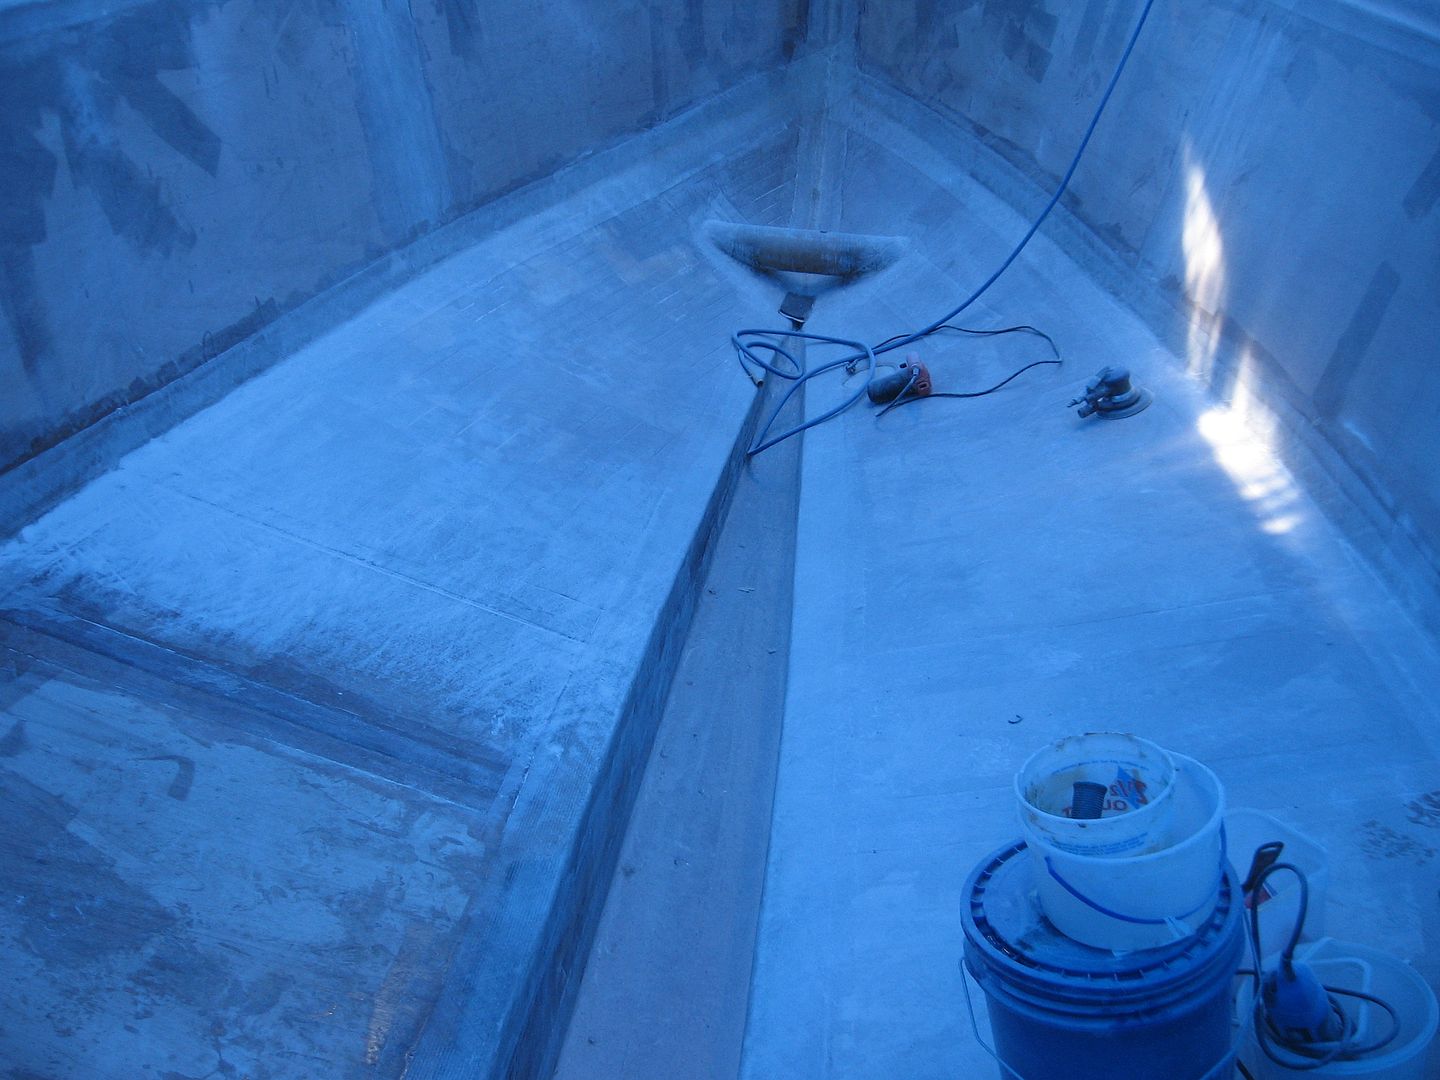
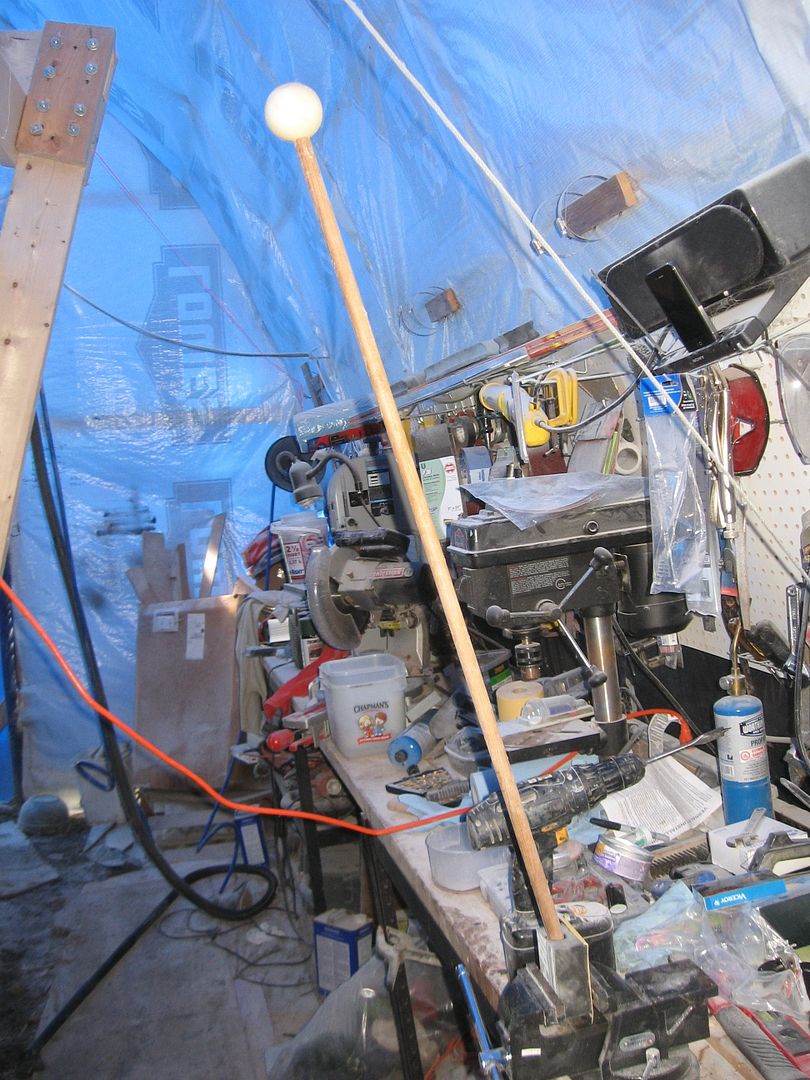
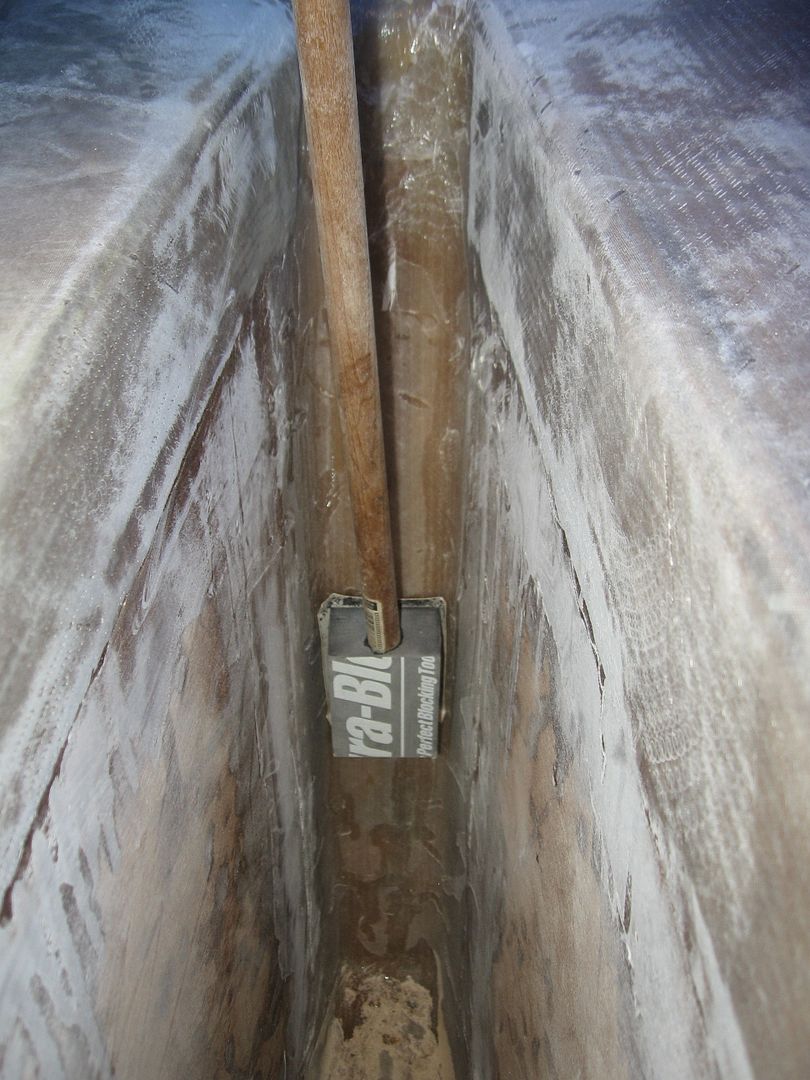
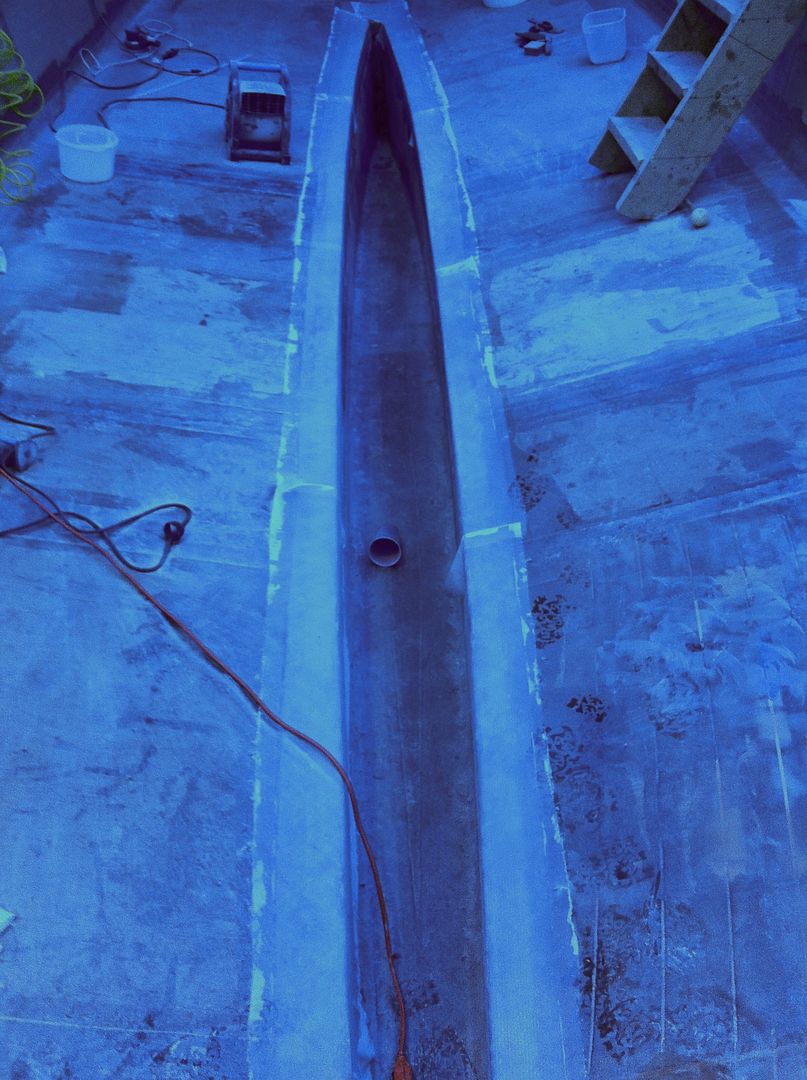
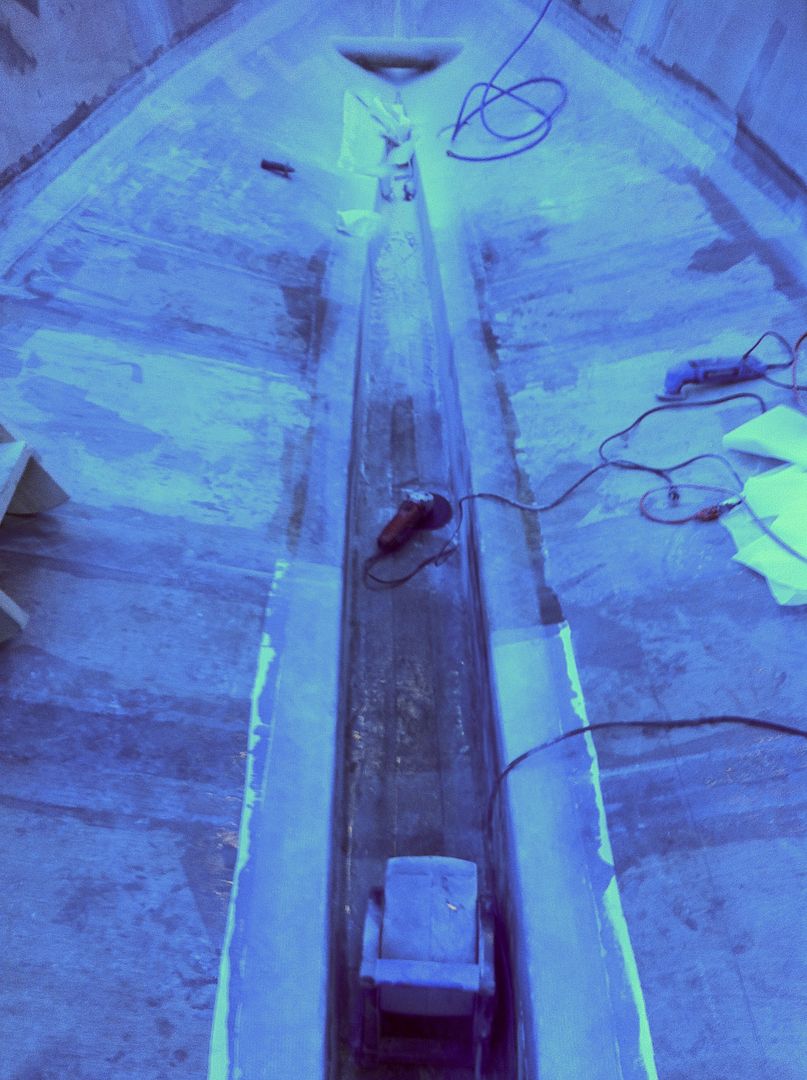
So yesterday I got the port side taped & peel plied. All went well.
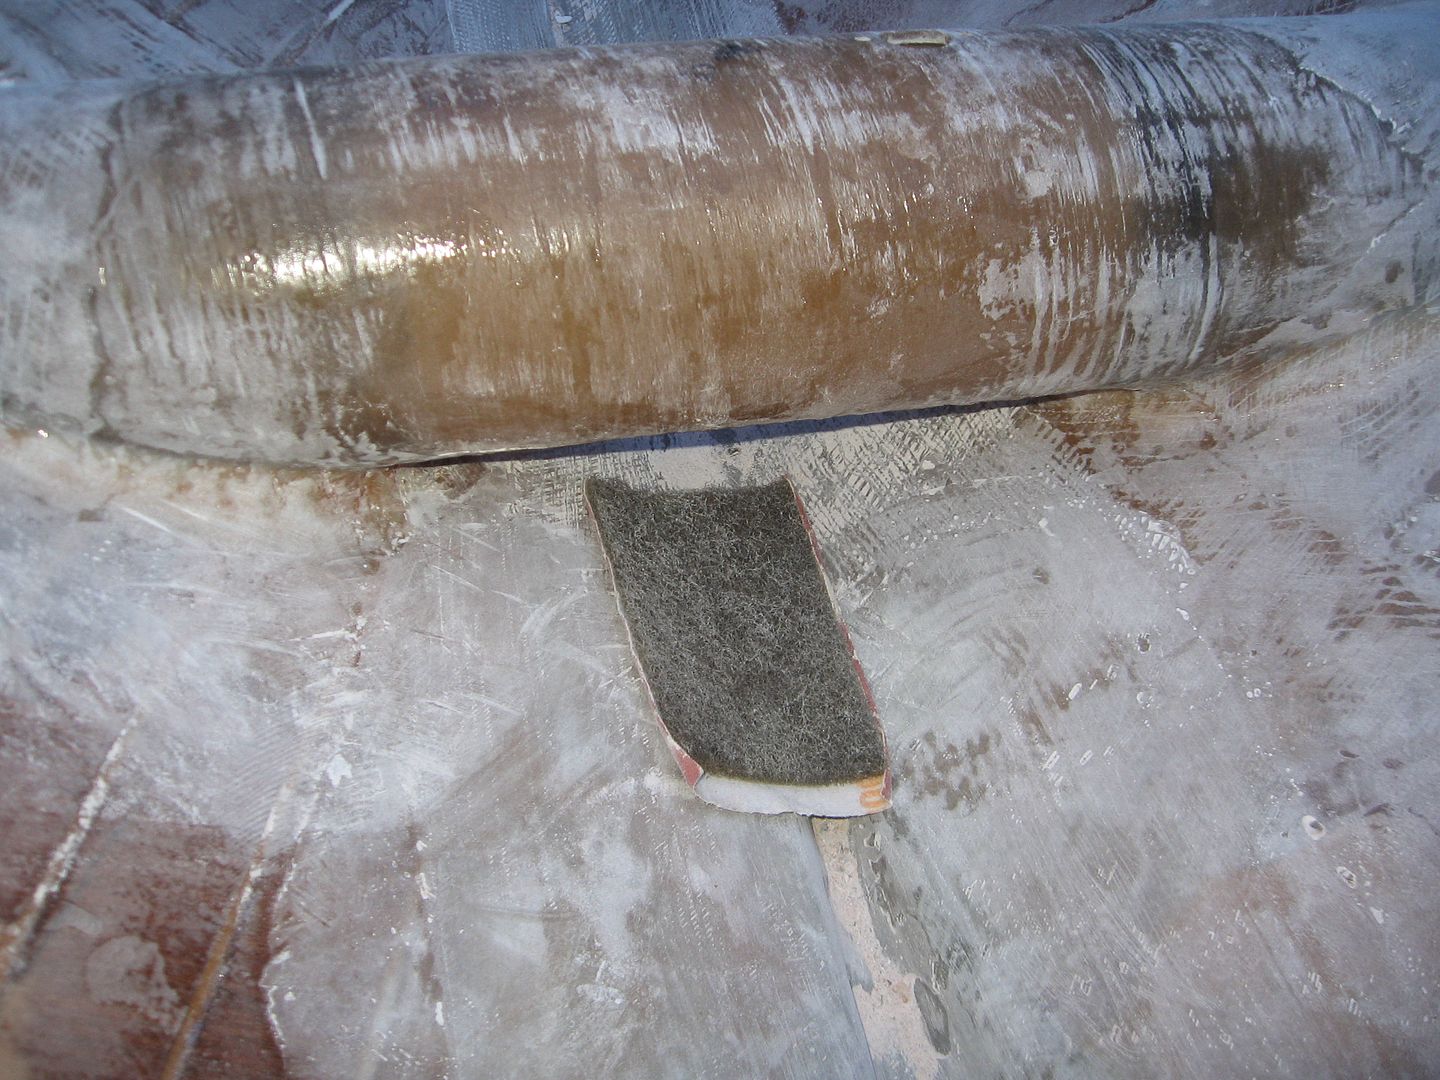
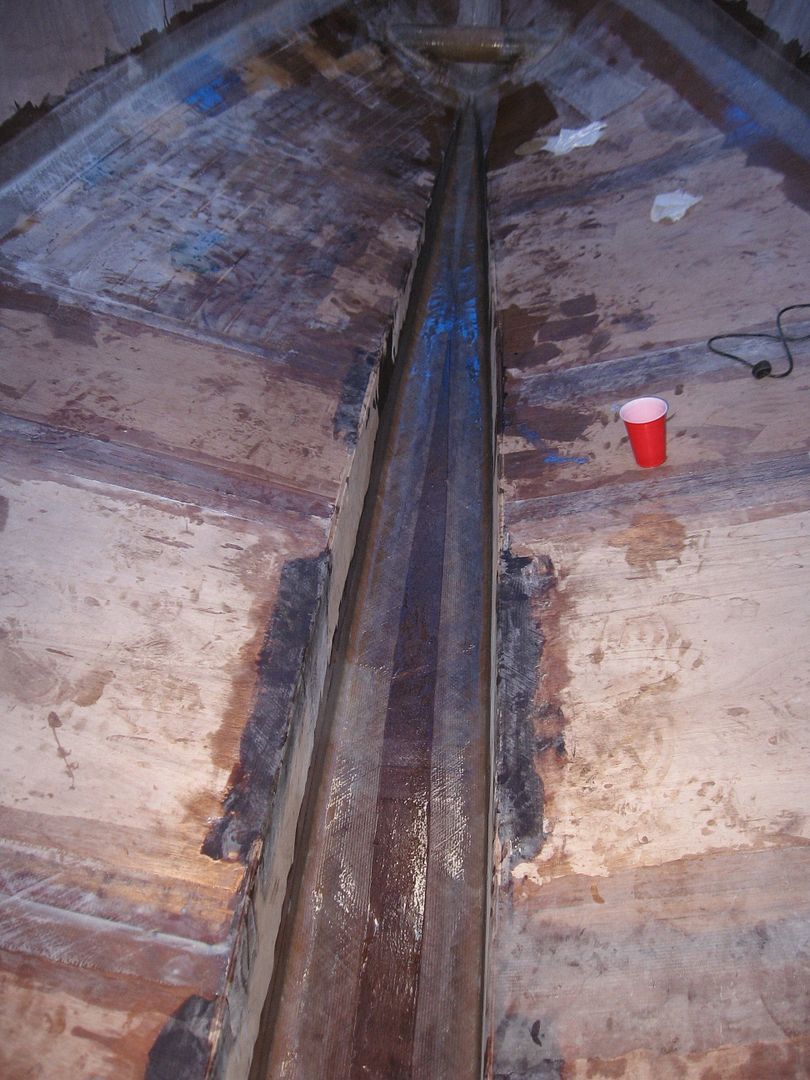
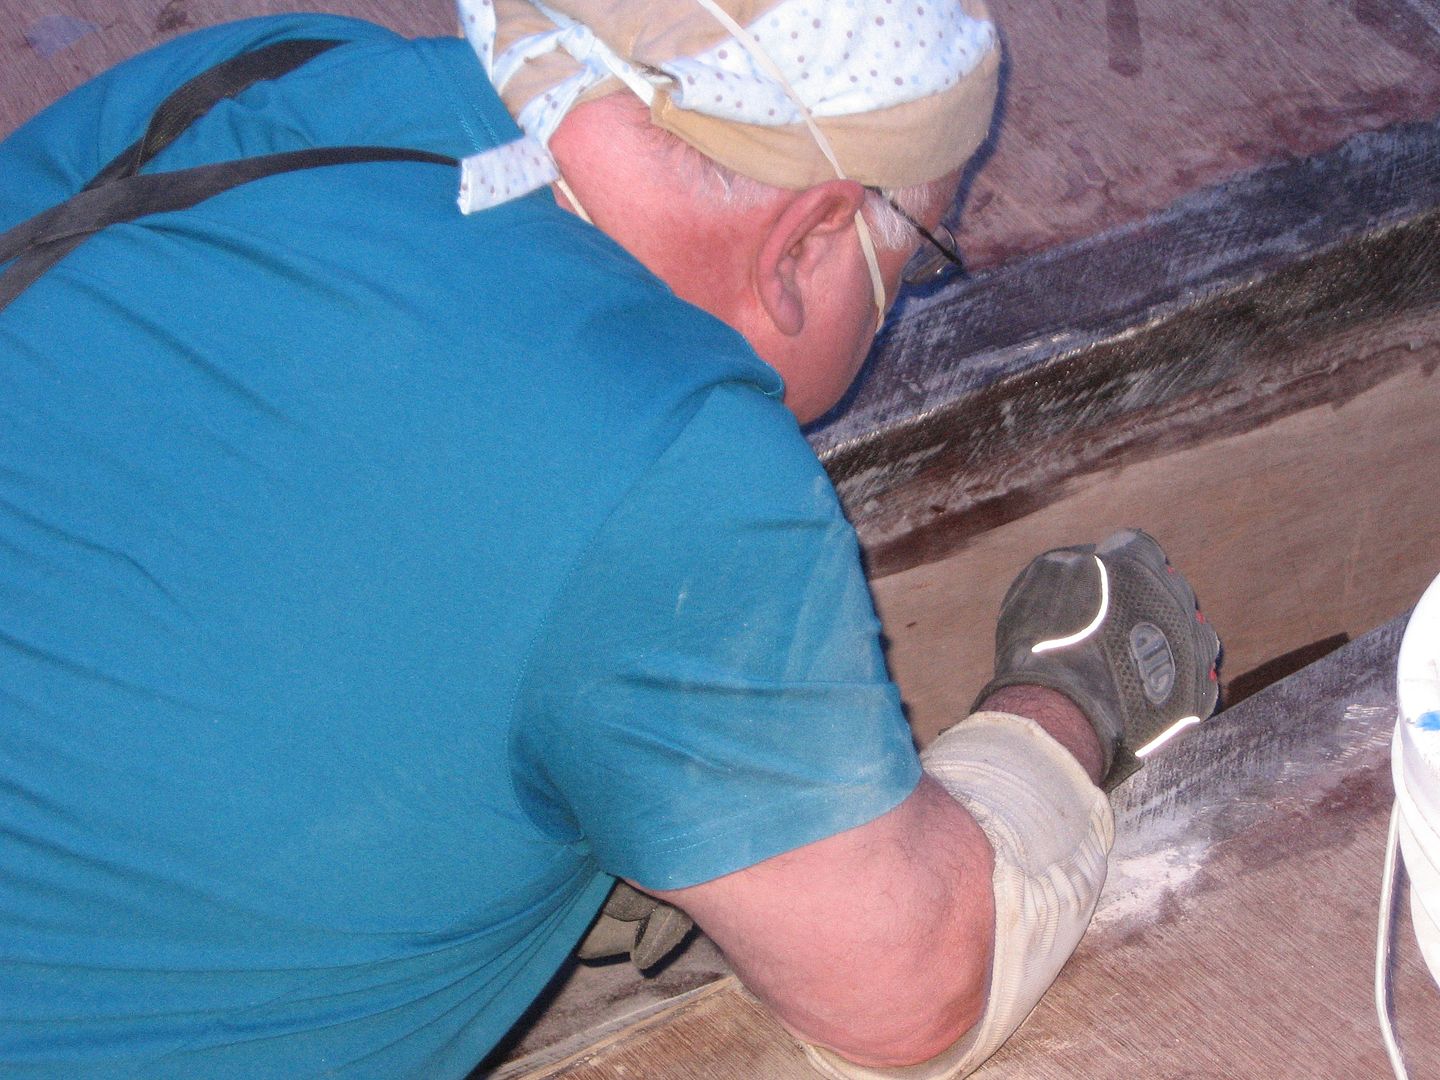
Keel to bottom panel joins taped, epoxied & peel plied!
Apologize for the blue tinted pics. Used my cell phone again.

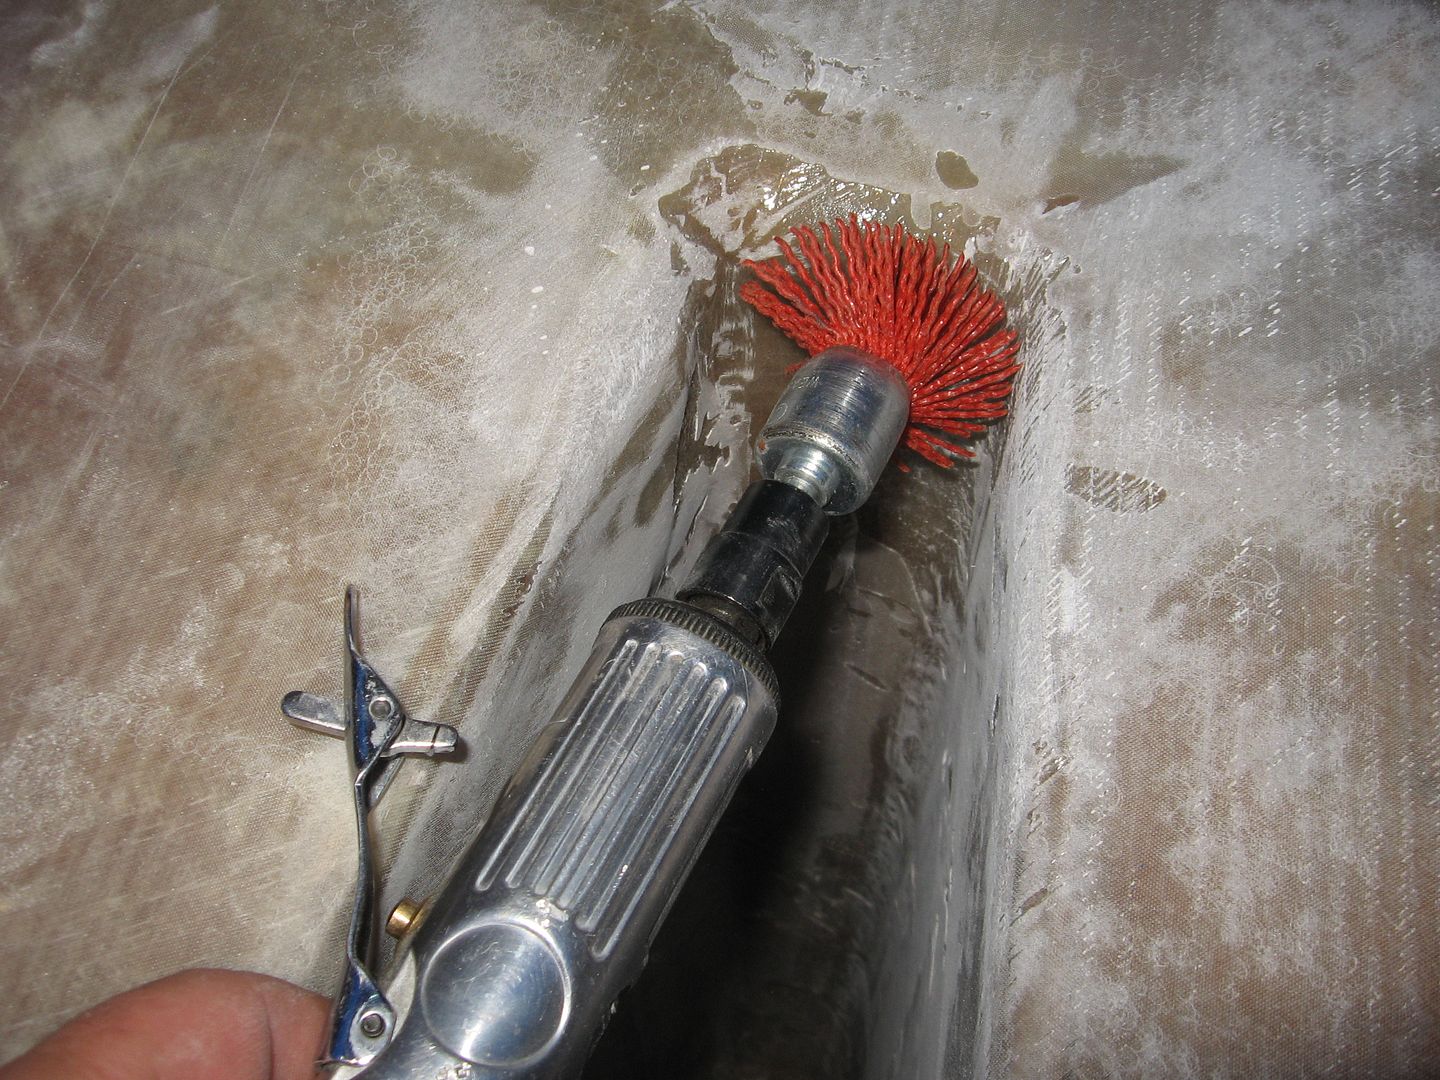
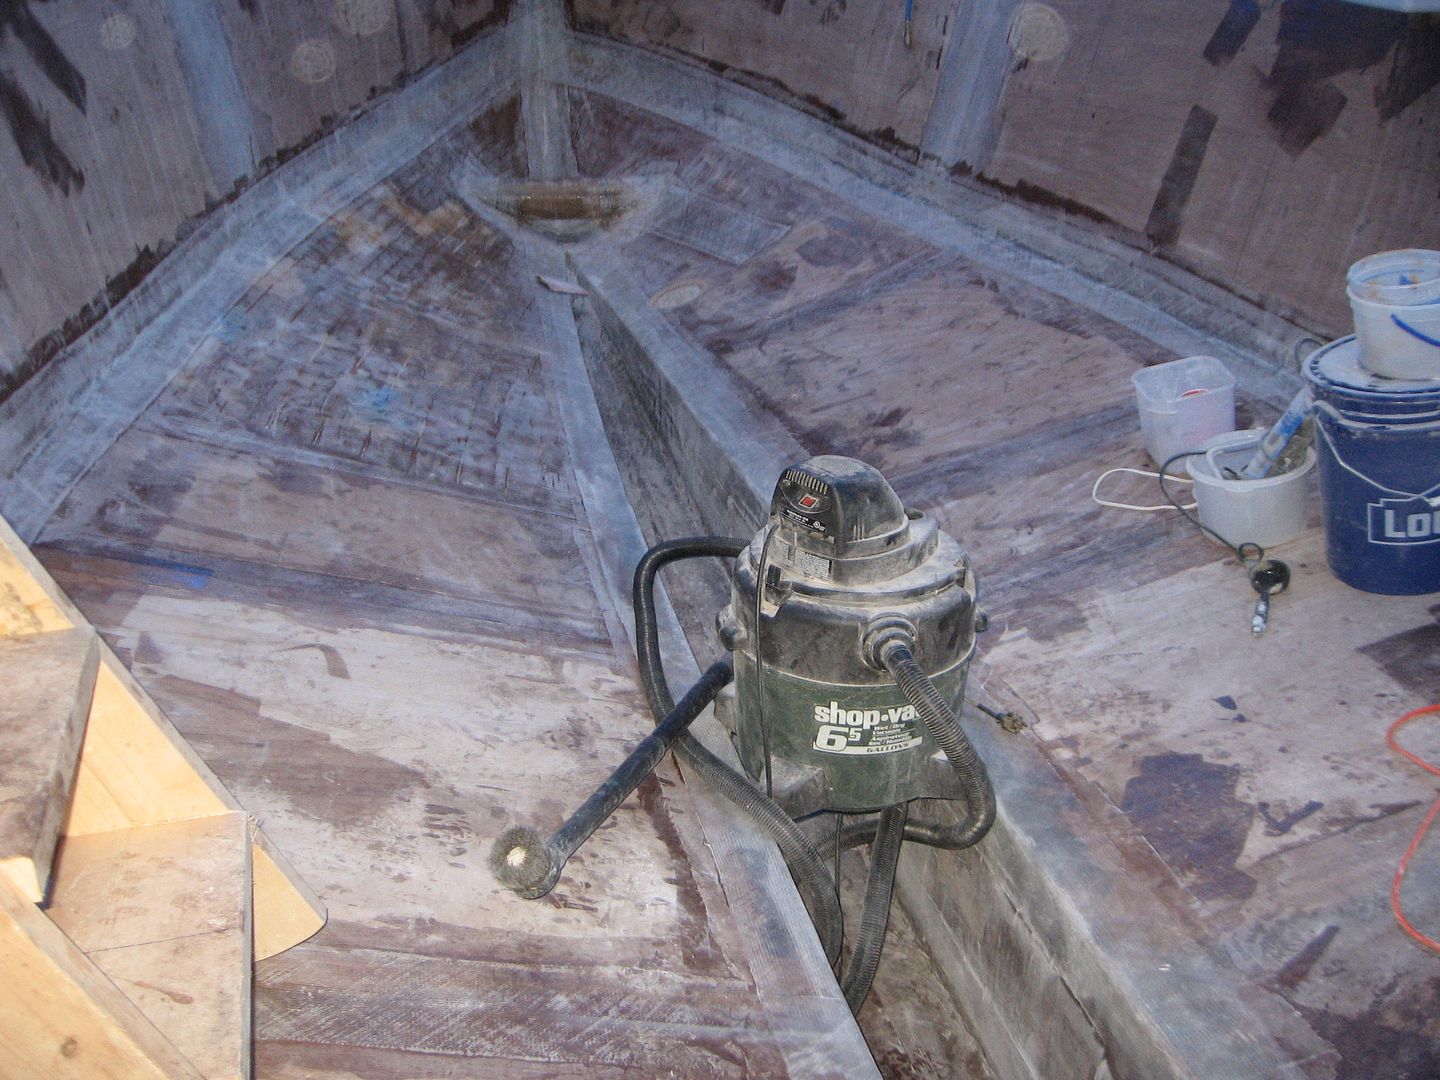
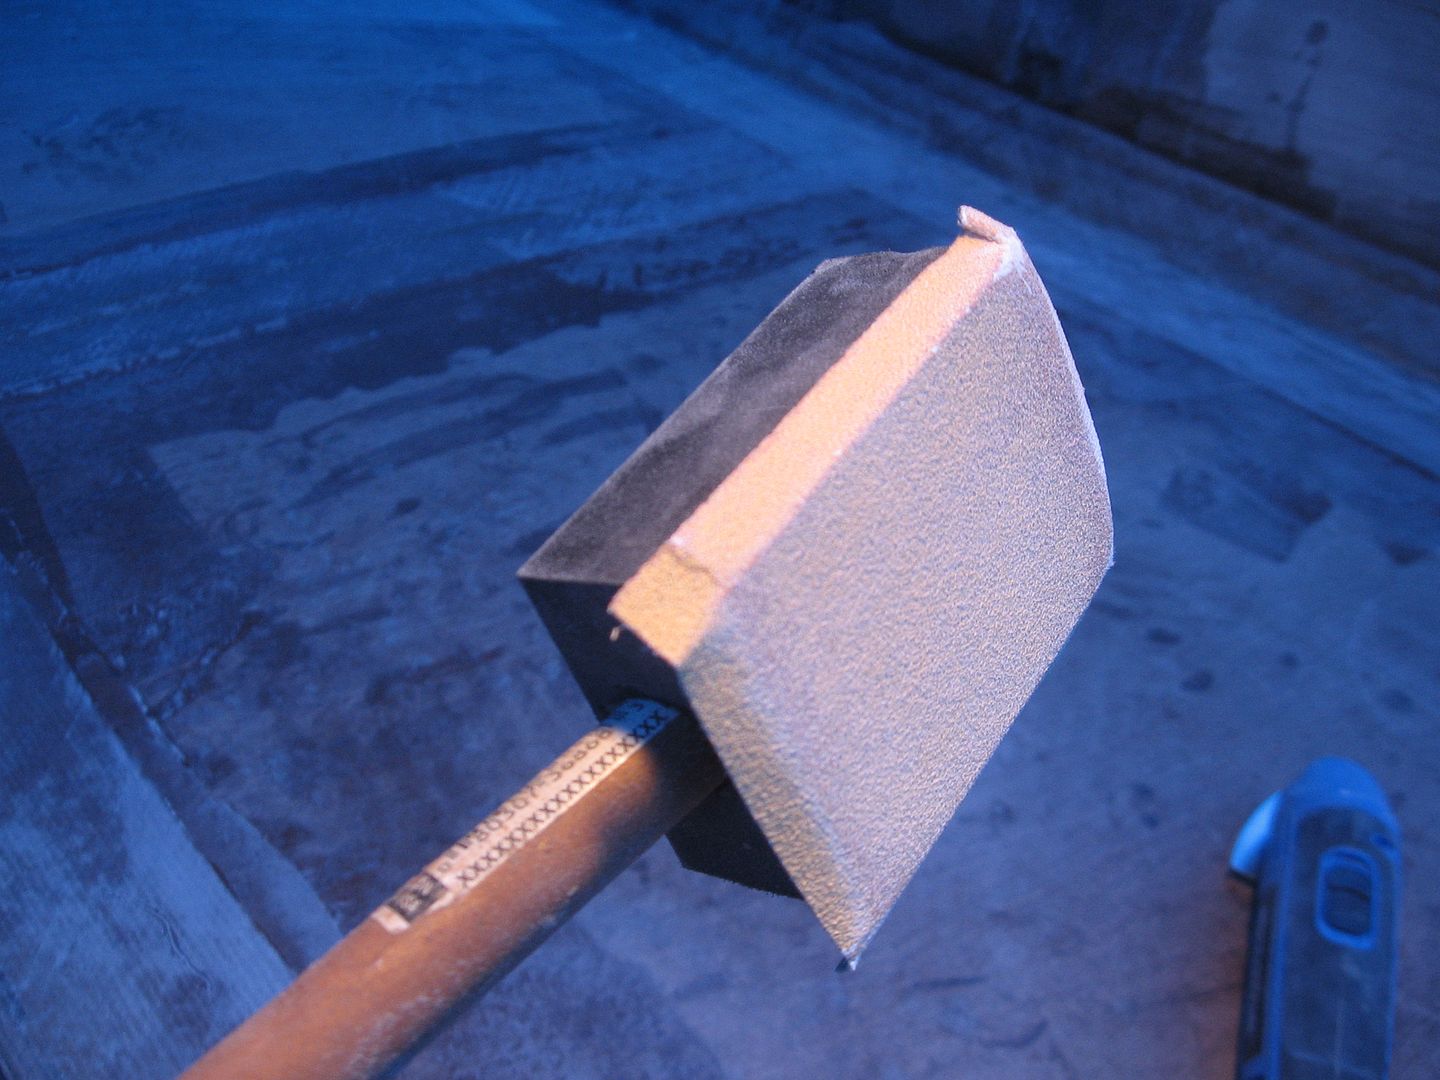
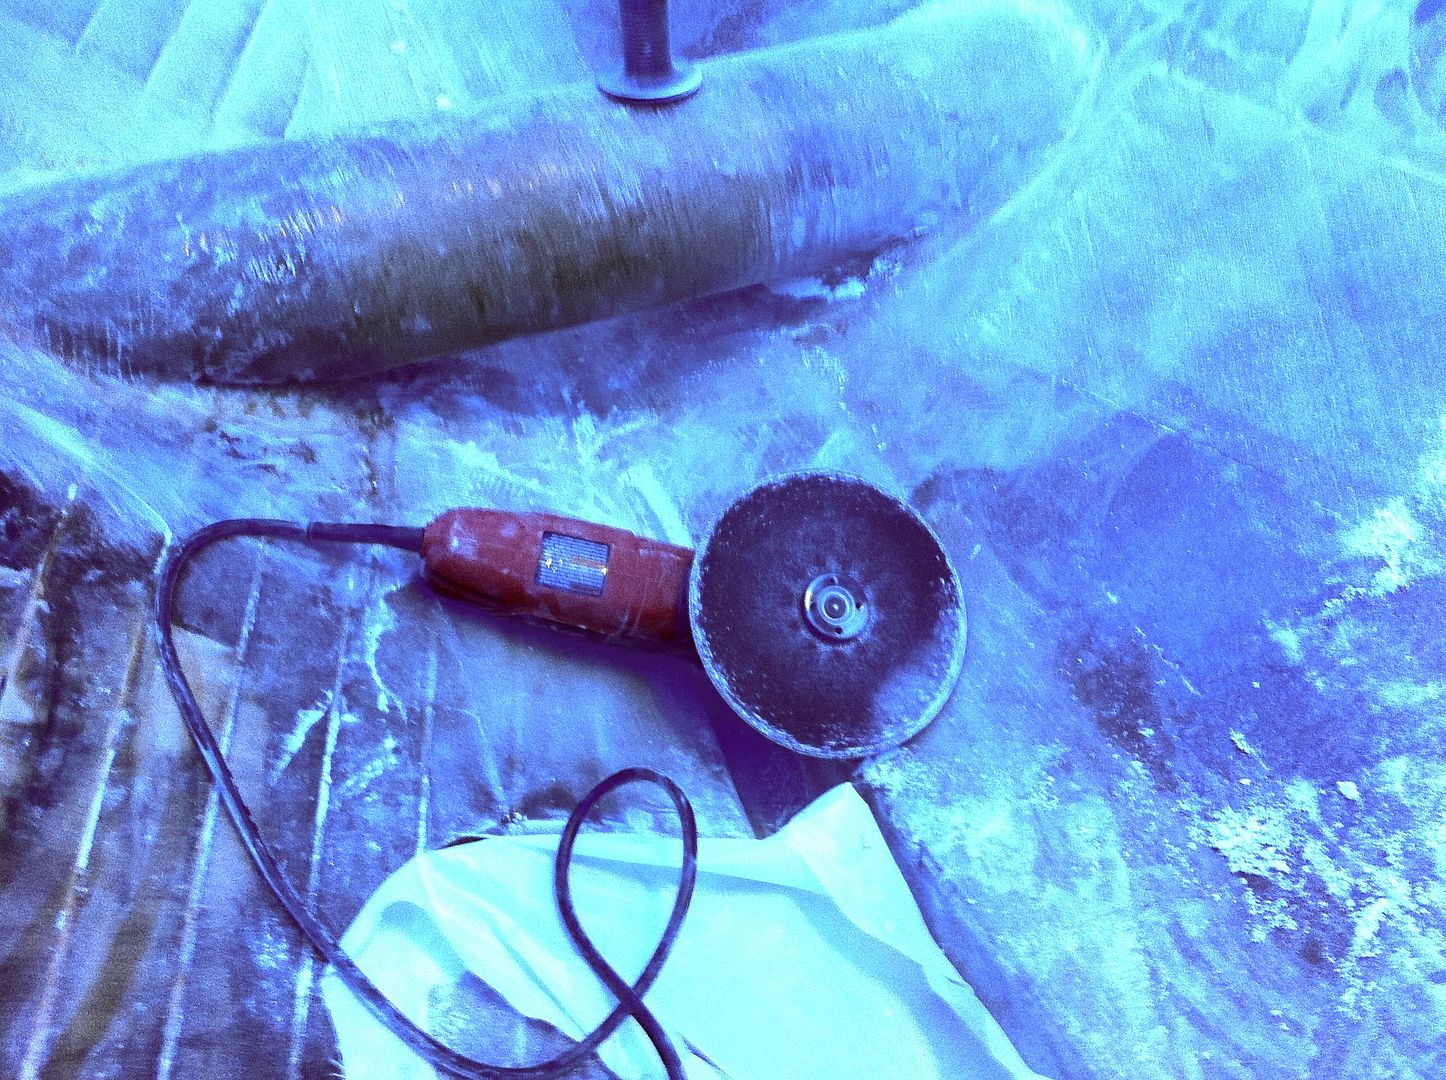
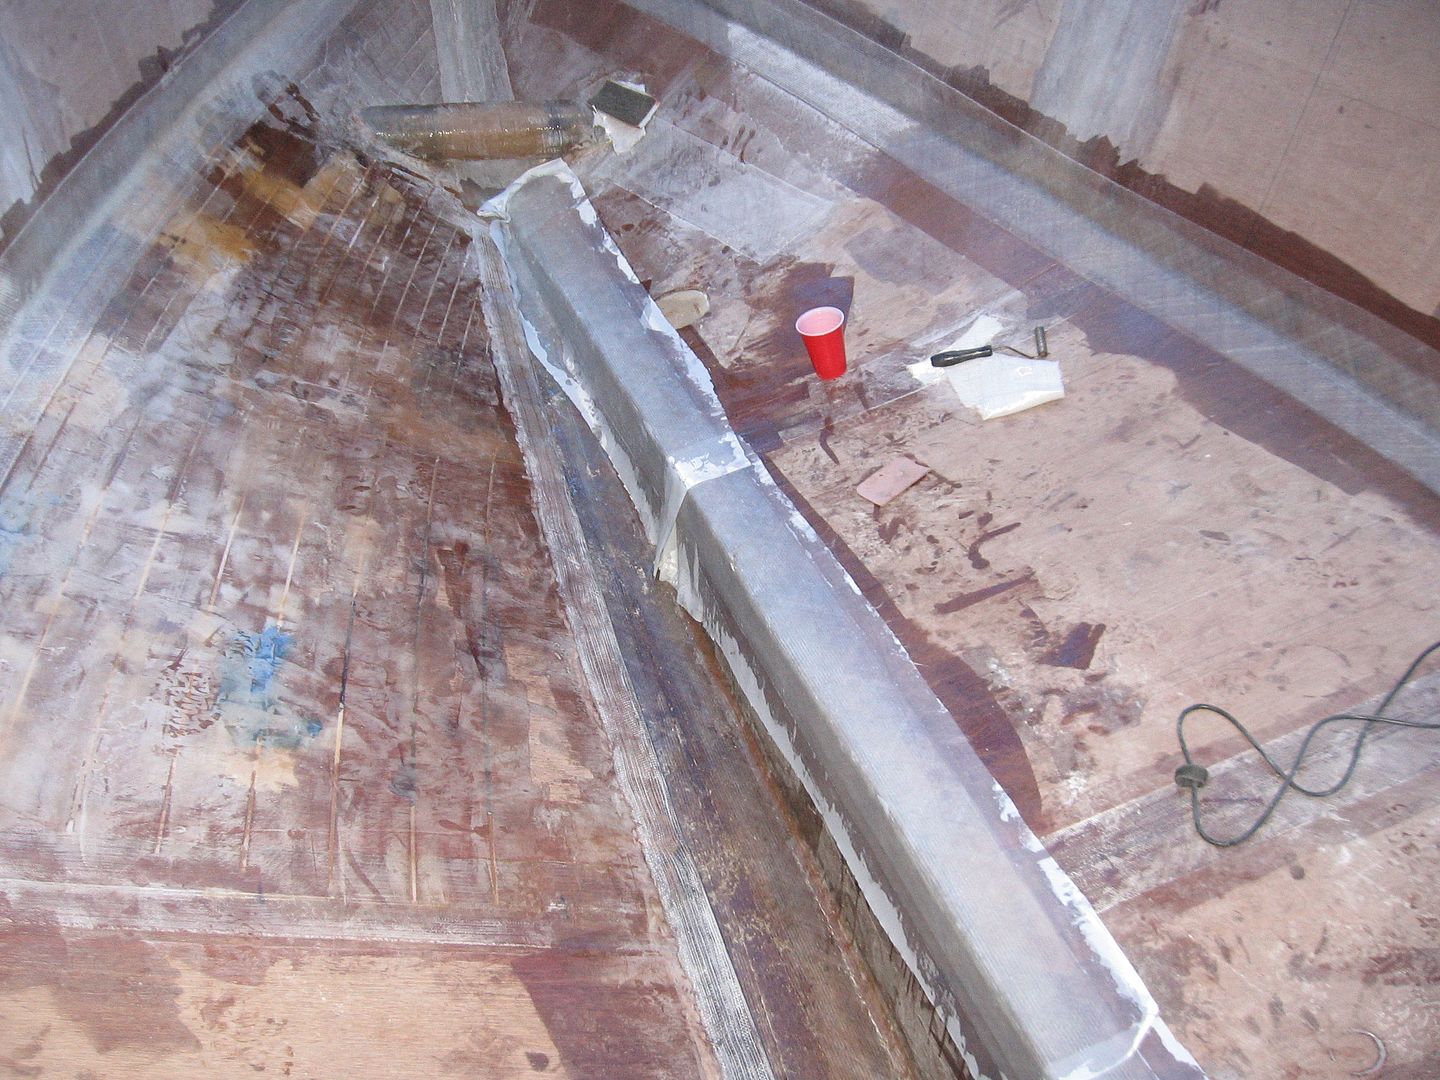
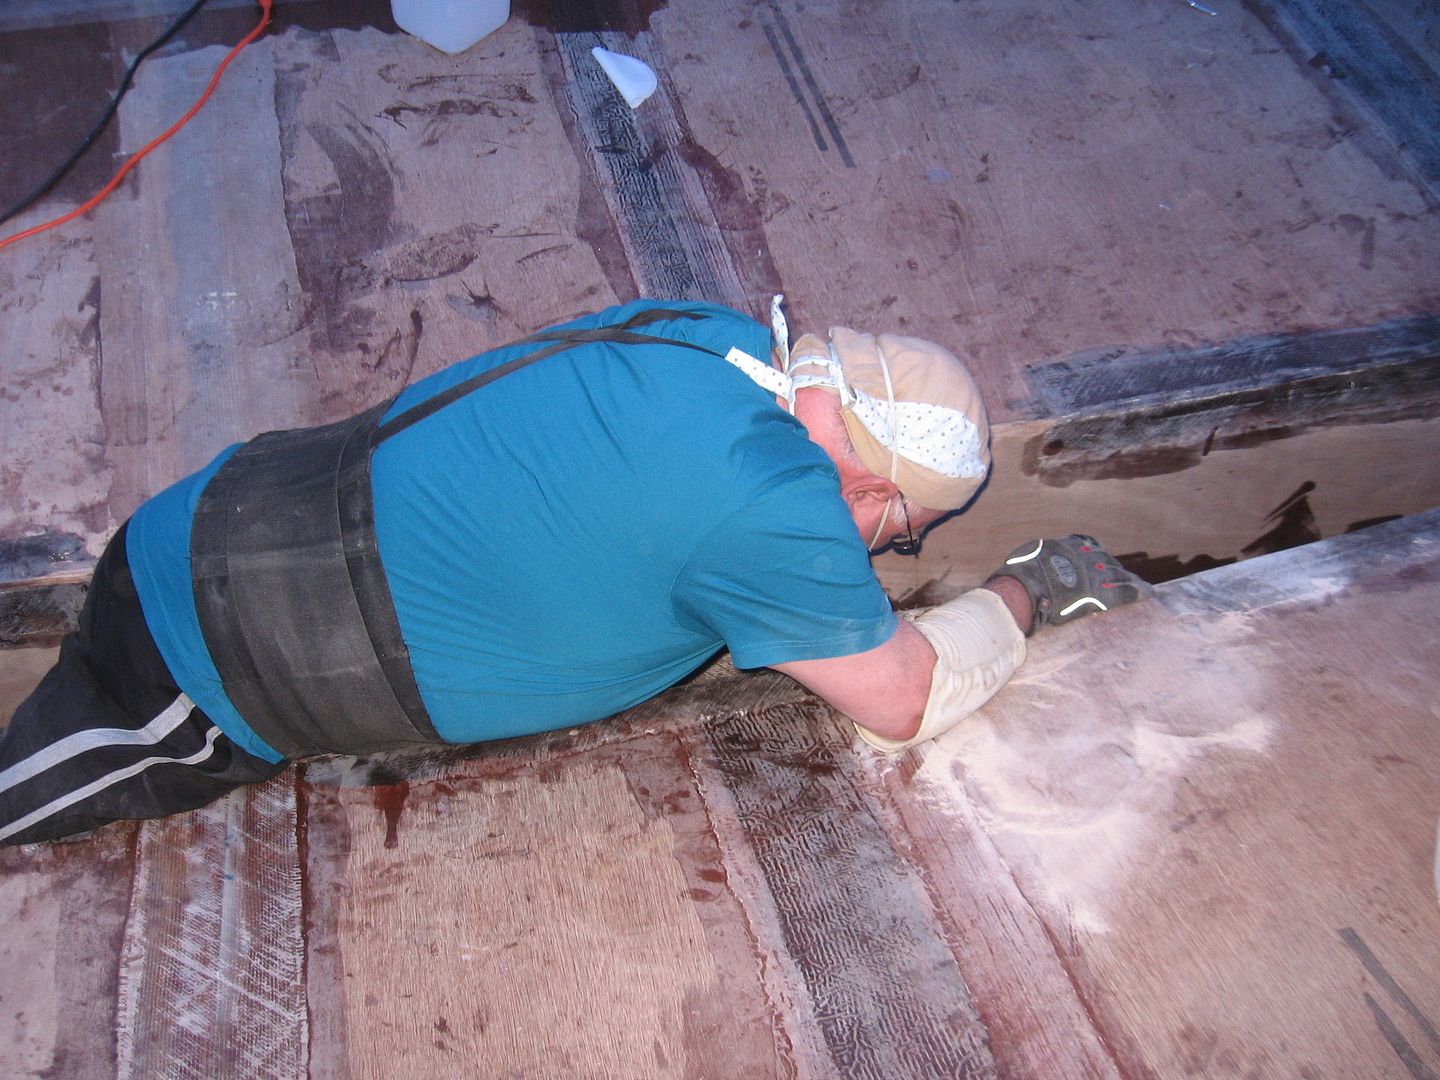
In an effort to speed things up a bit I bought a 7" backing pad thingy & some 80 grit discs for my 4" angle grinder. Hoping this would make short work of the taped edges & scuffing up the tape for the next layer of fabric. It worked wonders!
There's a new Sanding Attachment in town!
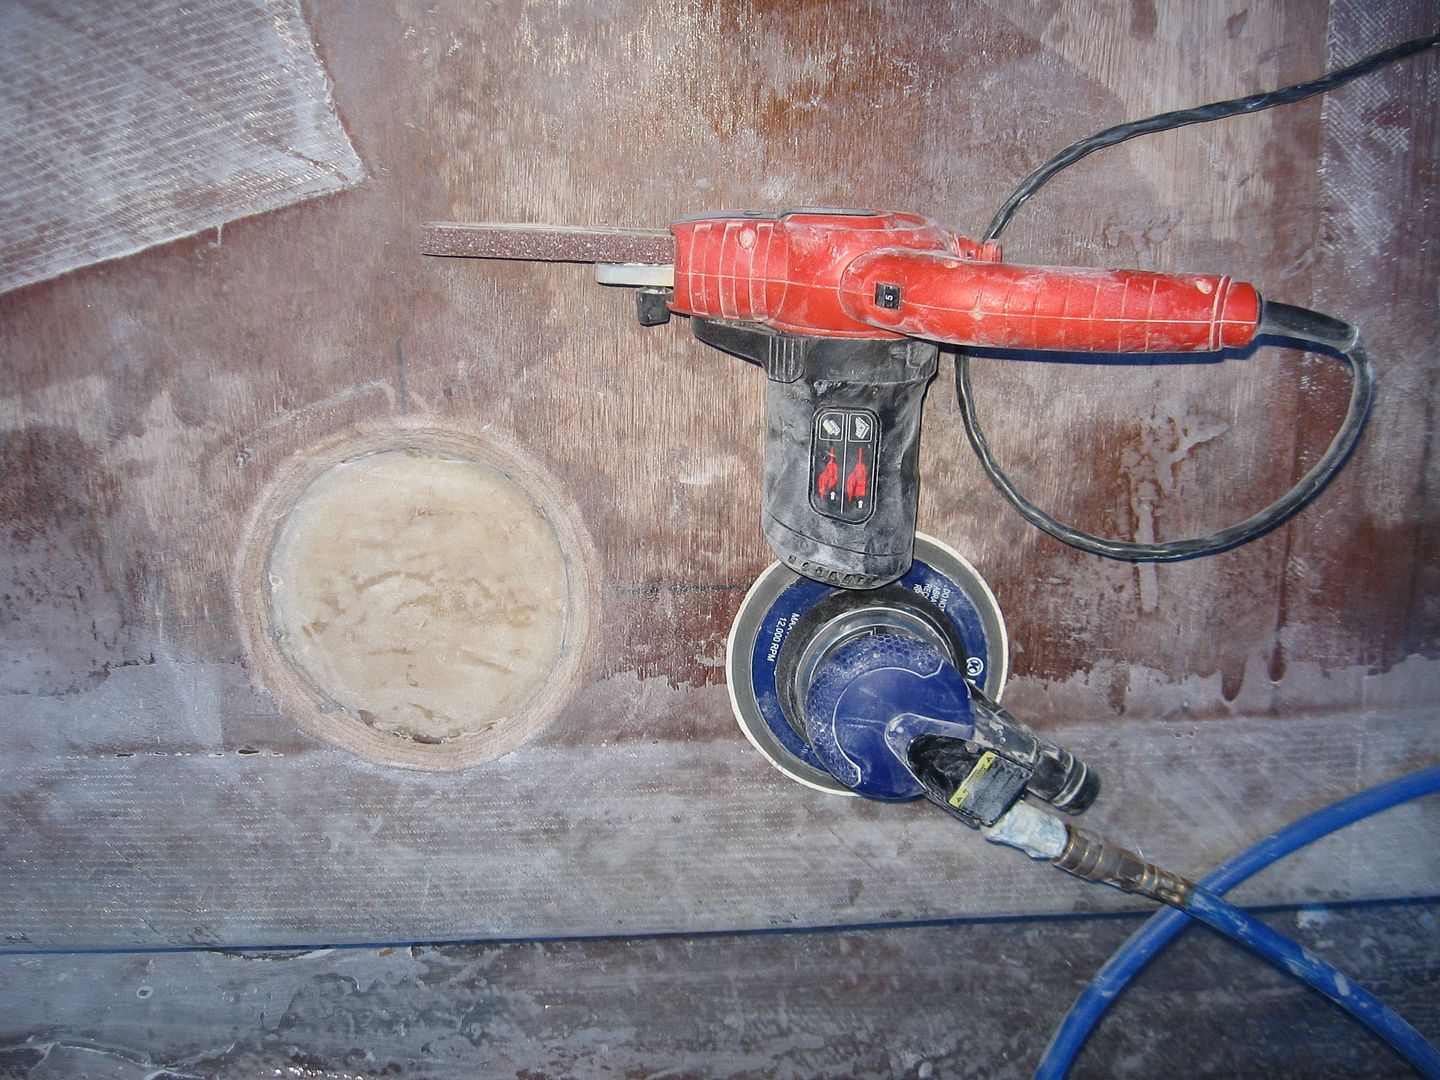
It's hard to give up on the air sander but it's just too slow for this particular application. No one will ever see these taped joints once the fabric is laid over top so cosmetics aren't an issue. I have to work past that. The 4" grinder is another 'Weapon of Mass Destruction'! ;-) It's a little unwieldy one handed and even worse left handed. Having carpal tunnel in both hands doesn't help either but I'll just pace myself and get as much done as I can at a time.
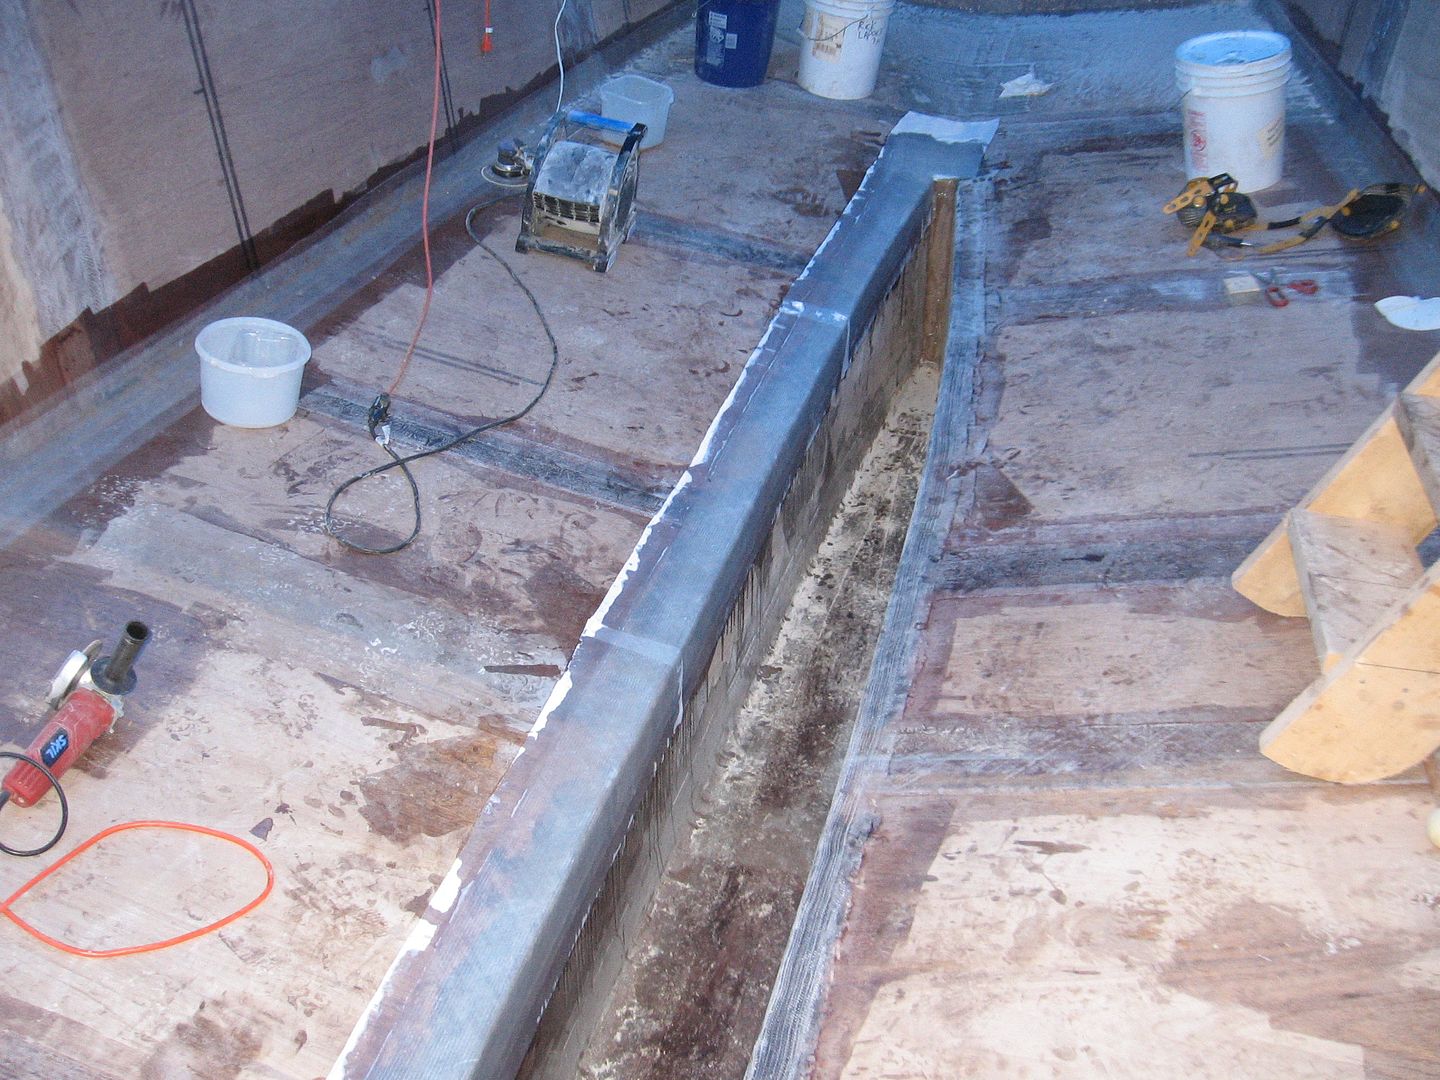
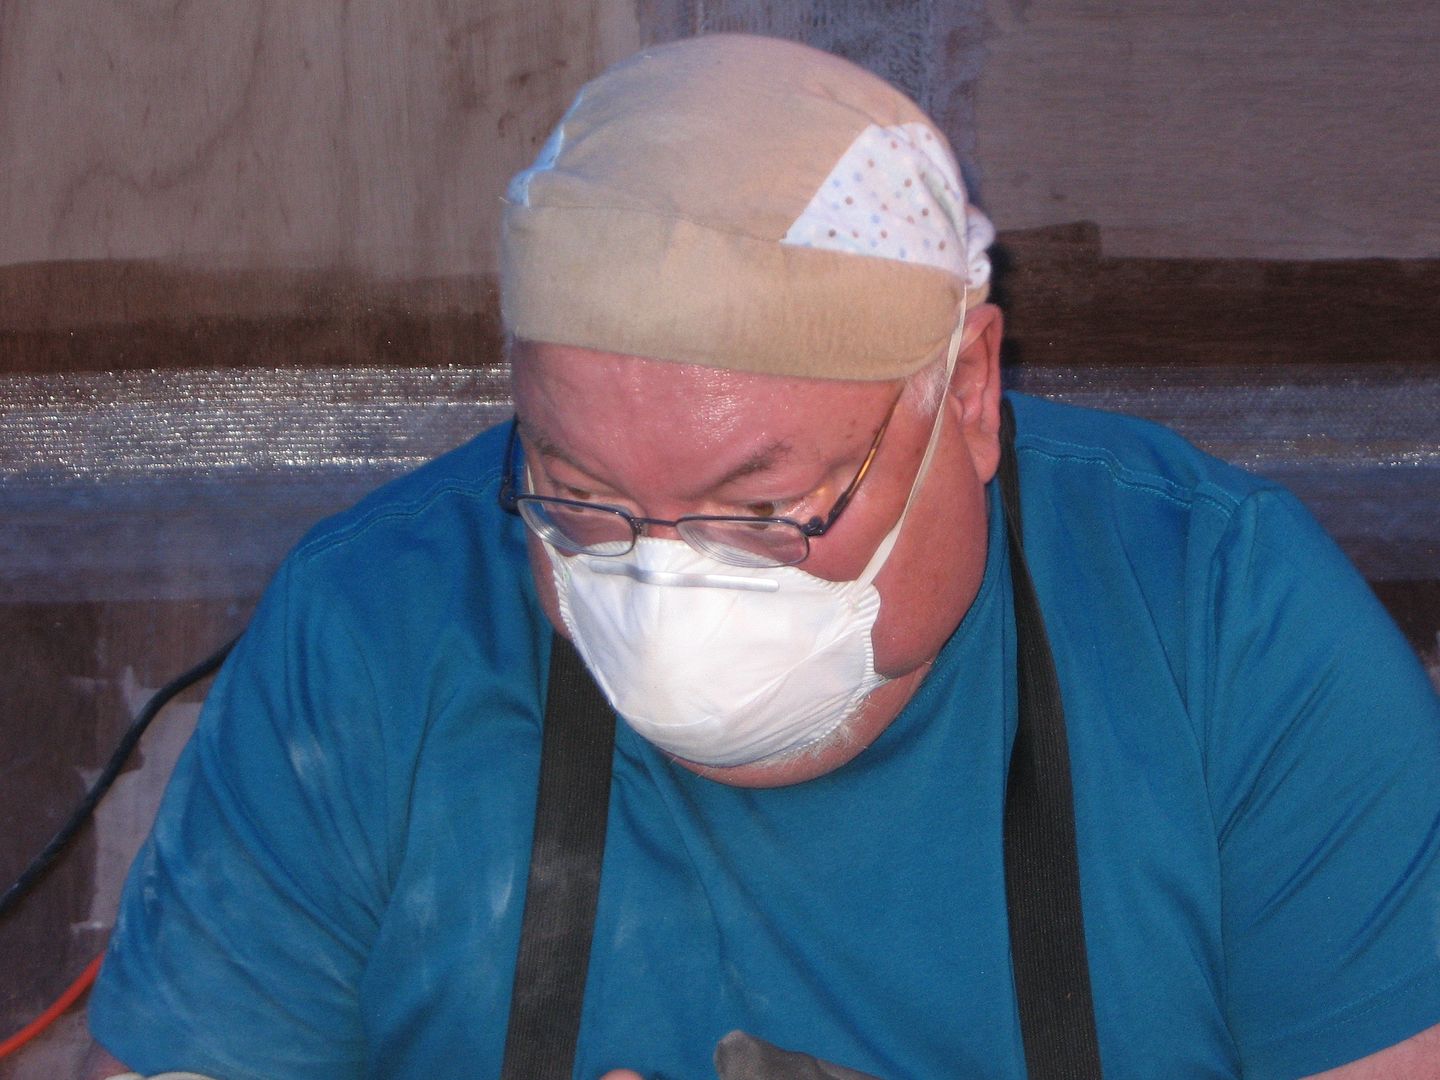
Making plenty of dust today. I'll itch for a week!
So in what would have taken me an hour & half with the RO air sander I got done in about 30 mins with the Grinder WMD. It's crude, but effective. You can notice the fan in the box keel in the foreground. I keep that blowing from behind all the time I'm sanding. It does a pretty good job of keeping the dust off of me, out of my eyes and out of the way.

I'm thinking at this point I might actually get some of the framing in the boat this year. I'd be nice to get the main bulkhead set in place at least. :-)

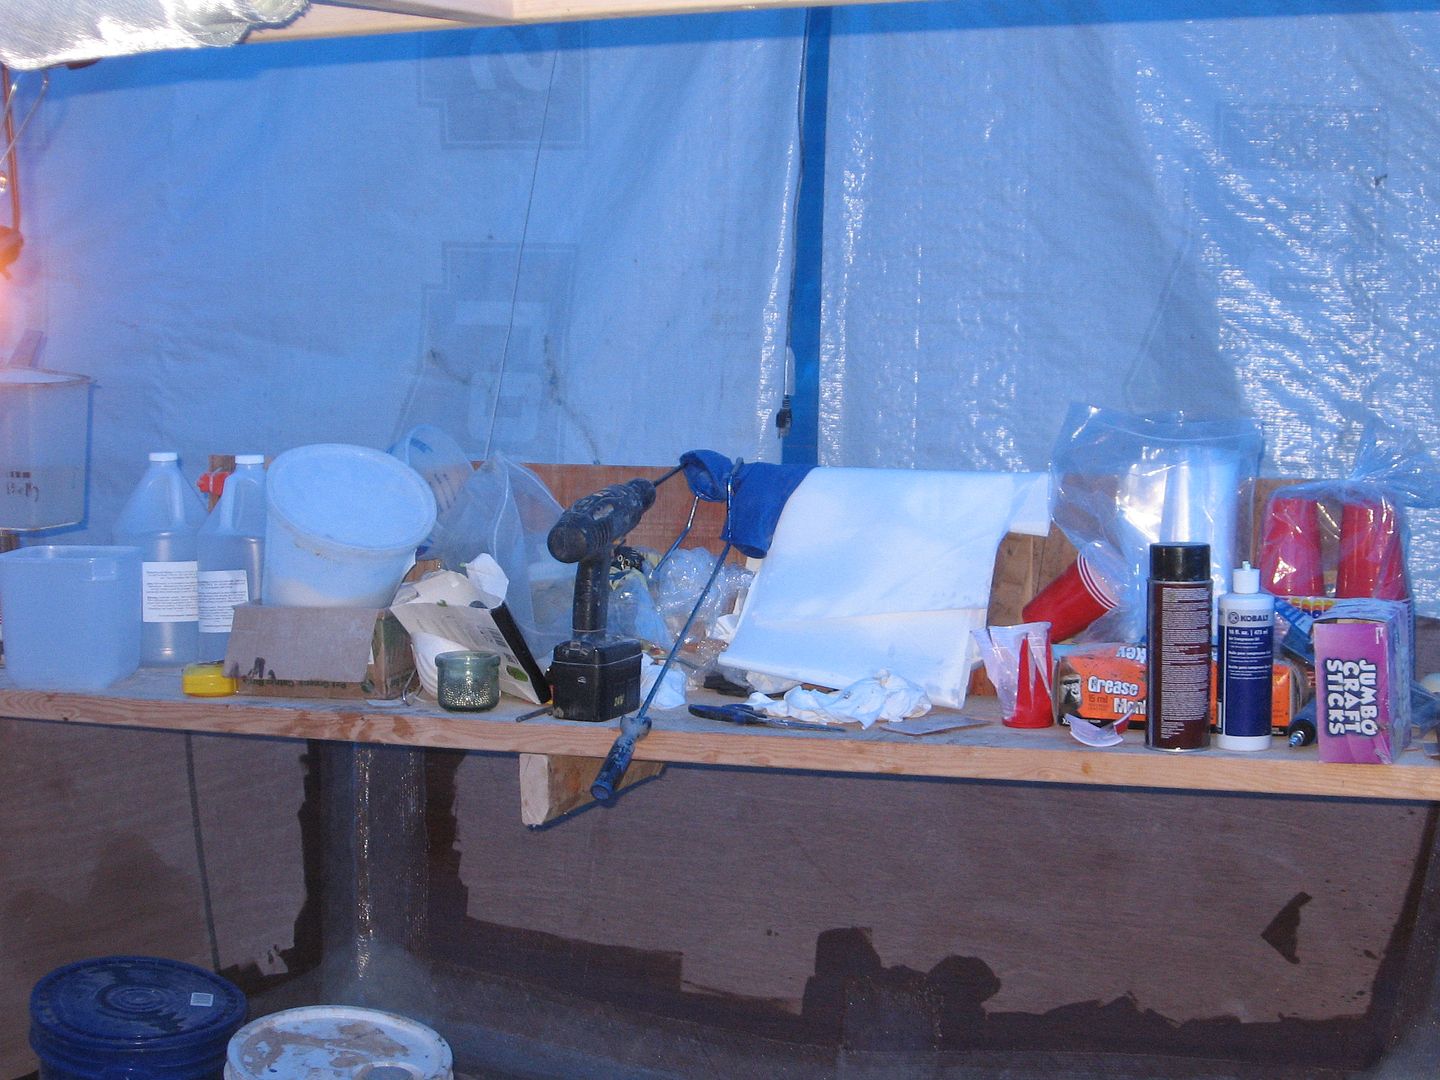
Inventoried epoxy supplies and I have 22 gallons on hand. That should be enough to get the inside glassed but I think I'll order another 6 or so to have just in case. When it's time to glass the inside I'll be looking for some volunteers to mix epoxy & run a squeegee so if you're interested let me know. The more the merrier!

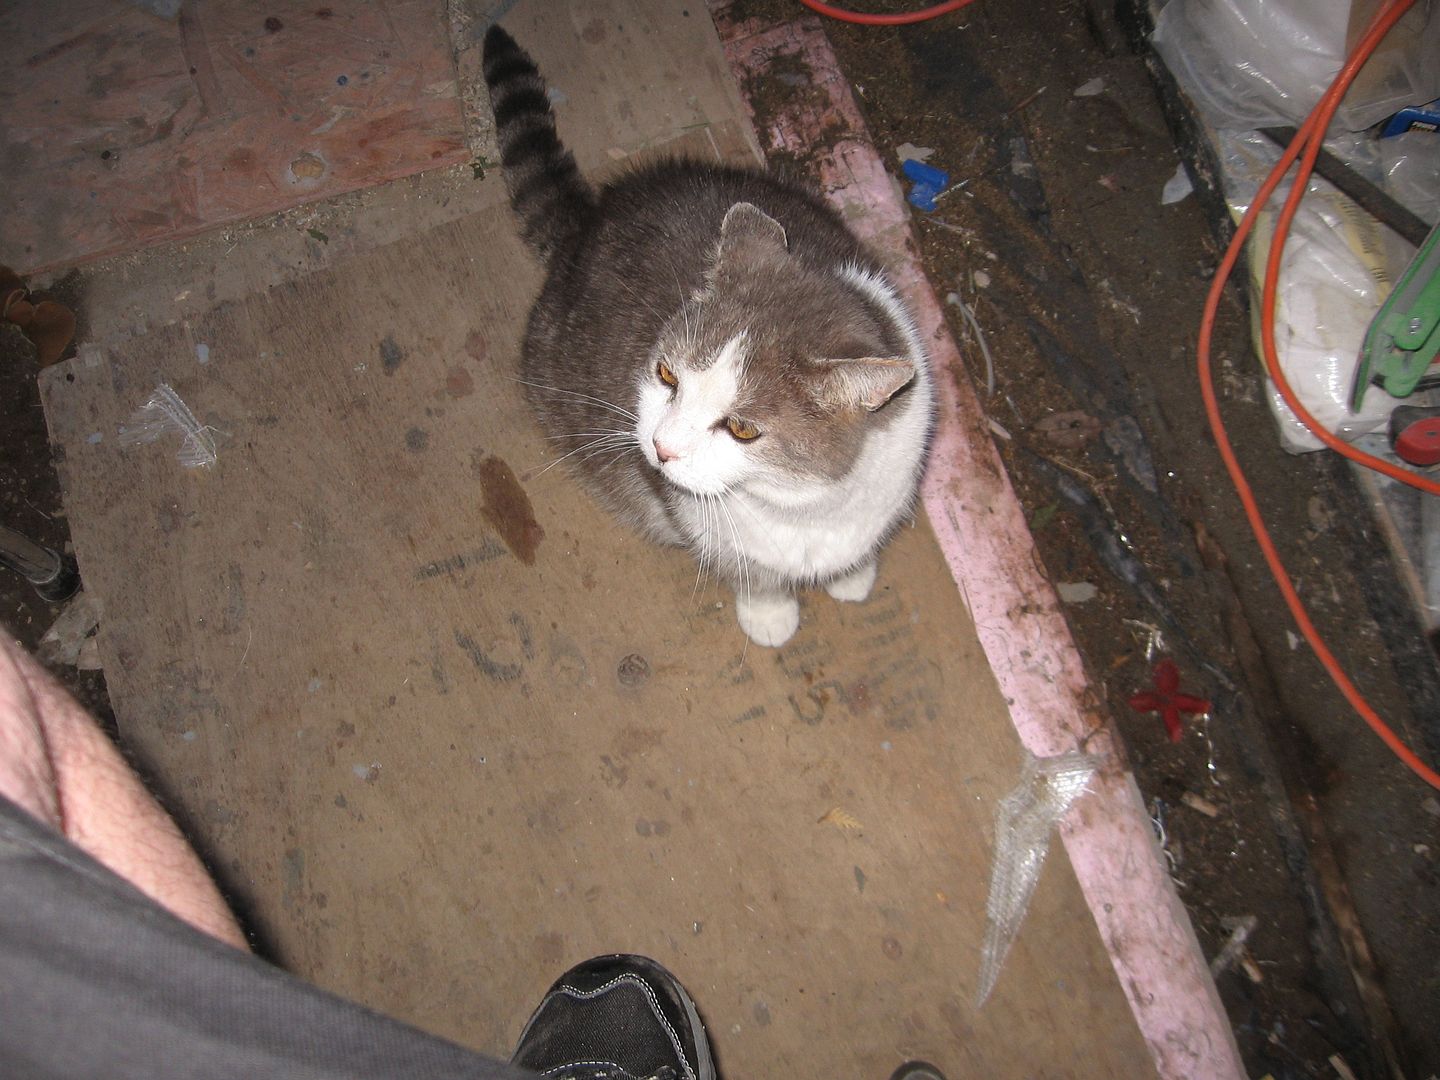
Hands are cramped up something fierce so taking a week break. Tomorrow is dentist appointment & taking a buddy's cat to the vet so not likely any updates.

Standby....


Sunday, June 14, 2015

Think I pulled a beer muscle

The ole' beer muscle (keg not a six pack) or aka 'abs' got a wee bit over strained the other day. I was rolling around in epoxy glue in the bottom of the boat when I felt the intense pang of a pulling beer muscle. Oh no. Not now! I really really don't need this right now. I finished up the best I could and hobbled out of the boat shed. *sigh*

Two days rest of the ole' panza and I was back at it again. This time taping the top of the keel sides to the bottom panels. I went at both sides at the same time which is a bit of a mistake. I ended up having to straddle the box keel almost the whole time.

Today I was back out there sanding down the tape edges and getting another layer of tape on the seams. I decided to do one side at a time so I can sit my fat arse on the other. Takes a bit longer but much easier on the arms & back.
Stbd side foreward, taped & peel ply.
I think it worked out much better setting a reasonable goal of getting just one side taped. I wasn't as rushed and didn't waste a lot of epoxy. I just worked steady at it. This time I rolled on a pre-coat of slightly thickened epoxy (baby poop) made with just some wood flour & cabosil. Rolled this on and laid the tape on top of that. The tape starts to take up some of the epoxy making it easier to wet out.
Stbd side looking aft.
Some of the best seams I've taped so far. Tomorrow I'll be back out there to tape the port side exactly the same as I did the starboard side.

Standby.

Tuesday, June 9, 2015

Absolutely Perfect Day

in the boat shed today. I got done exactly what I wanted to get done. Fillet & Tape the remainder of the box keel.
6" tape laid over fresh epoxy glue fillets.
The 6" tape got laid over with the 10" tape. This should make the joins nice and strong. The fillets worked out perfect. I used the billiard ball again. My neighbor, Robert, looked at me as if I had two heads, as he watched me do it!  :-)
10" tape wetted out and squeegee'd.
The whole time I was under intense pressure from the Project Manager to get the project moving along!
Boots aka 'The Project Manager'
Saw this yesterday morning. If he wasn't my bestest buddy I would of kicked his furry ass!
Owned!
So I guess the ole' Camaro is his now too! *sigh*  I wonder if he'll let me borrow it tomorrow so I can go have lunch in Ottawa. Hmmmm?

Just have to tape the bottom to the keel sides now. That should go quicker. Not as many contortions to get the job done. Using slow hardener now too which helps with pot life.

Standby.....

Sunday, June 7, 2015

Out with the old

In with the new. It was time.
Just plain worn out after 4 years of boat building. My toes were sticking out through the ends and the bottoms were so clogged with epoxy & shit that it was like roller skates inside the boat!
Now if these last half as long I'll be happy and the boat should be near finished! To whit, I was sanding away my sins from the messed up job I did in the box keel the other day.
I know it doesn't look it in this shot but there were plenty of lumps & bumps & bubbles that needed to get sanded out. I also ran into the epoxy kicking in the bucket thing (again) and had to take up about 10' of tape. That all needed to get sanded.
So as you can see, I don't fit in the box keel very well. This is where I need a few munchkins to come and help me along. I figure someone 3' tall would be perfect for the job!
Lori says she captured my best side with this shot! ;-)
A close up of the action. I'm using the 5" RO air sander. Eventually the box keel gets too narrow for that sander. I have to figure out another way of getting down there. Likely a sanding block glued to a big stick or something.
The messy boat work bench.
Captured perfectly, one of those WTF have I gotten myself into moments!

More sanding in my future. Standby...


Friday, June 5, 2015

Lil' bit frustrating

Apologize for not being around much. Family obligations, chores etc. kinda getting in the way. Only managed to stick my head in the boat for two days this week and only a couple of hours each day.

The box keel on this boat is pretty deep at the back, abt. 32" or so. It's a stretch to get down in there to make some nice fillets & tape the seams. Sorry, no pics. Not my best work by any stretch of the imagination. Just let me say it'll take a bit o' work with the ole air sander to fix that mess up.

So today I continued along the box keel making nice fillets & laying on the tape (2 layers, 1 x 9 oz x 6" wide and 1 x 17 oz x 10" wide.). It's warming up in the shed I can feel it. About 70 degs when I started. Half way through the second layer of tape the epoxy starts to kick off in the bucket. Once it starts to kick it won't soak into the fabric. Well that just sucks. Only thing I could do was cut the tape off (and throw 10' of it in the trash). I'll go back tomorrow and sand it all down and start up where I left off.

Anybody want some cats? Went to grab a rag from the rag bag. Hmmm? They're all damp. Sniff! Sniff! KAT PISS! Some lil' f*cker is gonna die! Grrrrr! So WTF do I do with 10 lbs of Kat Piss soaked rags eh?

And, on top of all that I think I pulled a tit muscle while flopping around the bottom of the boat like a grounded flounder. *sigh*

I hate my life!  *Sigh*