Sunday, November 13, 2016

Skyview

"Only the greatest minds have the messiest desks" - Author unknown but often attributed to Albert Einstein.


For my buddy Matt.

Saturday, October 1, 2016

Boom - Fail

So my drastic 'backyard eyeball engineering' plan to use a home made boom to lift the engine into the boat doesn't appear to be workable.
Backyard Boom
I anchored it down this morning and took the full load of the engine. It will lift it, no problem, but there is way too much flex in the supporting cable etc. and I can't get it high enough to clear the side of the boat.

I'll likely tinker with the skeg this upcoming week but that's that for 2016. I'm tired and really need a break. My first Grandson will arrive sometime very soon and I'm going to focus on that.

It's been a good summer, shorter season that most. I got a lot done but not as much as I would have liked. Absolutely everything was a struggle. I admit I'm overwhelmed and it's looking more and more like this is going to turn into a 10 yr project. Not exactly what I had hoped for but it is what it is.

Thank you everyone who has visited our blog. We have a total of over 140K page views now. That in itself is encouraging. Spread the word. The more the merrier. I honestly do appreciate all your comments and try, when I can, incorporate all the good advice I get here and on the forums.

So until next spring.....feel free to stand down now.

Thursday, September 29, 2016

The Lil' Engine

Brought the lil' huffer, our diesel, home from the marina yesterday. Their mechanic up and quit before the service was finished. Just as well. I now know the fuel injection pump requires service. I think it's better to wait until just before I have to fire it up to have that serviced. I'll likely sit in the boat for another 3 yrs at least w/o running.
Our lil' Yammy at home in the shed for the first time
At least the engine is one step closer to getting in the boat. A few minor things I'd like to do to it before I lift it in. Maybe this weekend. Will probably need another body to help.

Had to open up one of the shed doors to back the trailer in and offload the engine. This is what I found inside! :-)
Captain! There be whales here!  :-)
I have to admit. It really is impressive when you get to stand back and see all of it, well sorta all of it! :-)

This pic is from the other day. The wedge of white oak I mentioned that'll go under the keel and between the skeg.
Skeg wedge
I'm going to try to get the skeg installed next week. After that I'm off to Grande Prairie to meet my first Grandson, Connor Daniel Laporte!  :-)  I'll have one more week off when I get home then it's back to work for the gubment so that marks the end of boat building season.  :-(

Standby....

Tuesday, September 27, 2016

More rudder & skeg

Added some gussets to the rudder to stiffen it up. Some who've seen it on the forums suggested beefing it up. I have the materials so the cost is virtually nil, except for the Stainless Steel welding rods at $4 a pop!
Please no comments on welds. I'm no welder!
Yesterday I cut a wedge from solid white oak, destroying the blade in my benchtop band saw. Ended up giving that away to my Dad! ;-)  Useless for that kind of work. Anywho, I need a variety of fasteners to hold the skeg to the bottom of the keel. Couldn't get exactly what I wanted so I made my own.
Home made stainless steel bolts
I intend to weld these to the backing plate. The skeg, if it ever needs to be removed, will come off the bottom. The studs will stay in place.

I also discovered that I need some back & forth adjustment on the skeg. Because the keel bottom is not exactly level a wedge is required to level the skeg. This causes the bolts to 'lean' aft and don't directly line up with the holes in the skeg. I fashioned a template out of some scrap aluminum for the plasma cutter to cut the slots in the skeg.
Template for adjustment slots in skeg
I still have to figure a way of 'locking it in' position once it's bolted up. Likely some lag screws straight up into the wedge.

Got some bad news on the engine saga. The mechanic who was to service it up and quit. They now have no one to work on it. I'll be picking it up tomorrow and looking for another mechanic. I do know that it's the fuel injection pump that's the issue. If I can get it off myself I can take it for service myself. All the other things I needed done I can do myself.

Off to see the friendly machine shop guy!

Standby....

Sunday, September 25, 2016

Angry Pixies

Fusing metals together with lots of angry pixies is fun! I'm no welder mind you. I got a lil' buzz box inverter stick welder from Princess Auto for small jobs. Decided to make a few of my own 'special' modifications to the rudder this morning.
Adding trailing edge rod to rudder
Added another SS rod to the trailing edge of the rudder. It sort of seemed out of place with the ribs just hanging out there. I also added some more rod to the top of the rudder so it'll follow closer to the hull once it's all foamed & glassed.
Lower section ready for foam & fiberglass

I started out under the boat. Leveling the skeg and taking measurements. I have to lower the skeg about 1/2" so I'll have room to lift the lower section of the rudder out of the pintle bearing should it need to be removed. Not a big deal. I have to build a wedge to fill in between the bottom of the keel and the skeg anyways. Just haven't decided what material I'm going to use yet. Probably the white oak I have on hand.

Was a very chilly 2C this morning. Means later starts in the day.

More adventures tomorrow.

Standby....

Thursday, September 22, 2016

More Bits & Pieces

Spent part of the morning drilling holes in the skeg for the pintle bearing.
Holes drilled for Pintle Bearing
I must be getting good at this drilling stainless stuff. All 4 holes took me less than 20 mins. Trick is to drill slow and lots of downforce! Oh yeah, plenty of cutting oil helps a lot too!
It Fits!
It even fits! I love it when a plan comes together. Next step was to crawl under the boat and line this thing up. In and out, up and down, I must have been in and under the boat 25 times. Definitely a job needing an extra set of hands. Anywho, drop the backing plate in and a couple of bolts. Crawl back under and put the nuts on. Fack! Backing plate is upside down, none of the holes line up! Fack! Do it all over again tomorrow.

Got a call at lunch to go see the Machine Shop guys about the rudder. Just had to finalize a few details.
Flanges welded on, ribs laid out ready for welding
Matt, the guy in the machine shop is a decent fella. Think he enjoyed this little distraction from the day in day out doldrums of working on broken farm equipment! :-)
Cutting key way in rudder shaft
Little lathe work on the mating flanges
Rudder should be done this afternoon.

Standby...

Wednesday, September 21, 2016

The Dark Side

If you're squeamish you might want to look away!

The dark and dirty side of boat building that no one wants to talk about!
2 Weeks accumulation of trash
That's just what's been produced in the last two weeks of boat building. Solo cups, chip brushes, sanding discs, peel ply, tape rolls, latex gloves, paint rollers, zip loc bags, popsicle sticks, excess glue, etc.

Every once in awhile the garbage man and I get to chat. He asks how the boat is going, we do a lil' tour. Last time was a couple of weeks ago. He said: "You have the most interesting garbage!" In reference to my boat shed trash. I near pee'd myself laughing!

Nothing else to see here, please disperse!


Cheers!

Tuesday, September 20, 2016

Slow Start

Lil' slow getting started this morning, I slept in! But, back on track. Basement bulkhead #2 needed some trimming & fitting.
Basement Bulkhead #2 filleted
Went a little better than yesterday. Still cramped but not as bad as yesterday. Don't much like working with my head below my ass! ;-)
Basement Bulkhead #2 filleted, taped & glued
The space between these two bulkheads will be the wet sump. The shower sump & dewatering bilge pump will go in there. Tight fit but it'll work I think. The space aft is dry storage and the space forward just general storage. I'll line the bottom of both storage spaces with the Duragrid I used under the engine.

Still have a little more taping to do in the forward section and still looking for the soles that were cut for these spaces. It will be nice to get them in and be able to walk on a level surface! :-)

Carry on with your regular activities....

Sunday, September 18, 2016

More Little Nibbles

The plan for today was to plug the big hole in the support for the prop shaft. Just traced out the hole and cut the part with the jig saw. Slipped right in as if it was meant to be there! ;-)
Prop shaft hole plugged & glassed
There's at least 3 layers of heavy tape on that patch. I don't expect it'll be a problem. It only supports the shaft tube.

While that job sets up I turned to the forward cabin again. There's two small bulkheads that go in the forward section in the box keel. They help support the sole. First one, farthest back, is for the dry locker section. This is an extra piece I made up. The second one, nearest, is part of Frame D.
Small bulkheads fitted

I hauled all of Frame D out of the stack today. one part missing. Not a big deal. Onto some sanding in prep for glue, fillets & tape.
Dusty Fella's
Damn! Should have made a Youtube movie! Shoot! Highly recommend the 2" roloc discs for getting in the tight spots! They don't last very long but they do a very nice job on the fillets etc.
All sanded & prepped for tomorrow
So tomorrow's plan is to install the two bulkheads. Finish taping the stringers. I have to finish the Frame D puzzle and get it ready to go in. Once that's done I can install the soles on both sides.

Standby....

Friday, September 16, 2016

RTFM

That was a common response from the ole' fella's when one of us young punks asked a question. RTFM!!!  (Read The F*cking Manual). Ain't nobody got time for that nowadays! ;-)

Anyhow, I did read the instructions for the Python Drive. It just happened to be about 6 yrs ago! ;-)  The date on the invoice for the unit is December 10, 2009 so this thing has been sitting in my basement for that long now.

Thanks to 'Eagle Eye' Peter on the bateau.com forums for spotting the mistake. Good catch Peter!
Instructions on hand! Check!
As above I had the rubber thingies on the wrong side of the backing plate thingy. Once I saw the instructions "KaChing!" datz it!
Proper Fitted Python Drive
Once that was done I hauled it all back out and sanded the area for more fillets & taping. Then proceeded to do the ugliest fillets & taping so far. So bad I refuse to take pics & post them here. *ashamed*

Back to the machine shop to check up on the rudder. As of yesterday nothing had been done in almost 2 months. If it's not started today I'm bringing it all back home and looking for another shop that can deliver.

Standby...

Thursday, September 15, 2016

Continuing Saga

The next chapter of the Python Drive saga involves fitting the thrust bearing to the backing plate and mounting that to the bulkhead.

First crack at it! Ooops!
Just a slight miscalcuation
Just a little too tight. I'll blame it on converting from metric to standard!
Couple minutes with grinder and it slips right into place
The bulkhead is incredibly strong. I think you could probably pick the boat up in the air by it alone! Still some filleting & taping to do on it.

So after a lot of dickering around, up and down in and out of the boat I managed to get it aligned up (sorta) roughly. I can't install the prop shaft tube till the rudder & skeg get back from the machine shop.
Fitted and aligned (roughly)
The thrust bearing will eventually have to come back out of the boat for sanding & painting & installing the shaft tube. Mocking it up this way just confirms for me that I'm moving in the right direction.

Off to source stainless steel bolts & nuts.

Standby....

Wednesday, September 14, 2016

Glued, Screwed & Tattoo'd

It's in and it ain't comin' out! :-)

Bulkhead that'll support the Python drive, dry fitted, glued & taped.
Backing blocks glued & screwed into place
The screws holding the backing blocks will come out once the glue has set. The holes will be filled with epoxy & toothpics!! A trick my ole' buddy Peter taught me.

It' ain't pretty but it's done.
Glued and taped
Once that's setup it'll get a sanding and some paint.

Didn't do a blog entry yesterday but did do a Youtube video. For those who haven't seen it here it is....

Back to the shed this afternoon for some putterin'.

Standby...

Sunday, September 11, 2016

Sticktoitness

Sticktoitness  (Capeman 2016)

Capeman coined that phrase awhile back on the Bateau.com forums describing my persistence in working on this big project. Had to correct him though, the wife already describes that trait in me as 'Stubbornness'. Who am I to disagree with her eh?  :-)

Anywho, whether it's sticktoitness, stubbornness, persistence or whatever, I just have to keep nibbling away at this thing. Eventually, at the same pace your fingernails grow, I'll get it done one day.

Today's task was to dry fit and trip up the bulkhead that'll support the Python drive. You saw that yesterday. I measured 6 times and cut once! :-)  See? I learning!
Heavy fiberglass and peel ply
This small bulkhead will get an extra heavy dose of fiberglass on both sides. I think this is 24 oz/yd glass. Seen above it's been laminated and peel plied. It'll be ready to flip over and do the other side tomorrow.
Sanded ready for bulkhead installation
Sanded up the area between the two small bulkheads. This area will form the bilge sump and will have the dewatering pump and the crash pump (I think).

Going back in the shed this afternoon just to clean up a bit. The boat looks like it just got hit by a twister! (no joke, we had them rolling through the area last night).

Standby....

Saturday, September 10, 2016

Massive WTF Moment

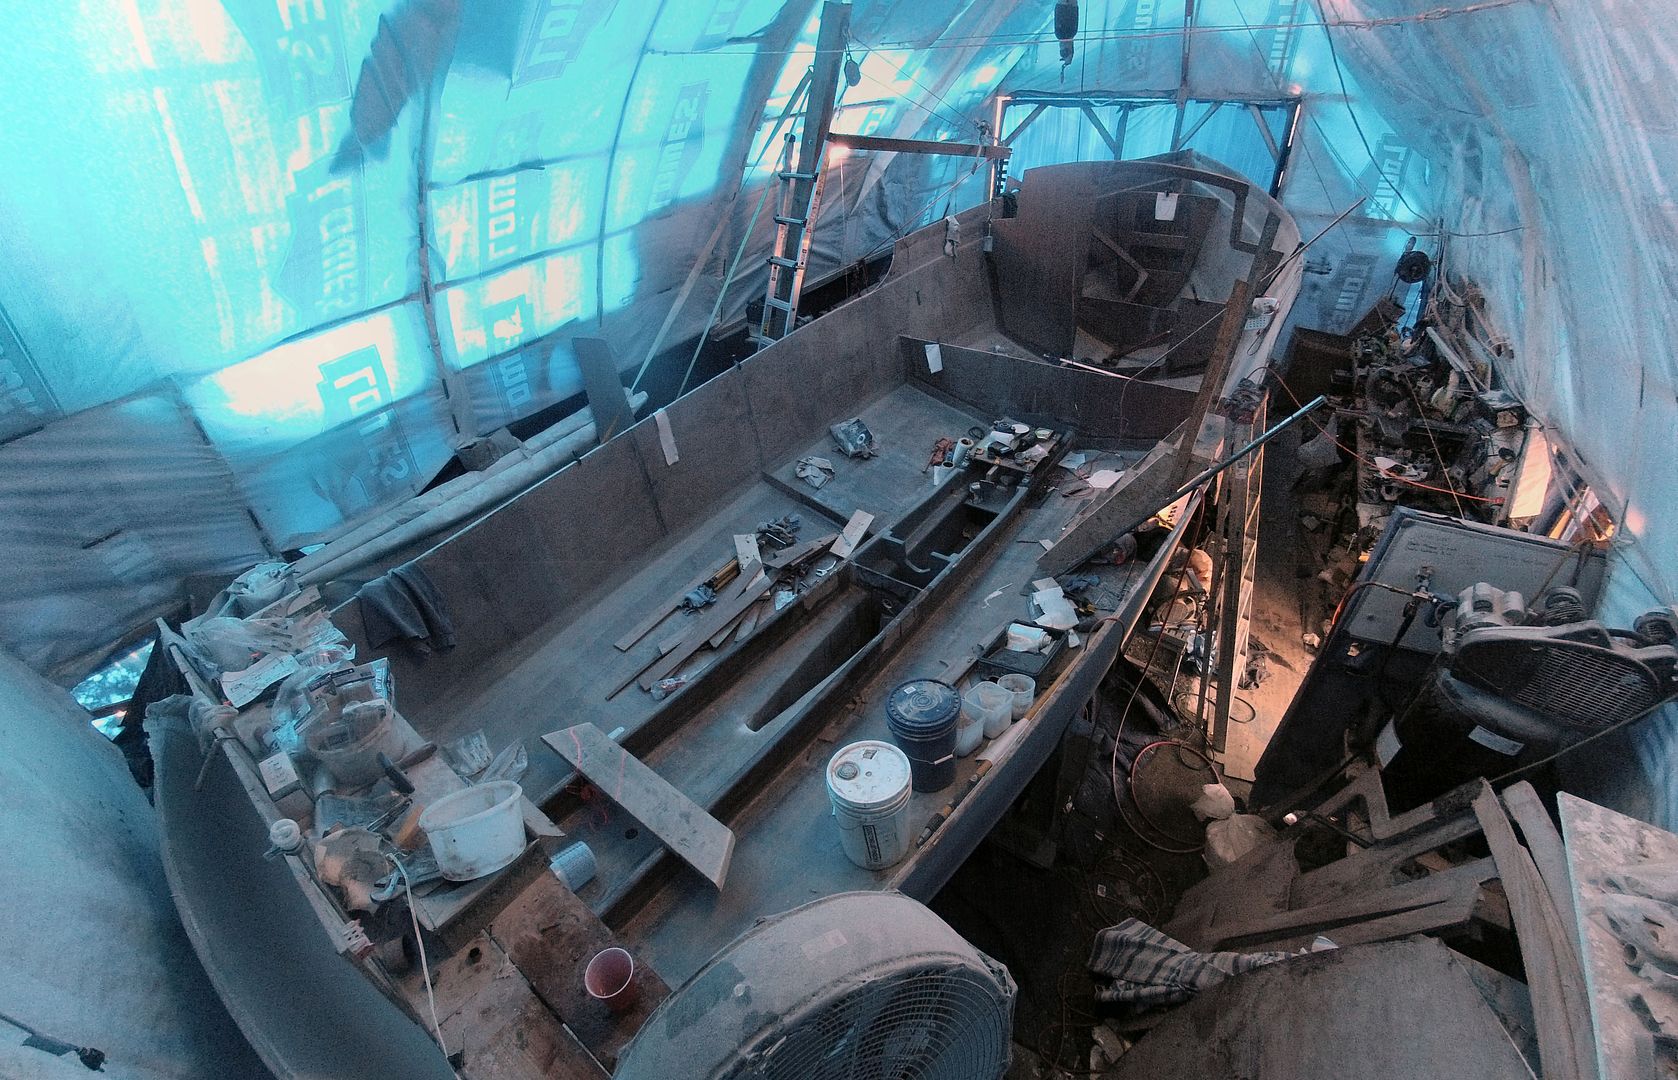
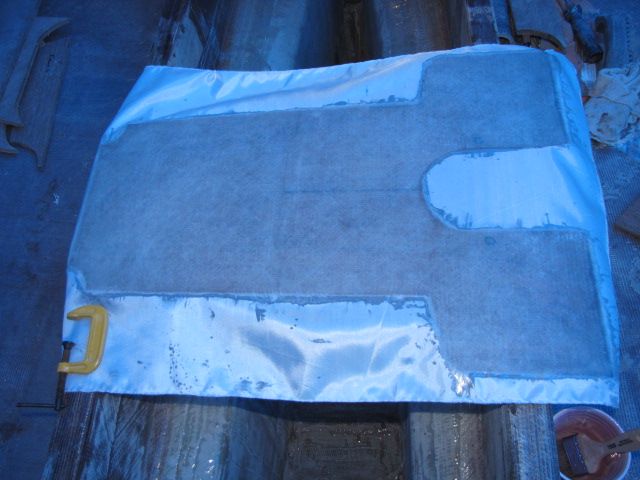
Stymied. That's how I felt this morning. Stymied. I sort of had it planned to glue & tape the two partial frames but then go to thinking ahead about the tanks that have to go between the frames. Downloaded, where I could find them, the drawings for the tanks.
Last time I actually saw these was 5 years ago!
We bought the fuel and water tanks 5 years ago on a mini-vacation to Rhode Island and Maryland. They immediately got stuffed in the loft of the garden shed and I haven't seen them since. Didn't really want to haul them out so trying to picture how they'll fit, based on the drawings, in my head hurts! *sigh*

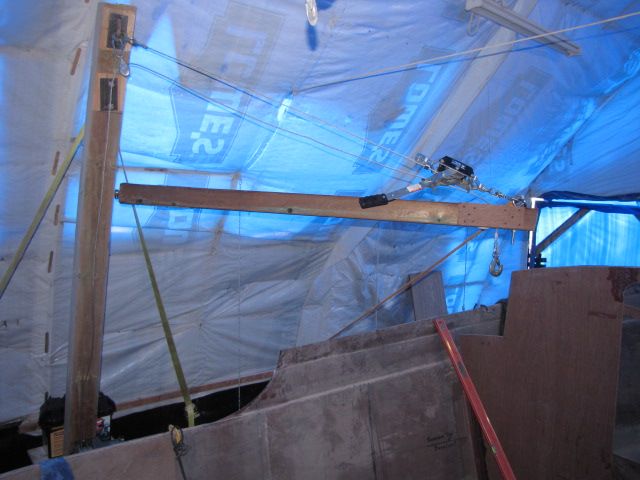
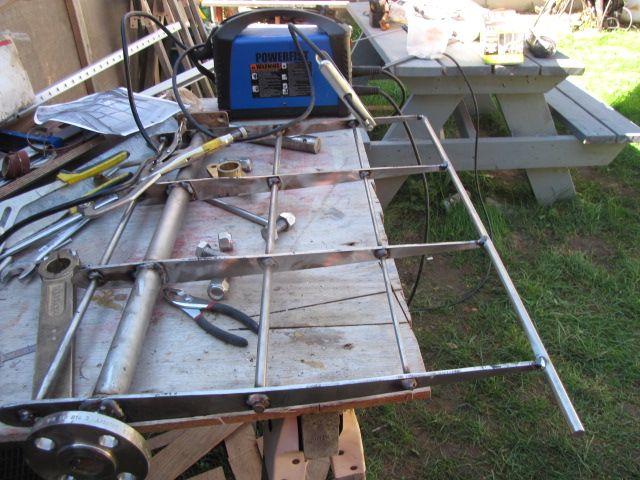
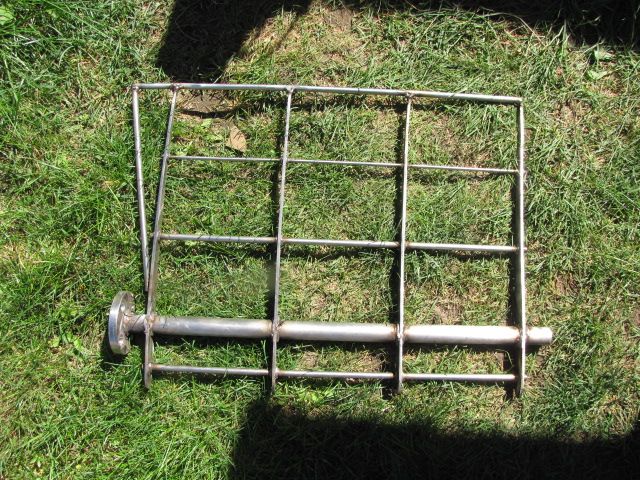
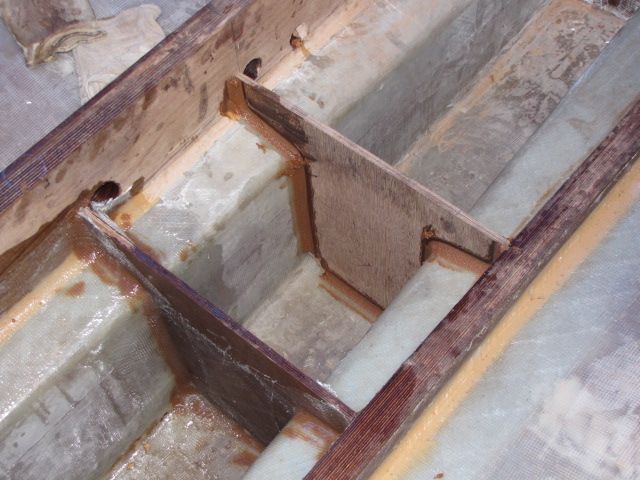
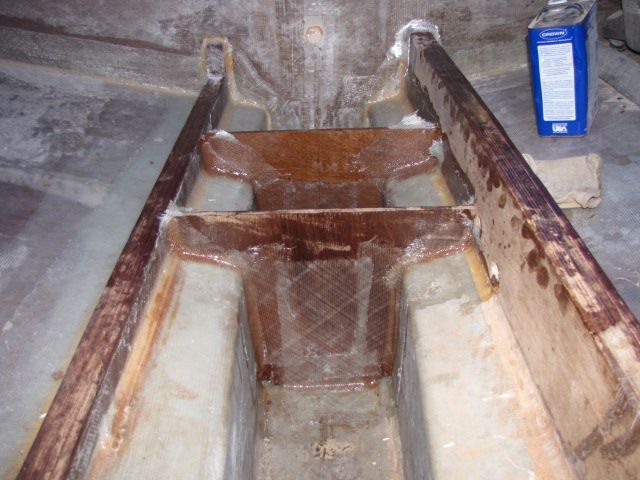
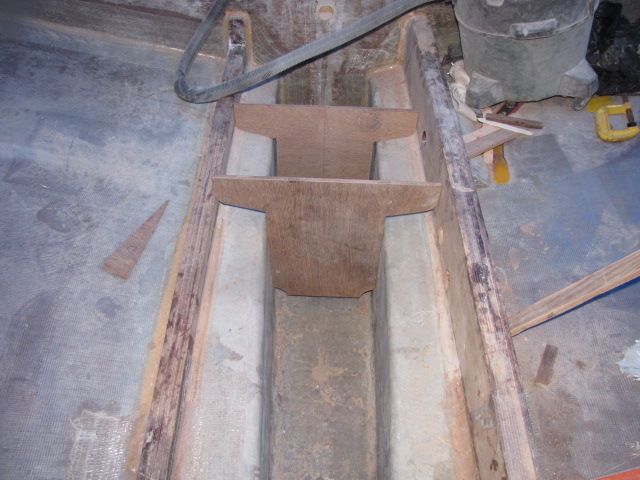
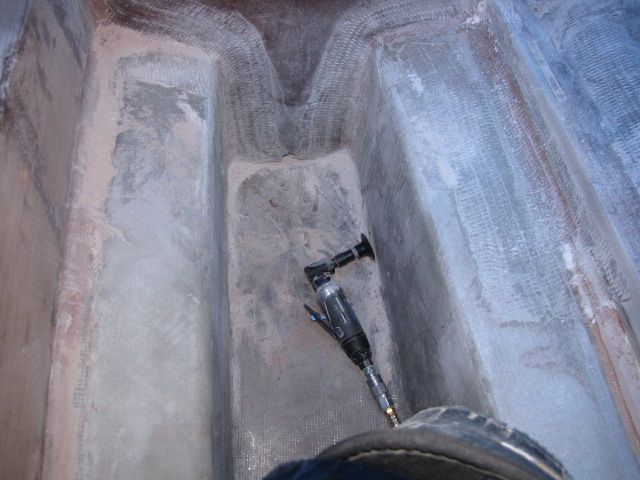
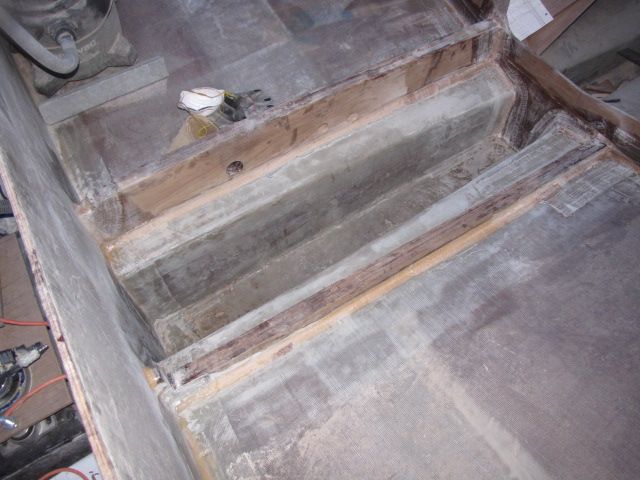
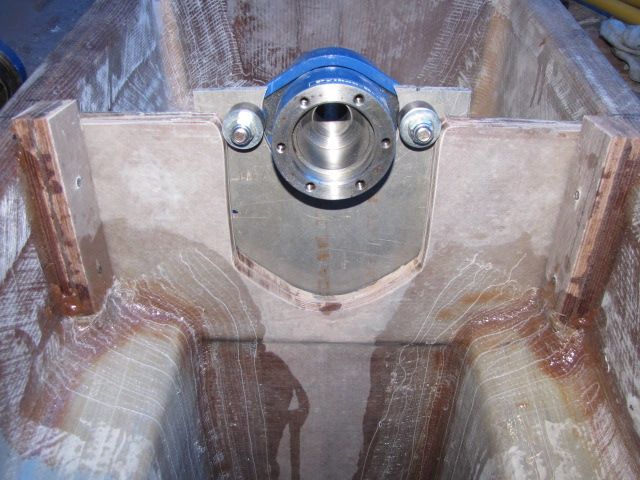
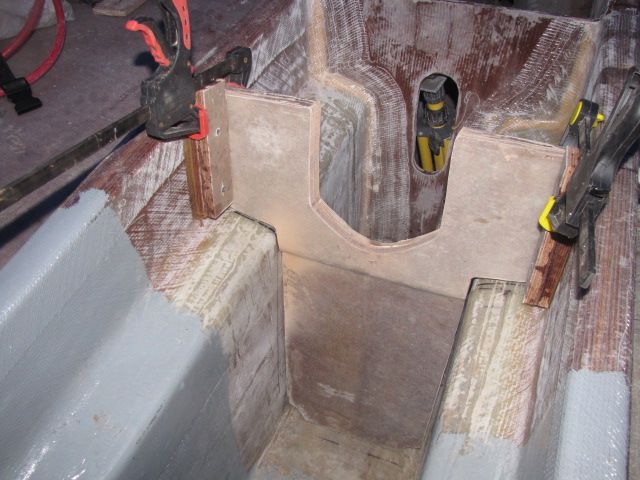
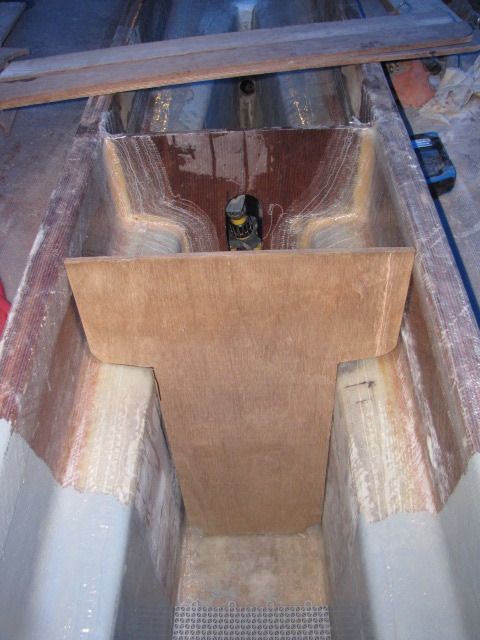
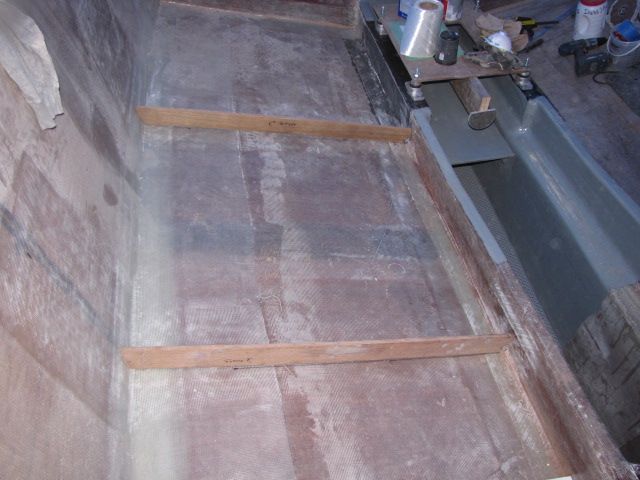
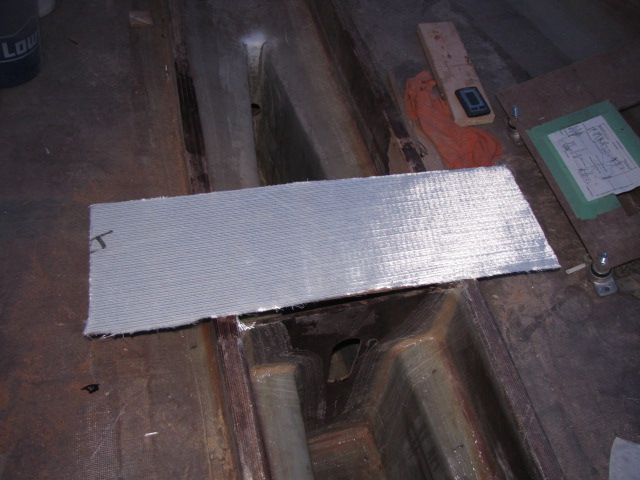
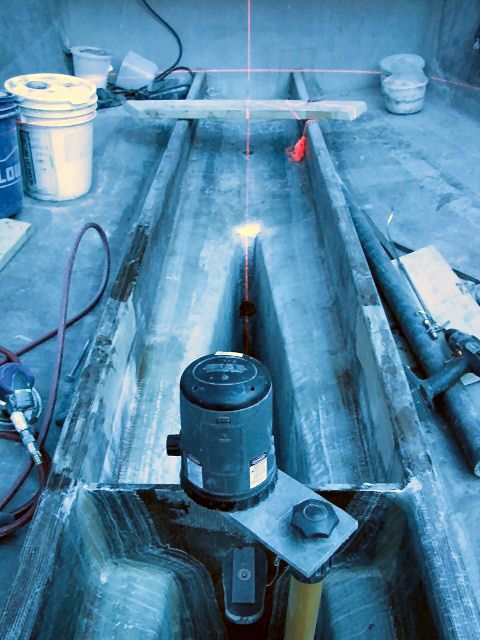
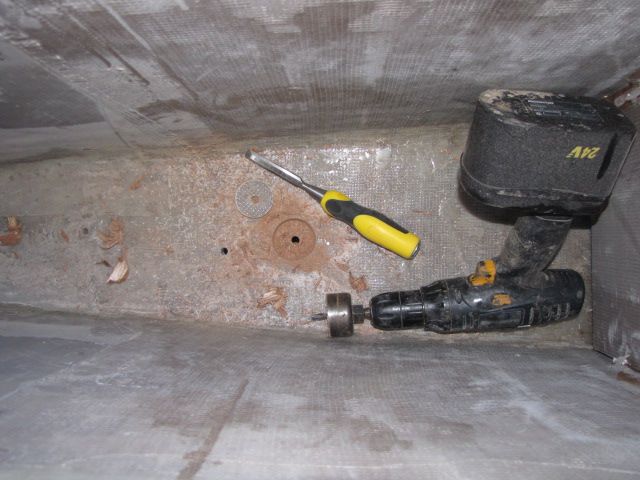
Anywho, as things would have it my mind kept drifting off to other things. I know one of the priority items, stuff I HAVE TO get done before the engine gets here, is the bulkhead in the box keel that'll support the Python Drive. I tinkered with this a bit awhile back. Time to lay it all out again and fab up a bulkhead.
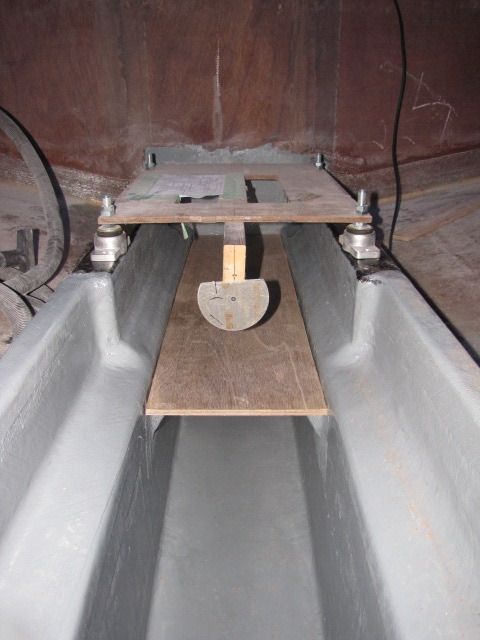
Blank bulkhead trial fitted
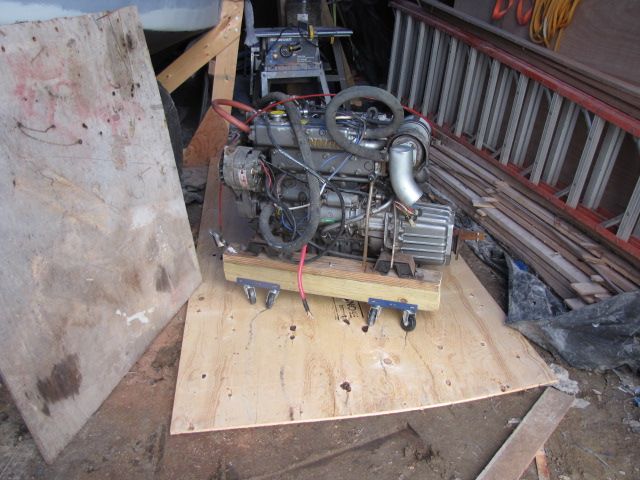
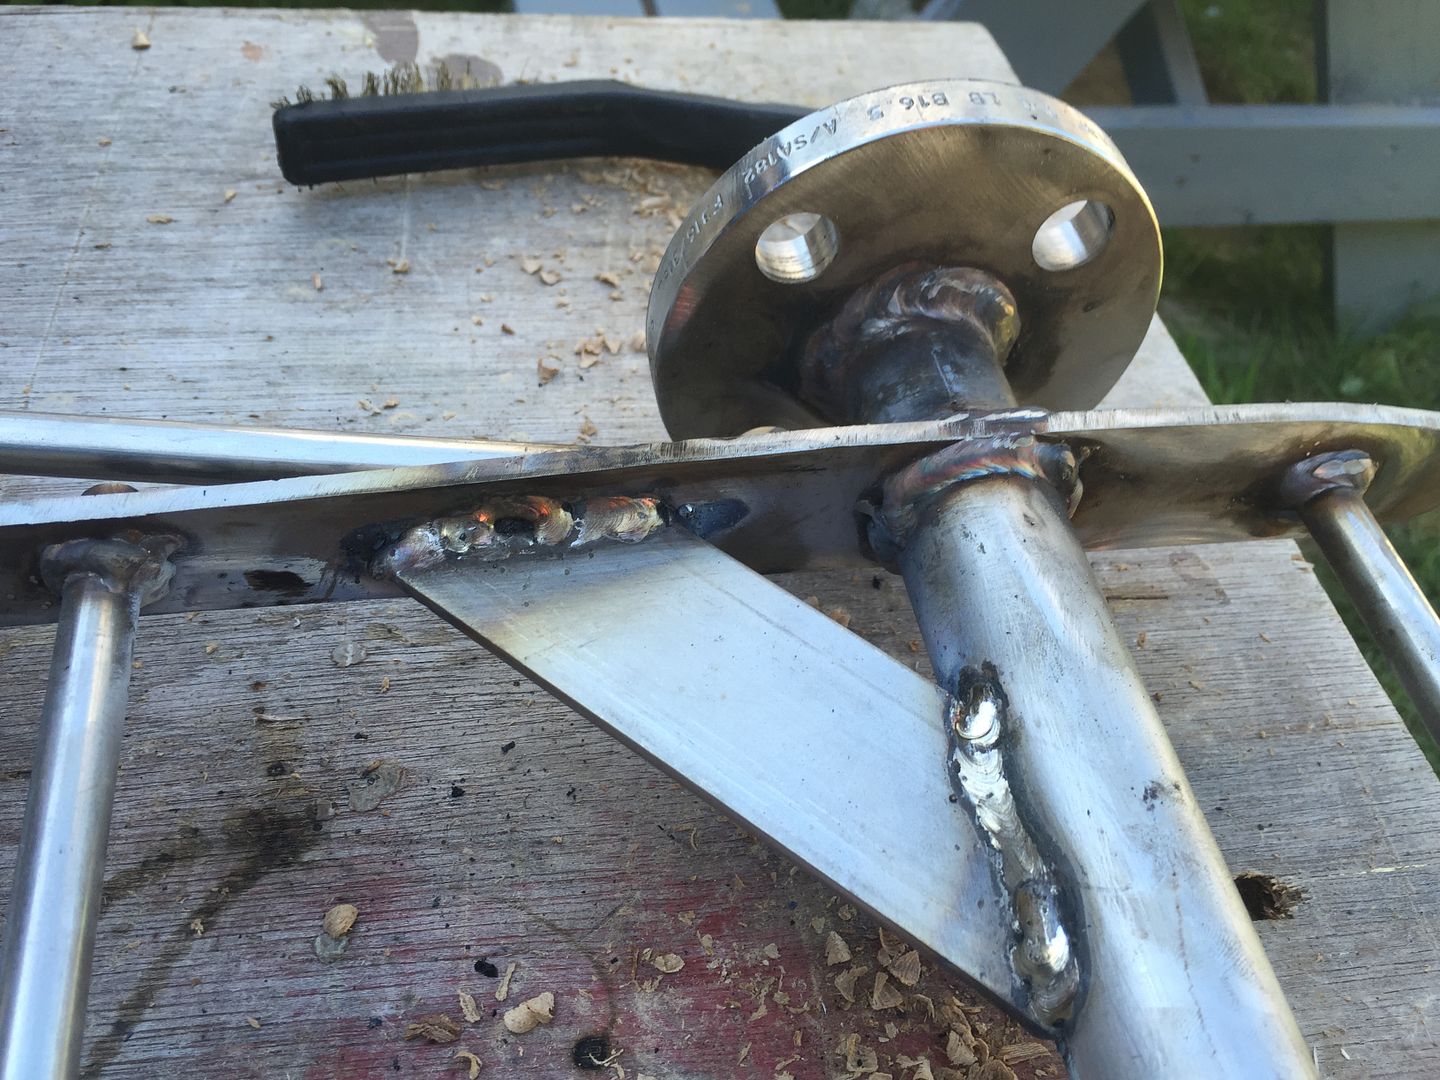
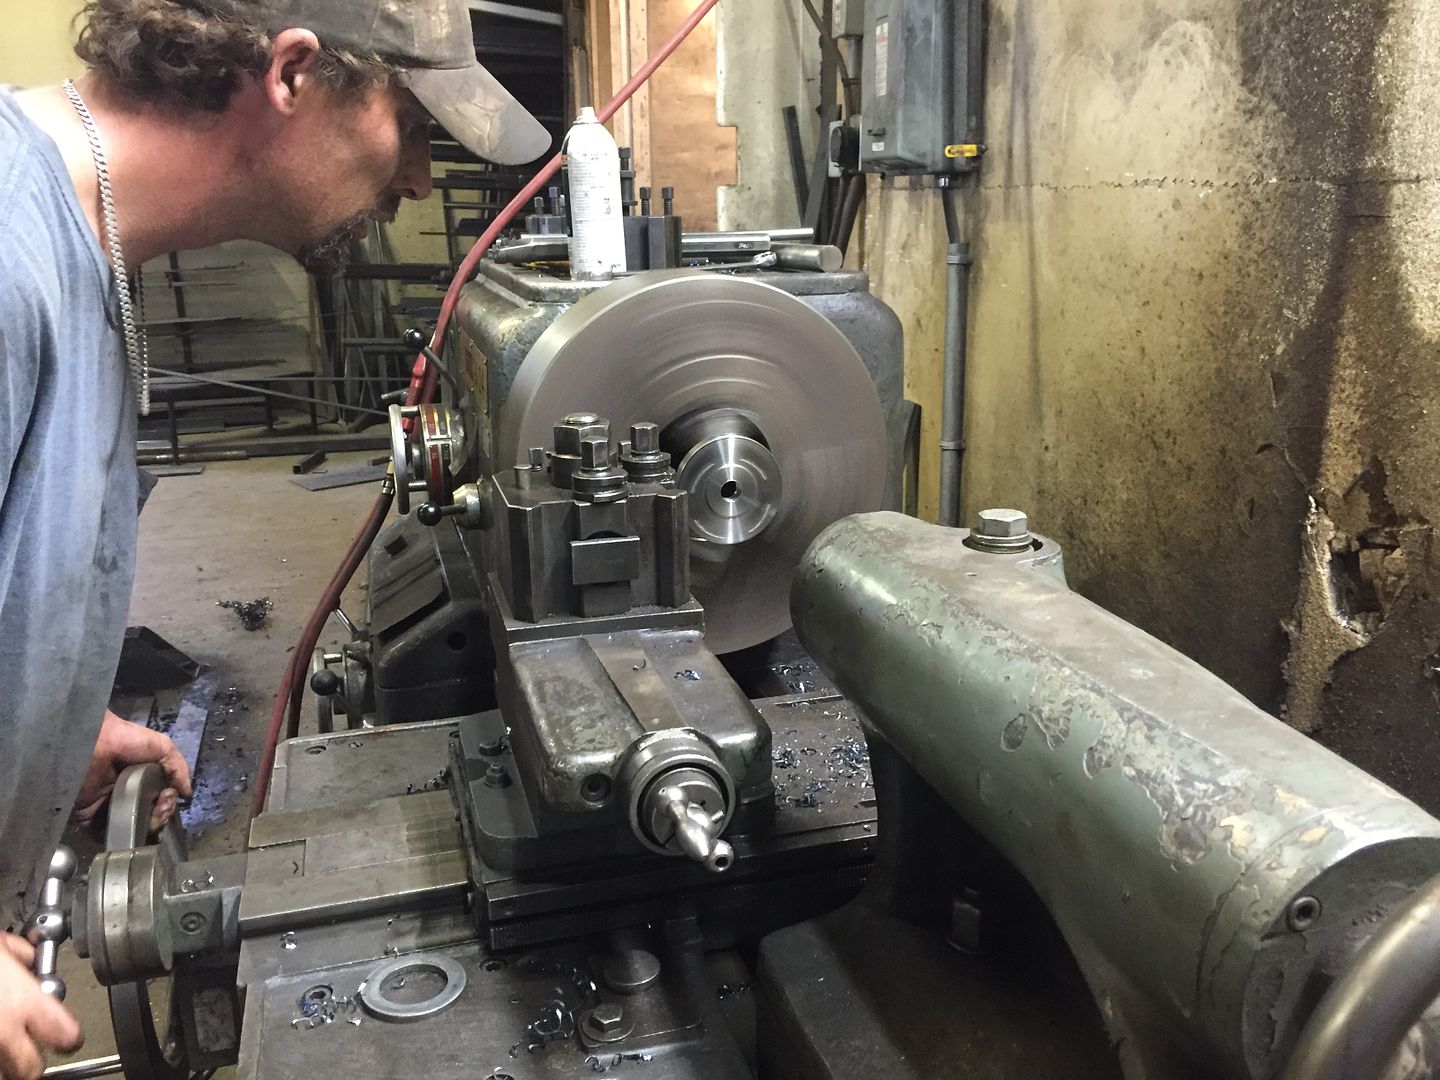
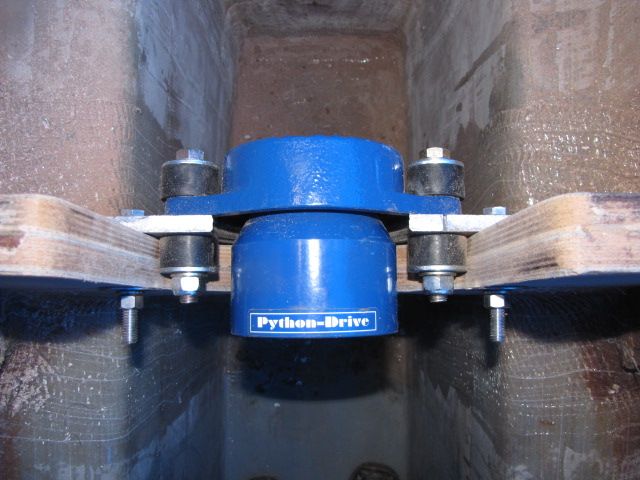
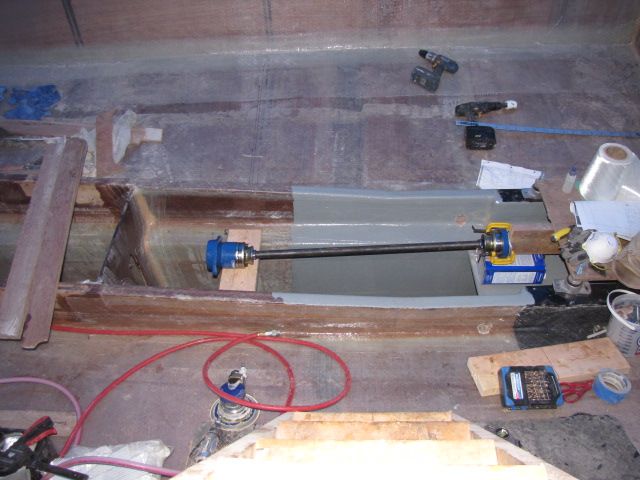
It's going to get pretty tight in there pretty quick. Not much I can do about it. Here's the extended shaft for the Python Drive.
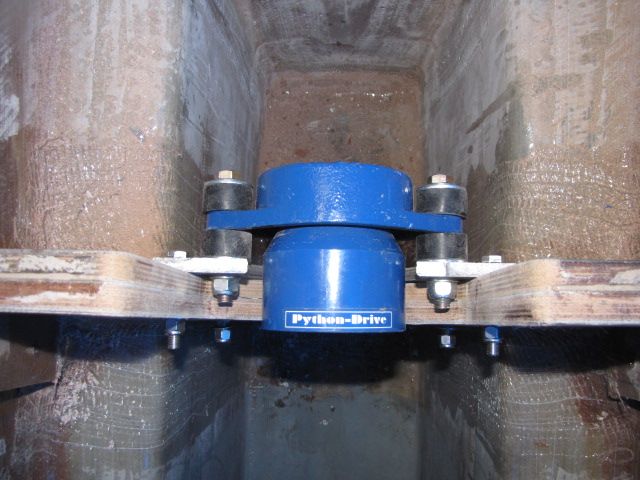
Python Drive extended shaft
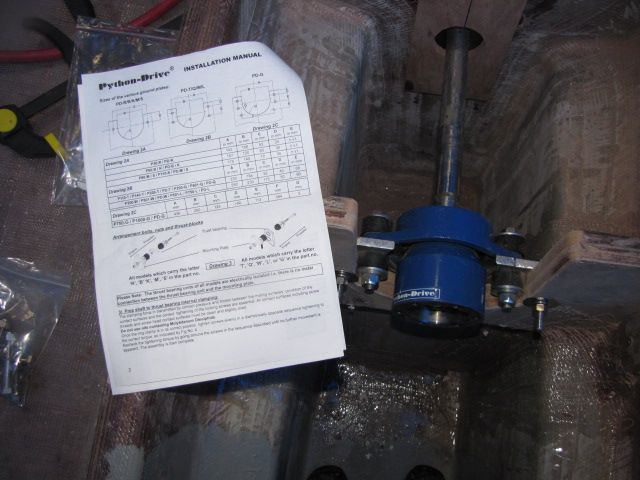
The geometry is pretty simple. The prop shaft is at 8 Degs from horizontal so the bulkhead supporting the thrust bearing will be 8 degs from vertical. That's easy enough. The extended shaft has two Constant Velocity (CV) joints. Manufacturer recommends a minimum 2-4 degs from axis for each joint to aid in lubrication so the extended shaft is angled 4 degs from horizontal. Quick & easy until you're standing on your head in the bilge trying to hold it all together and mark it out with only one hand!

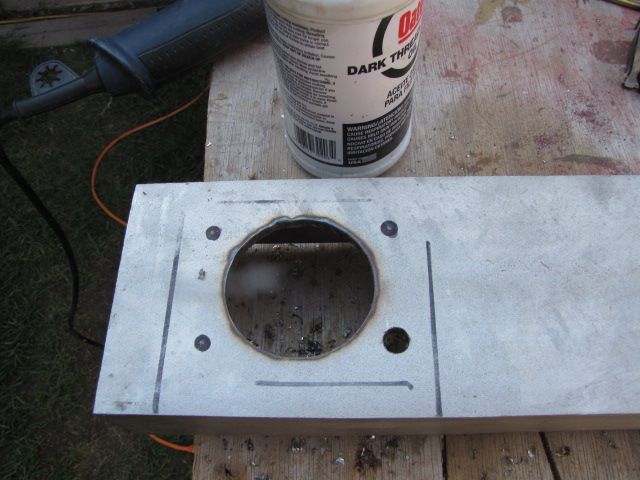
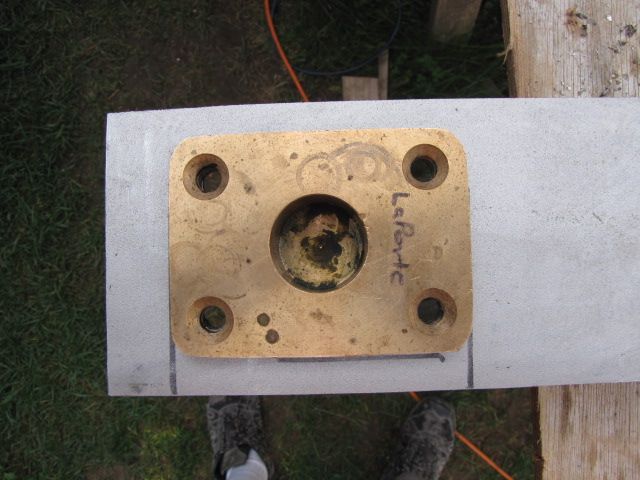
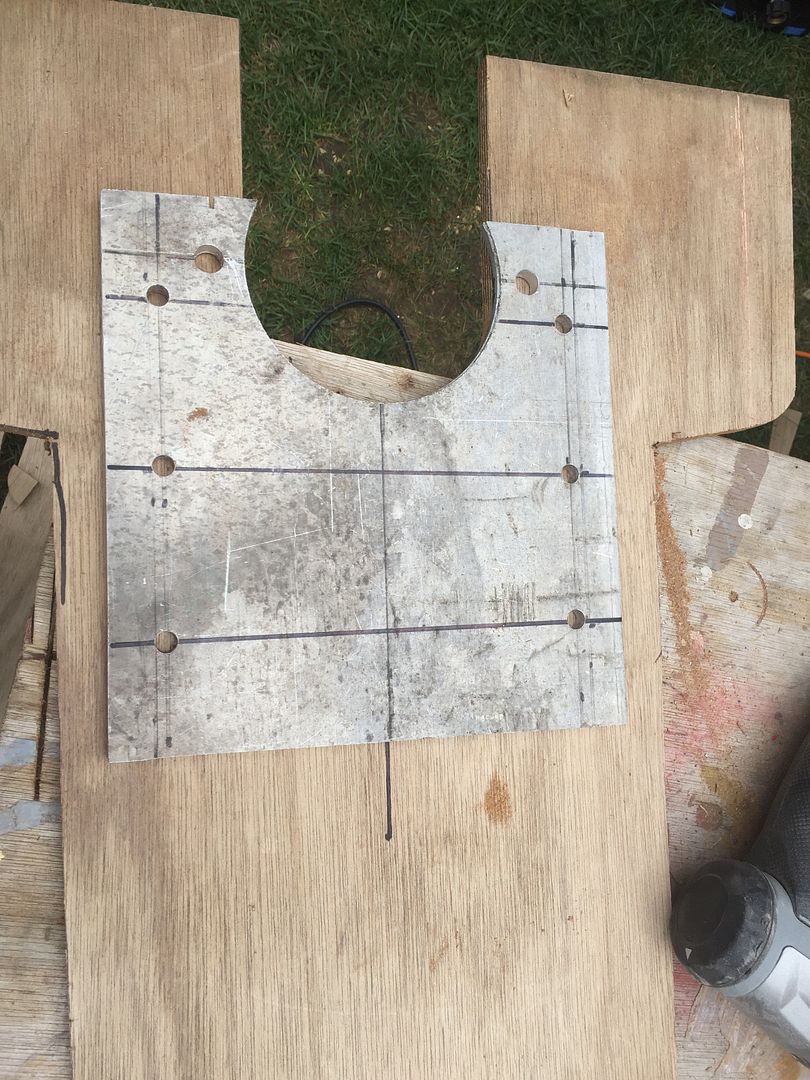
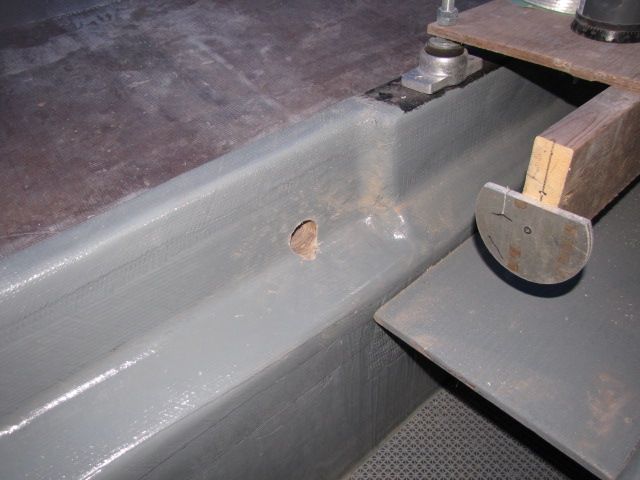
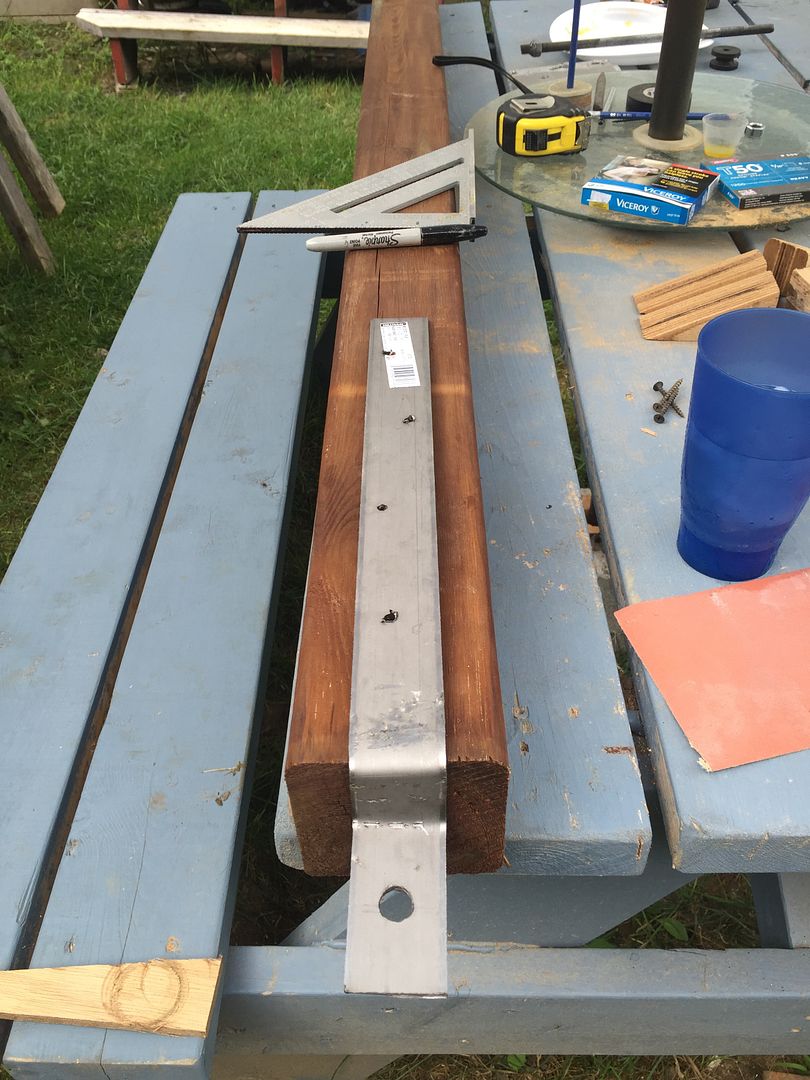
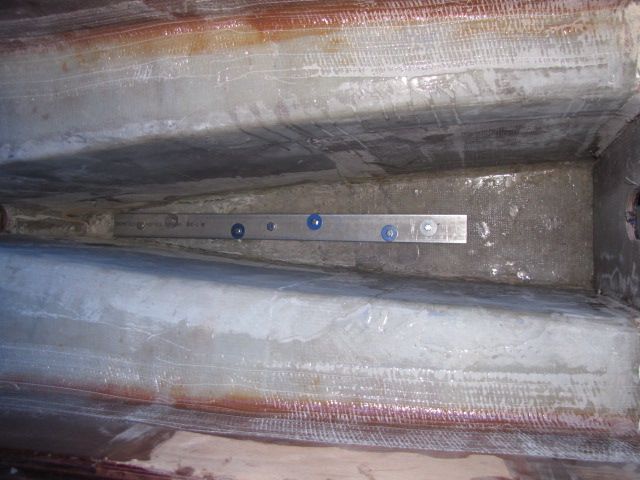
The thrust bearing part of the Python Drive will actually be mounted to a 3/8" aluminum plate. That in turn gets bolted to the bulkhead. This provides some wiggle room for minor adjustments.
Thrust plate
That's about as far as I got before the clouds opened up. Back at it again tomorrow.

The Project Manager stopped by for lunch.
PM helping himself to some of my lunch
 Can't very well say 'No' to the boss now can I?  :-)

Carry on.....

Friday, September 9, 2016

Drip Tray, Frames & Limber Holes

Trimmed up the drip tray and screwed it into position. Slapped a coat of bilge paint on her and called her 'Sally'! Done. What next?

Started to lay out the frames that'll go in the engine space. E2 and F for starts. I'll have to build small 'shelves' for the tanks to sit on so I have to get my dimensions down now.
Frame E2 (fwd) and F (aft).
Nothing spectacular I know but it's progress all the same. I'll likely do the port side first then switch the ladders around and do the stbd side.

I poured some water on the bottom of the boat to see where it'd sit. Lowest point identified I drilled two limber holes. These will allow any water that gets into the engine compartment above the stringers to drain to the bilge sump.
Limber holes drilled for drainage.
Tomorrow I'll be gluing and taping E2 & F into position then relocating the baseline and set the floor height with the rest of the frames.

Standby....

Thursday, September 8, 2016

Kinda Slow Goin'

Things have been pretty slow around the ole' boat shed lately. I'm still waiting on the engine to be finished it's service and the stainless for the rudder was just cut yesterday (supposedly).

This morning I only had a few small things to do. I cut & fitted the tray that'll go under the engine.
Catch tray fitted under engine.
That got a layer of glass from the 'offcut bin'. Dunno what weight it is, 18 oz maybe.
Glass on the tray waiting for epoxy.
I next had to change out a pulley I had on the boom setup. Originally had just a rope pulley but that wouldn't be good enough to hold the weight of the engine so I swapped it out for an 8000 pulley.
8000 lb pulley ready for action
Also had to hook up a rope pulley to help manage the boom. It'll control the slew as I pick up the weight. It'll naturally, because of the angle of the gin pole, want to swing into the boat so the rope will be able to control that.

Too hot in there now. More tomorrow.

Standby....

Thursday, September 1, 2016

BOOM!

Remain calm. Breathe! It wasn't an explosion! You can sit down now!

Two days of futzin' around making a boom to attach to the Gin Pole. The purpose of which is to lift the engine into the boat.

The engine dry weights 565 lbs. With fluids let's say 600 lbs. Nice round figure.

As you saw in Sept of 2014 the Gin Pole was more than capable enough of lifting over twice the weight of the engine and hold it there. Amazing considering the little electric winch was only $160 at Harbor Freight.

Fabricated two brackets that'll swivel on a 1/2" eye bolt that was embedded in the Gin Pole for the flip.

Brackets fabbed to swivel on eye bolt
Long story short I managed to single handed hoist this hunk of wood and metal up to the Gin Pole and get it bolted & strung into position.
The Boom!
I may add another eye bolt to the end and double up on the hoisting cable. This rig only has to work 'once' just like the Gin Pole did when we flipped the boat.

The cable ratchet is 2000 lb working capacity. The hoisting cable is 2500 lb capacity. The boom swivels on 1/2" Grade 8 bolt with nyloc nut. The sheave I borrowed from one of the 8000 lb blocks we used to flip the boat. I'll anchor the Gin Pole pretty much the same as we did for the flip. Maybe run one more strap to the aft end of the shed to take up strain as we lift the engine.

I plan to put tires & plywood on the bottom of the boat for the lift so if the engine falls it'll wreck the plywood etc. and not go through the bottom of the boat!

Standby....

Sunday, August 28, 2016

Drilling & Filling

Finished up drilling & chipping out the final two holes in the bottom of the keel. Once this was done I waxed up the bolts that'll be used to secure the skeg and taped them 'Up' through the holes I drilled earlier. This will make it easier to line everything up later.
Mold release wax on the bolt shanks
Taped in place from the bottom up!
Next mixed up a runny batch of epoxy & chopped strands. These small strands of fiberglass are only 1/4" long or so. Just poured them into the holes. Quick & easy. These will set to be rock hard and able to take all the torque I can put on them when the skeg is insalled.
Back filled with epoxy & chopped strand fiberglass
Just dry fit a piece of the 'Duragrid' I bought to go on the bottom of the box keel. The flexible water tank will sit on this. Hopefully there'll be enough air circulation to prevent any mould from growing down there.
Duragrid dry fit
Going back out to the shed this afternoon to start the drip tray that'll go under the engine.

Standby....

Friday, August 26, 2016

More Box Keel

So looking at the stuff I gotta stuff in the keel, skeg bolts & backing plate and the prop shaft tube, I gotta do the skeg stuff first. If I put the prop shaft tube in I won't be able to get to the bottom of the box keel at the stern.

Out comes the ole' trusty laser level! Let's get this puppy lined up!
Lining up the skeg backing plate
I only had 1 reference hole from the first test fitting. I need at least two to get the backing plate lined up properly. The vertical line from the laser makes an easy job of this.
Backing plate in place
I drilled all the holes and dropped the bolts in to see how they'd line up. Just a waste of time really. Next step is to overdrill the holes so they can be filled with reinforced epoxy. This gives a better core for bolting the skeg to the keel.
Drilling more holes in my nice hull! *sigh*
The trick here is to not cut all the way though. You want to leave the outer fiberglass in place. The old hole saw I had has a 1/2" piece of plywood stuck in it so there's no chance of going all the way through the bottom of the keel. Most of the 'digging out' of the remainder of the core is with a chisel & air sander.

Couple of finished holes.
ACME Holes!
 My neighbor, Robert, gave me a 24Volt cordless drill about 10 yrs ago. It's been a real workhorse. Along with the drill he gave me 3 extra batteries to go with it. One has bitten the dust completely.
Pooched 24V battery.
Another one has been intermittent. A real PITA when you need it to work. So in order to see what's going on I pulled it apart. One of the contacts wasn't soldered on and just a weak crimp holding it in place. I suspect that was the culprit so I soldered it fast!
Fixed!
It's on the charger now so we'll see how it goes tomorrow.

35C in the shed when I left 10 mins ago. Fans going full blast and it's still a scorcher.

More tomorrow.

Standby.....