Saturday, June 30, 2018

Rudder & Drive Shafts

First task of the day is to locate the proper position for the rudder shaft tube. Thought about it and thought about it and decided to go with the plumb bob & ole' Dead Eye! I have to be careful and fill in the oversize hole in stages. First will be to put two layers of 18 oz glass over the hole. Problem is there's a 2" fiberglass pipe that extends below the bottom. Ok, Arts & Crafts day!

Cutting holes in glass for bottom patch
 I eventually rounded off the patches above. Below I'm covering the fiberglass tube with packing tape. This will prevent the epoxy from sticking to it until I want it to.
Packing tape release all
 The next challenge I have is how to provide some clamping pressure on the patches until they cure. Working upside down under the boat is not one of my favorite things to do.
Foam rubber pressure
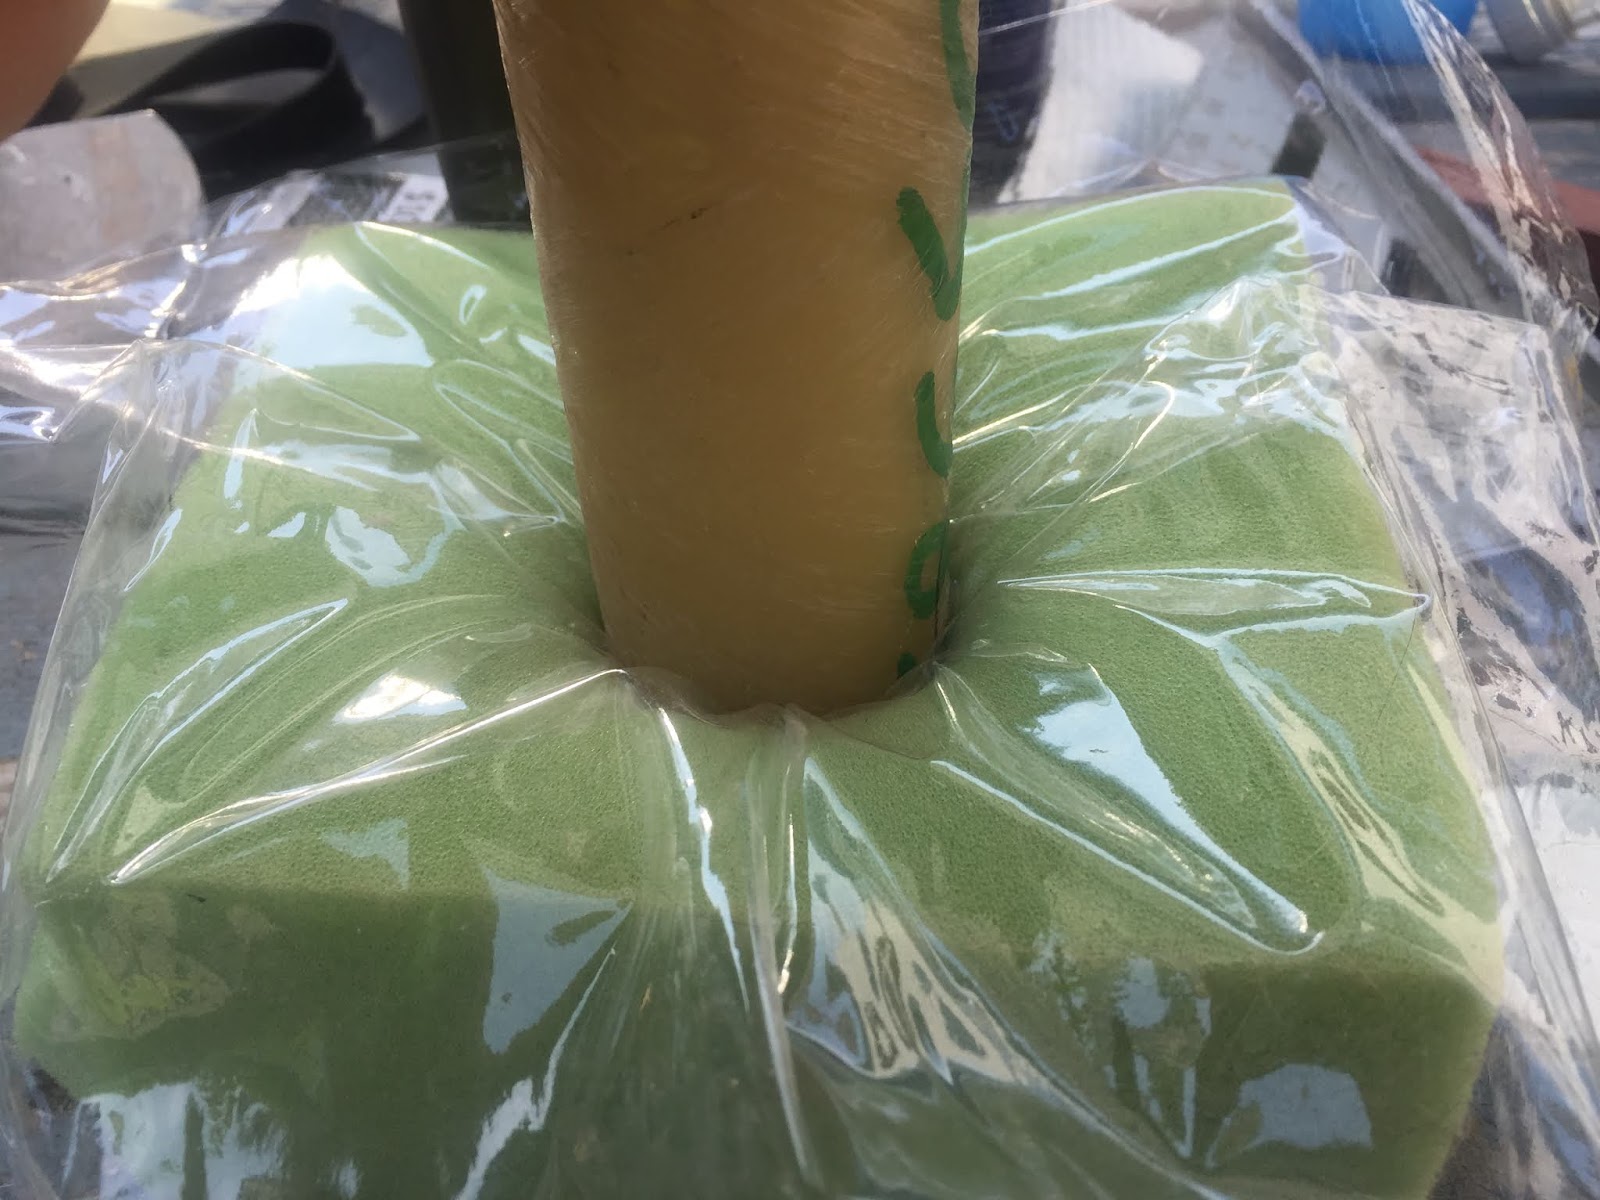
So what I decided to do was use some foam rubber from the Admiral's sewing room to push up on the patches until they cure.
Foam putting pressure on patch
As you can see above the foam pushes up nicely on the fiberglass. The plastic sheet insures it'll separate easily.
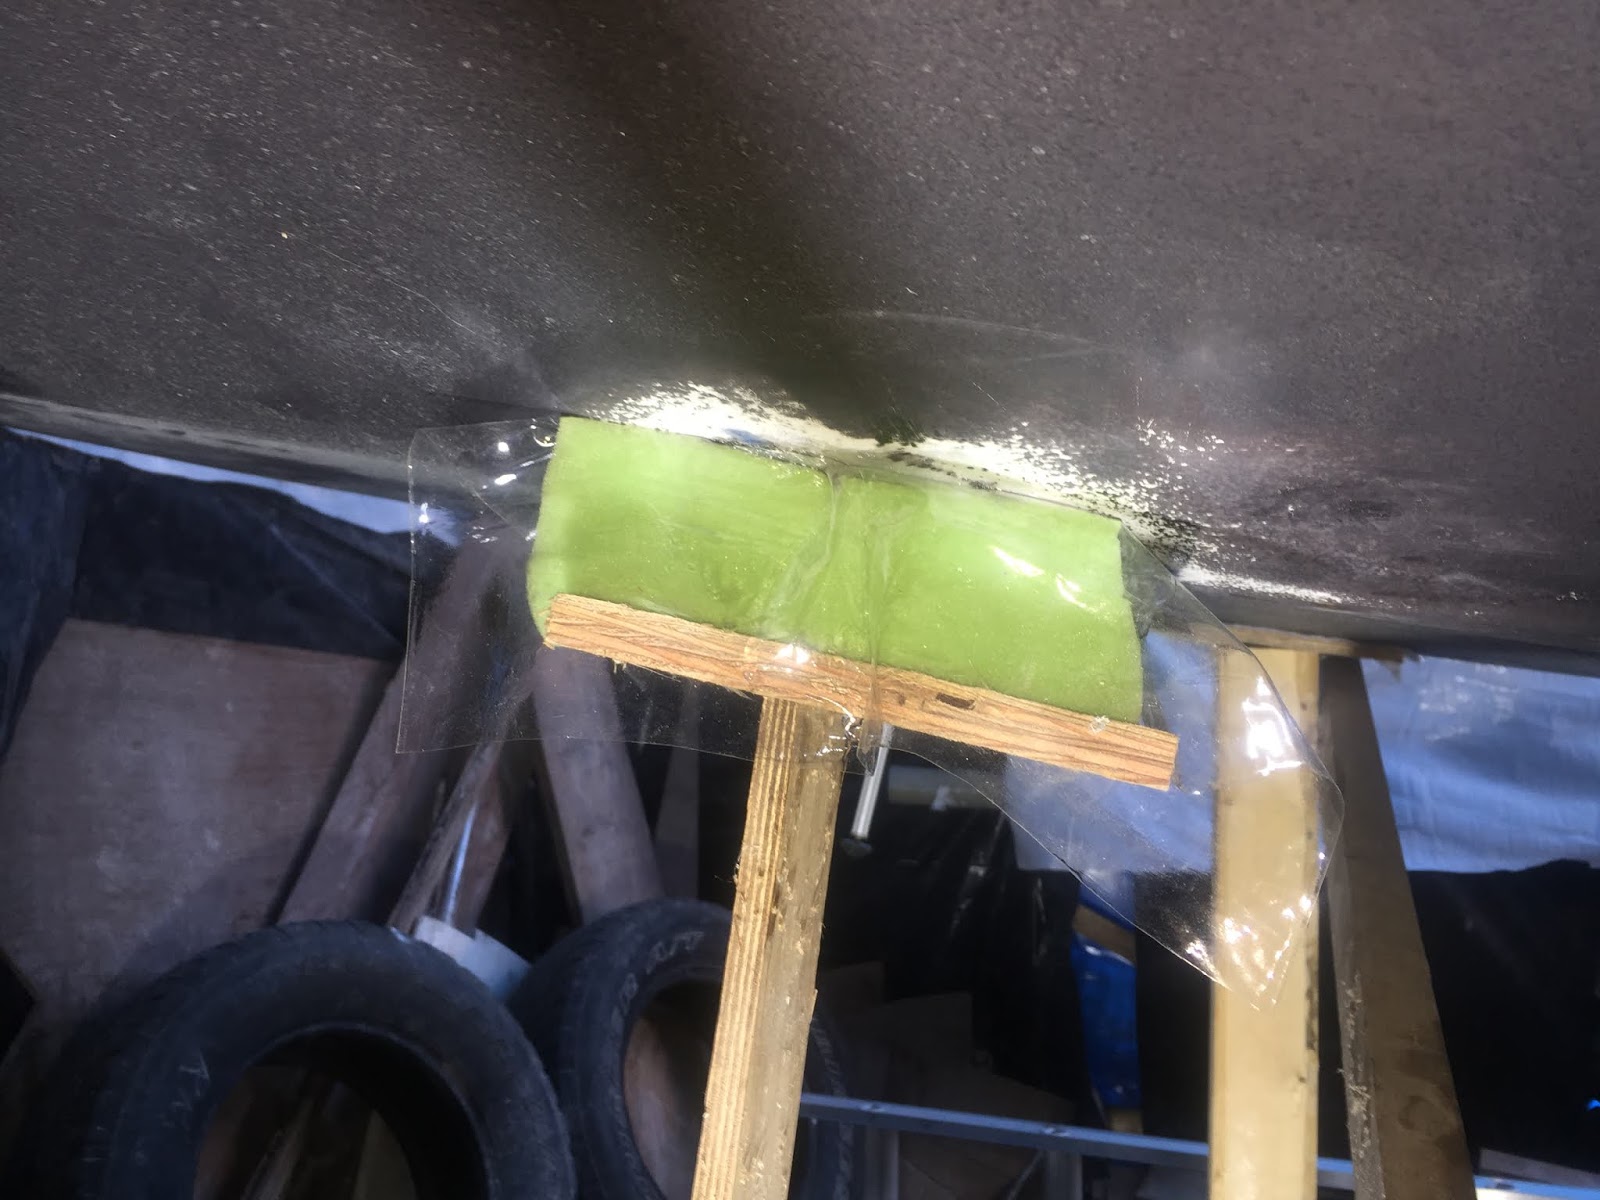
Counterforce
To counter the force of pushing up on the patch and fiberglass tube I laid on about 80 lbs of lead. That should hold it in place.

Once that was laid up and curing I puttered around with the drive train. Just mocking it up for now to see how it'll all come together.
Python Drive with drive shaft attached
I've seen this setup in my dreams for years. Now after something like 7 years of kicking this thing around my basement it's finally in the boat. I had to lift the engine to get it lined up.
Python drive shaft installed.
This drive shaft is exactly 1 meter long. Just so happens that's exactly how much we stretched the hull. I wanted the engine to remain in the same position as the original design for stability reasons. Underneath the engine we'll have a 50 USG water bladder for ballast and fresh water use as well. Bringing total F/W onboard to 175 USG including the hot water heater.

Sorry, no video today. Maybe next time.

Standby.....


Thursday, June 28, 2018

At last Progress

So now that the skeg is permanently affixed to the boat I can move on getting the steering & running gear setup. First up is the rudder.
Mockup rudder shaft slightly off center.
The hole for the rudder shaft is a bit off so I had to enlarge it. See video below.
Mocking up steering gear parts
Just roughly stacked are the components for the rudder. A heafty block of white oak will be glued to the bottom and fixed with a couple layers of carbon fiber & glass. On top of that is the rudder shaft stuffing box. A fairly large plank of white oak will take the place of that small piece of plywood and will hold the pilot bearing, hydraulic ram and rudder position indicator.
Looking down through the rudder shaft hole.
The rudder shaft hole is lined with a piece of fiberglass pipe. Only 4 inches long. I had to get it as true to vertical as possible. Small wedges cut from shim shingles worked perfectly!
Python drive bolted into place.
While the epoxy is setting up on the rudder shaft tube I decided to bolt the Python Drive into place. Not really much to it, just 6 bolts holding it to the bulkhead. Now that it's in I can position the engine with the jack shaft and work on getting it bolted into place.
Stern bearing carrier
The plastic fitting is Marelon. I couldn't find the correct bronze fitting. The Marelon will get epoxy glued to the stern tube (fiberglass) Not too worried about it coming apart. The stern bearing carrier will be bolted and set in an epoxy base. More on that later.

That's about it for today. Youtube video coming up later.

Standby....

Wednesday, June 20, 2018

Skeg attached! Minor Milestone

One of the tasks I have to get out of the way before I can move onto the rest of the drive train is setting the skeg. The skeg is a single piece of very heavy walled Stainless Steel channel. Almost 6 feet long and weights about 60 lbs.

Skeg fitted into place!
This will be the first piece of equipment actually bolted to the boat. A small milestone. No epoxy or sanding involved! :-)
Backing plate in place
I couldn't find the exact length bolts I needed to hold the skeg in place so I made my own out of SS All Thread and some nuts. Yes, I actually welded these together myself. No Grinding Involved! :-)
Lead weights holding backing plate & wrench in place
This really was a two man job but with numerous trips up and down the ladder I managed to do it myself. Using a big chunk of lead to hold the backing plate & bolt in place while I shifted the skeg into place and put the washer/nut on below.
Wiggling & wedging into place
It took some work to get the holes lined up. The tolerances are pretty tight. Five or six trips up and down and I got them lined up enough to get the bolts through the wedge and the skeg.
Bolted in! Yeah!
Once I got it in I checked it for level etc.
Fore & Aft - Perfect
Using my mockup shaft I slid it down into the pintle bearing to see how the shaft lined up.
Perfectly plumb!
And lastly side to side. Right on the money!
I do have a wee bit of a problem with the rudder stock hole I cut earlier. Dunno where I went wrong but it's out about 5/8". Ooops!
Plumb is resting on edge of pintle hole.
Not a big deal. I can handle it. All in a days work.

That's about it for now. A few more bolts to get in and I shouldn't have to remove or touch it again! It's been a very long time coming to this point. Thanks for following along. I appreciate it.

Standby.

Just in case you missed it on Youtube I did a FAQ's video.


Saturday, June 16, 2018

Latest Youtube video - Need more subscribers

Hi Folks

Offering up my latest Youtube video for your viewing pleasure. I've made a switch to a much heavier fiberglass tape and this necessitated a change in method to wetting it out. If you like/enjoyed the video please give us a Thumbs Up and subscribe to our channel.


Thanks for looking in.

Cheers

Wednesday, June 13, 2018

Feel the Itch and Sand it Anyways

It never seems to end. Sanding that is. I've gone around the frames I've just put in, 4 sides to fillet & tape tomorrow. But the sanding never seems to end. This is the direct result of not working faster/harder wet on wet. Once the epoxy kicks off there's a small window of 24 hrs to apply new glass/epoxy without the need to sand. Unfortunately life gets in the way too often for me to be able to do this so it's sand the tape & surfaces to allow for good mechanical grip of the epoxy. Also deals with any issues of blush.

I did make another video the other day. Here you go for those that haven't seen it.

This morning I got an early start before the rain and humidity drove me out of the shed. I got all the frames & joins cleaned up ready for more fillets & tape tomorrow. Some of the smaller areas are ready for 'bail out' should I mix up too much poo.
Tape laid out ready for filleting tomorrow.
This tape I'm using now is far above that spec'd by the designer. It's 18 oz and 8" wide. I can get away with two layers of this instead of 4 x 6 oz. This tape doesn't wet out quite as nicely but with a lil' elbow grease it'll be fine and much much stronger. The sides of the stringers will get a layer as well.
95 yds of 18 oz x 8" biaxial tape from Great Lakes Skipper! $145 USD.
Tomorrow fillets & tape.

Standby.....


Saturday, June 9, 2018

Pain and suffering

Been suffering some terrible back spasms this past week. Painful enough to drop me to my knees. Don't know what caused them, had a therapeutic massage week before for pain on my right side, these were on my left. WTF? Plenty of rest & drugs and it's almost back to normal so back into the boat shed I go!

Managed to get about 5 hrs of sandinsanity in today. Just cleaning up around joints that will get more glue & tape before I can move onto other things.
Cleaning up previously filleted & taped joints for another layer.

More dusty fella's. This looks back to the second last bulkhead.

Couple of hours in and still going strong. I'll pay for it later!!!

Looking down through hole for rudder shaft. I may add another layer of carbon fiber for extra strength in this area.

That's about all there is to it. No sandinsanity video today. I know you're disappointed. I'll try to get something on video tomorrow.

Standby...