Sunday, October 18, 2015

White Stuff from the Sky

Well the first white stuff (in this case hail) has fallen from the sky. The high temp for yesterday was about 4 C. I've pretty much given up on doing any more work on the boat this year. Pulled the epoxy in from the shed about a week ago.

I got done pretty much what I wanted to get done this year. There's some structure in the boat. Getting more done would have been nice. It's only when you do something like this photo below that you realize how big/long a commitment a project like this is:
I lost a good portion of one building season to the fall down the stairs that messed up my knee and back but as you can see we're no less than 5 seasons into this project with at least 2 or 3 to go.

Anyhow, that's it for this year. See you all in the spring.

Stand down.

Sunday, October 4, 2015

Glassing bulkhead panels

I'm alive and well. Lori didn't kill me for using her mixer. That's a $1 yard sale mixer she picked up a few years ago. We've burnt out a couple of them so far mixing glue.

Been down for the count for the better part of 3 days with an ear infection. Right ear deaf as a post & ringing constantly. :-(  Self medicating with Mexican Antibiotics so should be cleared up soon.

Anywho, managed to haul my butt out to the shed this morning. Lil' stiff getting going these cold mornings. I didn't much feel like crawling around in the bottom of the boat so decided to glass the two aft bulkhead panels.
Glass laid out on two bulkheads
This glass is offcuts from other parts of the boat hull. I had planned to use them up for just this purpose. These panels don't have to be totally fiberglassed but I have the stuff and it won't add much extra weight.
Neat coat of epoxy prior to laying the glass
I gooped & peel plied the two panels. First a neat coat of epoxy over the bare wood. When I finished they looked a little dry but they're not. I lifted the ply and the glass underneath is fully wetted out.
Wetted out and peel plied
I'll have to keep my eye on them for awhile. I did roll on extra epoxy and squeegeed them well. I think it's the cheap peel ply doing it. I'll be glad when it's gone but I have a full roll still in the box. Maybe I'll sell it on Kijiji or something.

Tomorrow I'll flip these panels over and do the other side.

Standby....

Thursday, October 1, 2015

Bedding, filleting, taping stringers

Haven't been totally slacking off. The weather's changed and it's very nice for working in the boat shed. This morning it was a lil' chilly at 12 C but warmed up nicely by noon to a comfortable 16C.

Got to work with some sanding and then time to mix goop. Now mixing up epoxy glue is pretty hard on my hands. It didn't take long before they were screaming at me to stop! So had to fall back on the old way we mixed up epoxy glue. Went into the kitchen and rifled through some of the ole' Lady's kitchen gadgets till I found her hand mixer!
Mixing epoxy glue with hand mixer
Now this is the way to do it boys! Couple minutes with the mixer and you've got a nice peanut butter consistency goop!
All mixed ready to go!
I don't have a proper mixing bowl and this ice cream bucket has some pretty sharp corners so you have to take a minute and scrape out and mix up the stuff from the corners. Once you get this done you load it into a plastic freezer bag and use that like a cake piping bag.

Stringers bedded & fillets done
Takes awhile to get the goop under the stringers. I just kept squeezing till it came out the other side. There's a 2 popsicle stick height of the stringers off the bottom. This all gets filled with the goop.
Pretty nice fillets!
I laid down some pretty nice fillets if I don't say so myself! *Pat on the back*  Maybe I'm finally getting the hang of this stuff.
Stringers taped
Once the fillets set up a bit I taped them into place. Normally I would have done at least 3 layers of tape but my hands were absolutely killing me by now.

More tomorrow.

Standby.....


Sunday, September 27, 2015

Bubble, Stringer Alignment & Bulkheads

Took most of the day off yesterday to recover from a beer binge on Friday night at our HS reunion. I don't normally drink a lot of beer. Three big jugs of it and I was a lil' tipsy! Woke up Saturday morning about 2 AM with a horrible pain in my right elbow. Wife says it's 'beersitis' and to just suck it up buttercup! *sigh*

This morning's task was to deal with the bubble in the keel. I slit the top of it open and poured in a couple ounces of epoxy. I then jambed in a piece of plywood covered in a grocery bag and wedged it tight with some 2x4's. A fair amount of epoxy squeezed out so I think I got all the air out of it. We'll see tomorrow.
Bubble Fixin' in the Bilge!
So next up I'm putzin' away at trying to align the stringers. Careful measurements & laser level helped but I was still off a bit, about 1/16". Figured out one stringer has a slight bow to it. So I'm sittin' there lookin' at it and Shazam! I'll drop the two aft frames in to help me get it aligned!
Frame I is actually a bulkhead
That's Frame I. Just sitting there for now to help align the stringers etc. I have some sanding to do before I can start to bed down the stringers & fillet/tab these parts in place. Likely tomorrow I'll start that. The pink line hanging down is a plumb bob which I used with the laser level to find the center line.
Laser level & plumb bob to find center
 If you look closely you can just make out the laser on the cross pieces.
Frame H sitting in place
Frame H was next. I should add that neither H or I had the slots cut for the stringers so I had to do that before setting them in the boat. They'll both need a little trimming here and there to get the to fit properly. The stringers will be raised up off the bottom of the boat slightly so that they can be 'bedded' in thickened epoxy. This will require some further trimming to get the frame/bulkheads in their proper place. I have to remark the base line around the perimeter of the boat to ensure the frame/bulkheads are at their proper height before I fillet/tape them down.

Got lots of ponderin' to do so I don't make any mistakes or get stuff out of sequence that'll cause me problems later.

Standby....


Friday, September 25, 2015

There be stringers here

STAR TREK and related marks are trademarks of CBS Studios Inc. © 2015
I couldn't wait. Just had to haul the stringers up and into the boat to see what they look like. Here's one going up on the electric winch.
First one, port side getting loaded into the boat
Technically they're now 'in the boat'
Still have a lot of work to do on them before I start bedding, filleting & tabbing them in.
Stringers roughly centered looking aft
Stringers looking forward
Yesterday was a repeat of the day before. I laid some tape along the bottom/keel join as extra precaution. I also had to lay in some glass at the very back of the box keel. Unfortunately I couldn't stay with the boat on bubble watch and sure as shit I got two bubbles. I'll be in there tomorrow with the grinder to get them out and patch them up. *sigh*

This was about as far as I thought I'd get this season. I'm happy with the progress even though it's dreadfully slow by most standards. I've got about 4 gallons of epoxy left and that should be enough to get the stringers bedded & filleted and maybe taped. I don't know.

Standby.....

Wednesday, September 23, 2015

Playing Catch Up

Yesterday I tinkered with the stringers. Radius'd the edges that'll have glass draped over them and sanded the rest.
Router makes quick work!
Yes the router makes quick work but it also makes a big mess!
Harumph!
So I got that nastiness out of the way and started thinking. That's not always a good thing so the wife tells me. *sigh* Anywho, I got to thinking of putting a layer of glass on the stringers before they go into the boat. Something like this.
Glass laid over stringer
It would certainly save me some back breaking work inside the boat on my hands and knees. One of the ole' Fella's on the forums suggested I move the saw horses and stringers inside the boat and do it there! Cool! I don't think I could have built this boat without the ole' Interweb forums! Thanks Crusty.

Today's mission was to finish up the fiberglass on the box keel. Been putting that off 'cause it's a sh*tty job. I always do that. Terrible work ethic.
Looking aft towards back end of box keel
Looking forward, tape gooped & peel plied!
Aft end finished
Forward end finished
This layer of tape over the bottom/keel joins is extra. The wide fabrics just weren't wide enough to provide an overlap on the side/bottom join and the bottom/keel join. It only took a half hour and about 3 pints of epoxy so what the heck. Little extra piece of mind. I'll do the other side tomorrow morning. It gets pretty messy if I try to do both sides at once. I need a place to sit my fat arse when laying on the goop! ;-)

Standby....

Monday, September 21, 2015

Transom Glass & Stringers

So I reluctantly hauled my butt out to the shed this morning to see the results of yesterday's glassing fiasco.
Peel Ply removed.
Didn't turn out too bad. There's a few spots that look dry but they're not. I'm guessing there's a sizing on the fabric or some kind of contamination that turns white with the epoxy.
Looks dry in some spots
A couple of minor bubbles but nothing serious that a sander can't fix!
Couple of minor bubbles
Still not 100% happy with it but it'll do. A couple coats of paint and no one will ever notice eh?

Spent the rest of the morning on the stringers. Glued up the second (stbd) side aft two sections.
Stbd stringer sections glued up
Both stringers side by side
Those stringer sections are now about 13' long, approx. 8" wide and 4 layers thick. I'm guestimating they weigh about 90 lbs each. Going to be a wrestling match to get them in the boat. Going to charge up the winch battery today!

In my haste last time working on the stringers I forgot to fix one end of the starboard stringer for splicing. Doh!
Mr. Router to the rescue
Took about 10 mins with the router to clear away the plywood on both sides of the stringer section. I bought a straight cut bit just for that job and it's pretty much toast now. I don't know if they can be sharpened or not.
Ready for splicing.
I won't fit the other sections of the stringers together until I get them in the boat. The section where the 39-1/8" splice is located is just about where the engine will go. I've got some work to do to figure out how I'm going to mount the engine and may have to modify the stringers.

Should be hoisting the two large sections of stringers into the boat tomorrow. Another milestone. :-)

Standby.......

Sunday, September 20, 2015

It fought me

The beotch fought me every step of the way today.

The task was to epoxy the 12 oz on the transom then layer on the finishing fabric (12 oz plain weave). The 12 oz is bad enough to use with cut ends fraying etc. but it wets out nicely. That went Ok. Then I started with the 12 oz plain weave. What a PITA. This stuff is sh*t! Friggin' FleaBay cheap fiberglass. Never again! Not that all stuff I've bought off of eBay is bad but this particular batch was. I think I bought it for the cabin roof because it's 8' wide which is rare for fiberglass.

I managed to catch some of the struggles on the GoPro but the damn batteries keep dying. I think both my camera's are pooched. Likely from all the epoxy & fiberglass dust! Video tomorrow. Computer isn't cooperating today.

In the end I put on the peel ply and rolled that out. I don't think it'll help. I have a sneaky suspicion the next video will be a sanding video of me grinding all that crap off! *sigh*
Transom glassed & Peel Plied
So after that lil' fiasco I tinkered with the stringers again. Cut up some perfectly good mahogany plywood for the inserts & splices.
Assembling aft section of port side stringer
Oh the wonderful sting of mahogany splinters! :-(  I forgot how that felt. Little buggers!
Gluing the spice
Mixed up a little epoxy & wood flower for glue and stuck the two sections together with the 20" splices. That's over 60 lbs of lead compressing the stack. There's a few screws in there to keep it from sliding around. Once this sets up I'll add an extra layer of glass to each side.

Standby while I go have a Rum & Coke!

Saturday, September 19, 2015

Little bites here and there

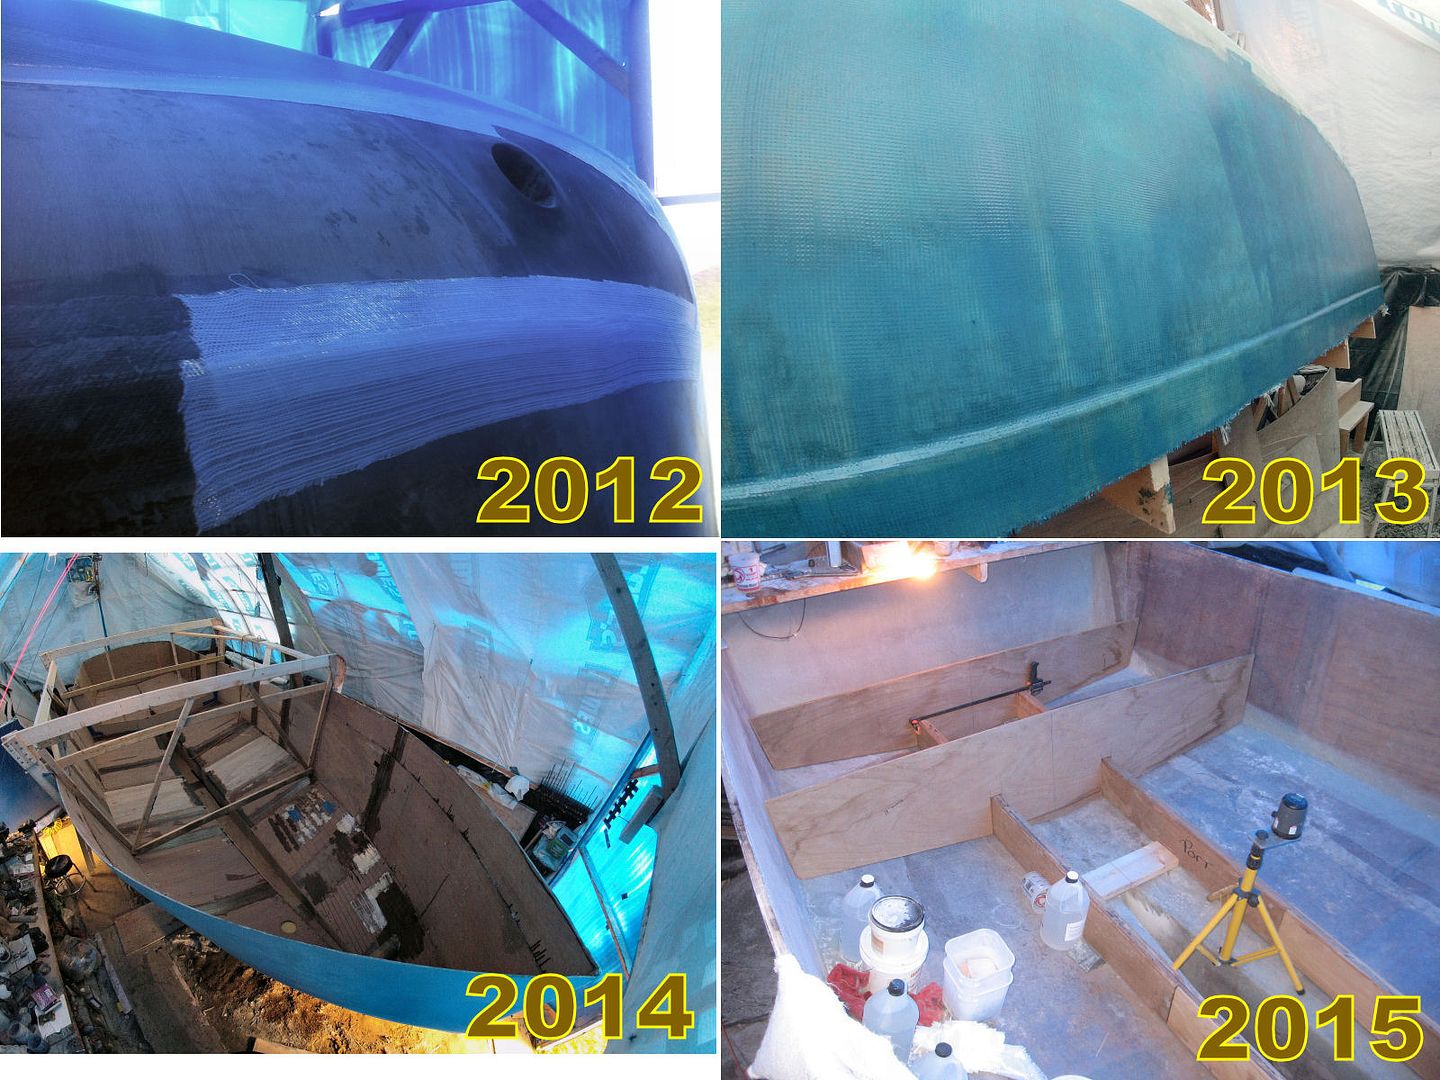
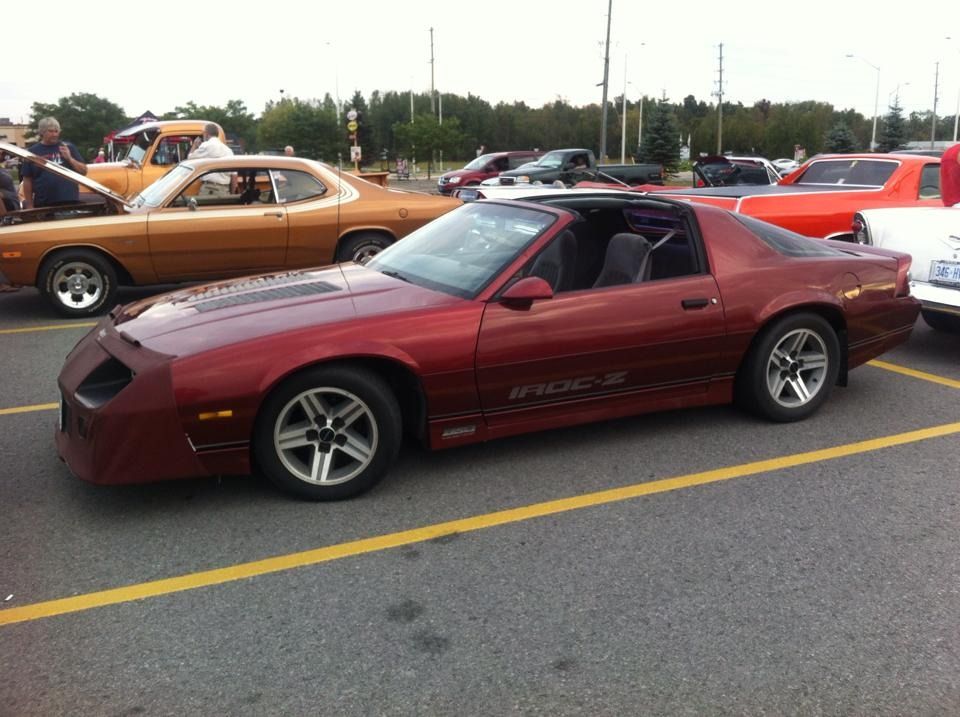
Took a day off to rest up my hands and get away from the cats & boat for awhile. The Admiral and I took our final car club cruise last night which was fun!

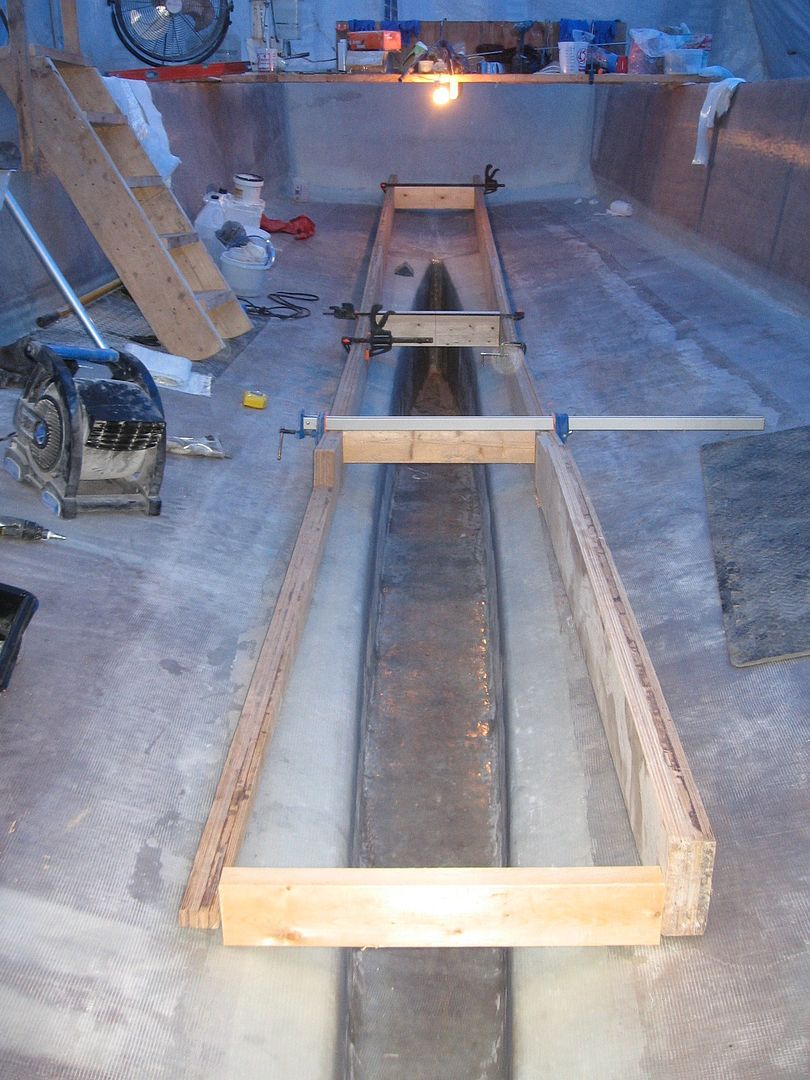
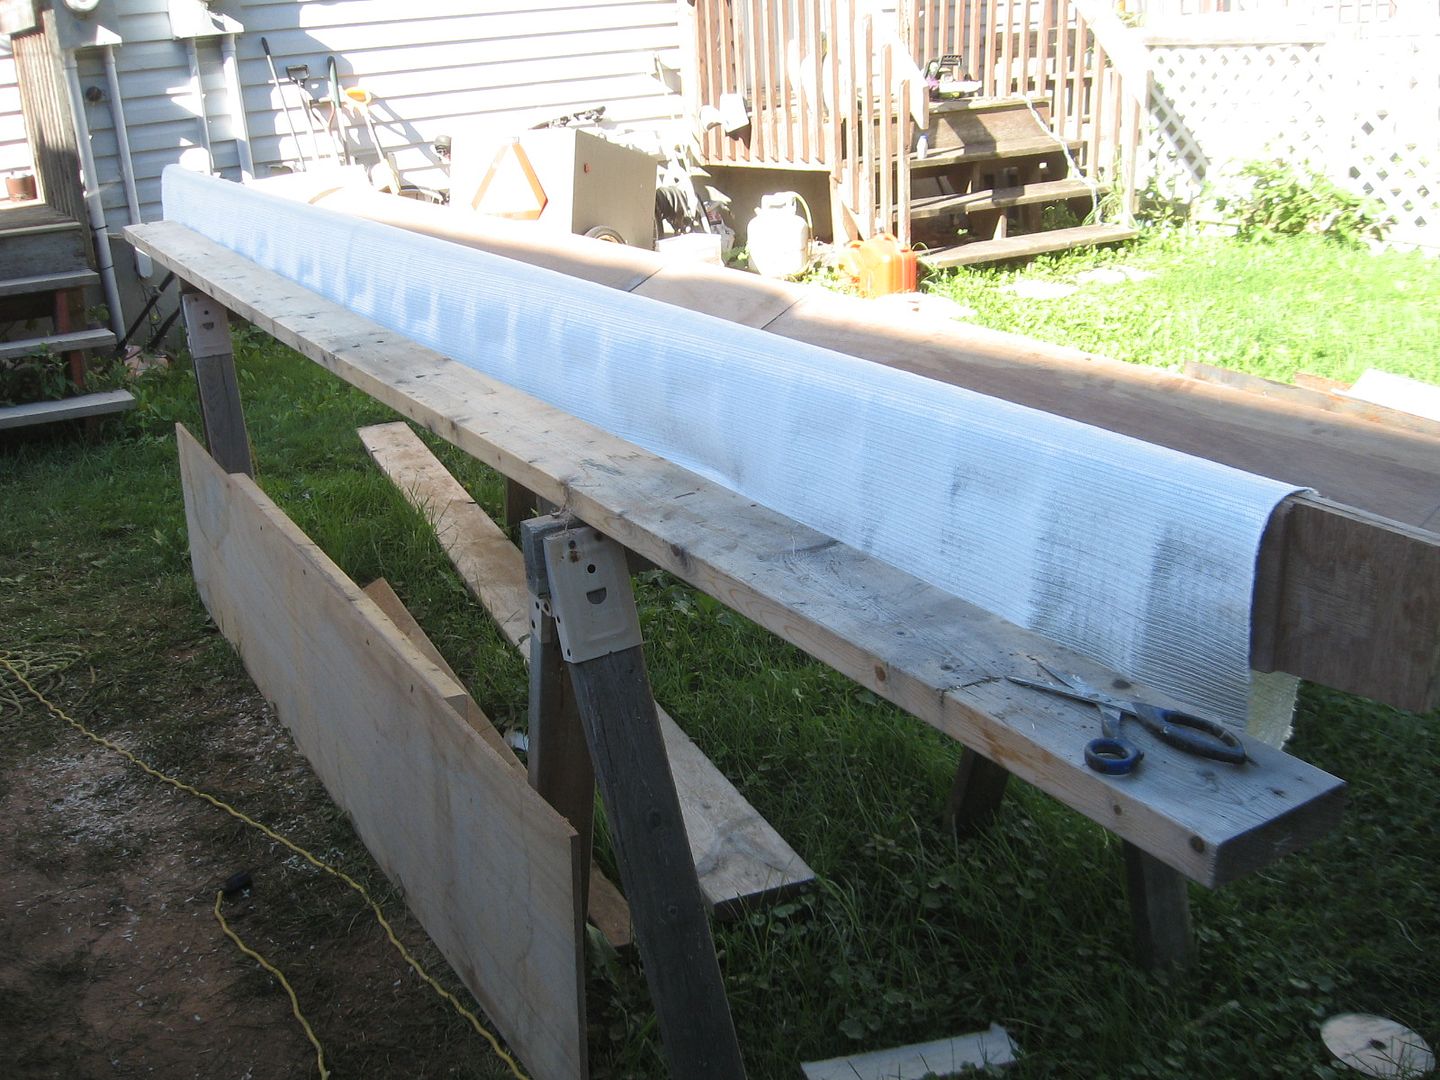
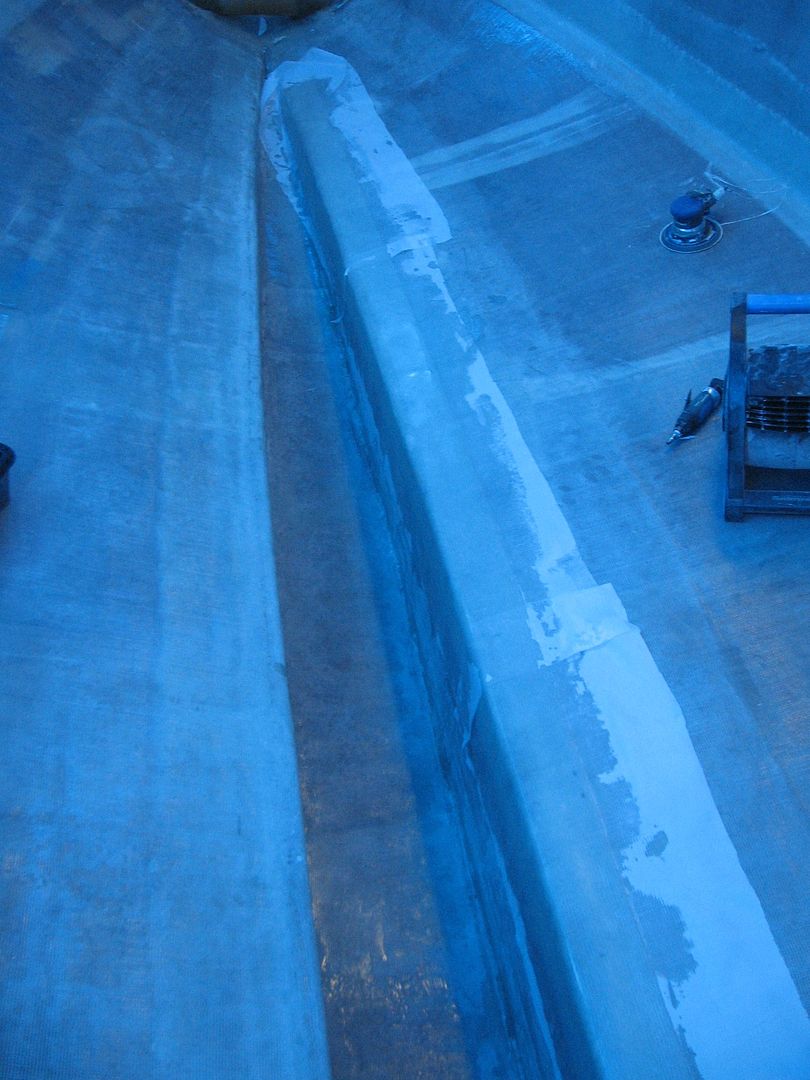
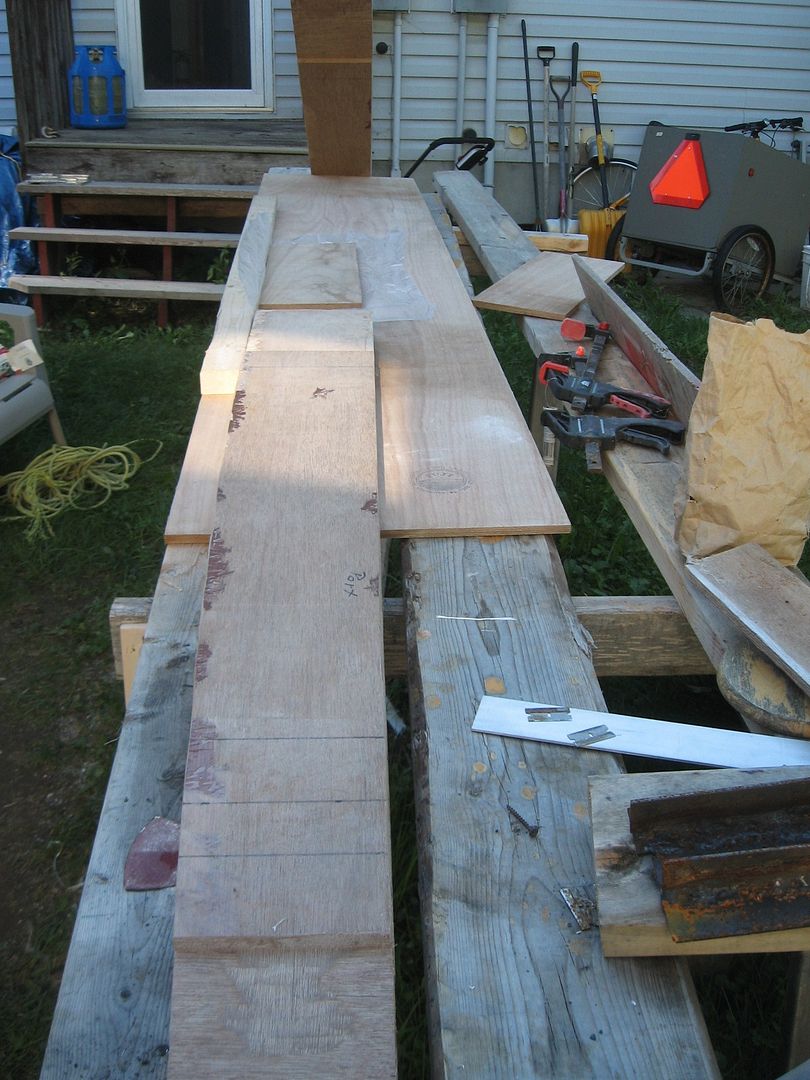
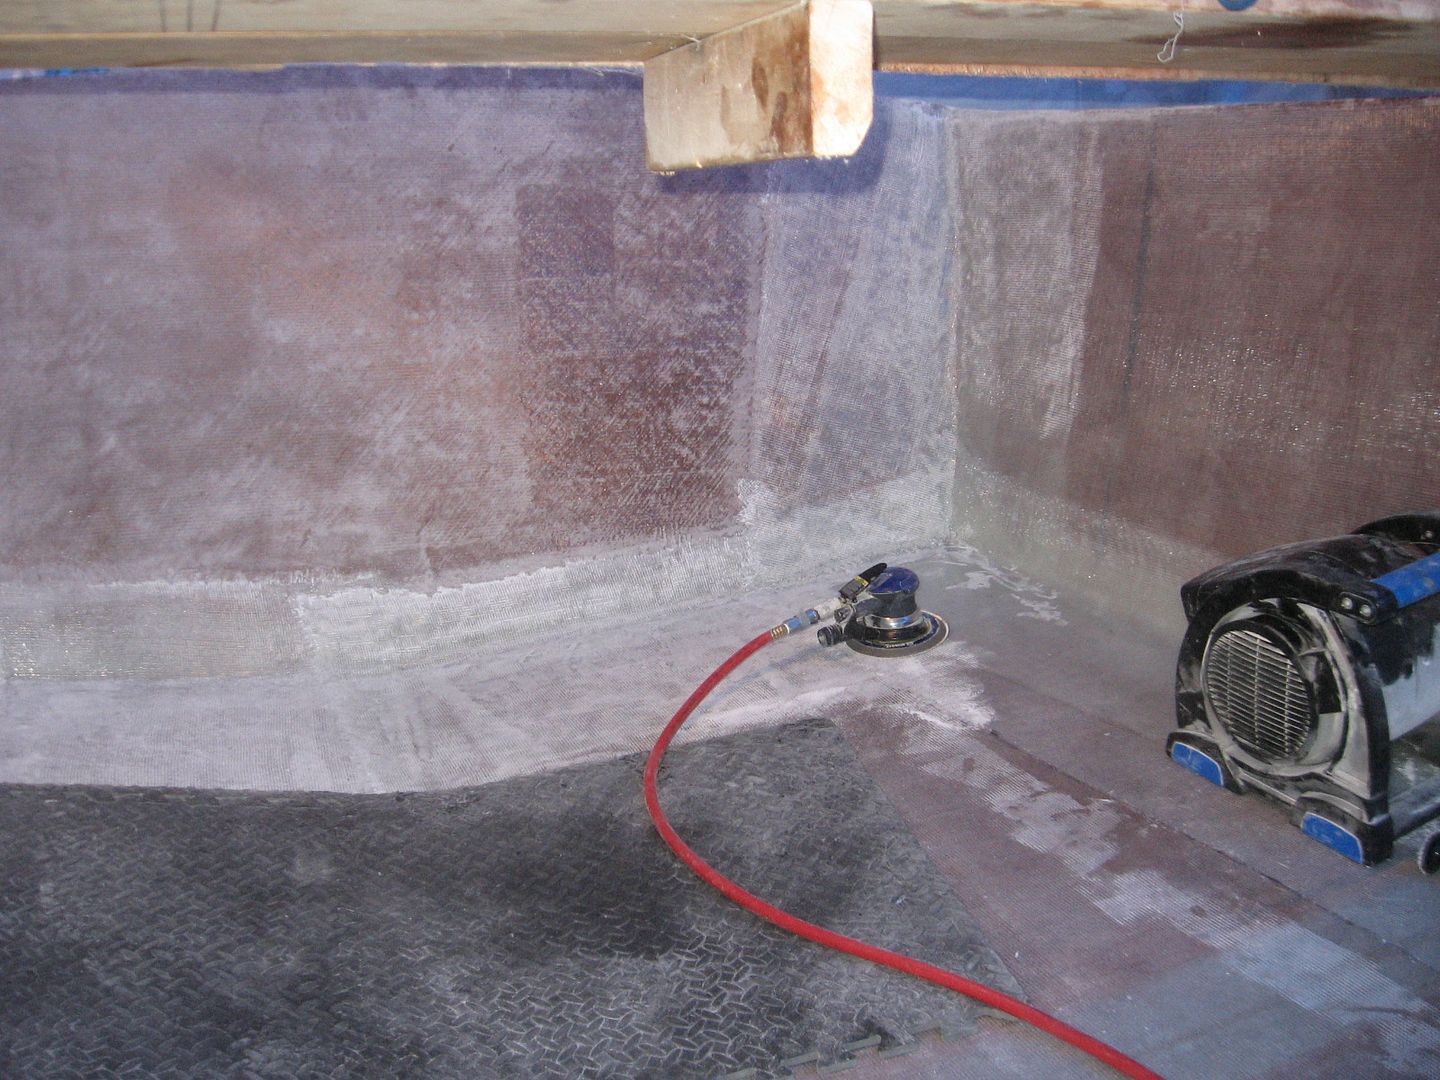
Taking a day off to rest the hands seems to be the ticket to getting stuff done. Gives me time to plan out a little better what it is I have to do next. This morning's venture into the boat shed started with some sanding.
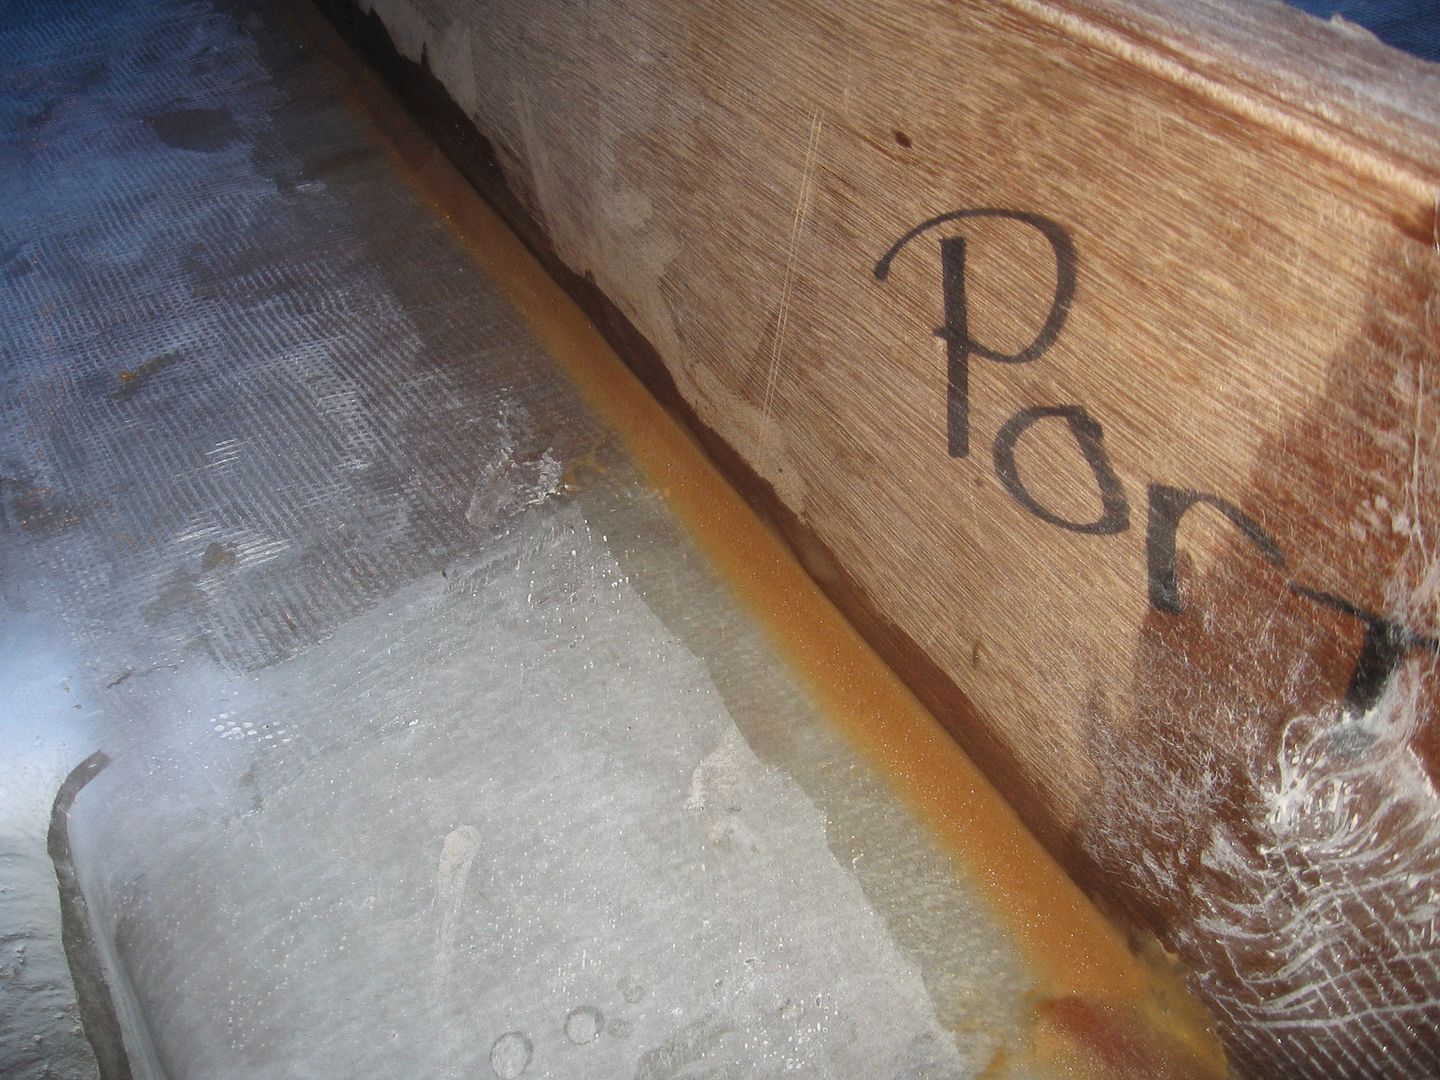
Sanding the box keel
Trying to get through this most unpleasant of jobs as quickly as possible I pulled out the 8" High Speed Spinning Wheel of Pain and Suffering. Whipped down the keel in about 20 mins. It's messy though, tossing fiberglass and dust everywhere. My lil' fan buddy can't help when I'm using this tool!
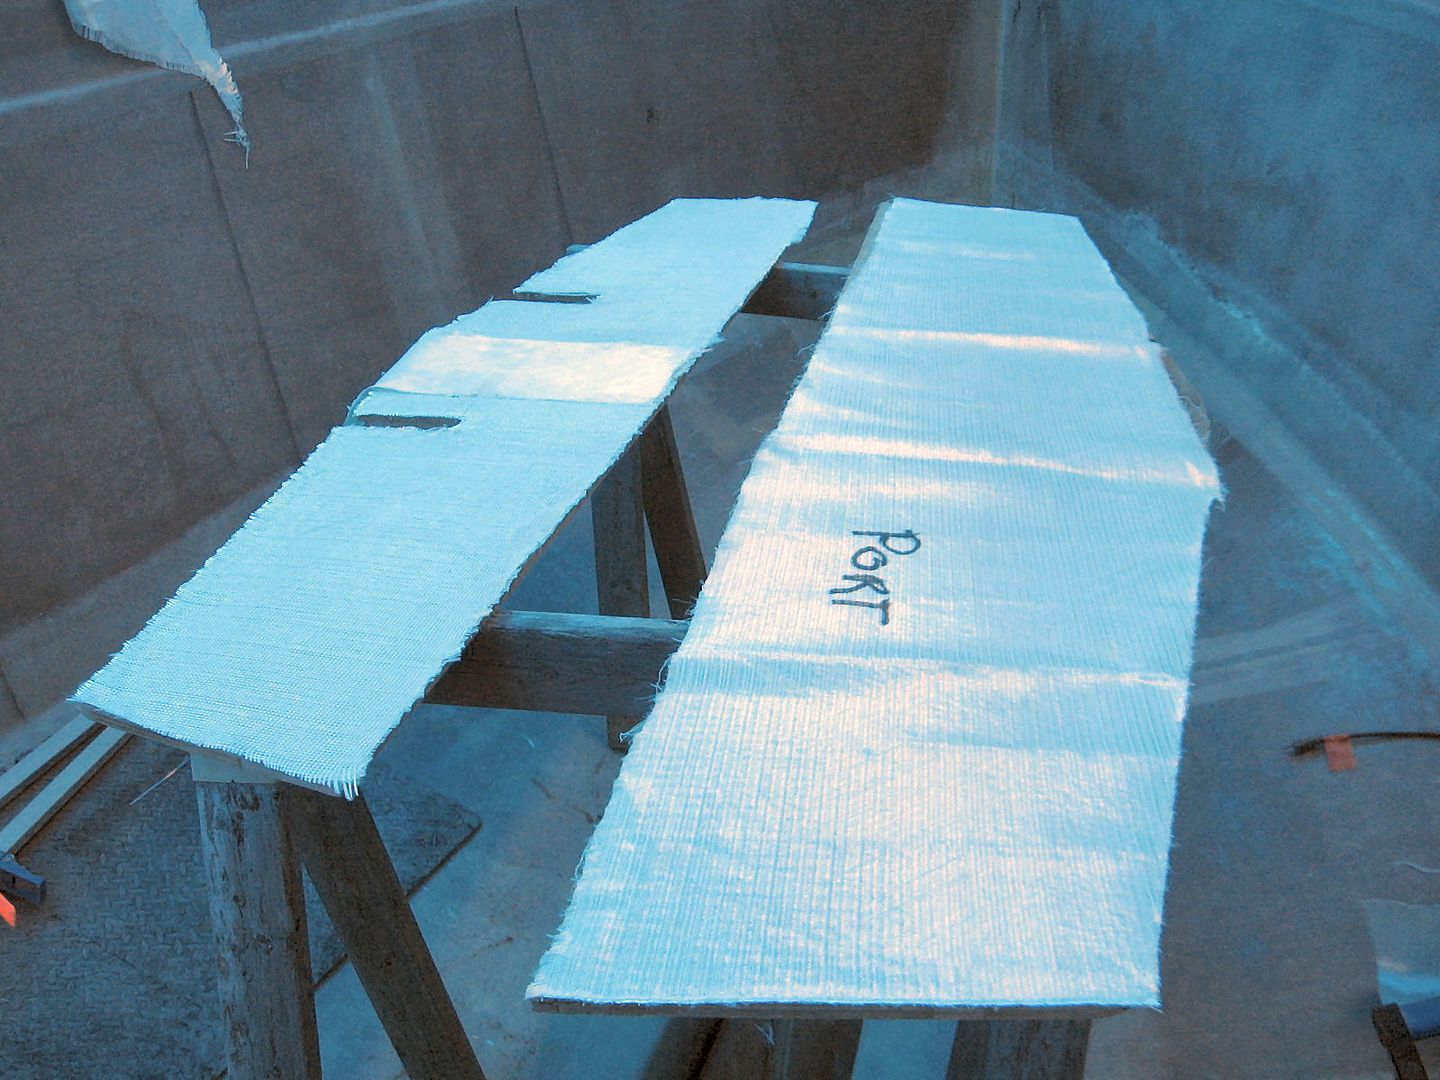
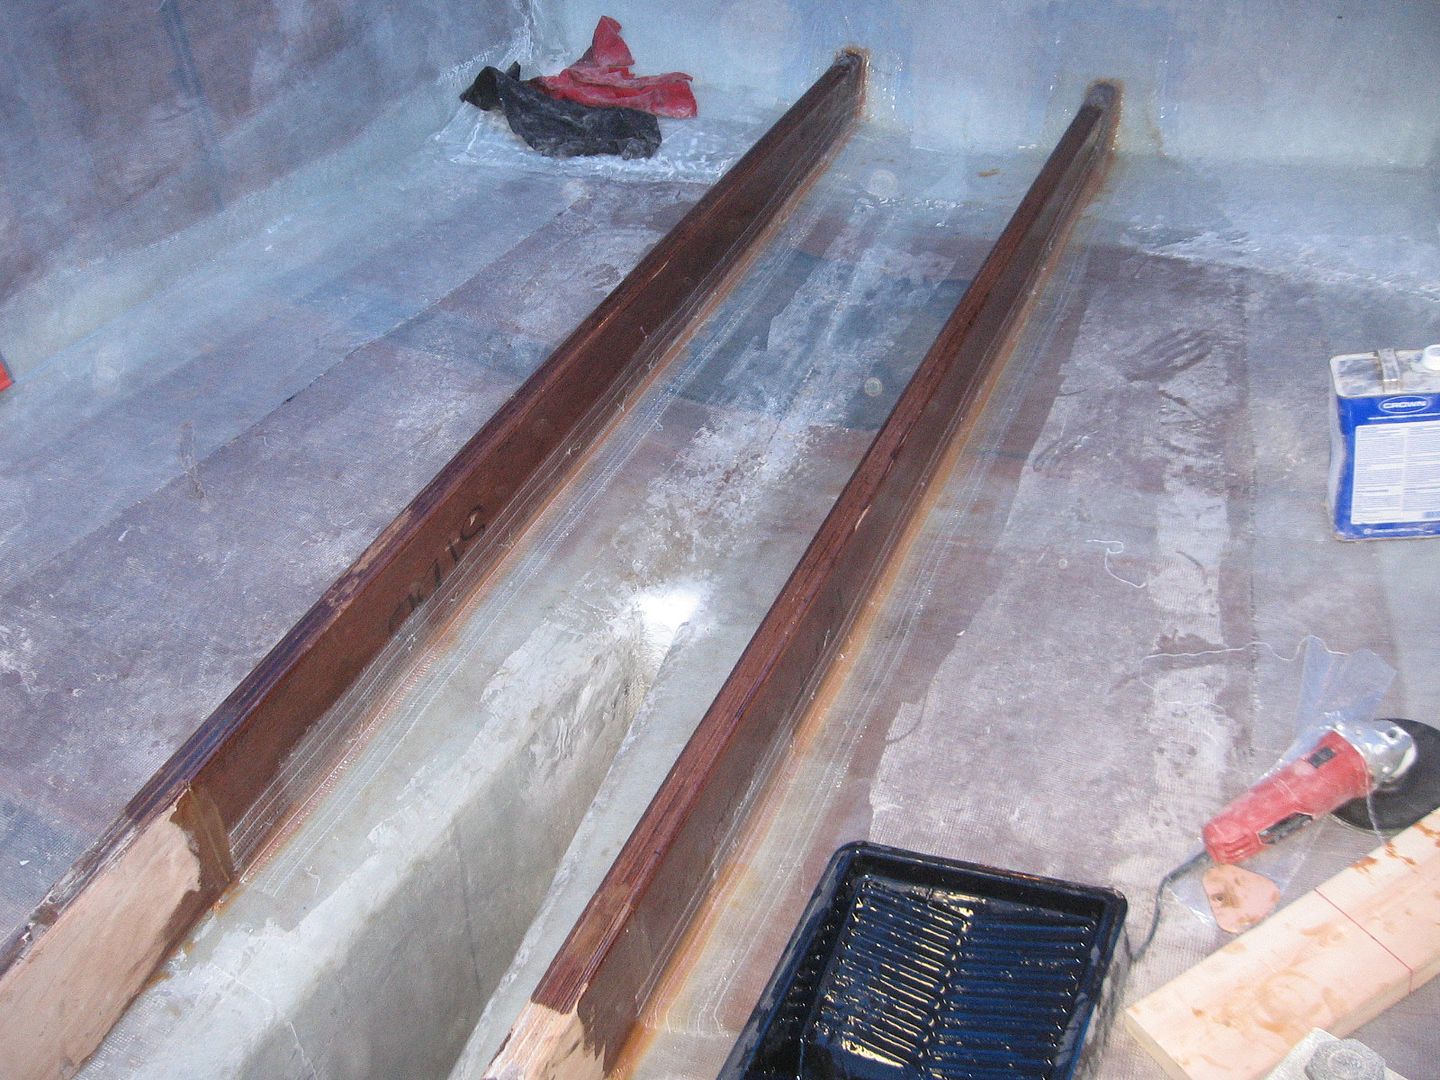
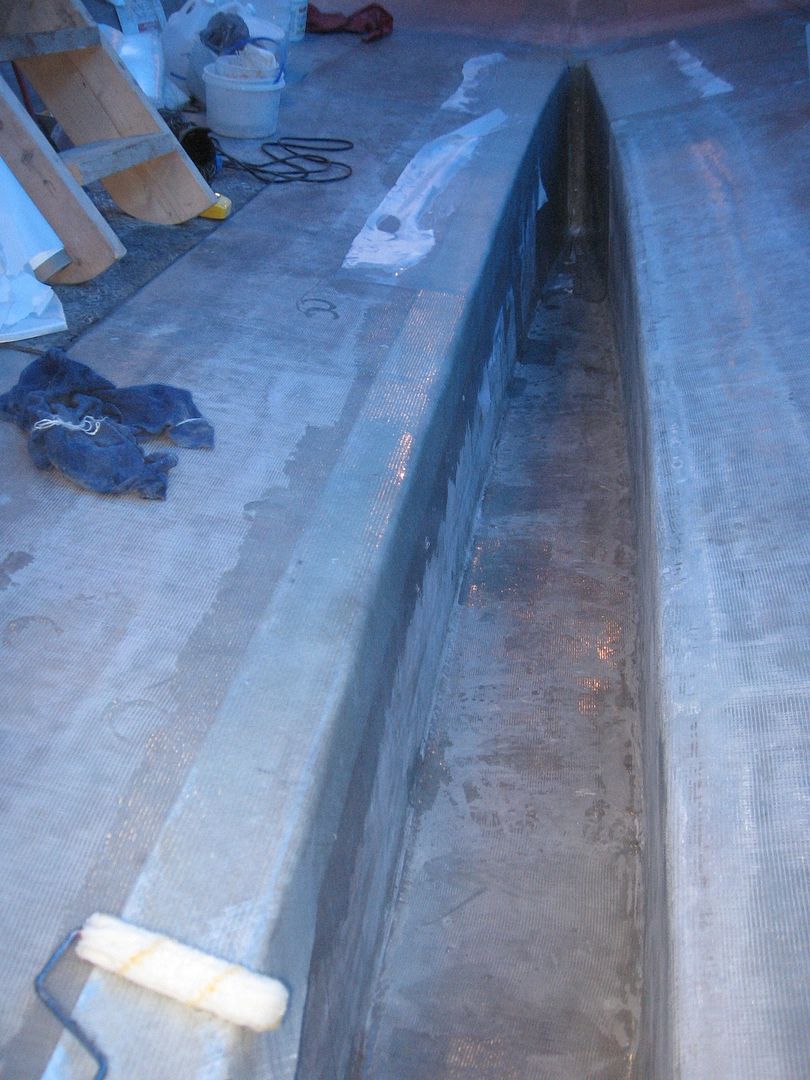
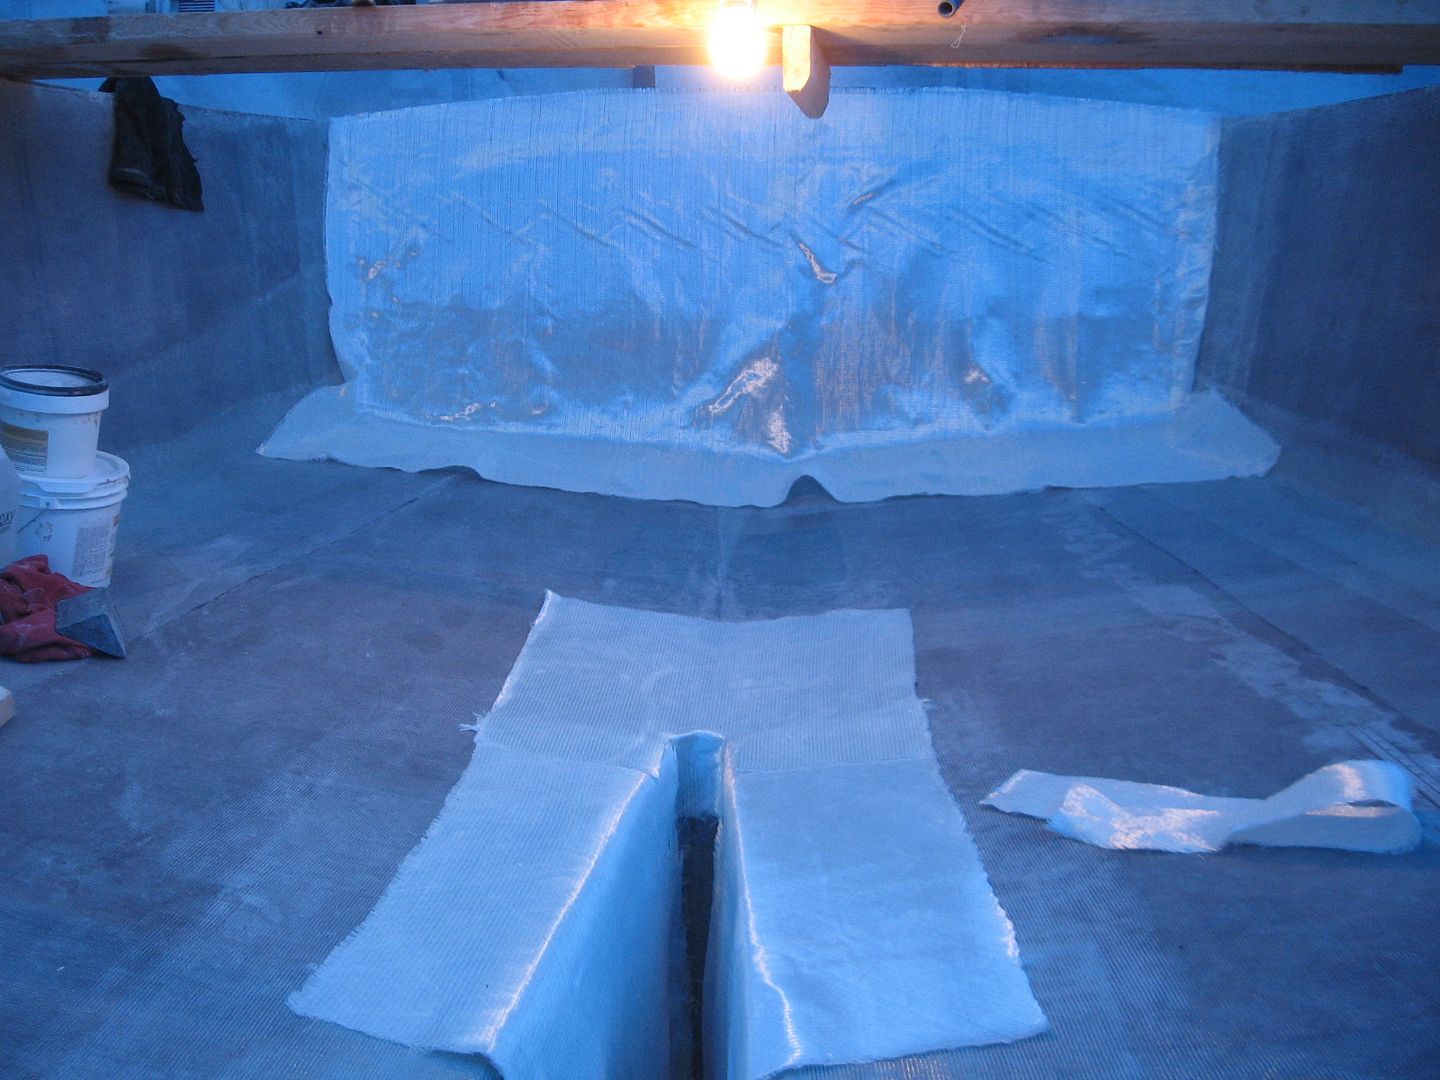
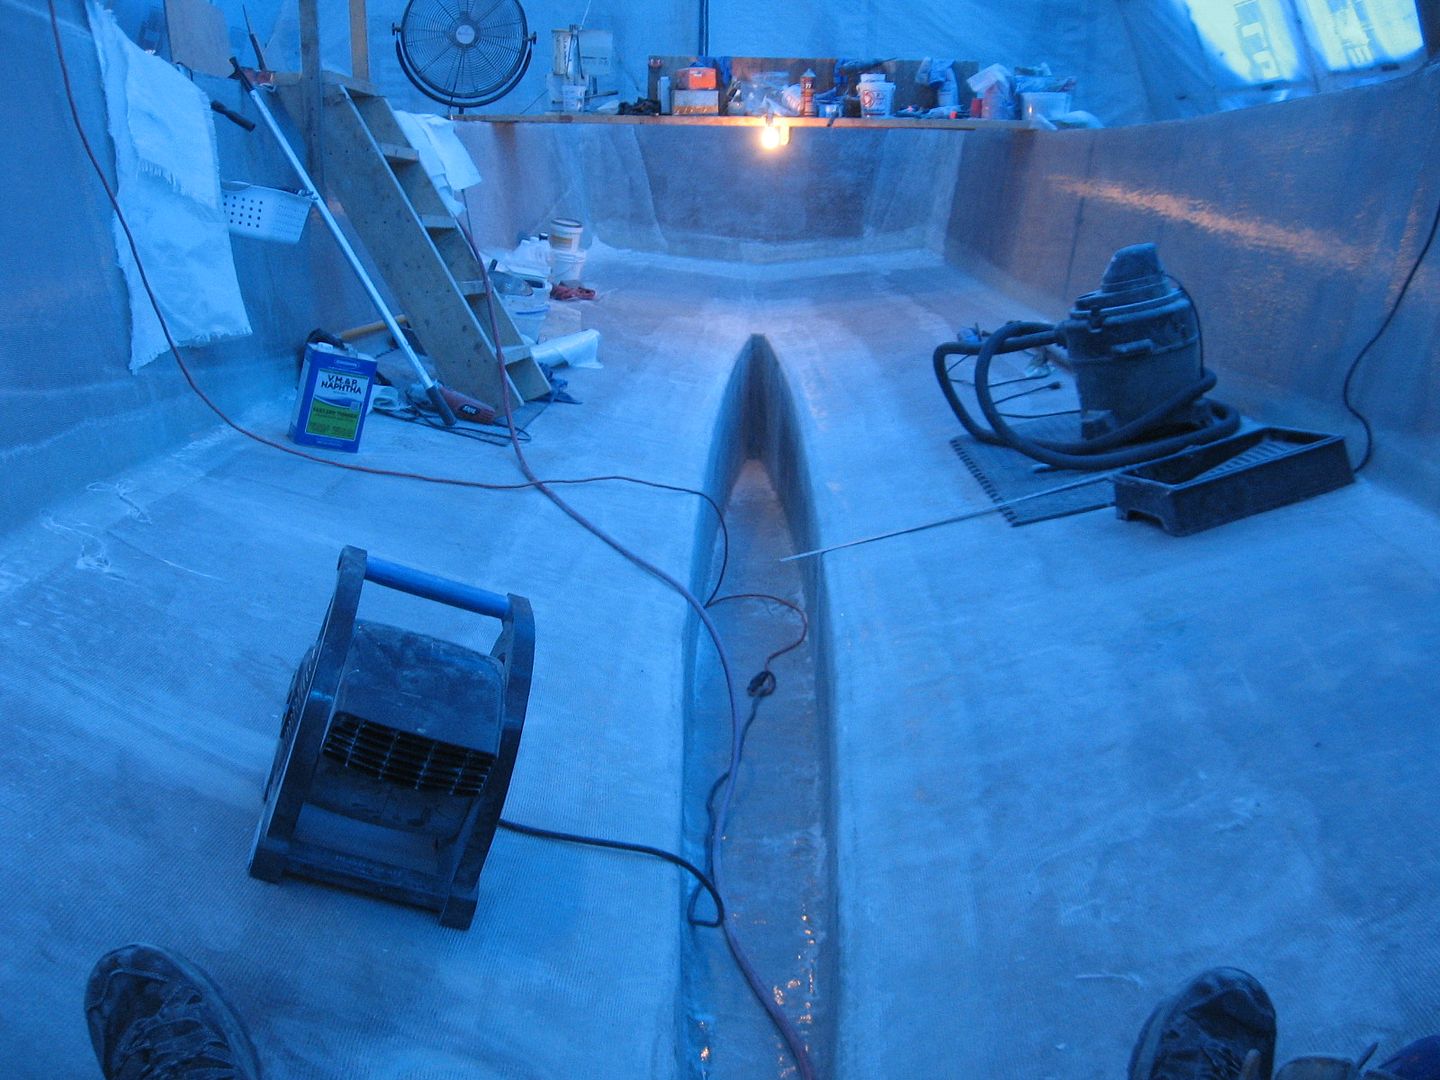
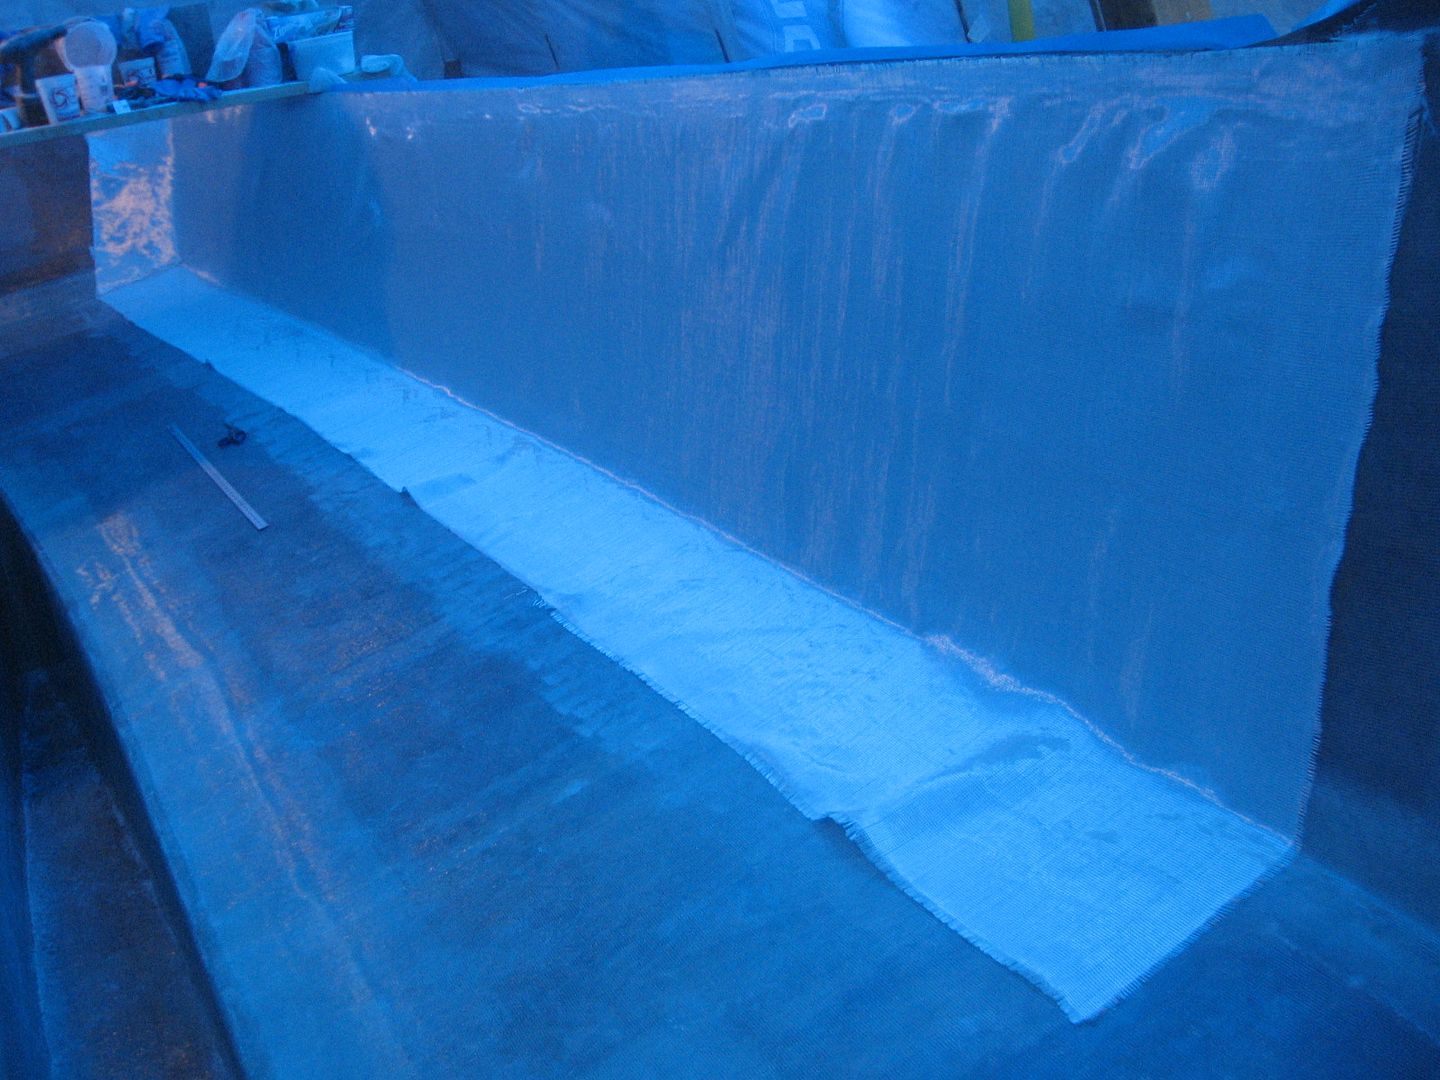
Back end of keel and transom glass laid out
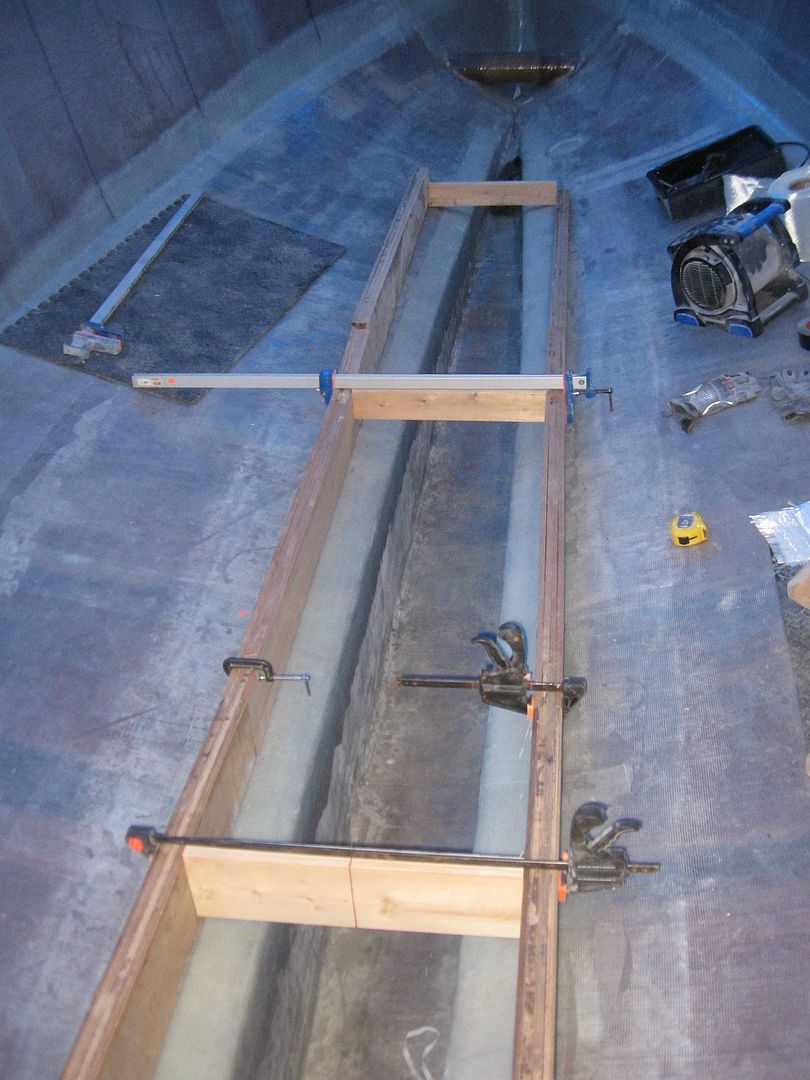
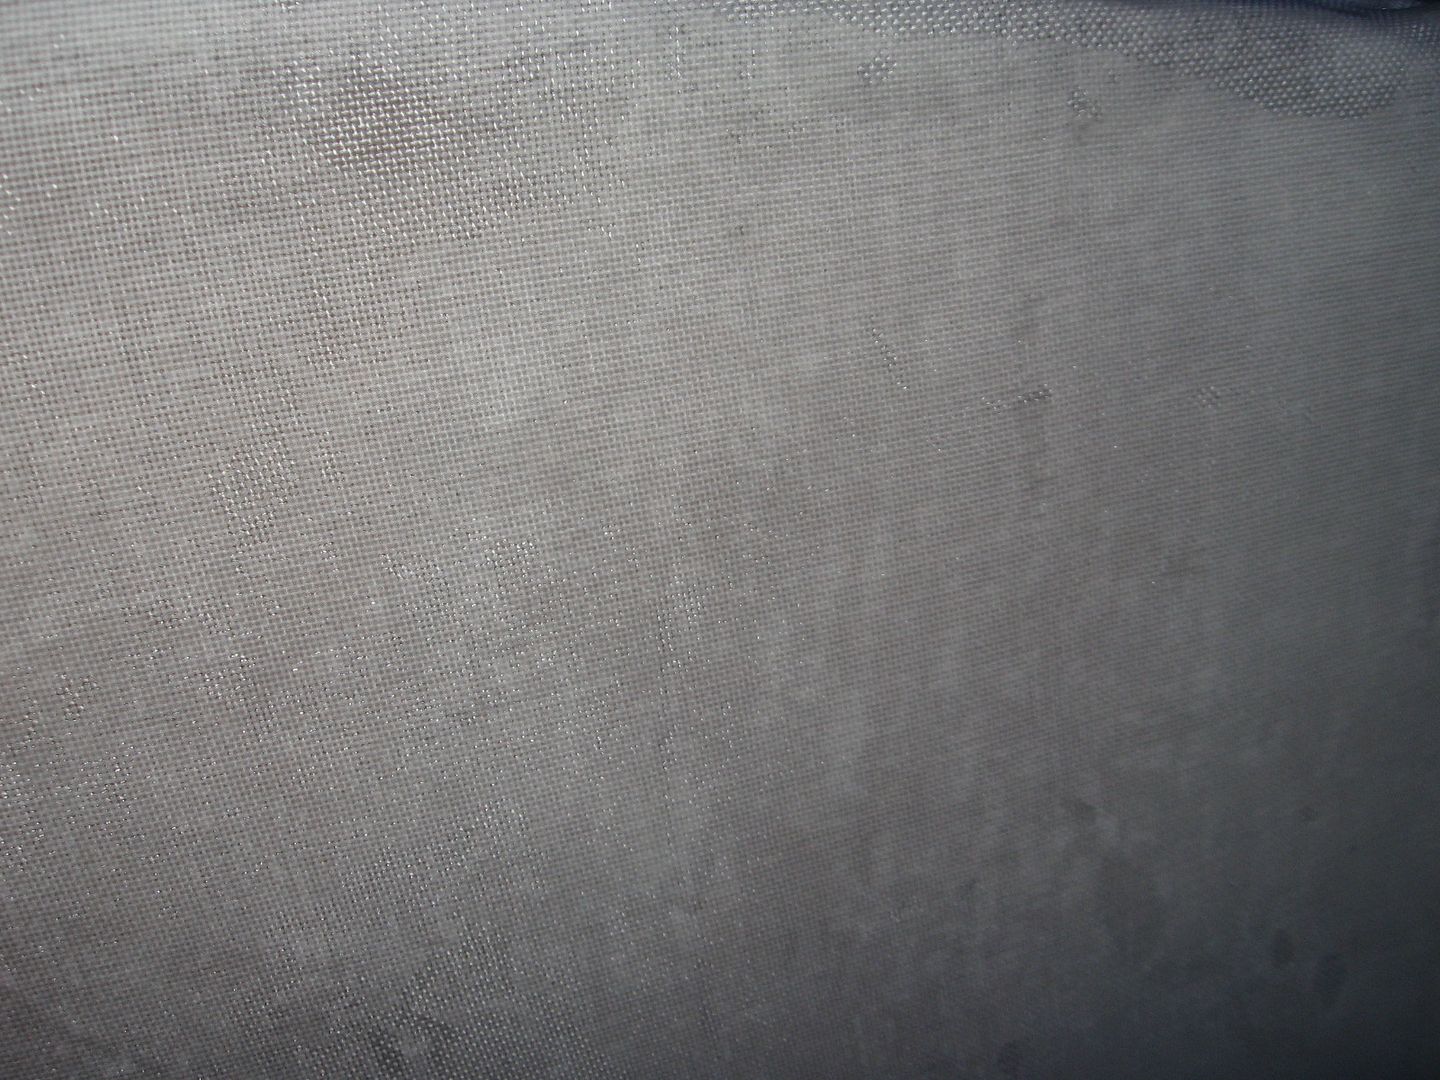
Once the sanding was done the whole boat was vacuumed & air broomed out prior to the areas being glass getting wiped down with solvent. I then laid out the glass. Had just enough 12 oz fabric (barely) to do the transom.
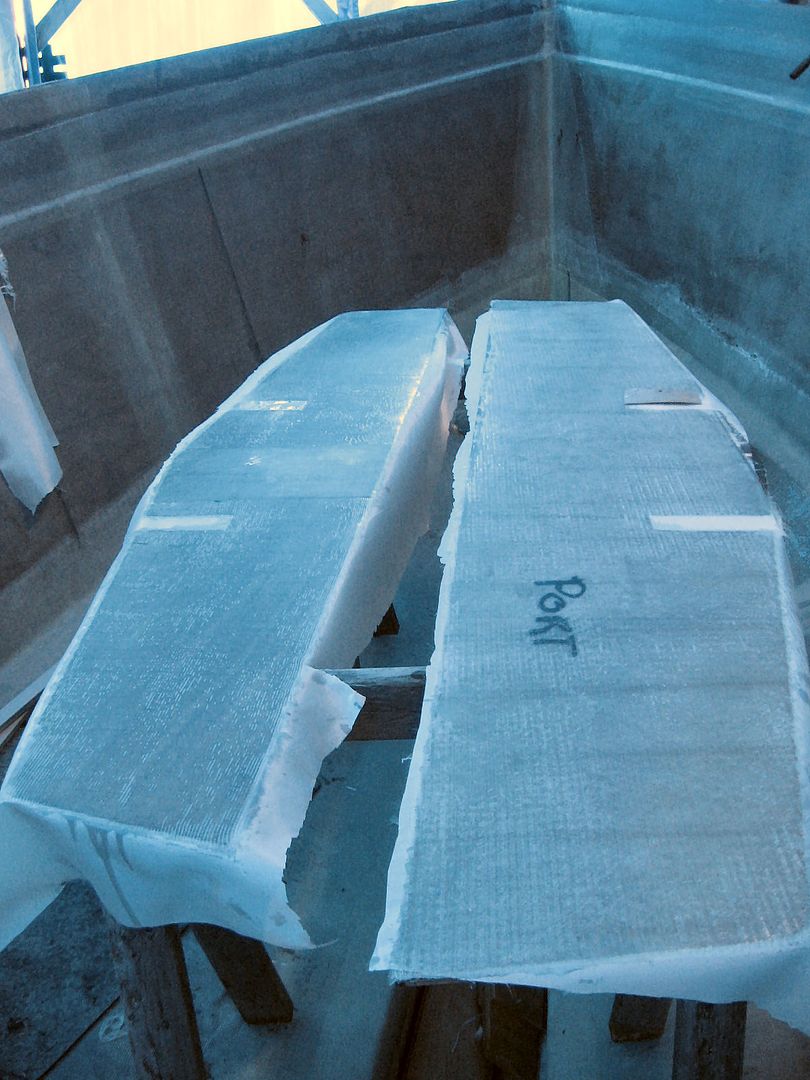
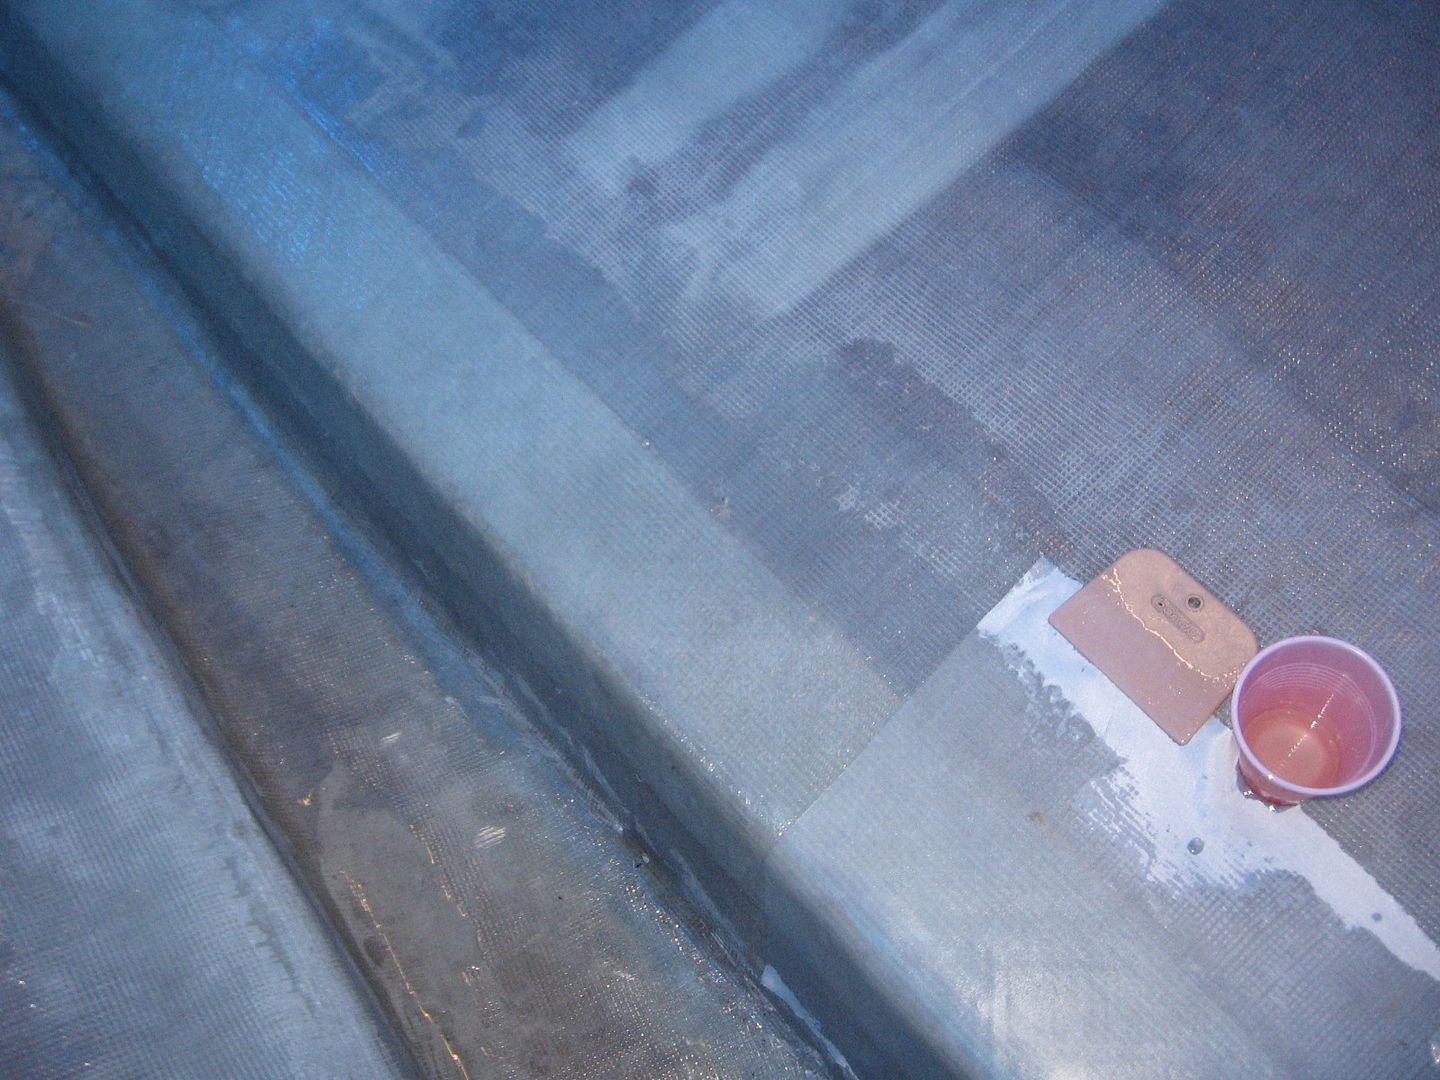
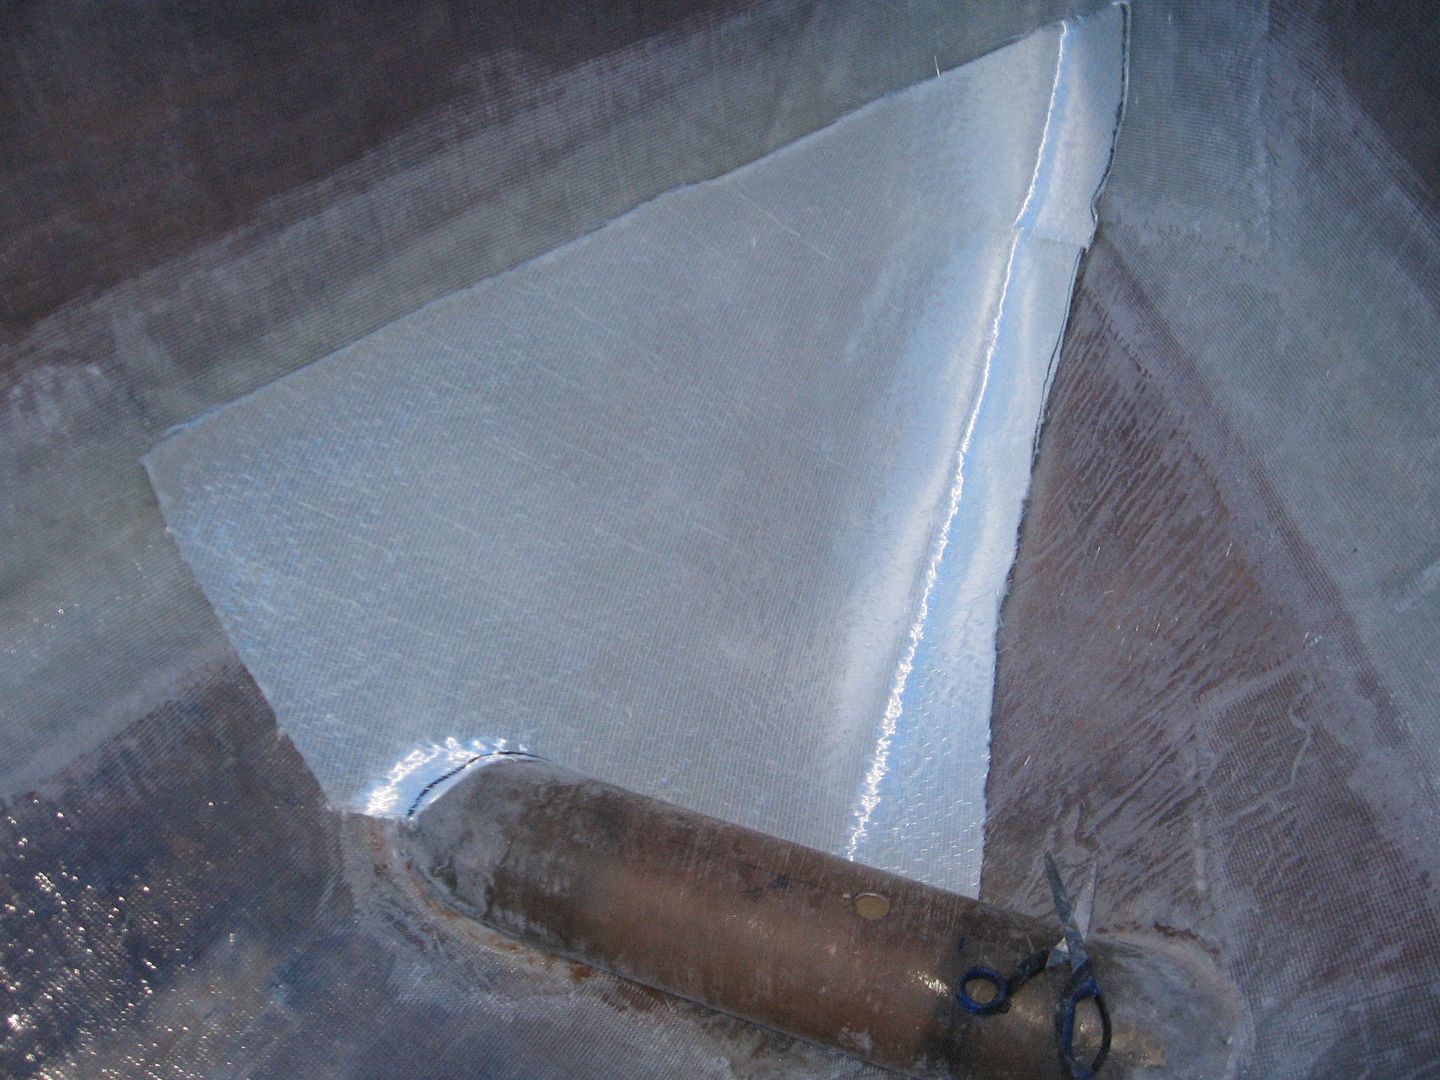
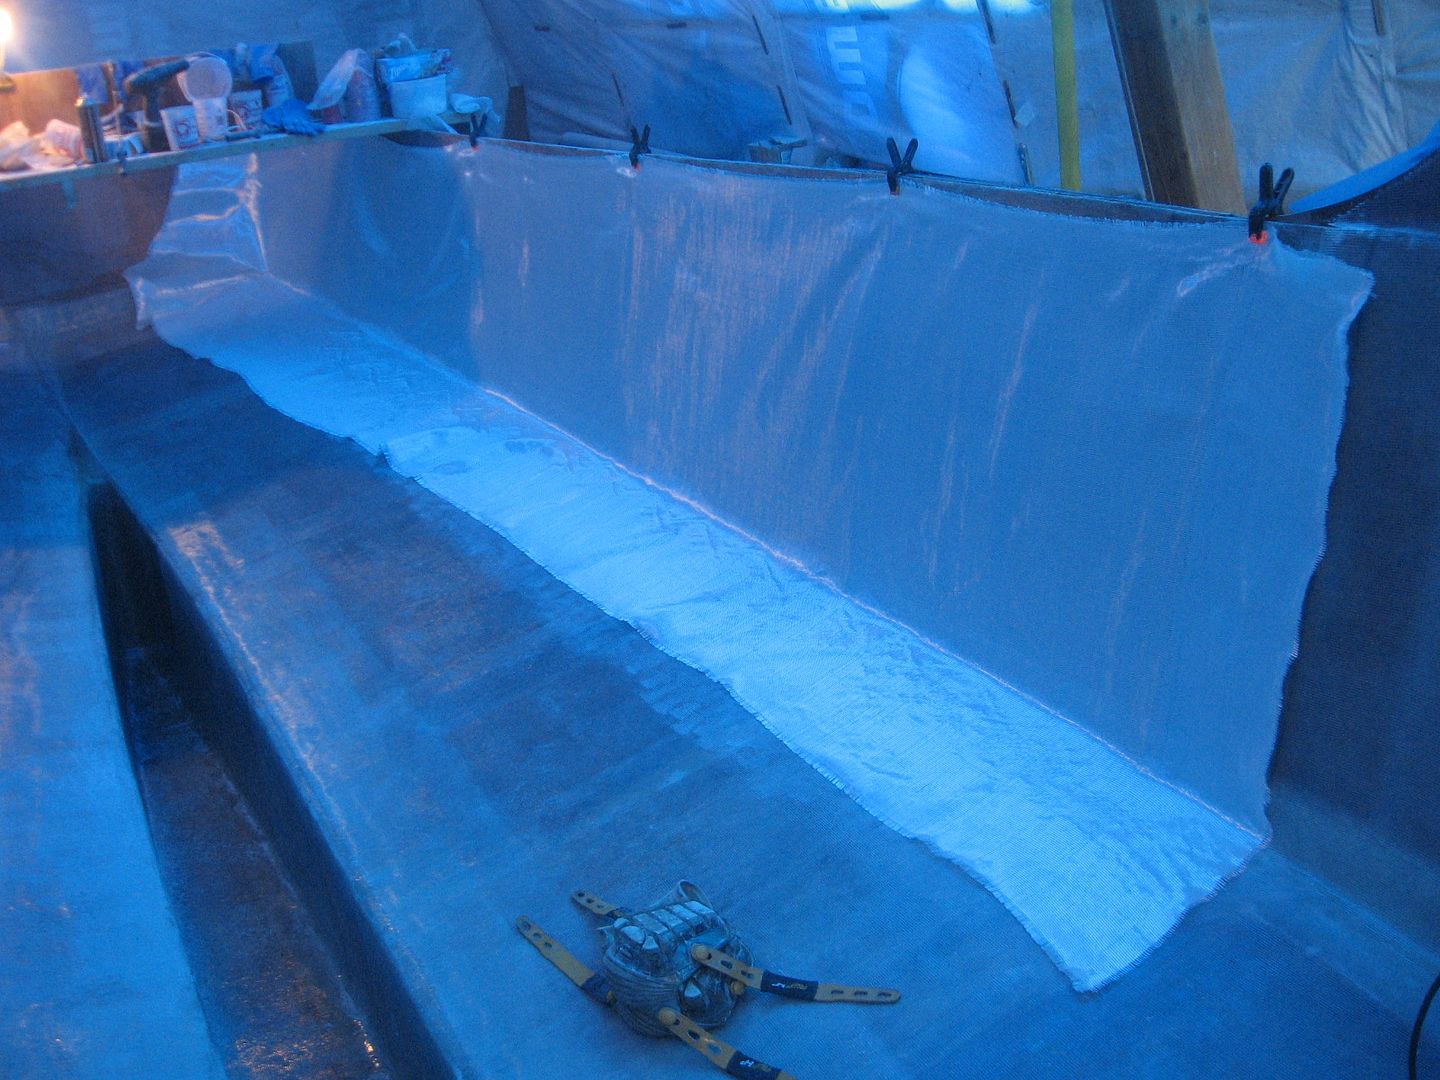
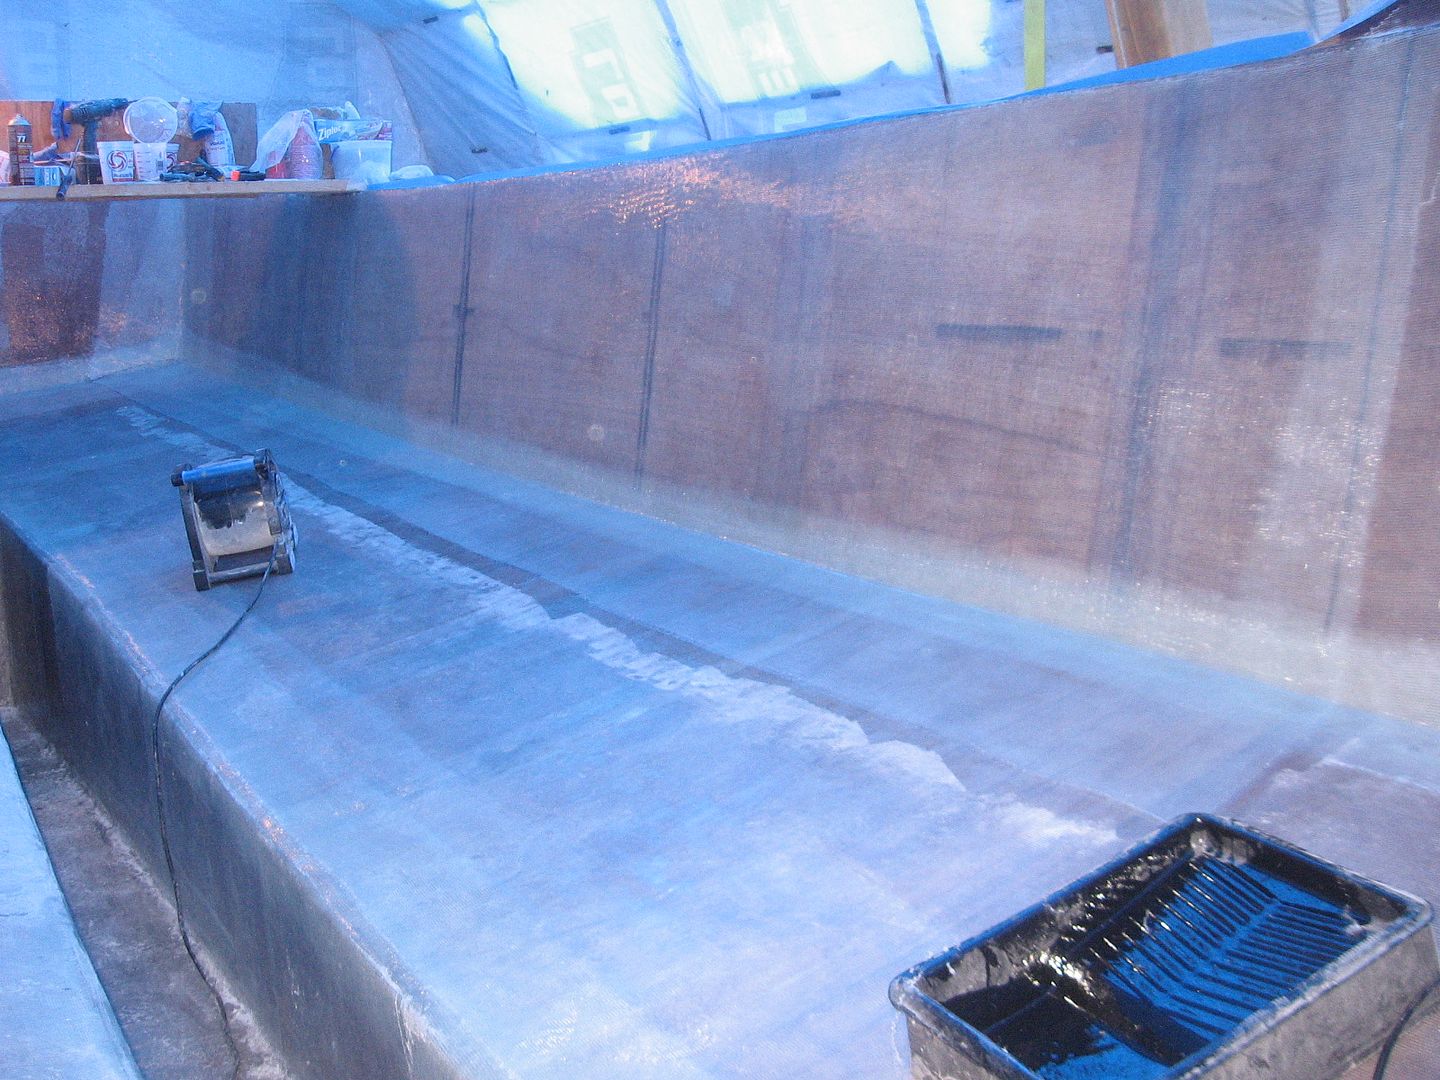
Bow section getting glass laid out
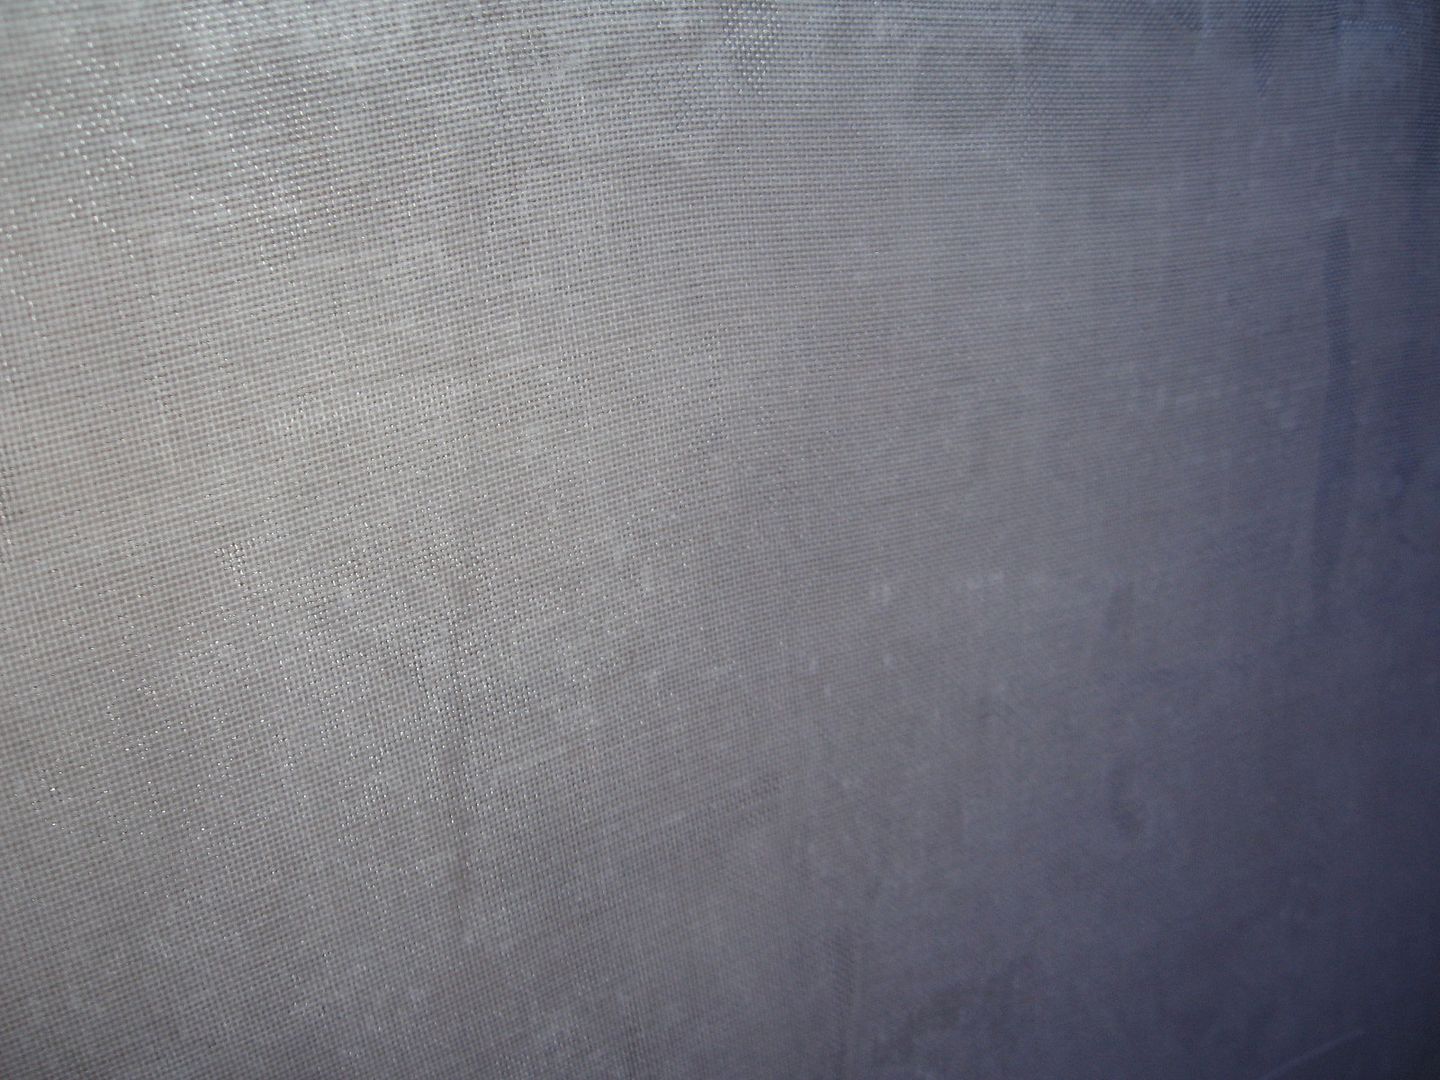
Next up was the bow section forward of the thruster tube. I didn't have any 12 oz left so I took a tour of the garden shed to see what I did have. There's still a ton of 33 oz triax left so I whacked off 8' of that. I split a 4' x 4' section into two triangles and that gives me the basic shape.
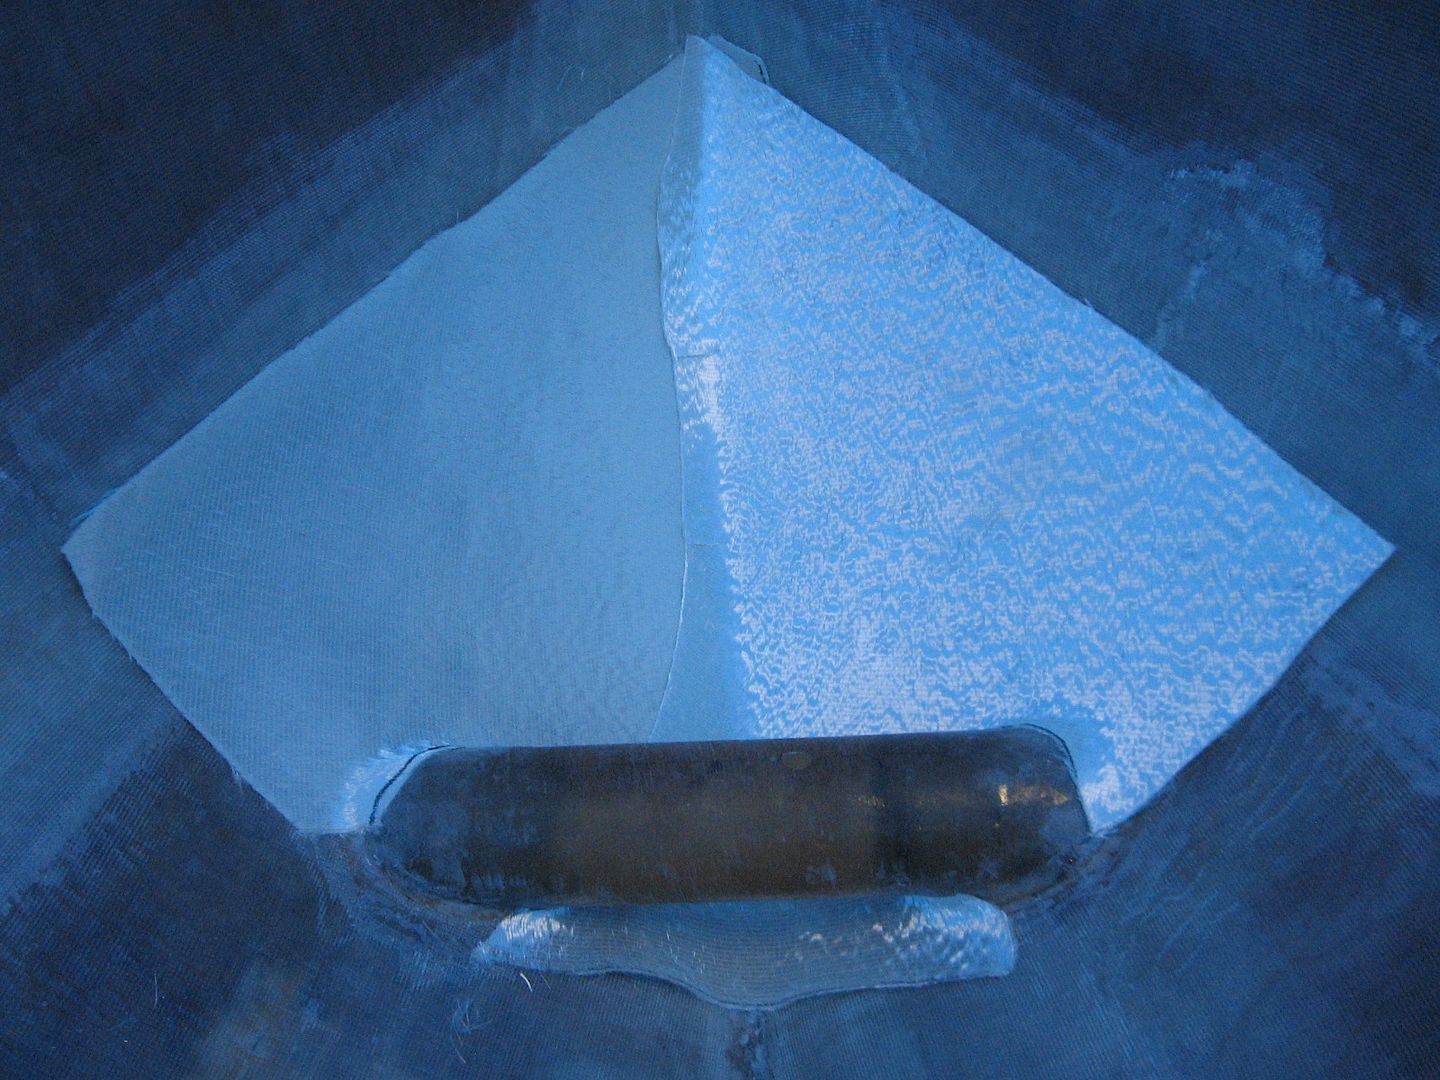
Both sides of bow glass laid up
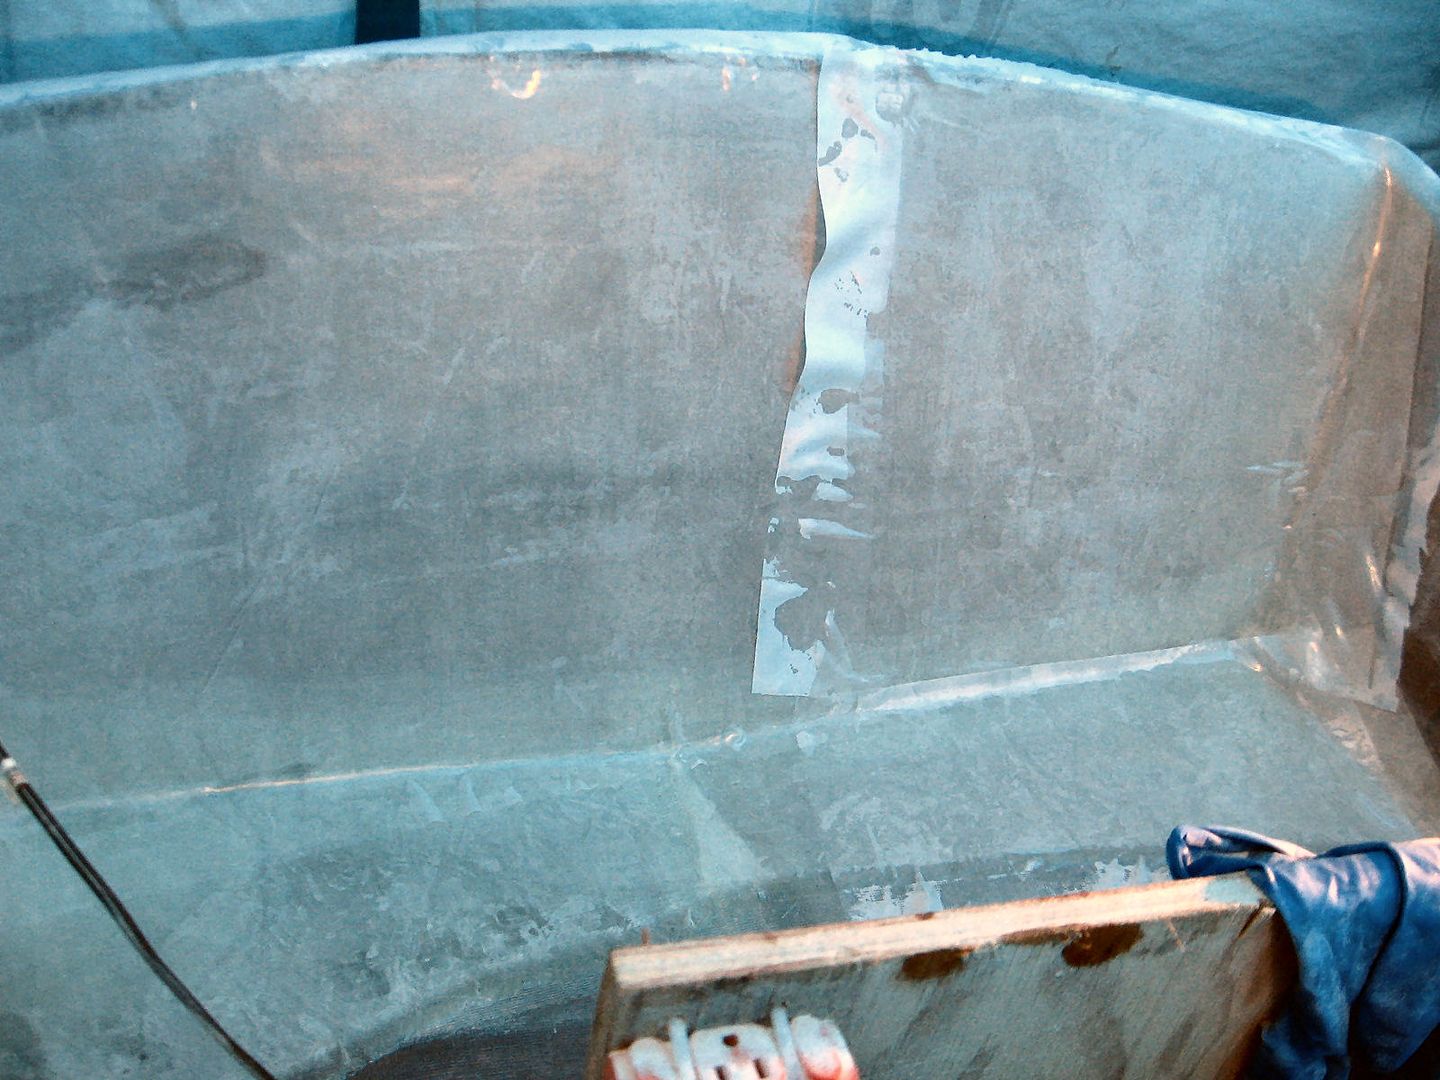
This 33 oz fiberglass is heavy! That little section there will absorb over a half gallon of epoxy! It's massive overkill, almost 3 times what the designer specified. I don't think it's a waste of material though. If we ever hit anything head on this section is right at the waterline. With the carbon fiber on the outside and this extra fiberglass inside we should be safe. We almost hit a picnic table a few years ago in our old boat. I'm sure if we did hit it we'd have had major problems!
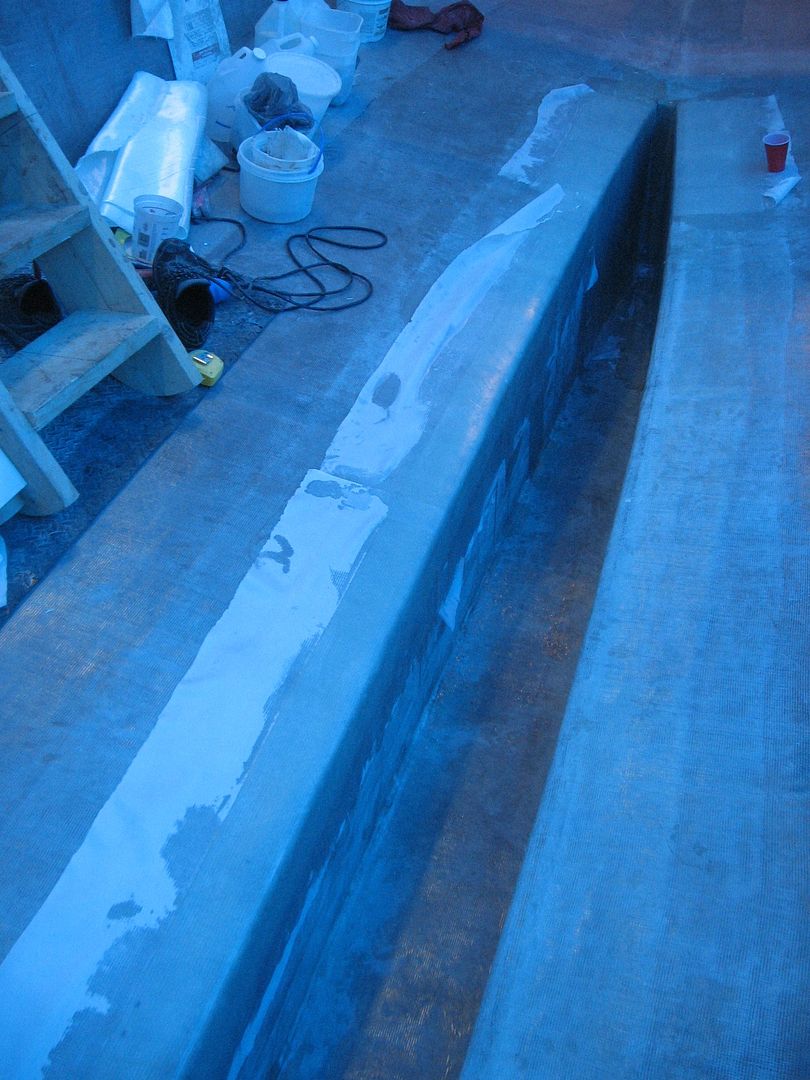
Gooped!
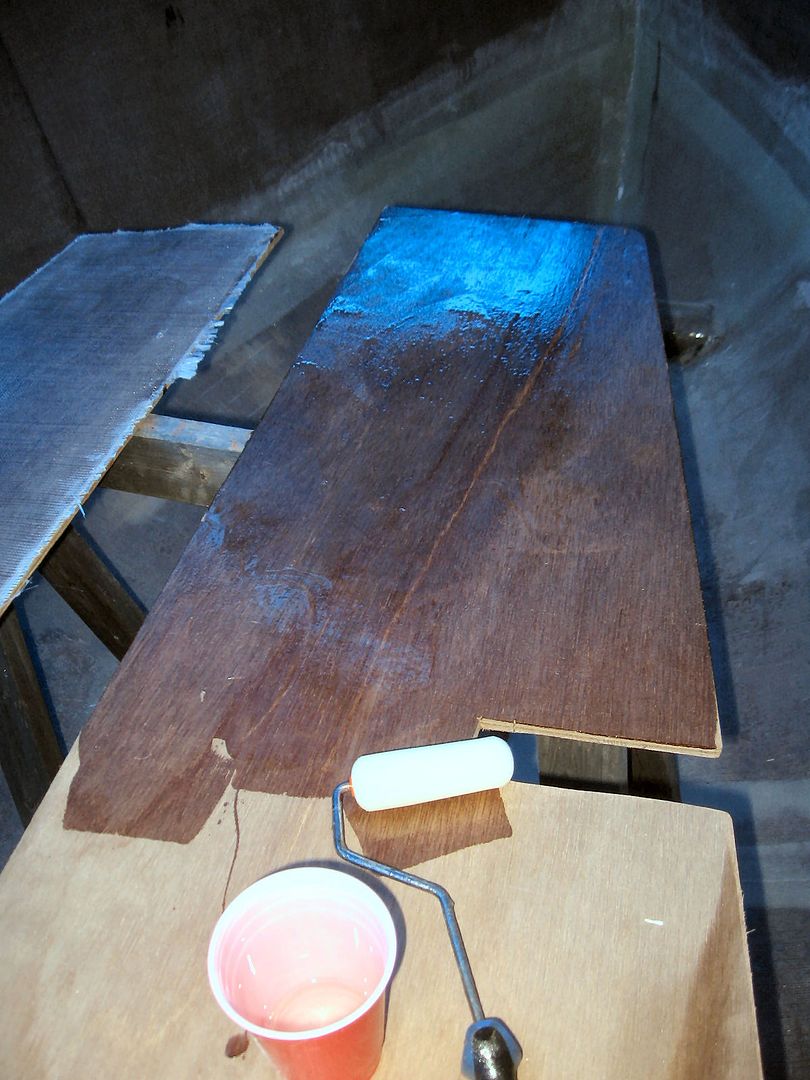
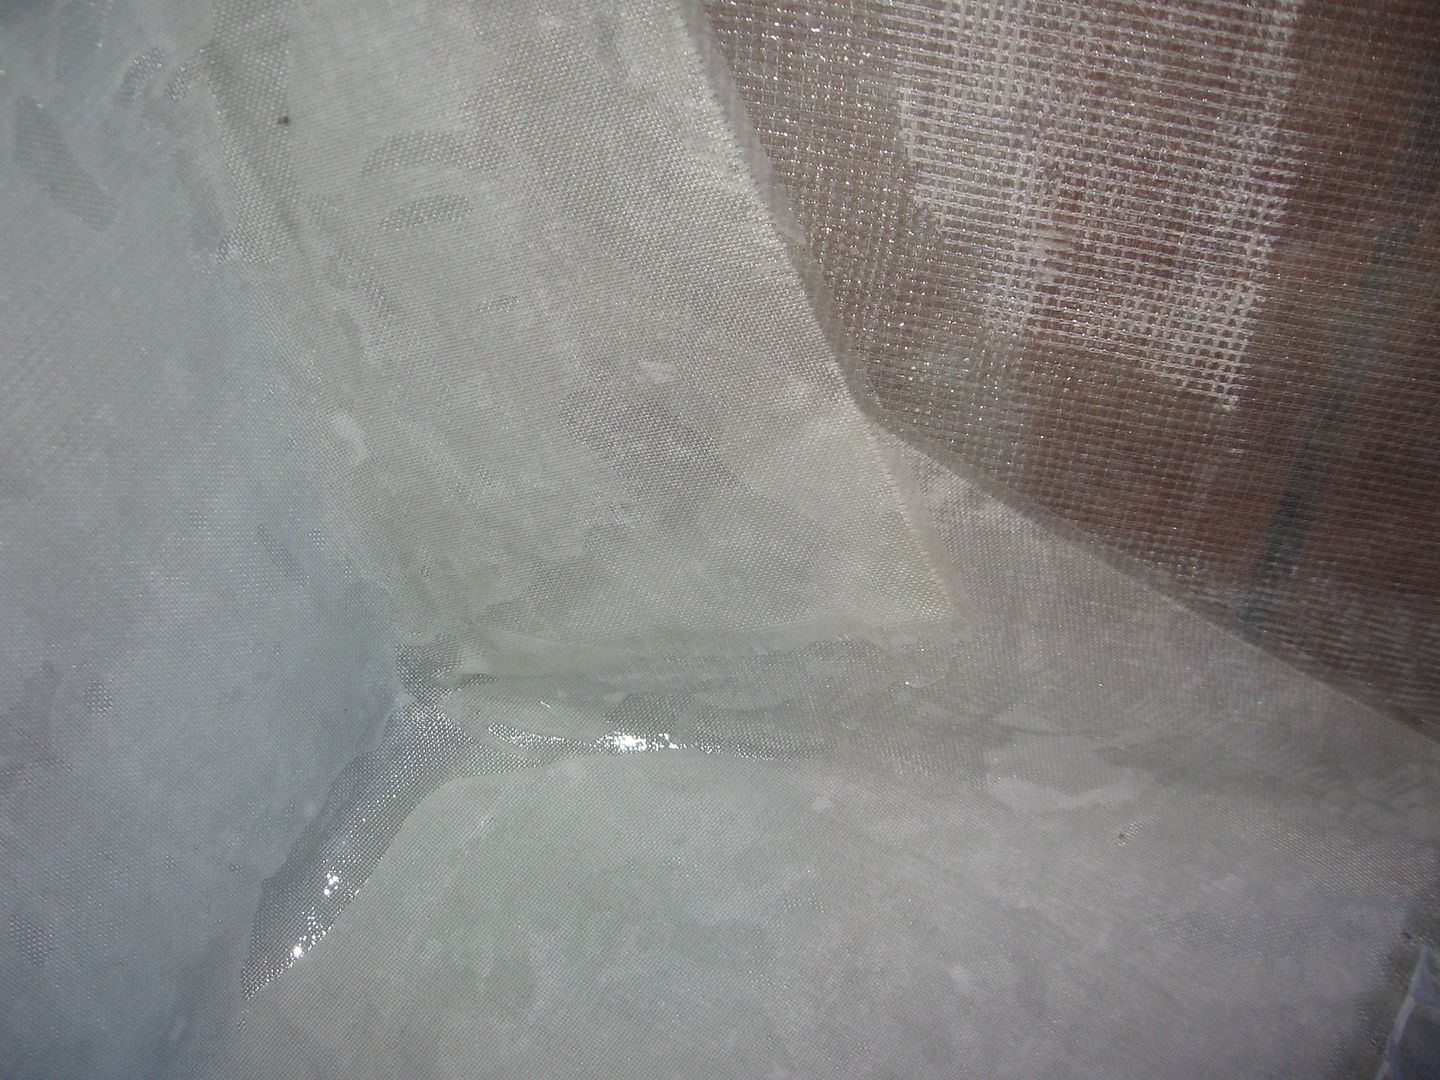
As well as being heavy the 33 oz fiberglass is ultra tough to wet out. You have to start wetting it out on the back side then give it time to soak through a bit then hang the glass up on the section to be fiberglassed. Even then there's about a half hour of continuous rolling & bubble squeegeeing to get it thoroughly soaked and stuck down.

Called it quits after that. I'll goop the other two sections tomorrow.
Our crusty ole' rusty IROC at the Friday Night Cruise In.

Standby...

Thursday, September 17, 2015

Couple of half days

Spent the last two days (half day each) doing my favorite thing, sanding fiberglass! ;-) Yesterday I got a start on the transom and back end of the keel.
Prepping the transom for glass
It's ready
That took me till 'bout noon and I went inside to see what the Ole' Girl had in mind for lunch. 'Pizza' she replied! Wohoo! Anywho, an hour later and three pieces of home made Mummy Pizza down and I'm just screwed! No more sanding for me! Siesta time!

Luckily today wasn't a repeat of yesterday. I got into the shed about 9'ish (Ole' Mummy is on nights so she likes to sleep in) so I didn't wake the Admiral up. Got right to sanding the box keel from stern to stem. I want to put an extra layer of tape on the join between the bottom and sides of the box keel. When I laid out the fabrics for the bottom they aren't wide 'nuff to go over the bend.
We're makin' dust today!
I use the little 2" flappy disc sander to feather out the fabric edges. This lil' gem makes short work of it. I've sanded back away from the bottom/keel join to allow the stringers to get bedded down without having to do any more sanding.
That's a long way's away! ;-)
I'm sitting on the bow thruster tube to get that shot. Pretty cool! I've still got a bit of the bow section to sand and the bottom/sides of the box keel. That'll take me tomorrow to finish up I think. Saturday I should be putting in the last glass in the keel & bow.

Standby....

Tuesday, September 15, 2015

Port sides aft

Kind of a lazy start this morning. Didn't make it to the shed till after 09:00 and then did a wee bit of pondering. Wasn't exactly sure I would have enough of the 12 oz fiberglass to do the side.
Just 'nuff! Whew!
Made it! With about 5' left on the roll to spare! Whew! I knew it was going to be close.
Trimmed almost ready for goop!
Took about an hour and a half to lay it out, secure the top edge and trim it up. There was more ponderin' time in there as well! ;-) Dunno what I was ponderin' but I just was!
Extra tape along chine
The area along the chine gets fabric overlapped from the side and bottom panels. Because of the standard widths of the fabrics the overlap is sometimes only a couple of inches. The designer recommends 5" to 6" overlaps. To make up for the shortcomings in overlaps I laid in an extra piece of 8" 17 oz fabric tape. This should do it!
About half way, 3 qts of epoxy
Mixing quarts instead of pints seems to speed things up a bit. At least it's fewer trips to the sticky stuff machine!
1-1/2 hours and about 1-1/2 gallons of epoxy. Done!
Caption to the above photo pretty much sums it up! ;-)  Another big bite outta the whale!

So what's left? The bow section forward of the bow thruster tube, the very back end of the box keel and the transom. I'll spend a good portion of tomorrow prepping them for fiberglass and goop them on Thursday. I think I'm going to add an extra layer of the above mentioned tape along the keel to bottom join and if I have enough epoxy left over I'm going to put some of the off cuts of fiberglass in the bottom of the box keel.

Bubble watch for an hour or so then it's shower time! I smell really really bad! *lol*

Standby....