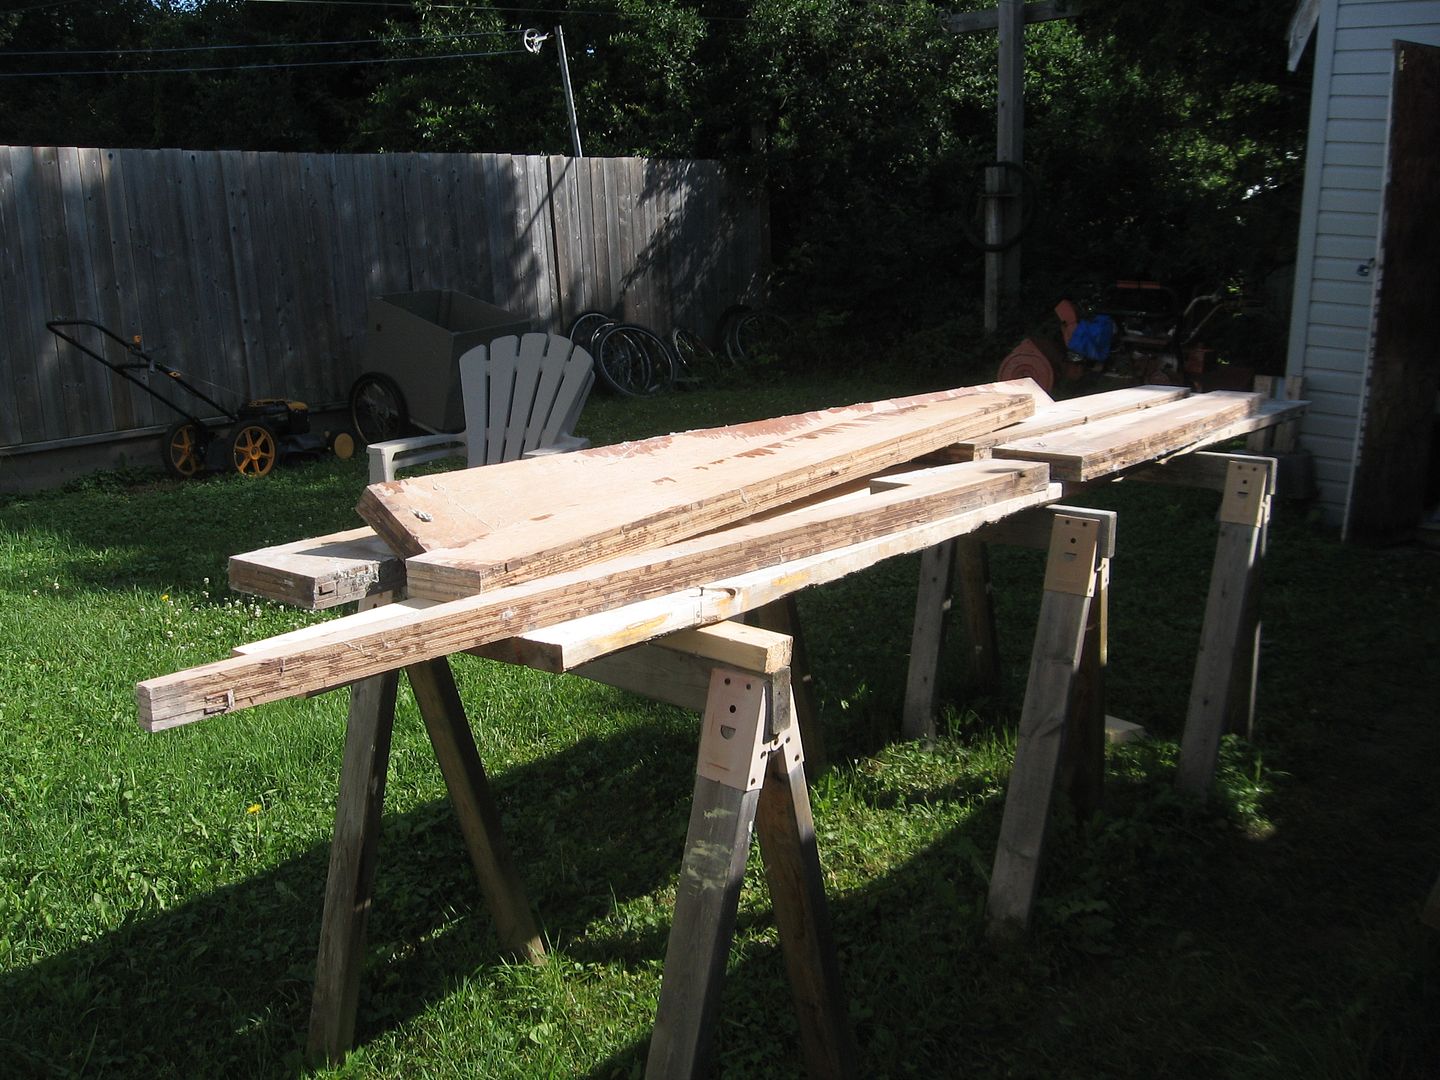
It's been pretty warm around here the last few days. Yesterday it hit 102F with the humidex. About 30 C if I remember correctly. Wasn't much better the day before.
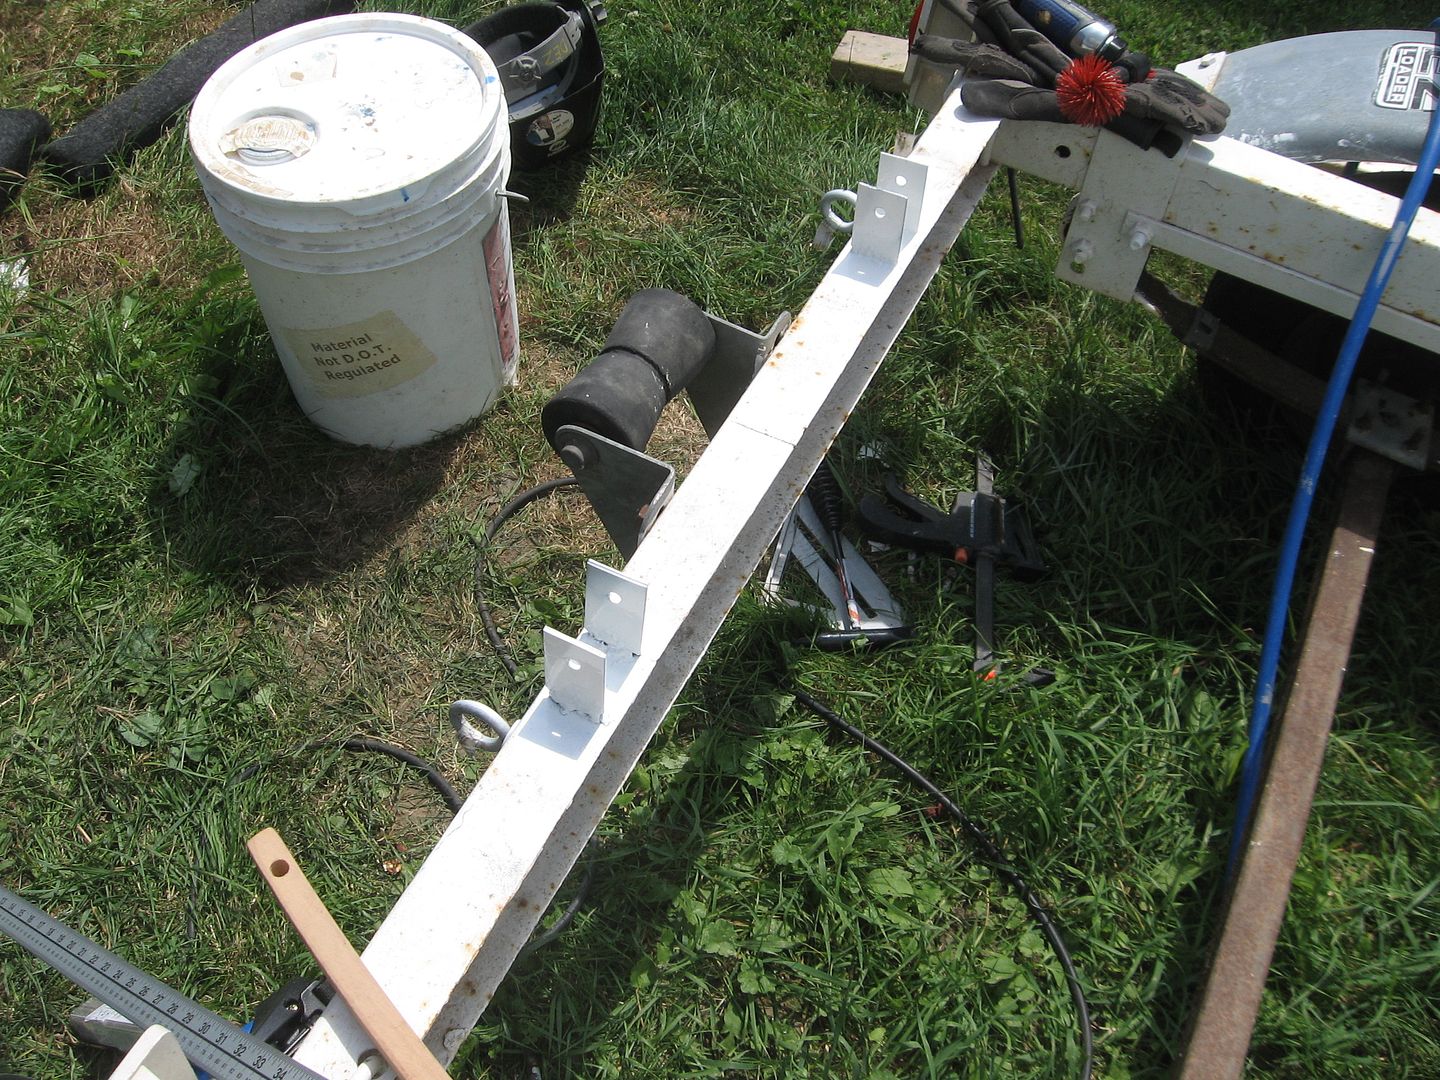
I did tinker with my new welder and added a couple new brackets to the dingy trailer. These will support new beds for the dingy to rest on.
New brackets to hold bunks for dingy
They were my first welds with this little inverter welder. I don't think I've stick welded anything since I was a deck hand on the Griffon way back in the early 80's. Mel used to call me 'Sparky'!
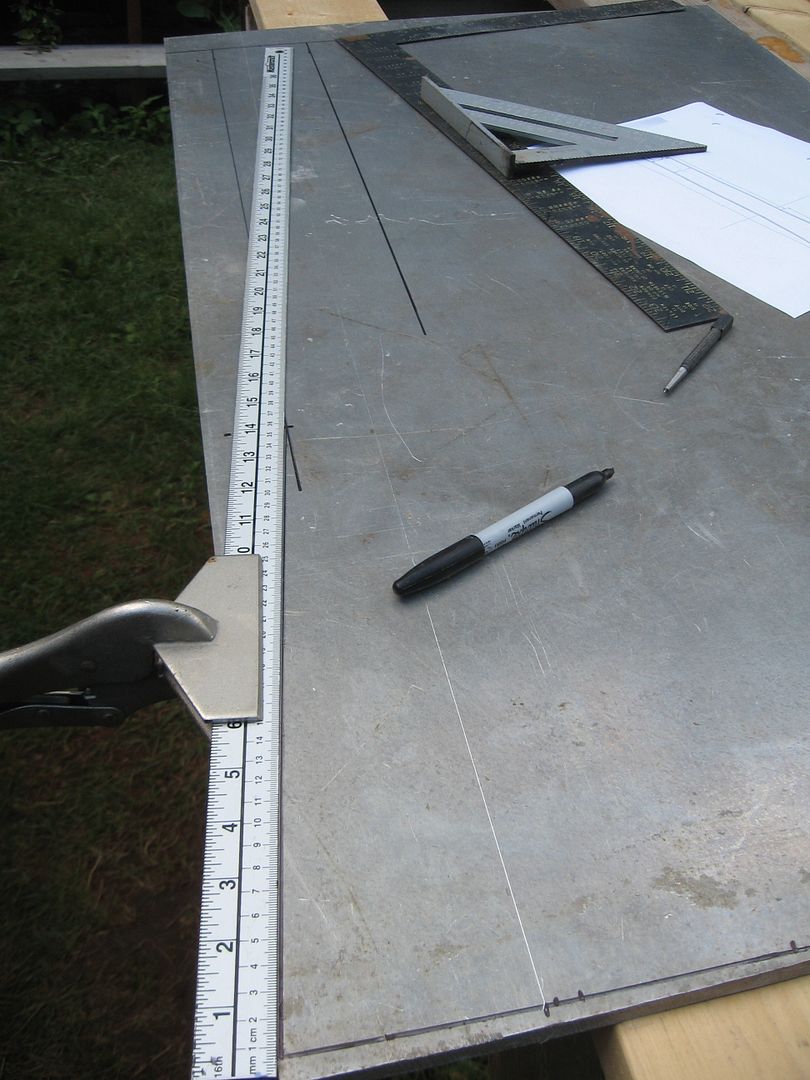
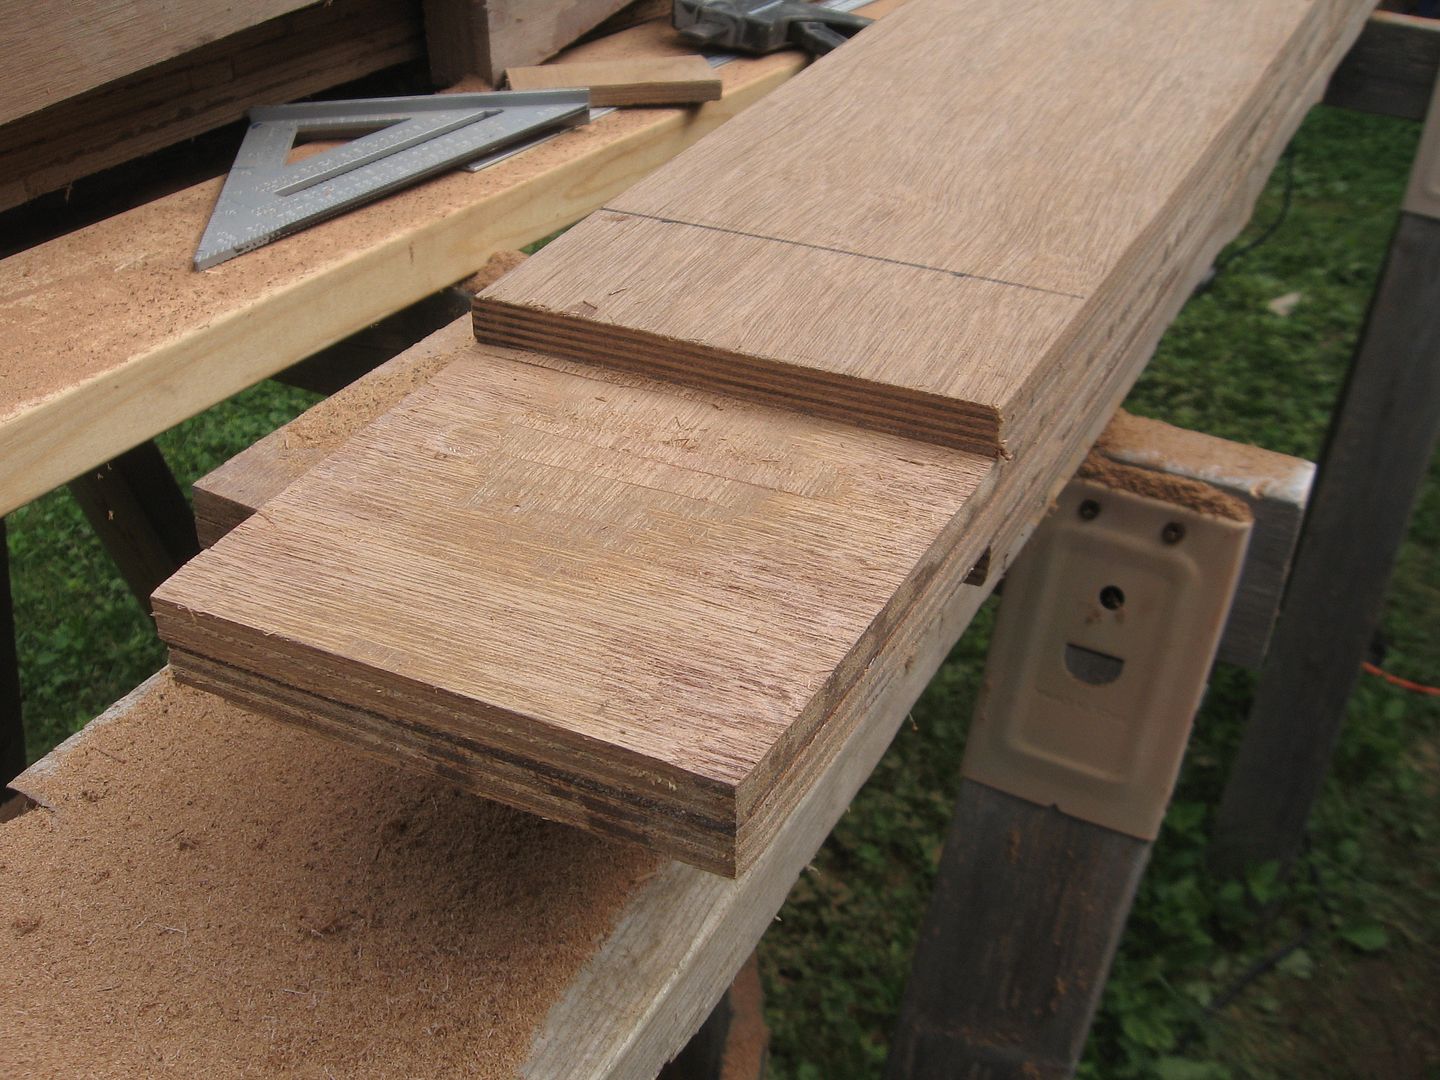
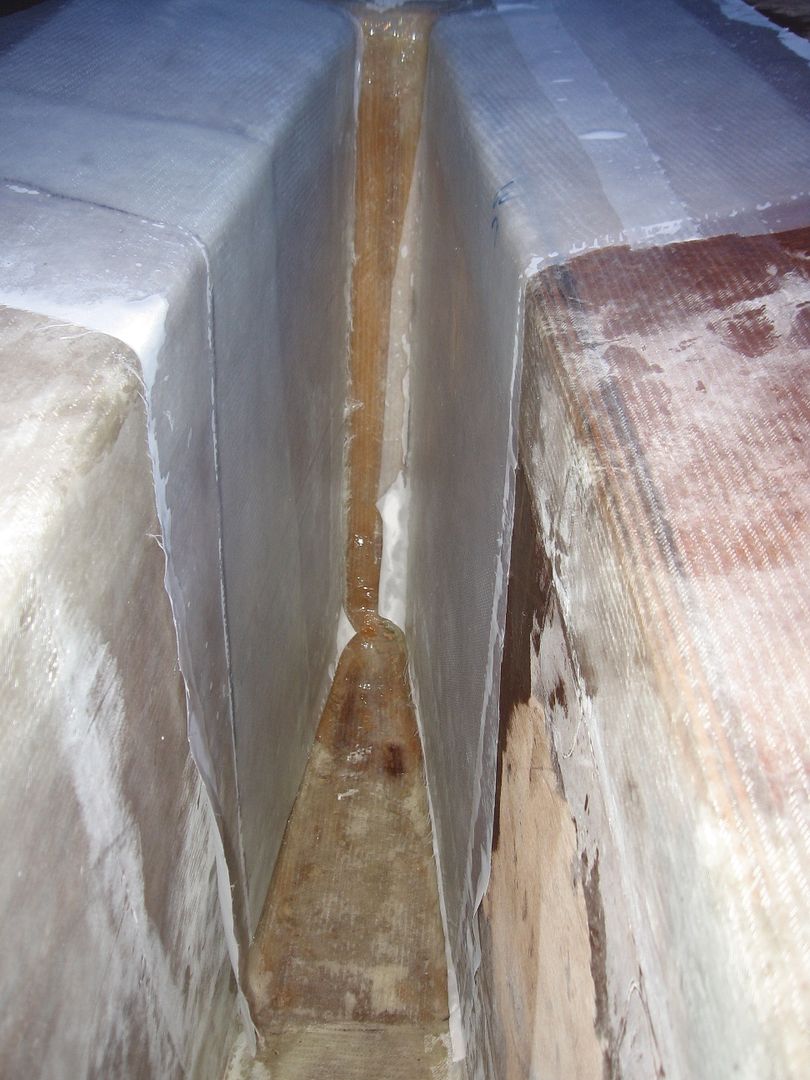
Anyhow, today started out with thunder showers and then after it cleared up it got muggy as h*ll. I puttered around till afternoon then started to lay out the skeg on the sheet of aluminum I have.
I drew up some plans for the skeg way back when the boat was still upside down. That would have been the time to attach it but I wasn't thinking that far ahead. Couple of weeks ago I stumbled across the deal on the 3/8" plate so that sort of kick started it a bit.
Laying out lines to cut for skeg
Definitely not a precise piece of fabrication but layout is simple & straight forward. Measure thirteen hundred times then cut once! Usually works! *sigh*
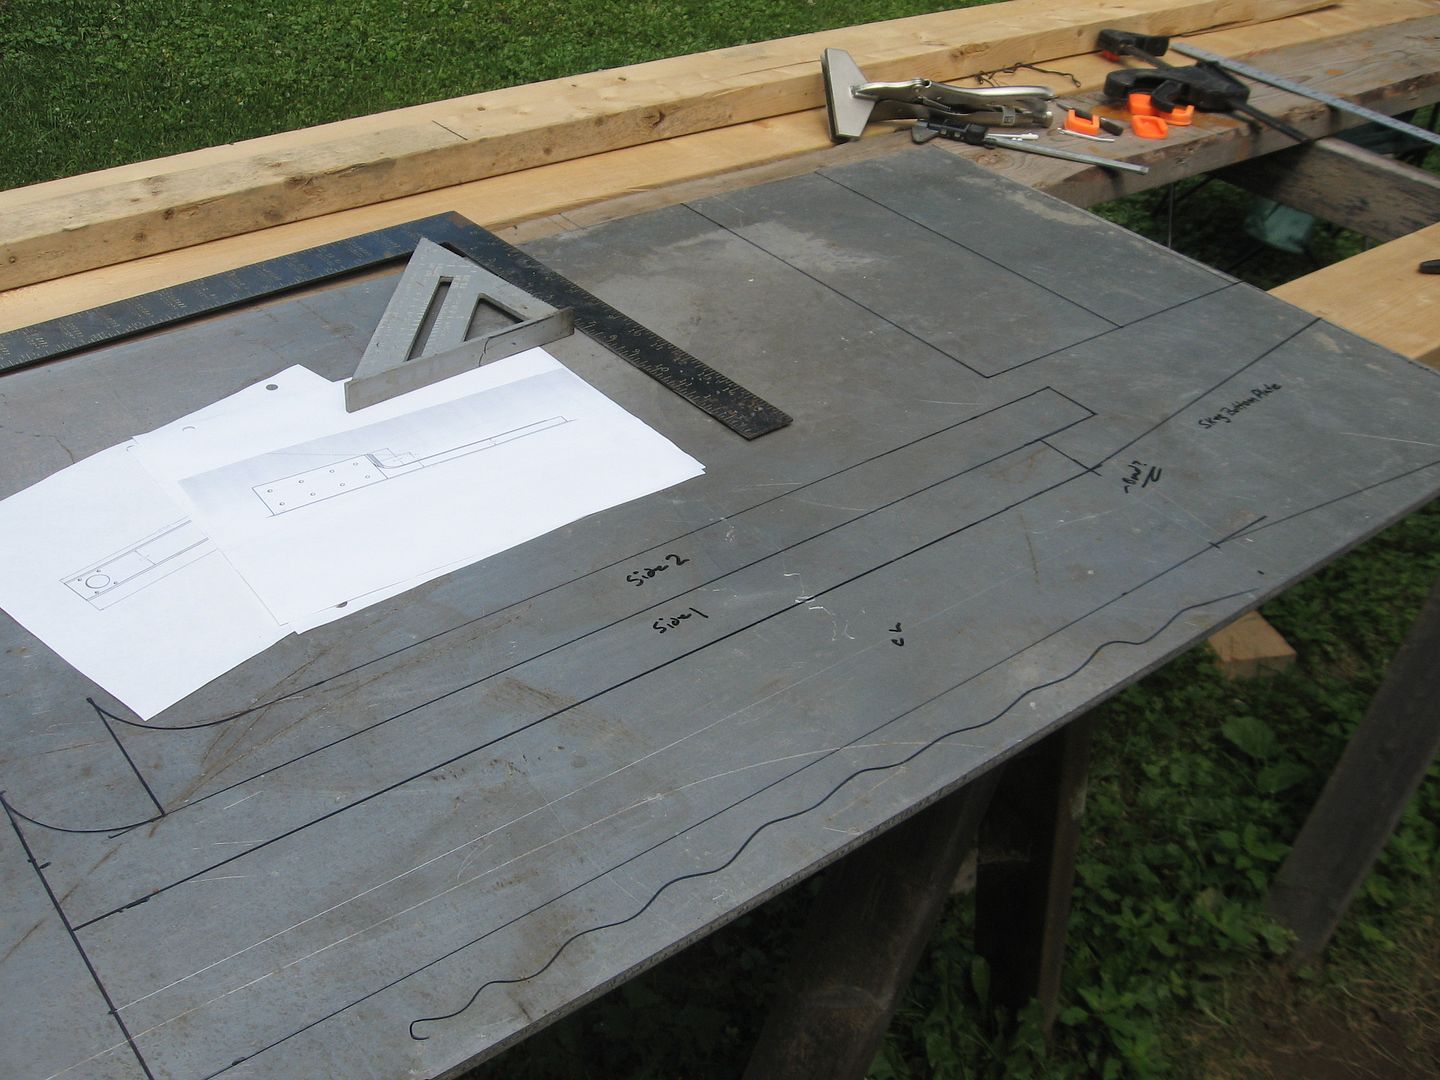
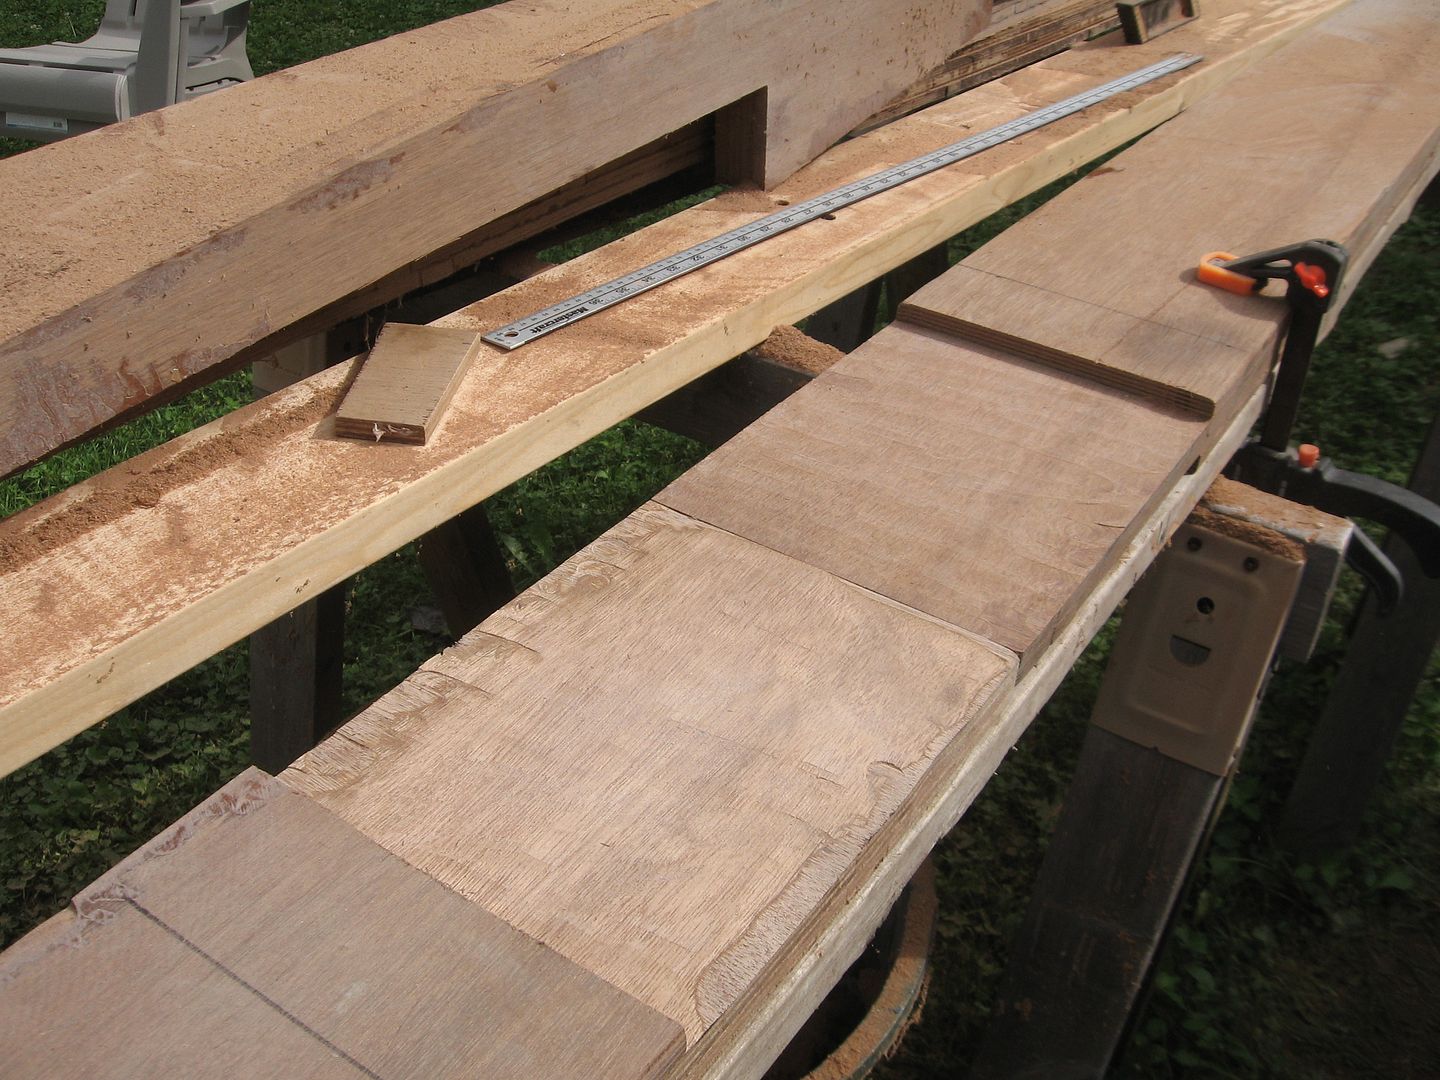
Parts laid out & nested
Various pieces drawn & nested as best I could. I left lots of extra 'meat' for grinding & fine tuning etc.
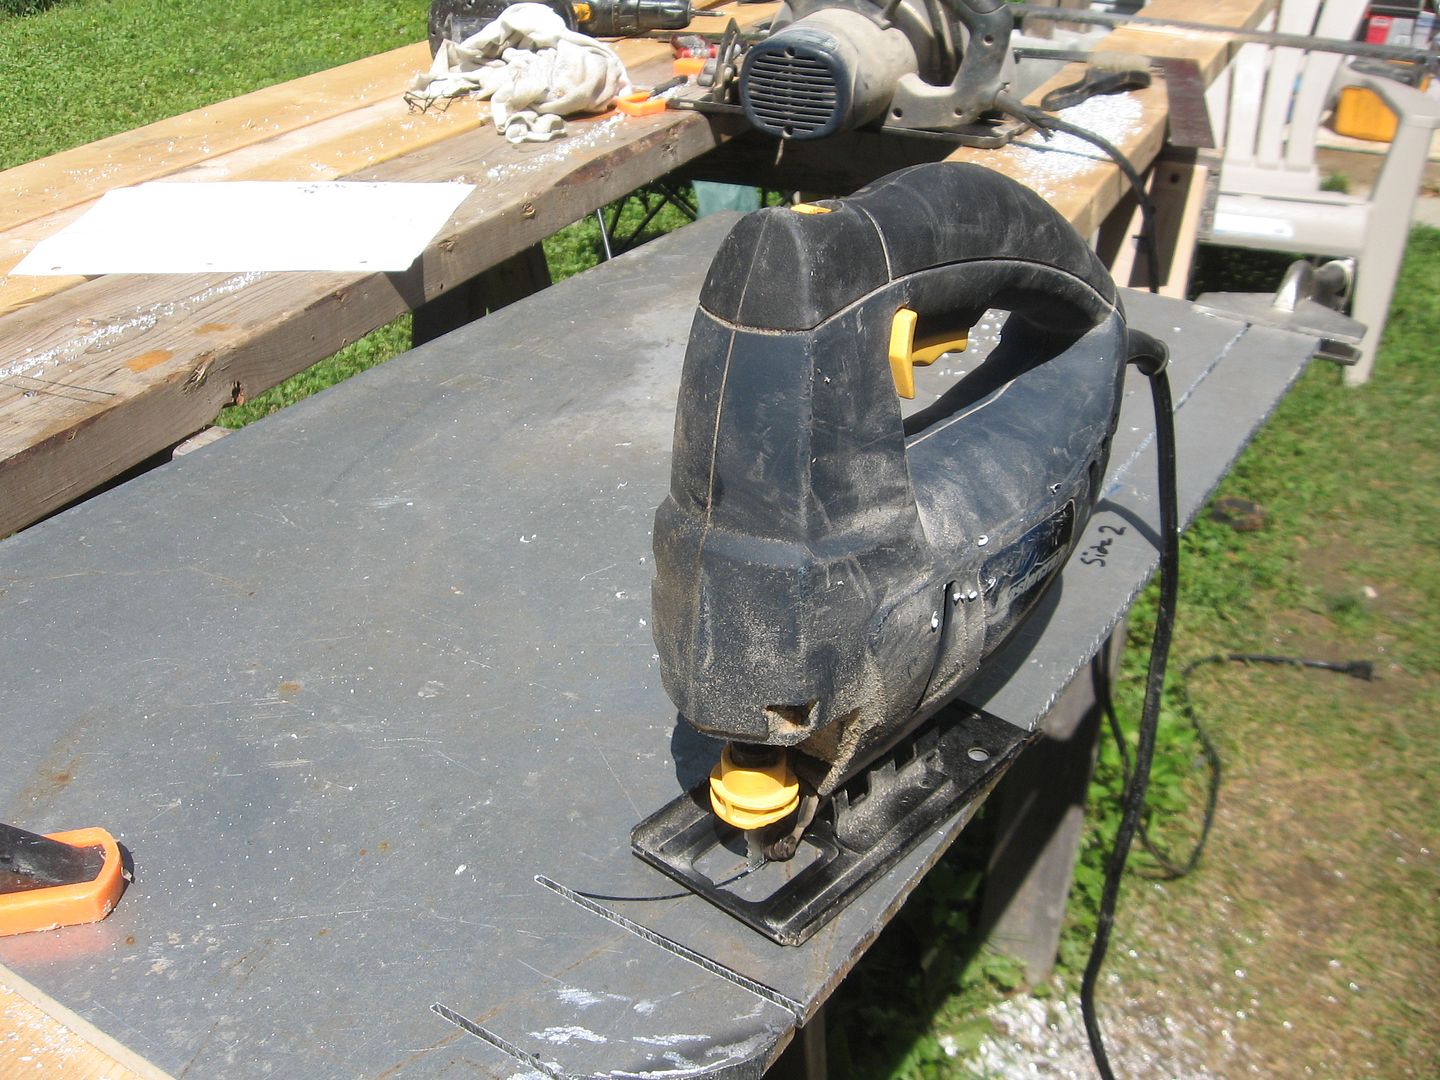
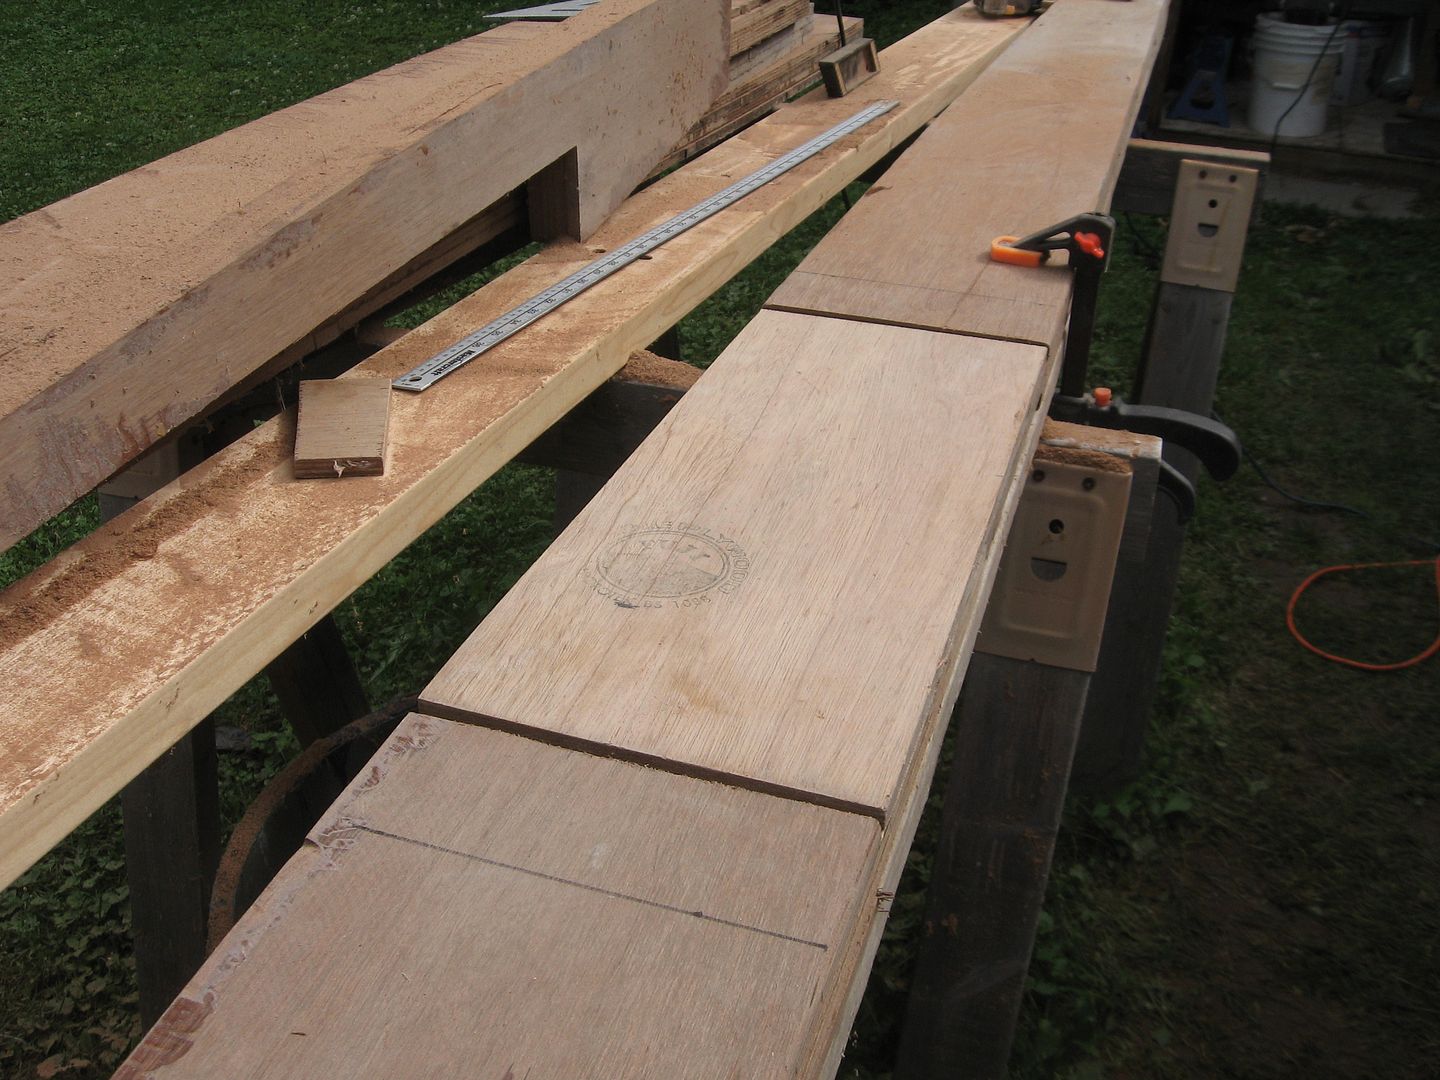
The circular saw works fine for straight lines. Goes through this stuff like butter! The curves required the jig saw. It worked but it was slow & painful. Destroyed my old Crappy Tire jig saw after two cuts! I think they have a lifetime warranty though! ;-)
Jig sawing essential for curves
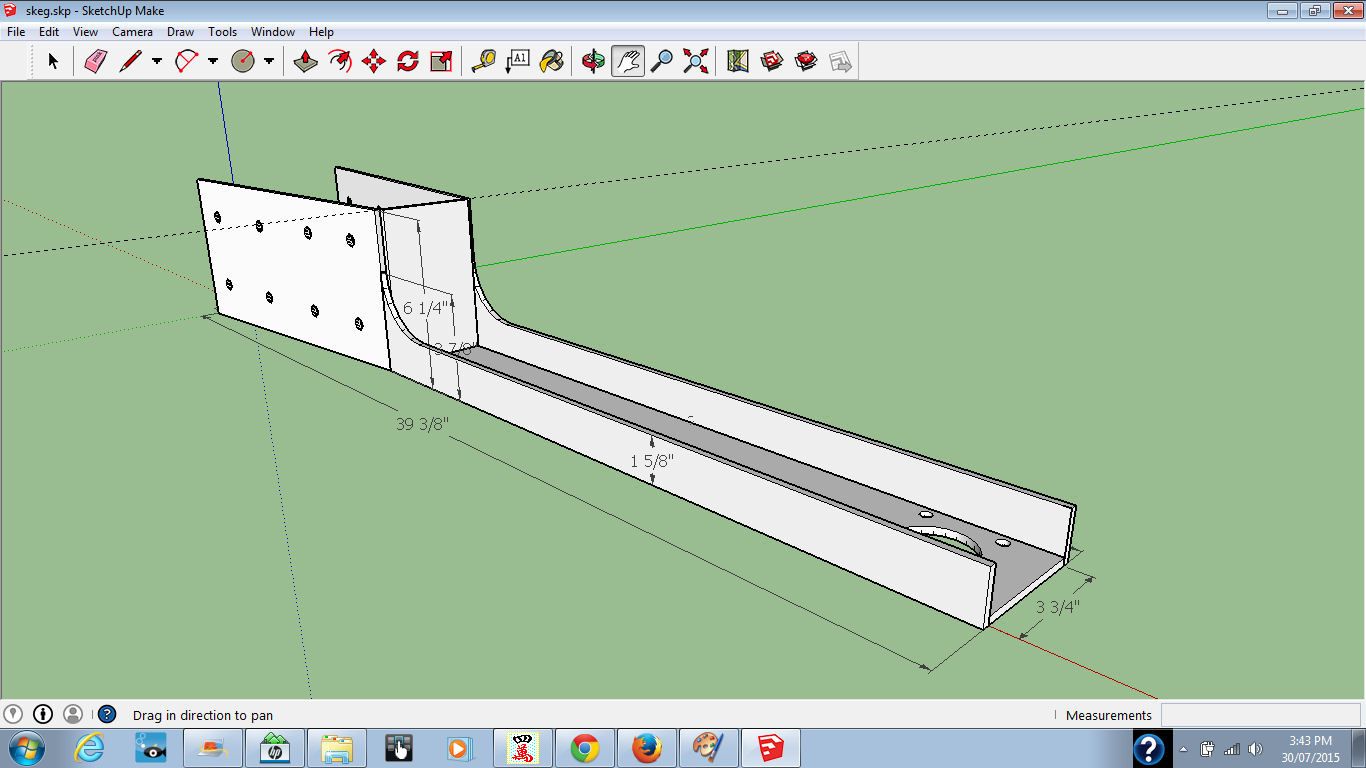
So here's what the thing looks like as designed.
Sketchup design for skeg
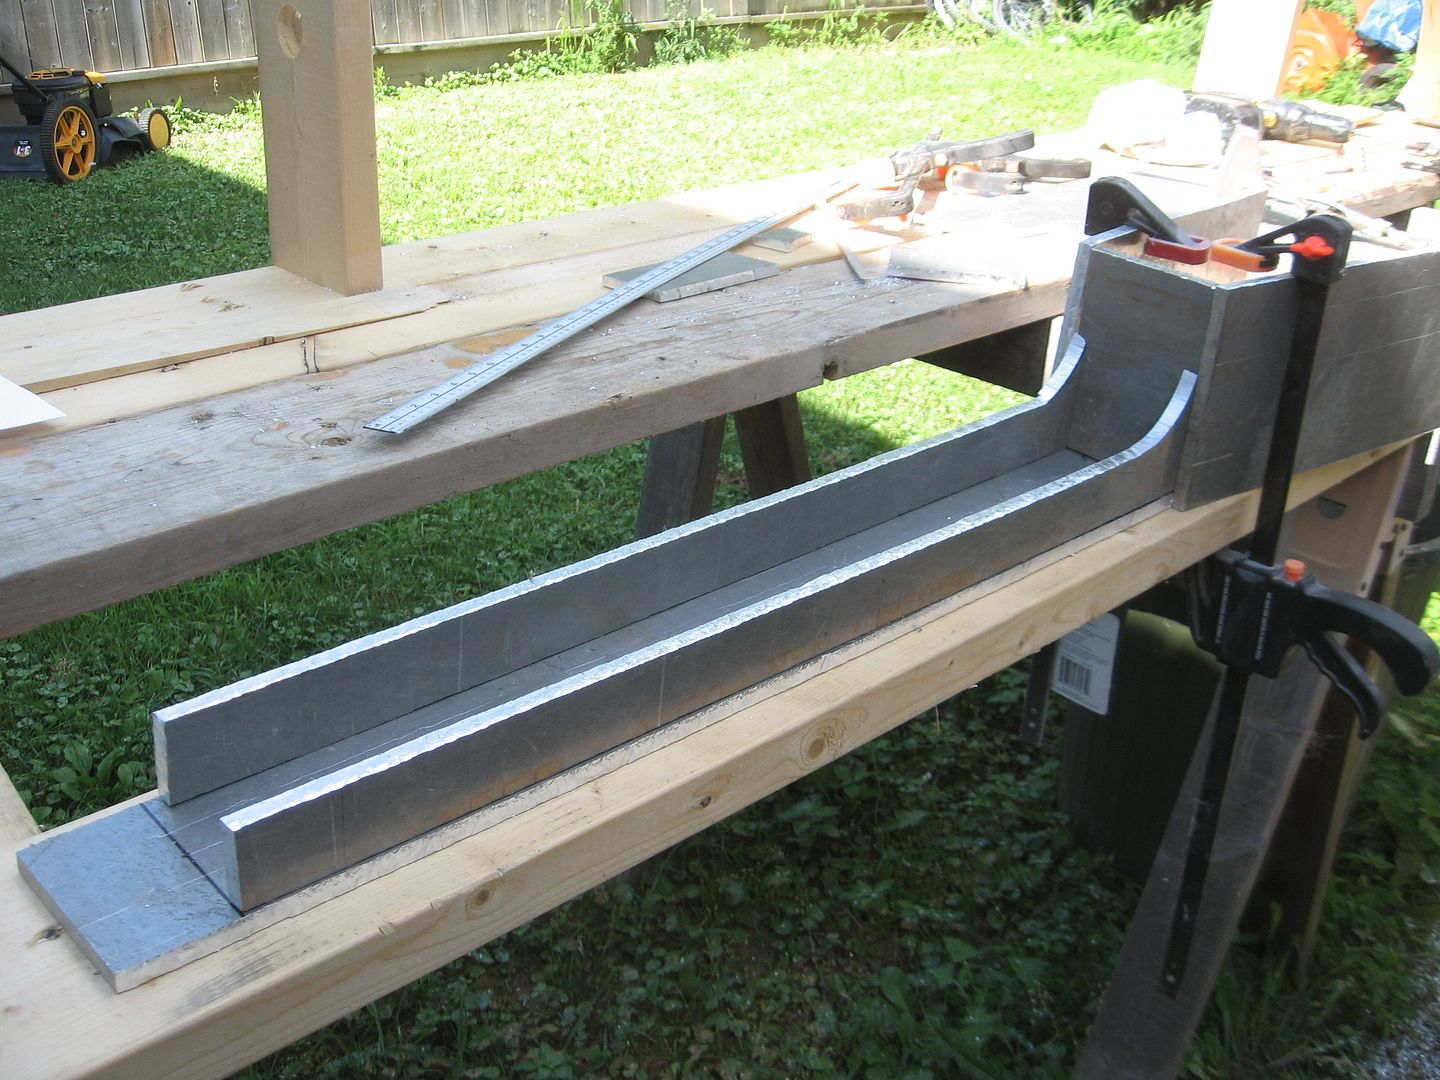
And here's the results of my aluminum butchering.
The skeg
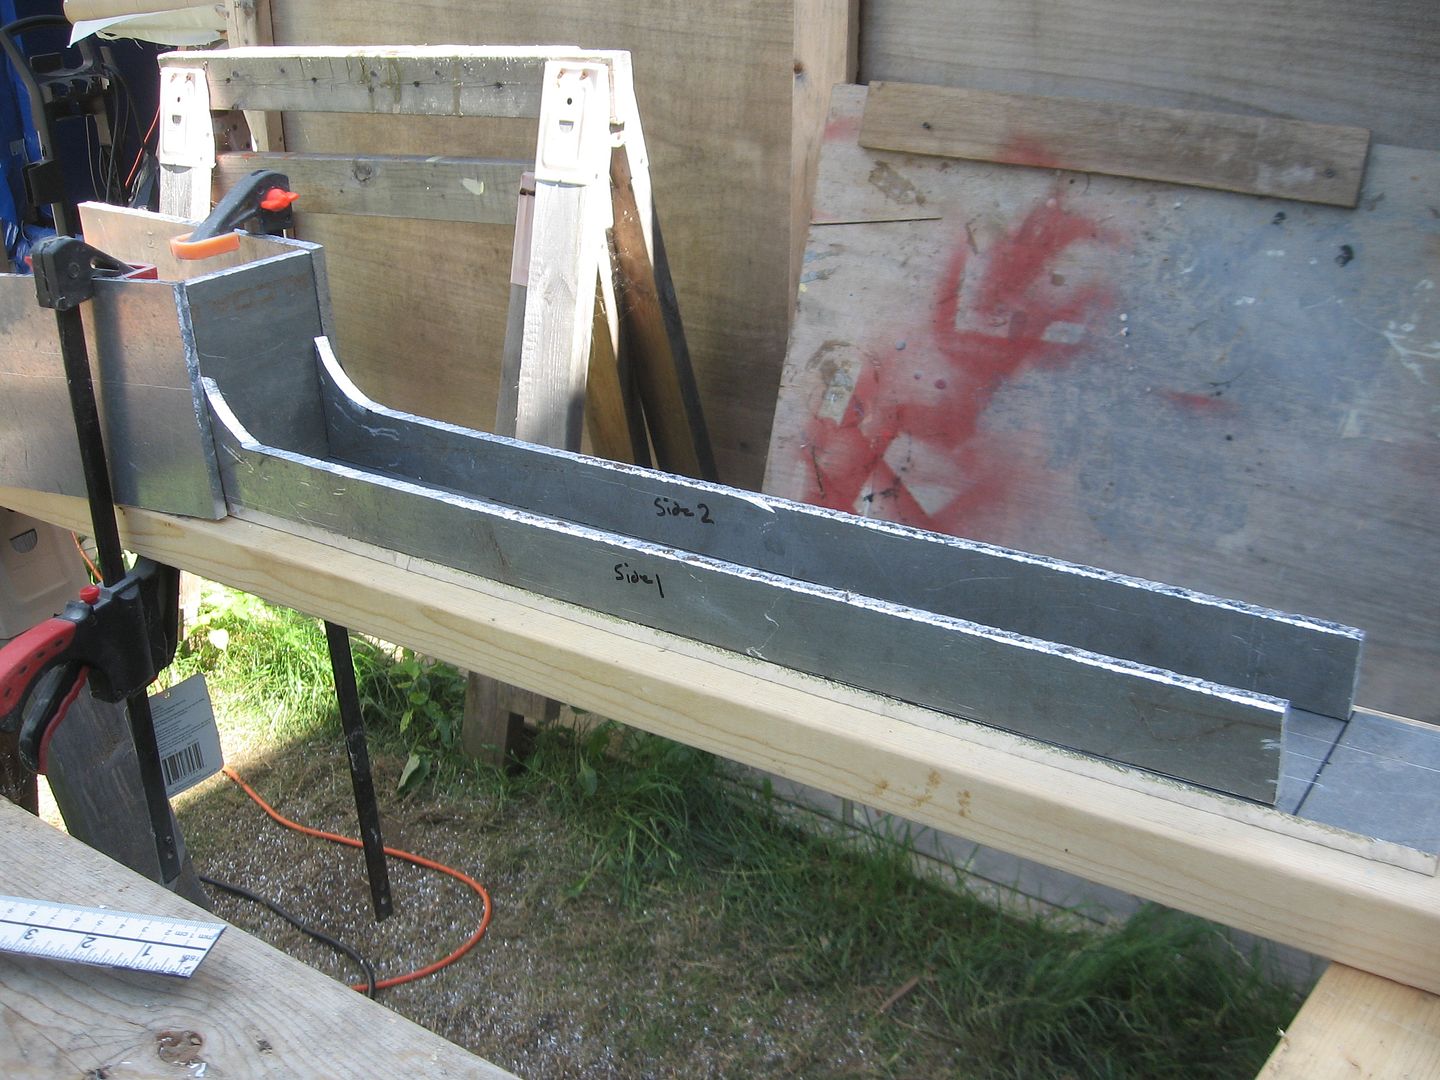
And from the other side.
The skeg
So the plan is I'll get it all cleaned up and the edges to be welded beveled. I'll tack it together with my new handy dandy high voltage metal fusing machine then take it to the metal shop to have it properly welded together.
In case you missed it here's a video clip from yesterday when the Project Manager takes a wander though the work site to check up on things.
That's it for now. Hopefully things will cool down a bit and we can get back to fiberglassing the inside of the big tub!
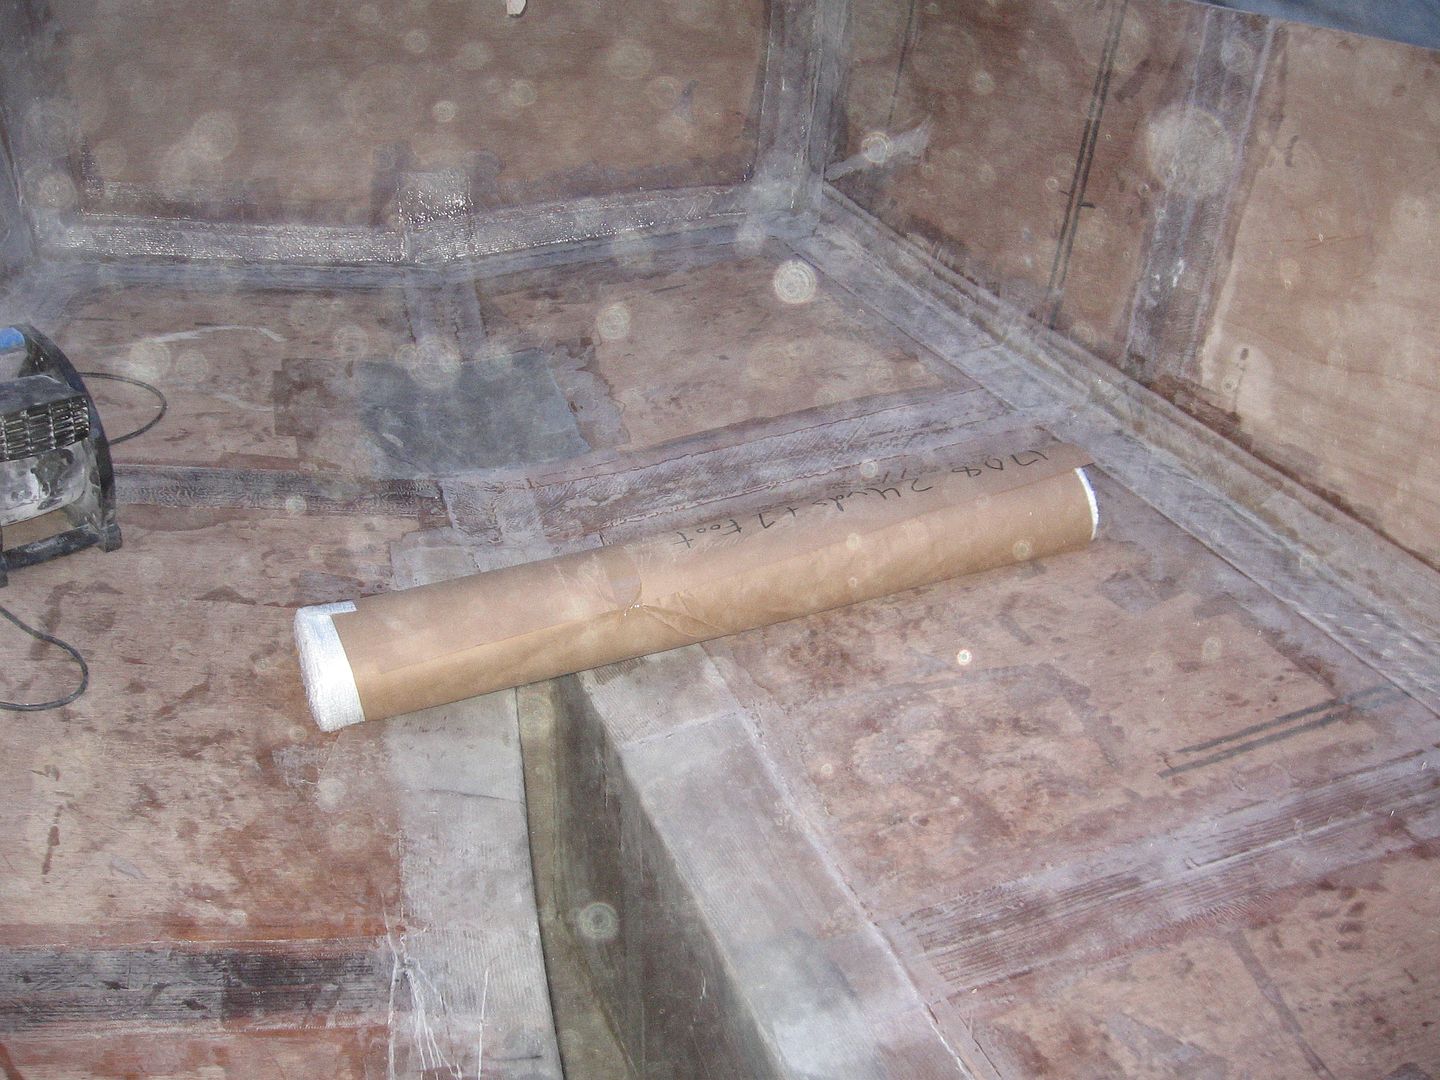
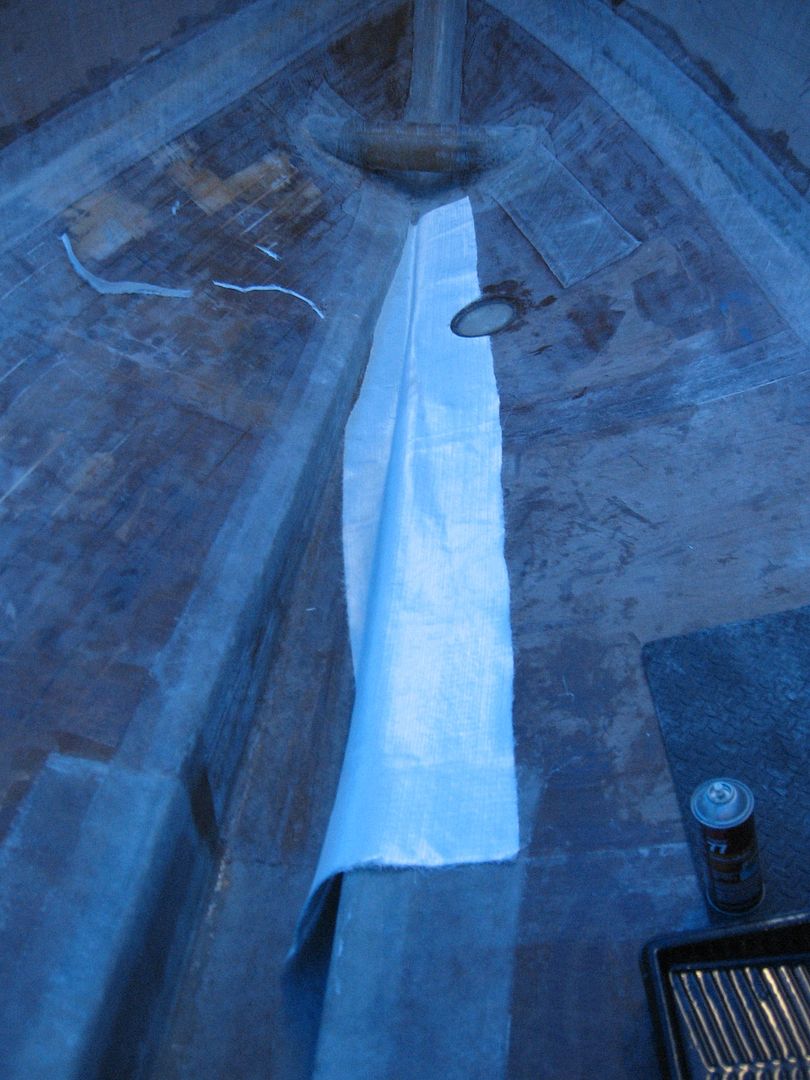
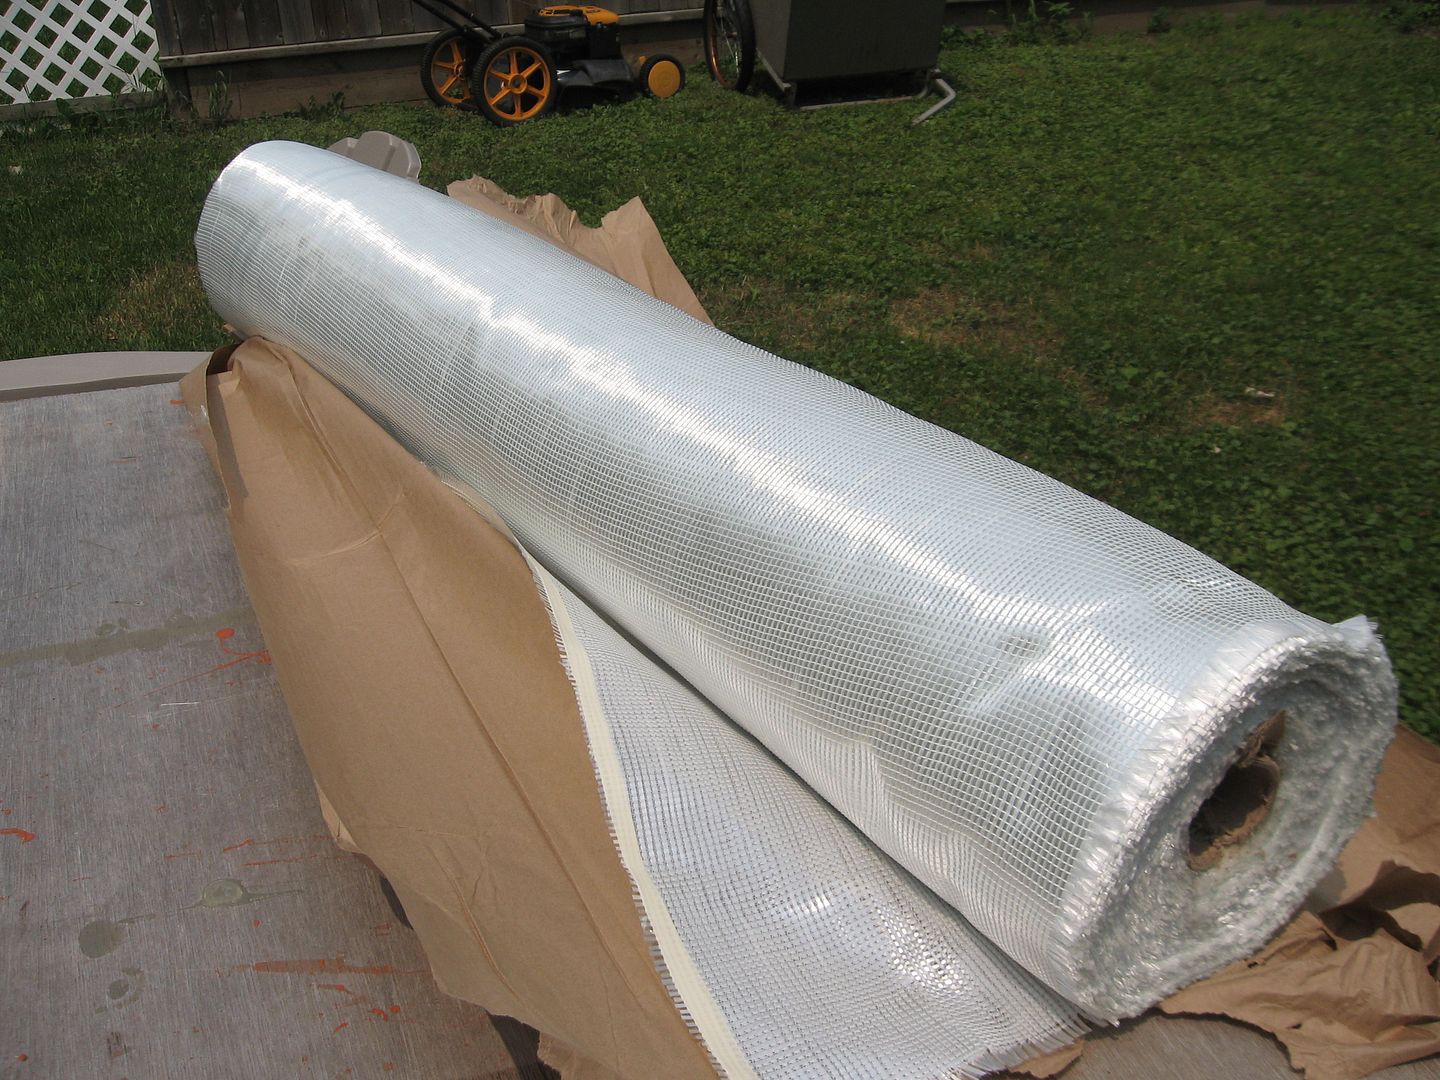
Made a run to the UPS store on Friday and picked up the fiberglass I ordered.
Unwrapping the glass so I can get this party started!
Had it unwrapped and in the boat within minutes! :-)
Not exactly light at 56 lbs per role. I have two roles.
One roll of this glass should do the bottom and the other the sides. This will get covered with another layer of 12 oz 0/90 fabric. Still debating if I need a finishing layer of 9 oz plain weave or not. I have plenty of extra glass in pieces I can use inbetween the frames later if I like.
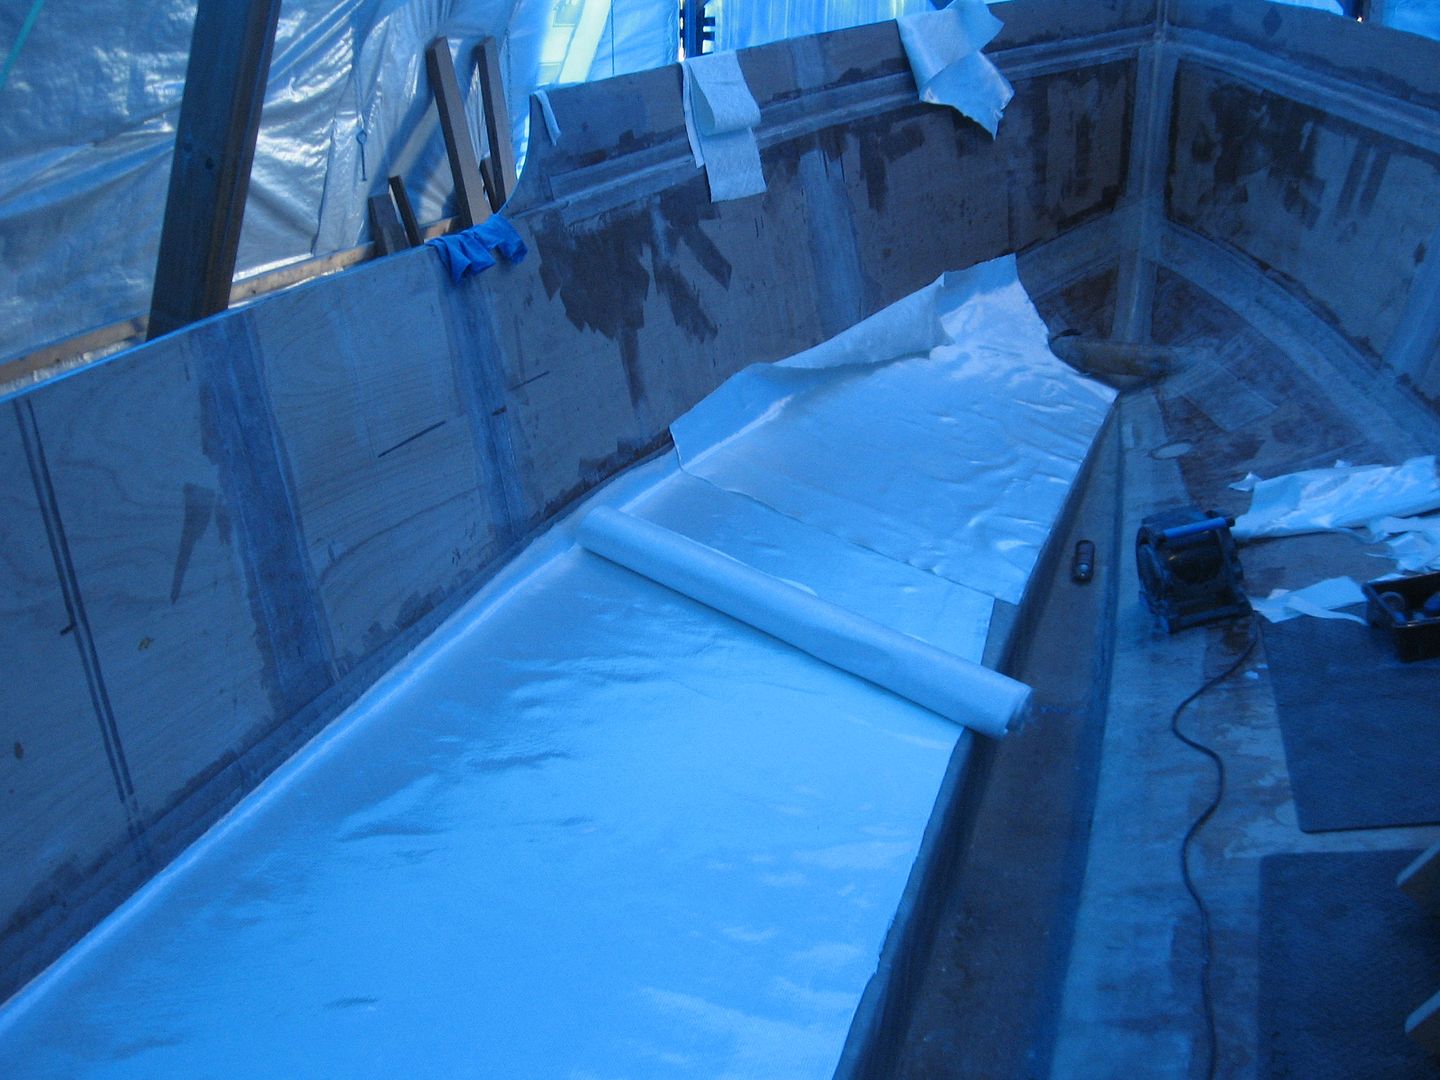
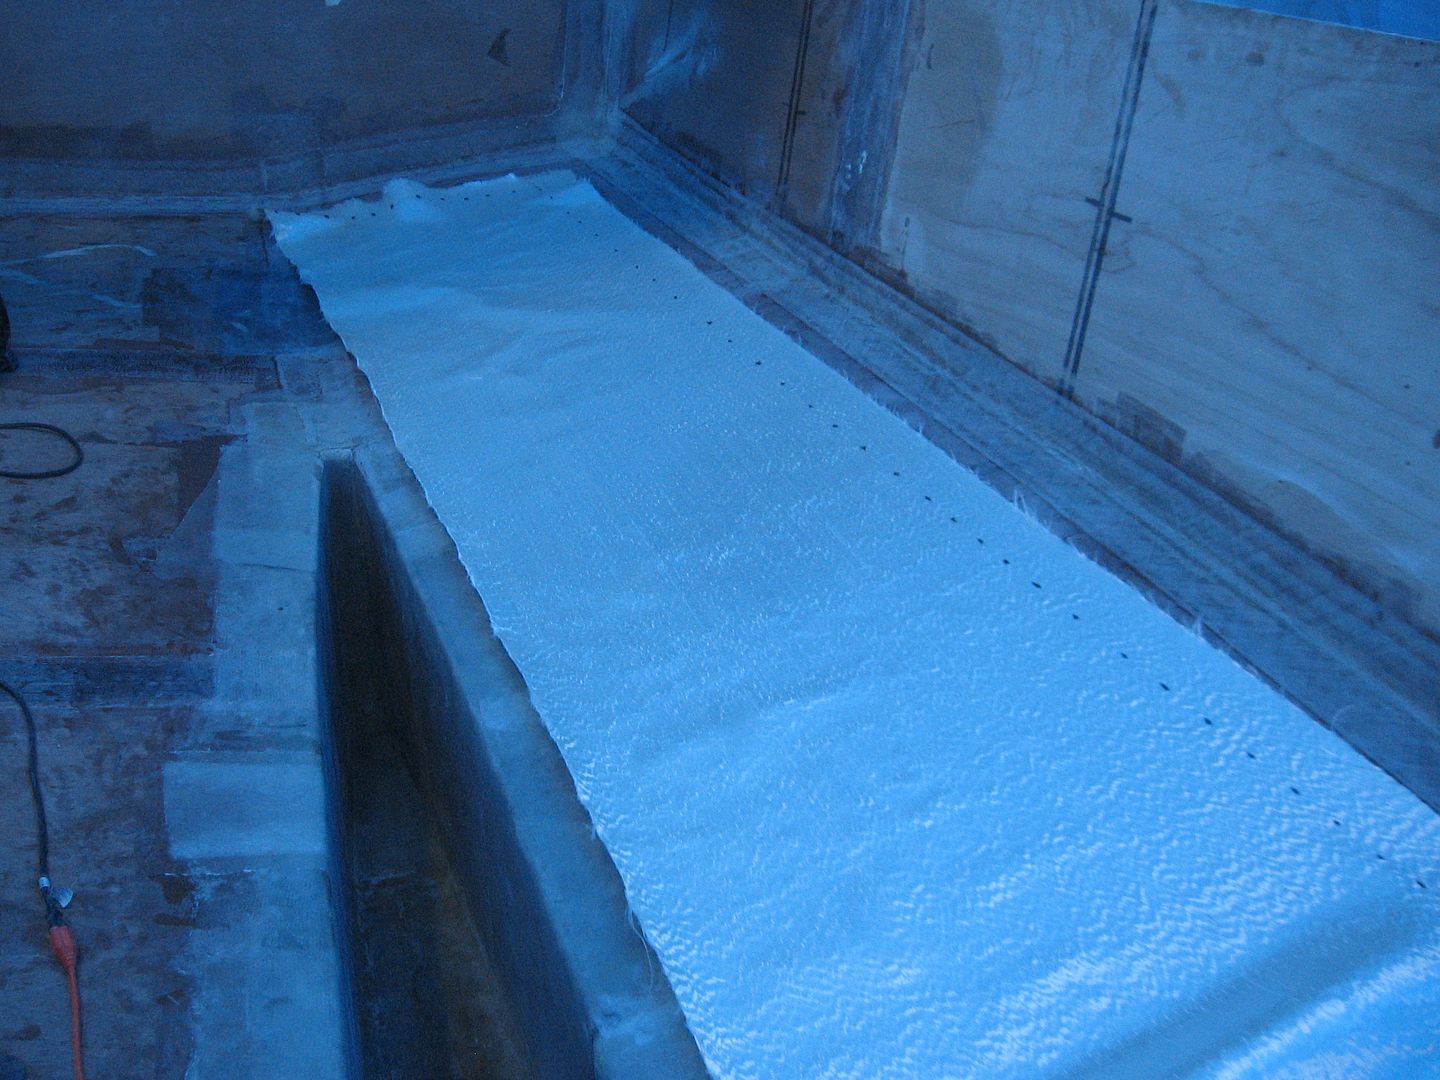
Looking aft, 20' long & 50" wide
Looking forward
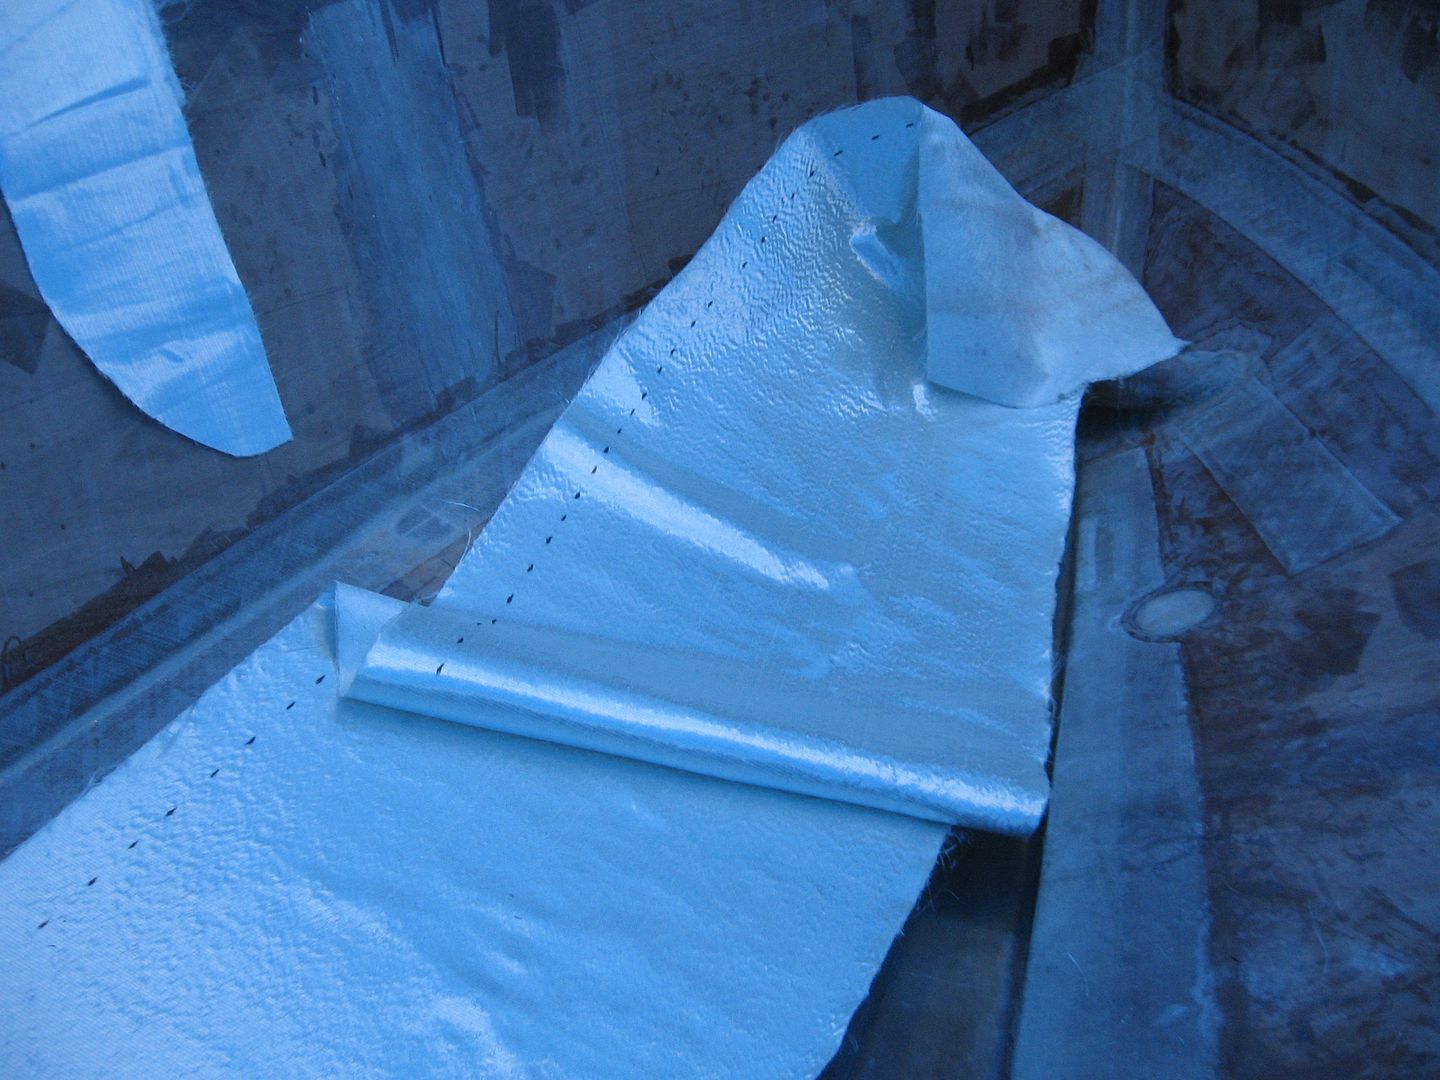
There will be three sections with generous overlaps. I tried to do it in one piece but can't handle the big fabrics inside the boat especially in the bow where everything wants to end up in the bilge, including me. The bow thruster tube was problematic so I split the fabric at that point. Extremely warm now with the humidex so I'll have to wait a bit till the temperatures moderate before epoxying this panel.
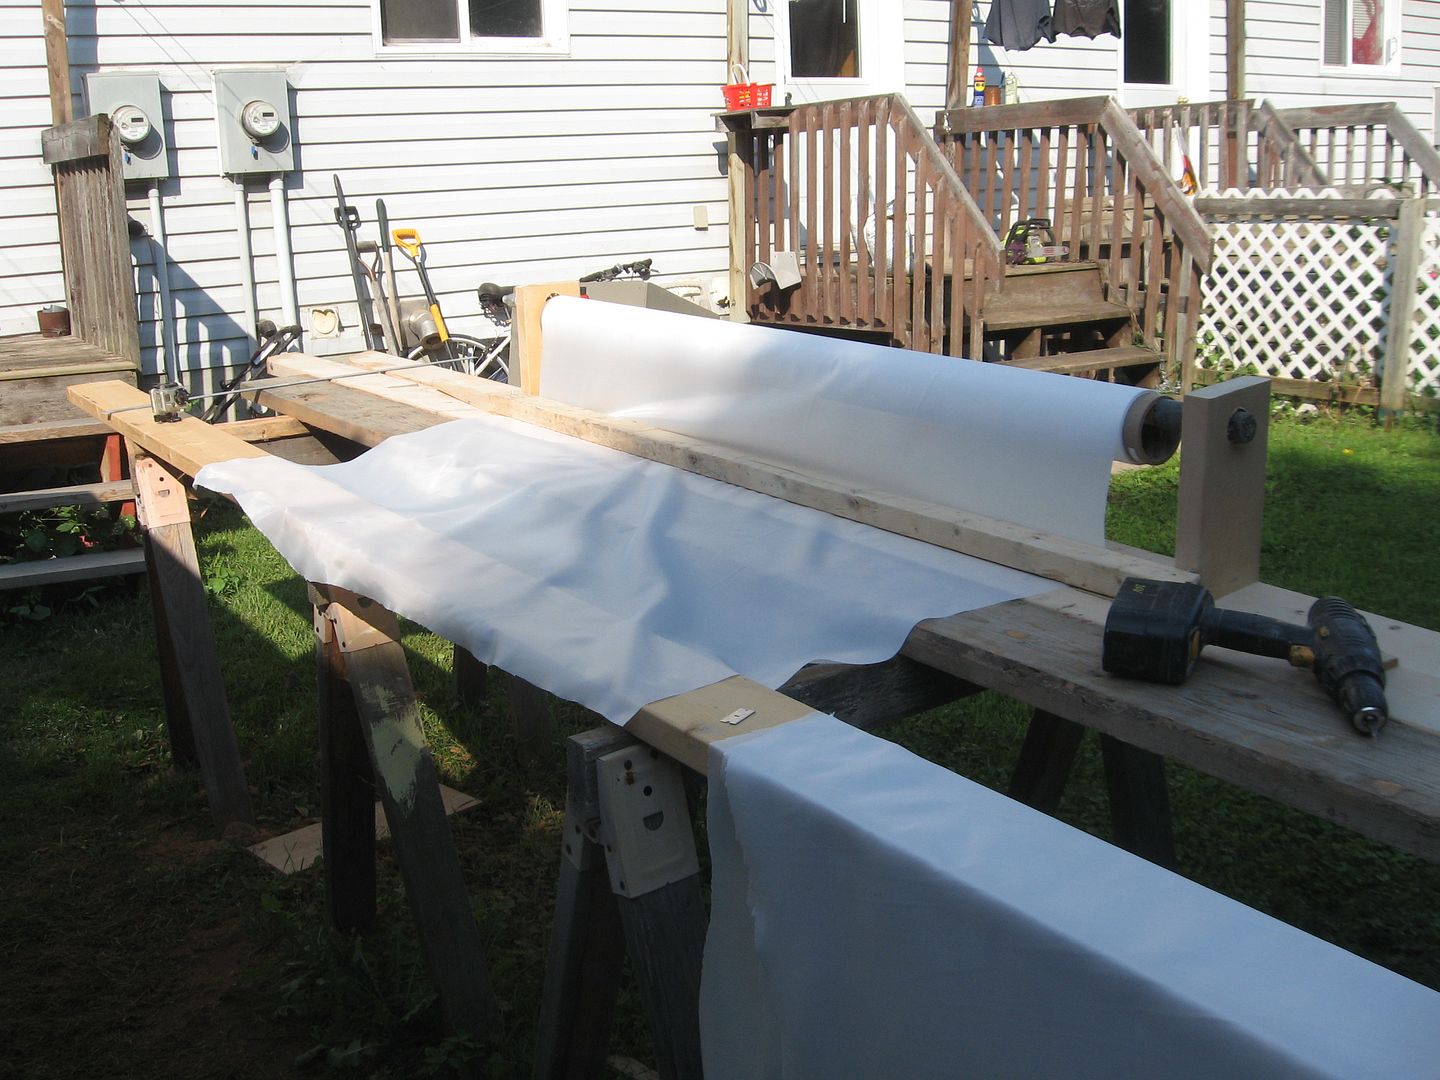
Peel Ply Rig
I build myself a little rig to spool out the peel ply so I can cut it to length. It's a real PITA to cut with scissors. Razor blades are much more efficient. I'll be working in smaller sections like I did with the box keel port side so I cut the peel ply to about 28" wide (as far as I can reach).
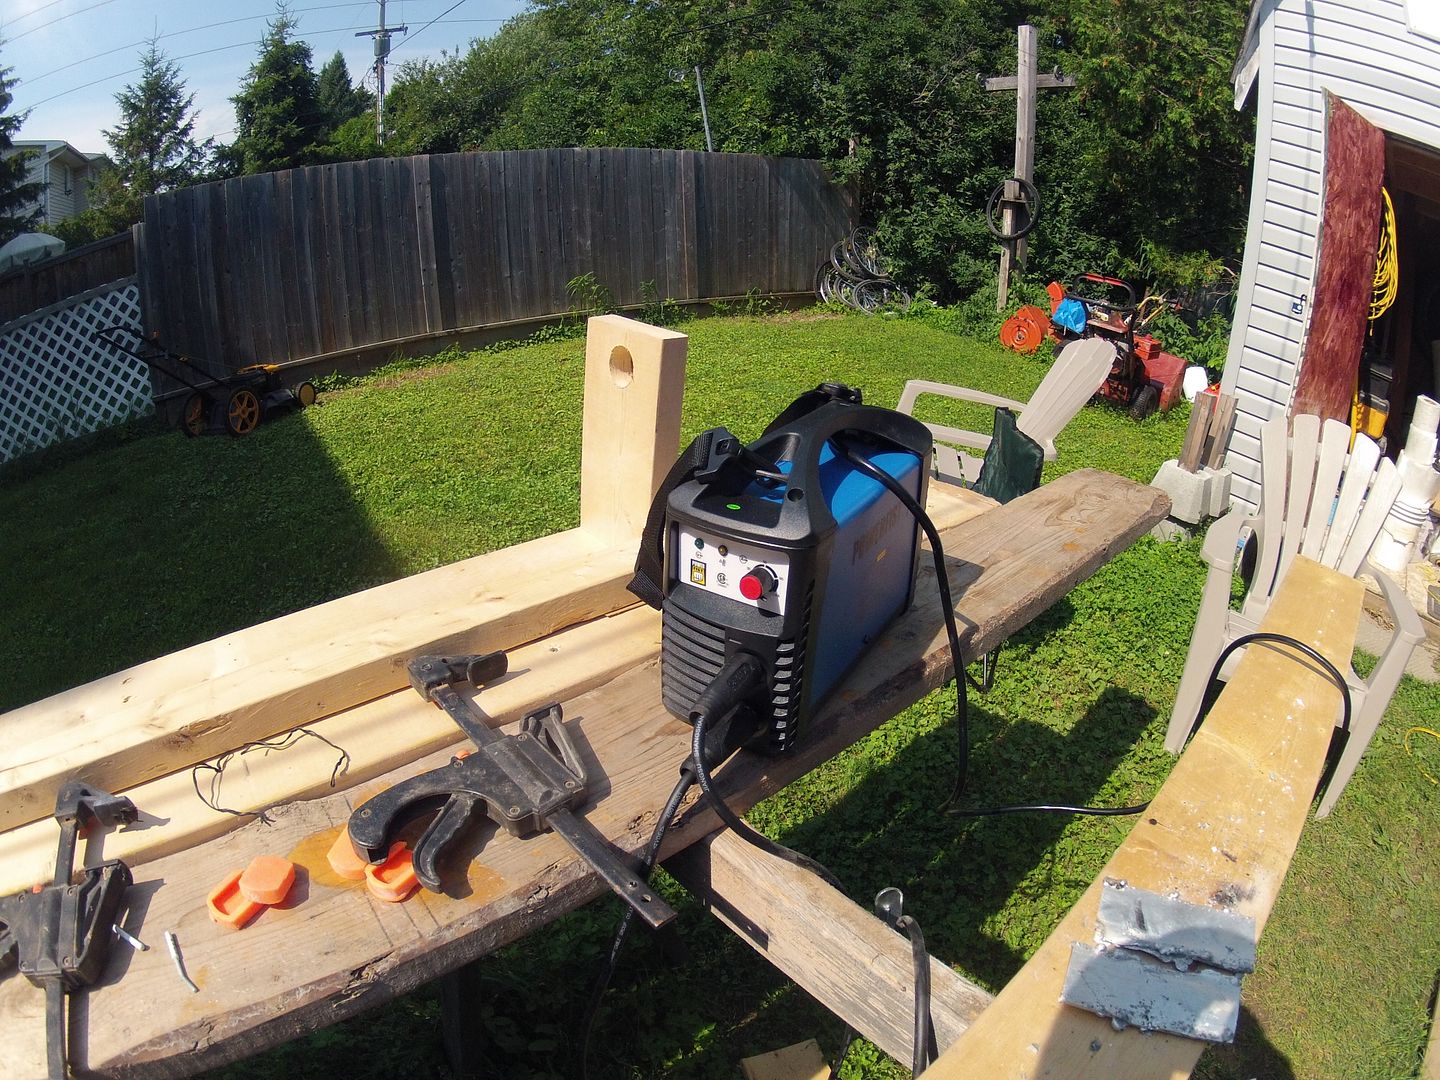
Power Fist 80 Amp DC stick Welder
These portable units came on sale at Princess Auto for $150. I've had MIG welder before and that was Ok for most stuff. I bought a pkg of aluminum electrodes to tinker with. I'd love to be able to afford a 'Real' welder some day but until then I can practice with this one.
Had to call it quits early this morning. By 10:00 it was over 90 F in the shed and that doesn't count the humidity. Humidex says it'll feel like 99F this afternoon! :-(
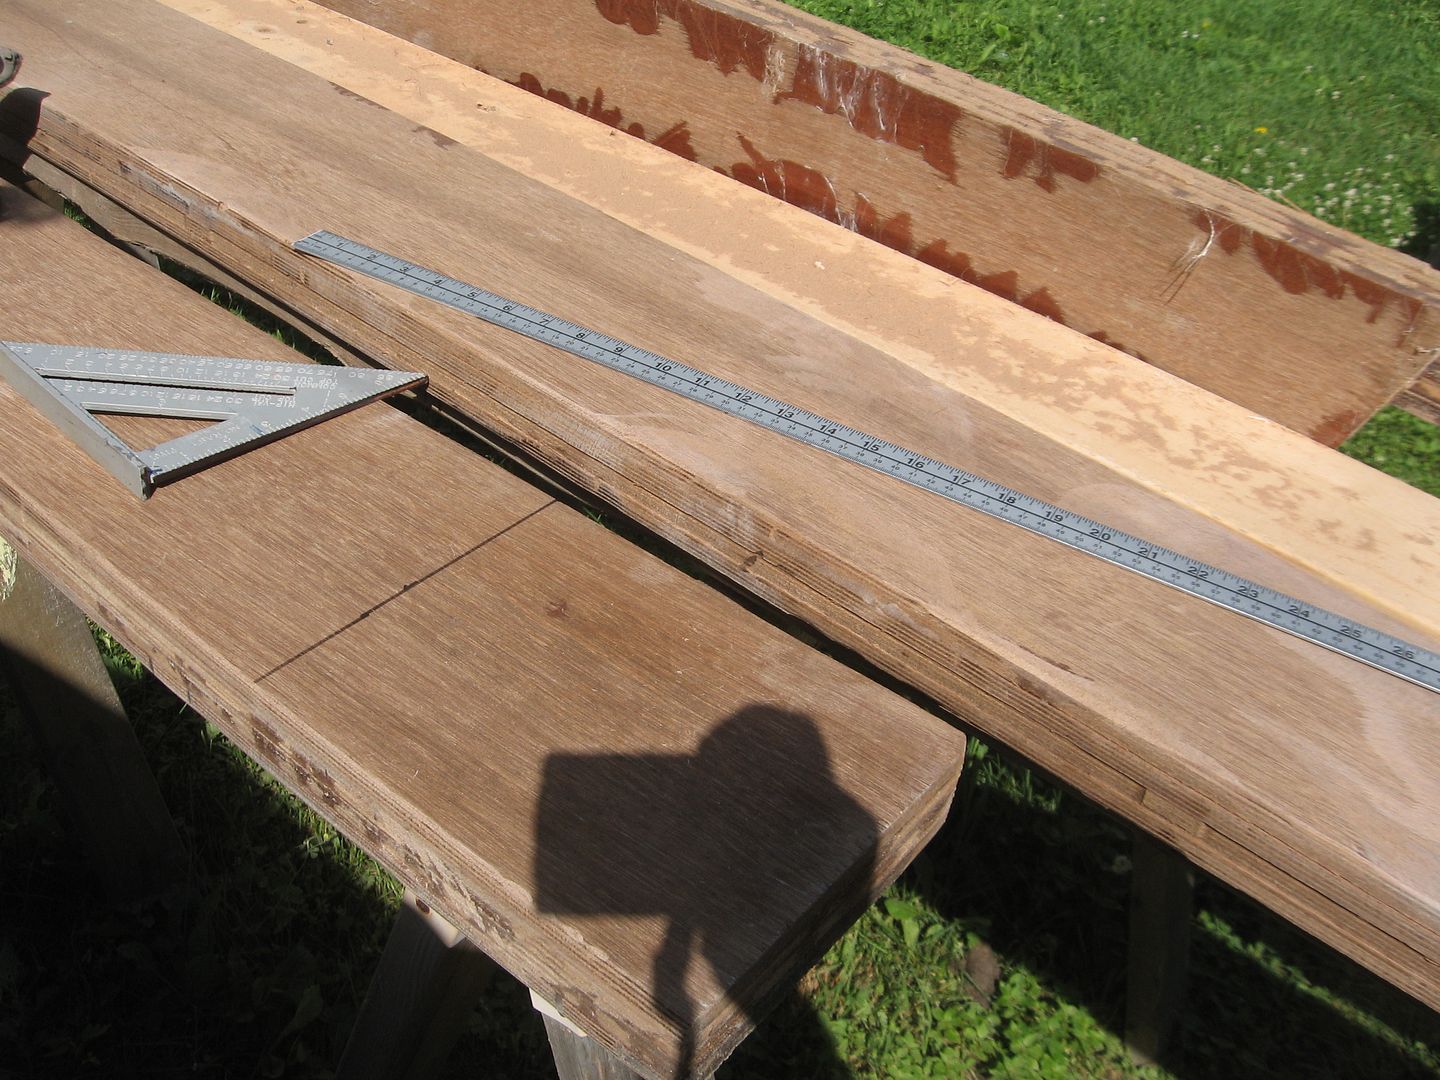
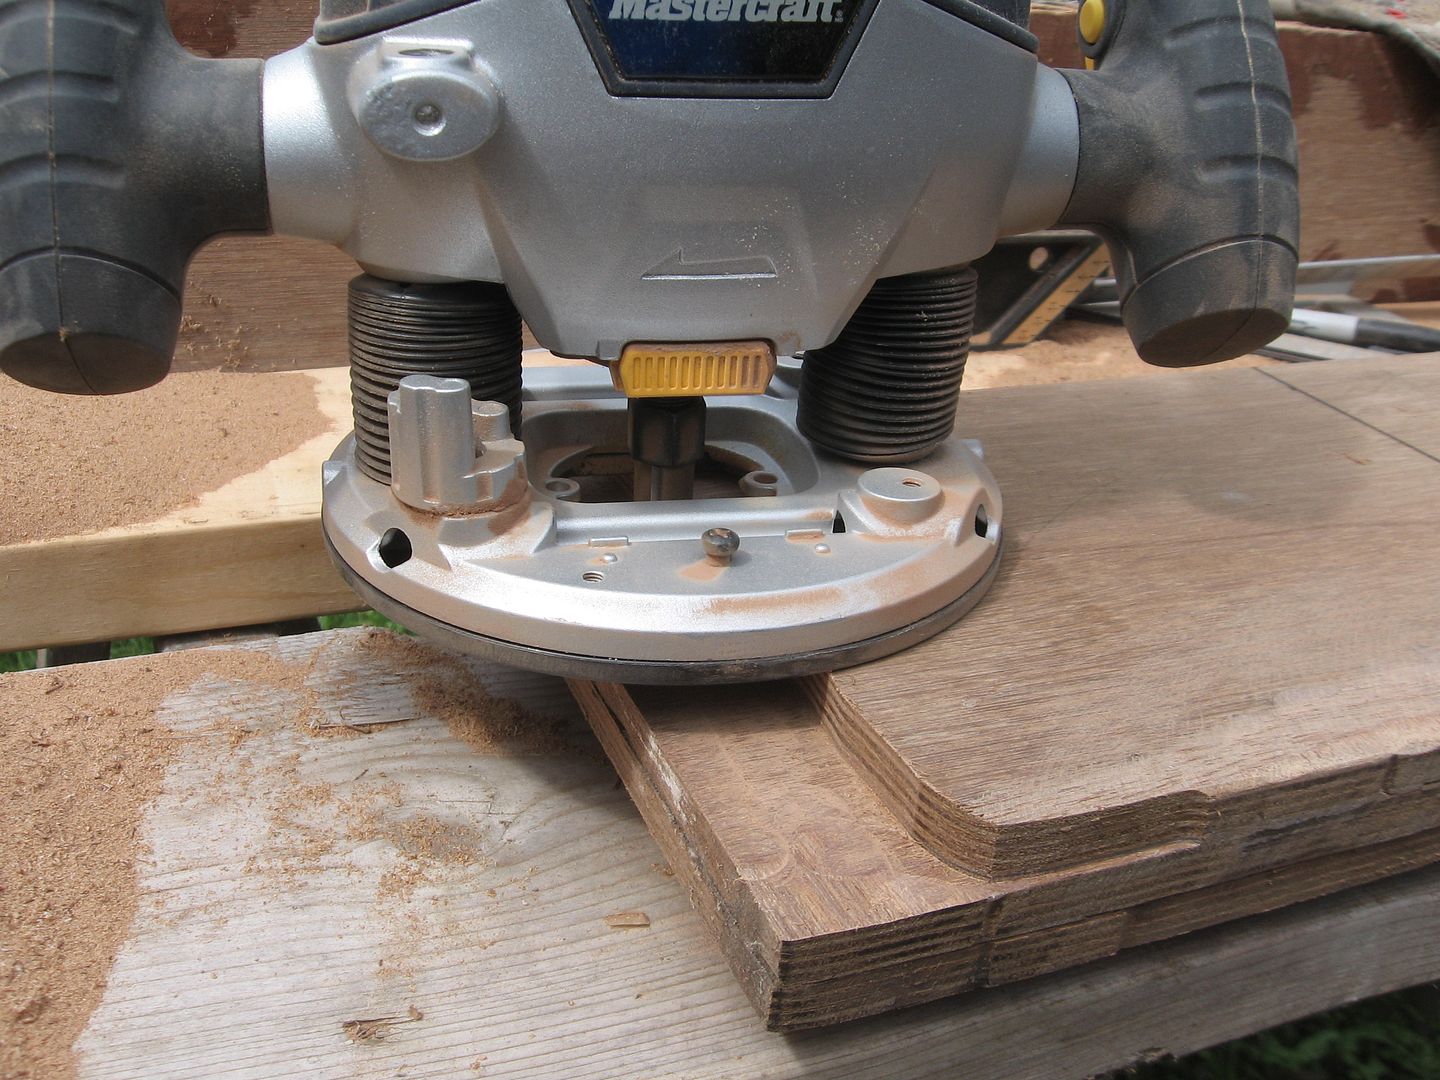
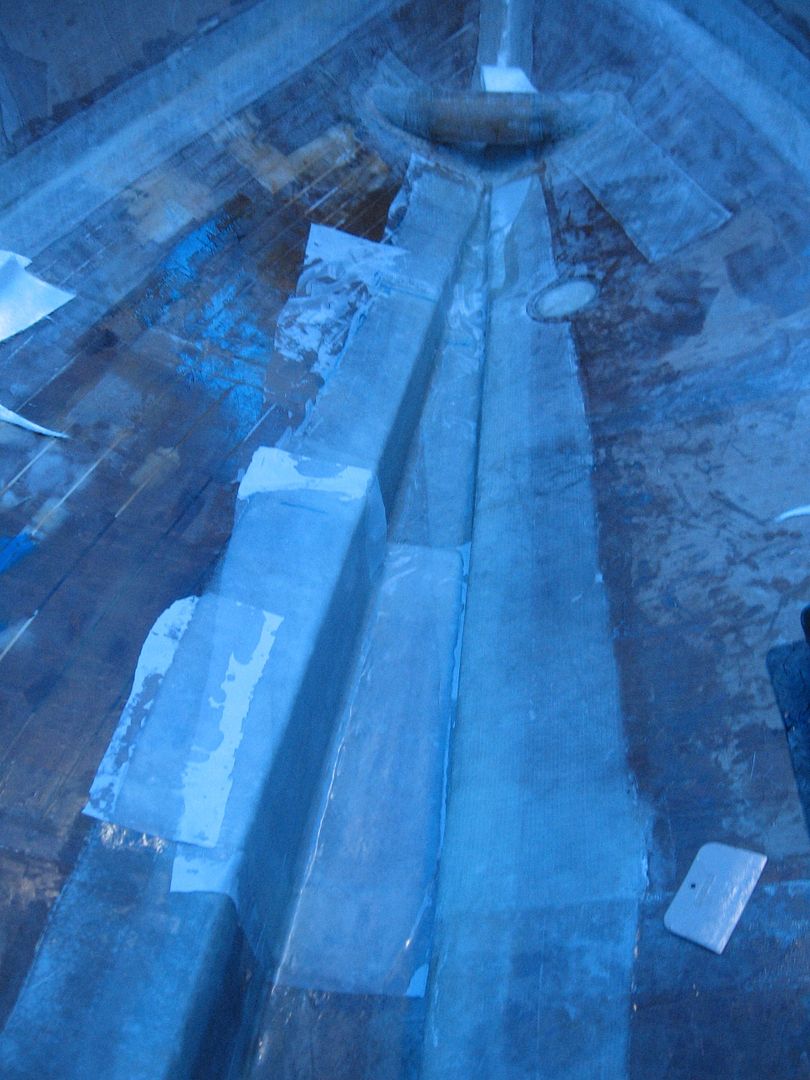
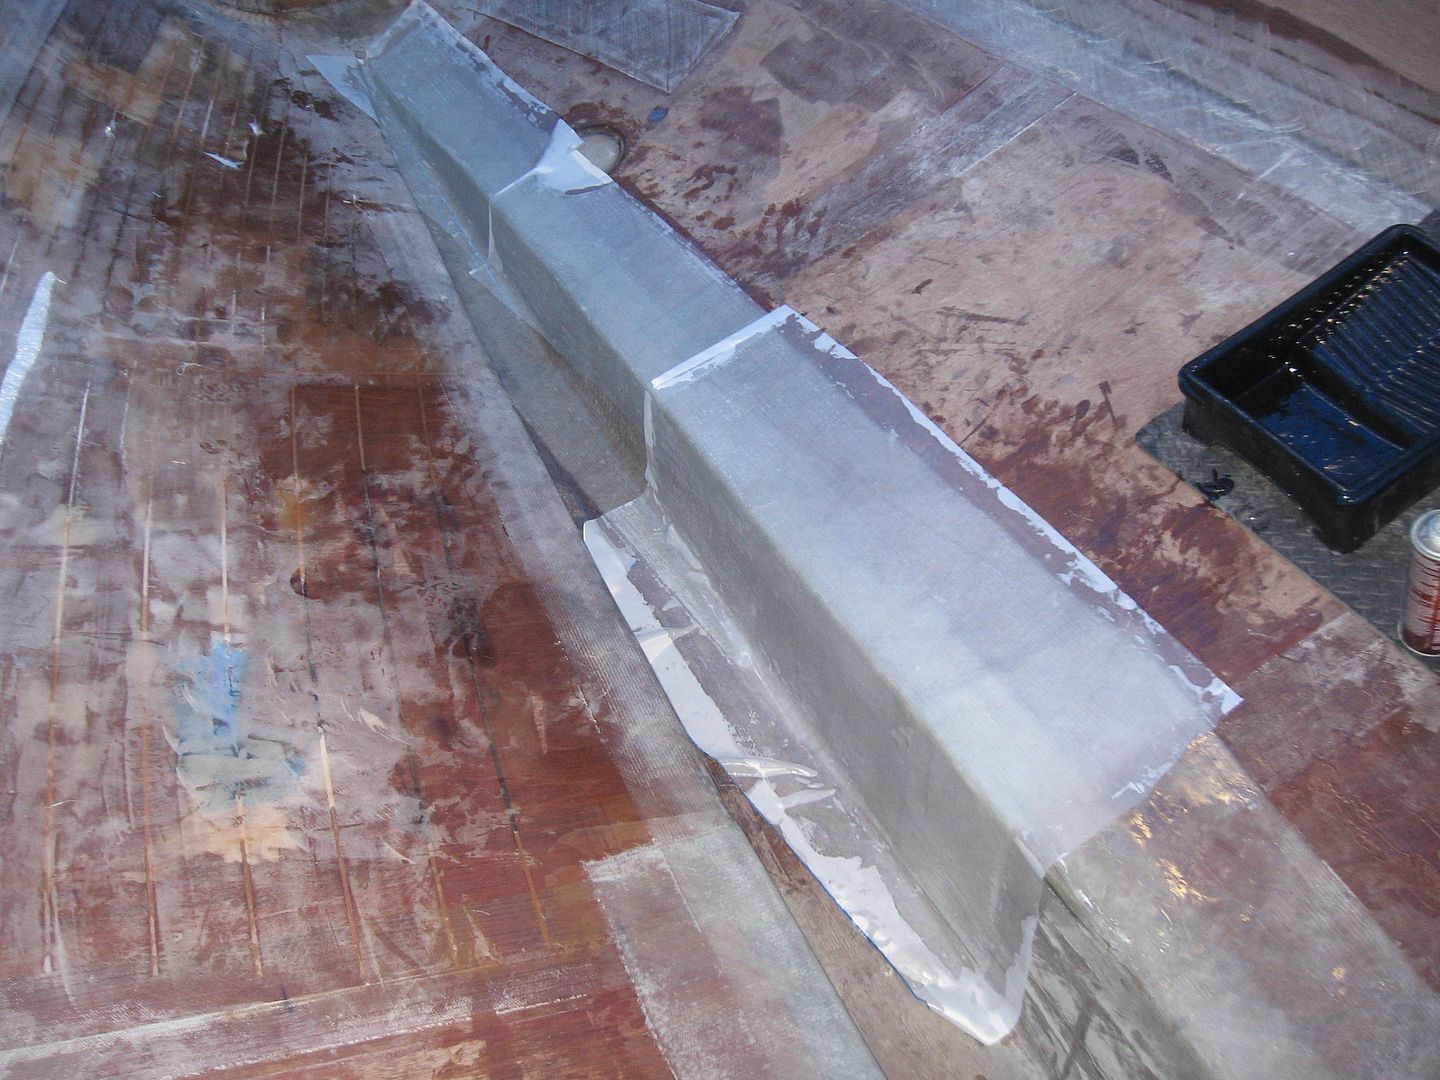
So left off yesterday working on the stringers. Here's what I have in mind for the splice/joint.
Main joint in stringers routed out for butt block
You can see above I've routed out a good bit of material (10") for the overlapping butt block that'll get inset into the joint.
The two sections of stringer to be joined together
Because this appears to be the main splice just aft of the engine beds & where the sub bulkhead will go for the Python Drive I made the splice extra large.
Test fitting a piece of 1/2" ply to illustrate the joint
And again from the side.
Side view of the joint
In the above pic the bottom layer of wood is just a 2X8 the stringers are resting on. The void would get a butt splice same as above. I hope that illustrates it well enough. It'll all get glued & glassed once in the boat.
Port side is done. I'll do the starboard side on the weekend then tuck them away. Fiberglass supplies will be in tomorrow so I can get back to that wonderful job!
Stringer are longitudinal structural members that will significantly strengthen the boat. The stringers in the TW28 are made up of 4 layers of 1/2" marine plywood glued together. In all they're about 20 some feet long. In our boat with the modifications they'll be almost 23 feet long.
When we bought the kit we knew it was likely one of the first ever cut on a CnC machine and as such would have some errors. All the pieces for the stringers were cut at the exact same length with no overlaps to splice them all together into one piece so we ended up with 4 per stringer.
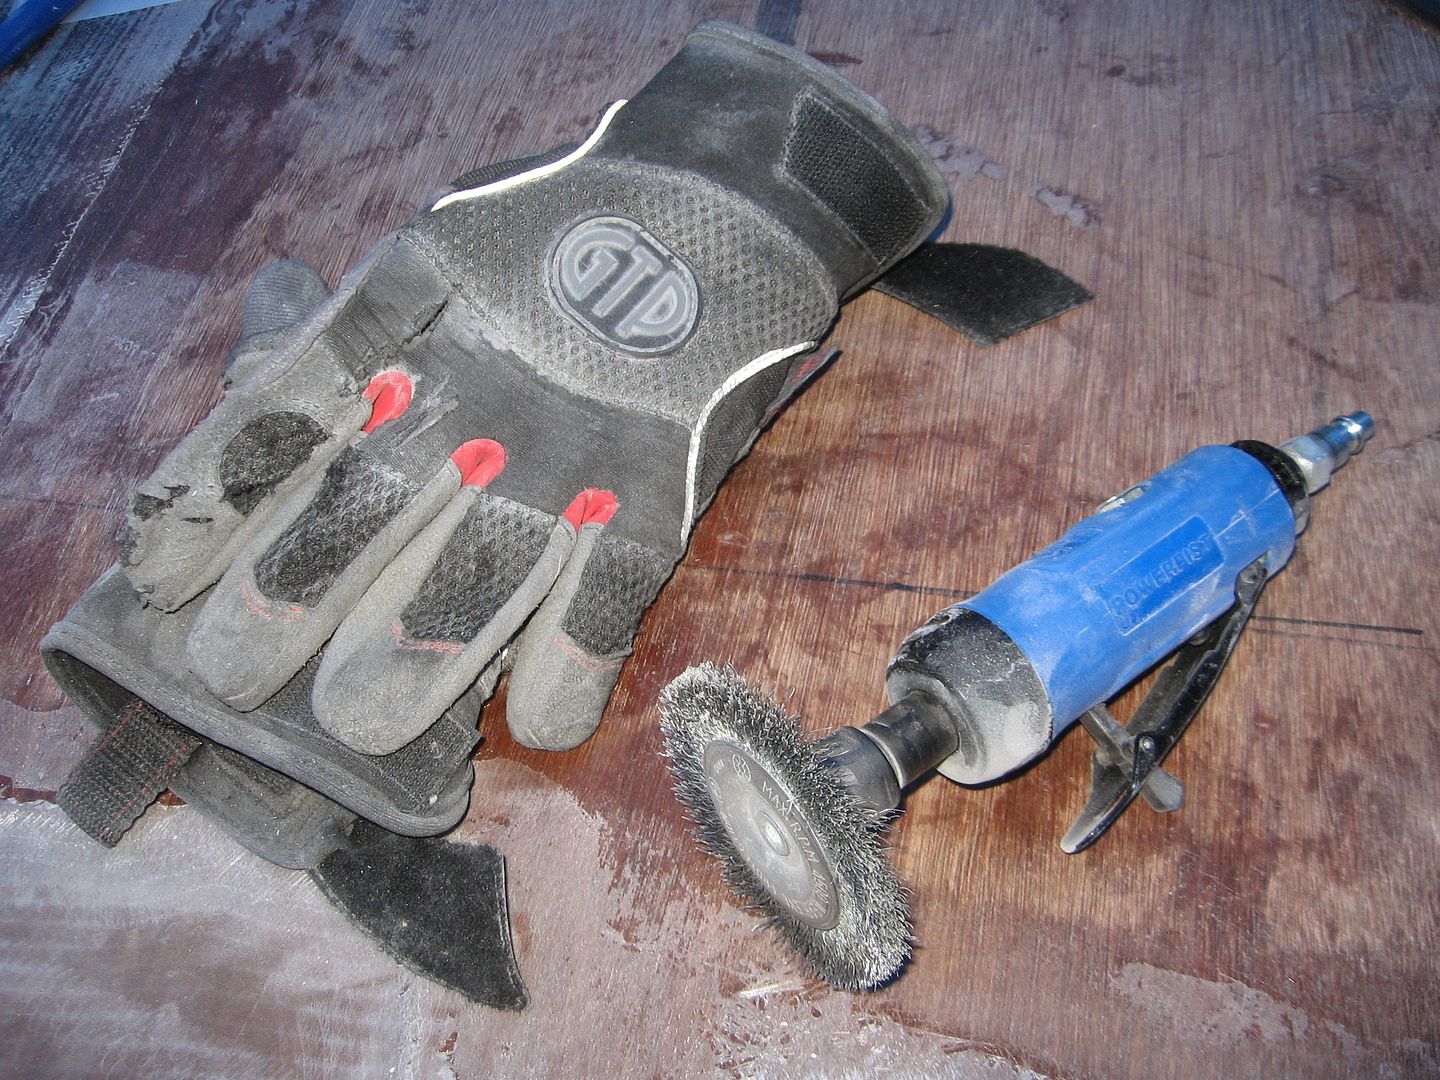
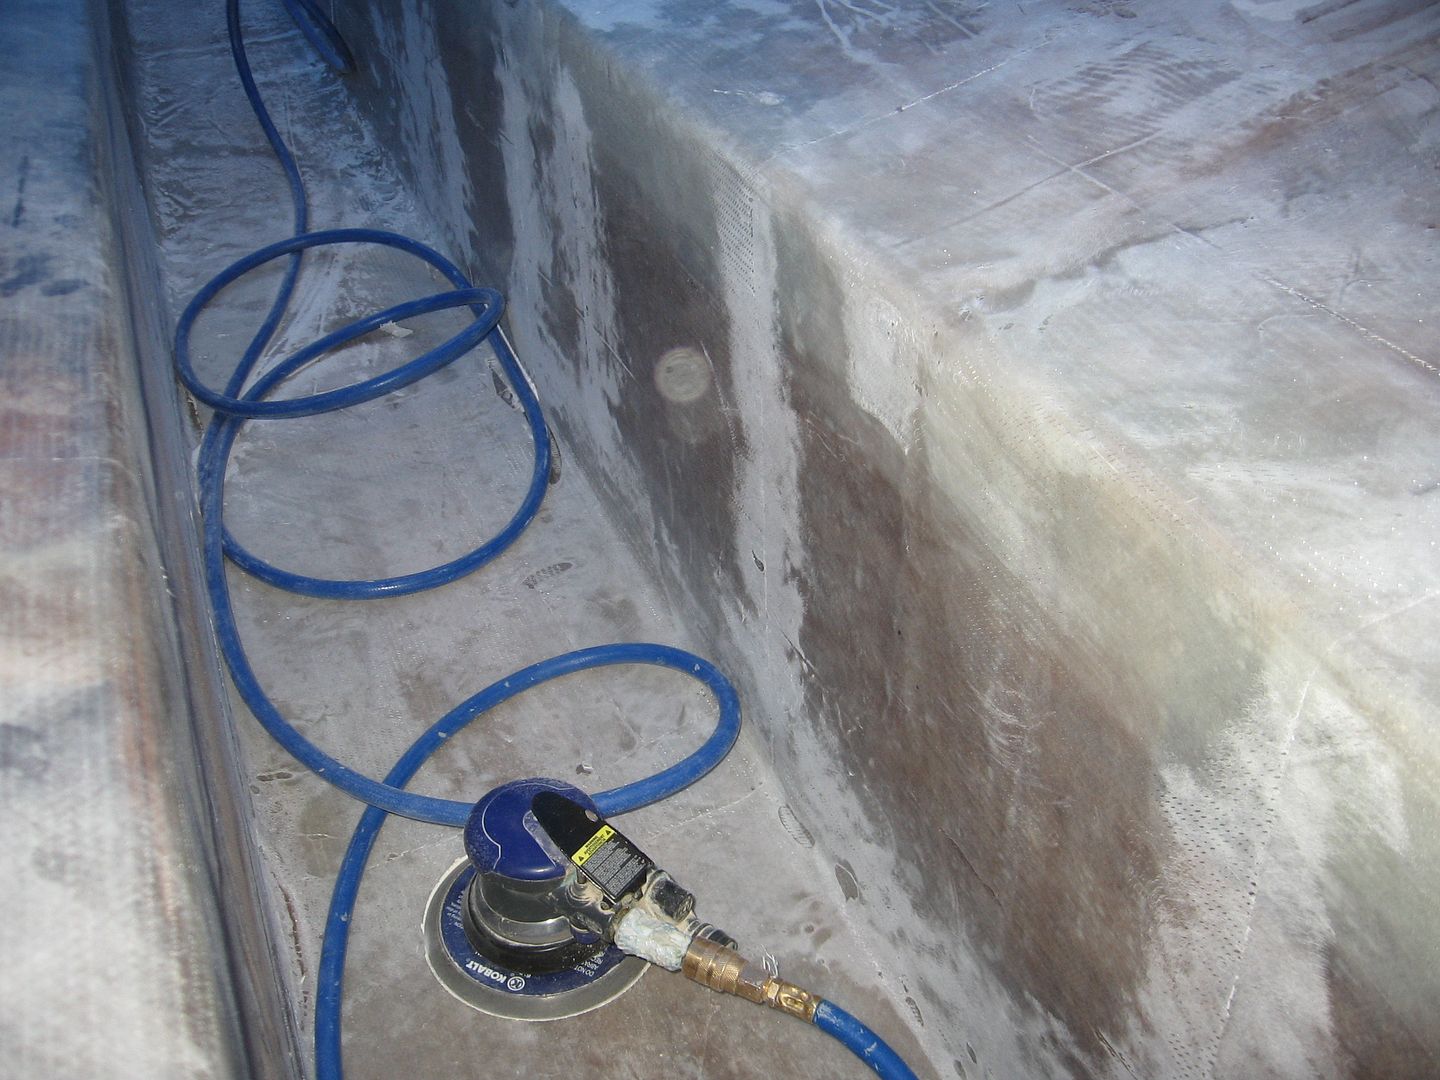
First job was to dress the stringers up a bit, get rid of the nubbies & slivers. This was done with the 7" High Speed Spinning Wheel of Death.
The big grinder makes short work of it! :-) The downside is there's always the chance you might kill yourself or someone nearby! *Zoinks!*
I figured the quickest way to fit all these parts together would be with a splice. To do that I have to remove about 10" of 1/2" plywood from each end and each side of each adjoining stringer part.
To do that in the quickest way possible I decided to use the router. I did consider other methods, sawing some kerfs & chiseling them out etc. but the router seemed the method with the least amount of effort.
I took some more video and will post that tomorrow. Had to call it quits due to rain.
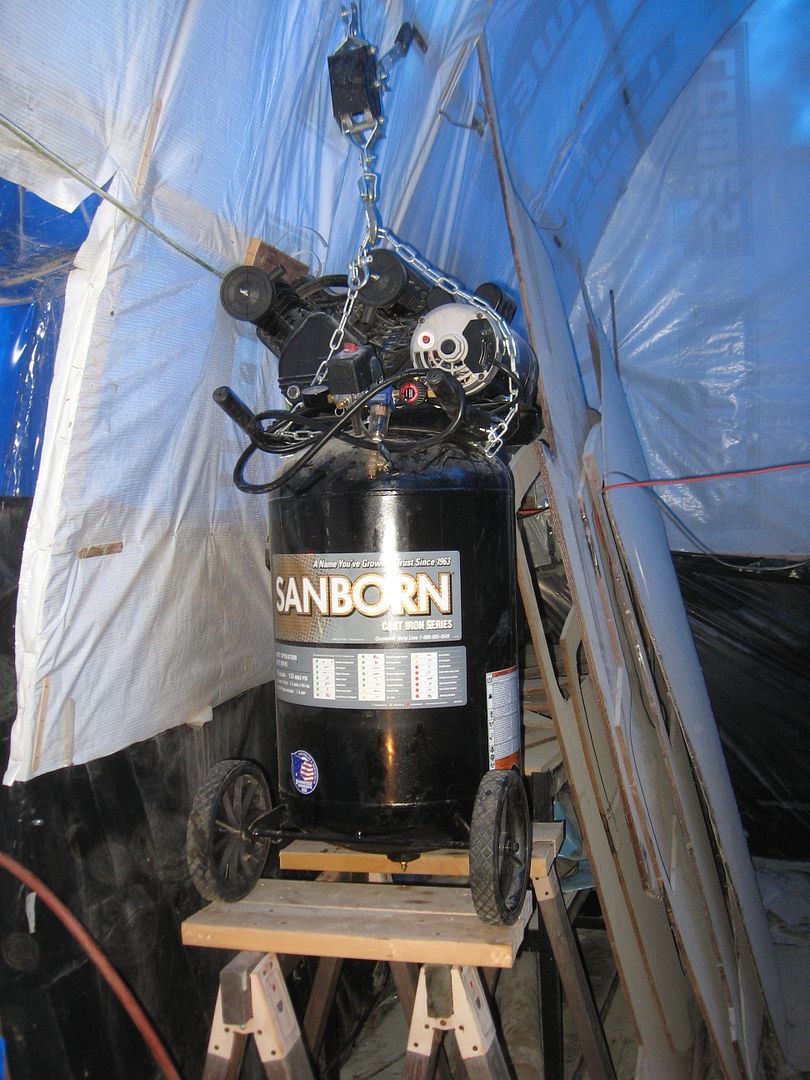
Relocated the air compressor from the garden shed to the boat shed.
Fewer hoses & connections should mean better air flow. Well that's the theory anyways. I needed the room in the shed and having the air compressor up and away behind the door gives me the room and I don't have to drag it out of the shed to drain it on occasion.
That's it. Just waiting for fiberglass to be shipped.
Standby..
PS. Bought an inverter welder & some aluminum rods. Going looking for scraps of aluminum to practice on.
Way back when I thought I was smart I figured I would cut out the long sheets of glass for the bottom panels. This stuff is heavy. 33 oz/yd. I used it on the keel & outside bottom panels and thought it would be easy to measure & trim the long sheet for the inside at the same time.
Anyhow I roll it out today and WTF? Something ain't right!
Looking the other way. And yes I did flip it end for end and it's still not right.
No way I couldn't have been that far off when I trimmed this up then I found this........ *Sigh*
Doh! I had trimmed this piece against the port side panel and not the bottom panel! What a frikkin' idiot! What the hell was I thinking? I wasn't using this heavy stuff on the sides at all.
So here we are. I don't have enough of this stuff to do both bottom panels. Think I'll just roll it up and stick it away somewhere. Means I have to order, which I just did, 48 yds of 1708 to replace it. I already have the 12 oz I need. It's only a $450 mistake. *Sigh*
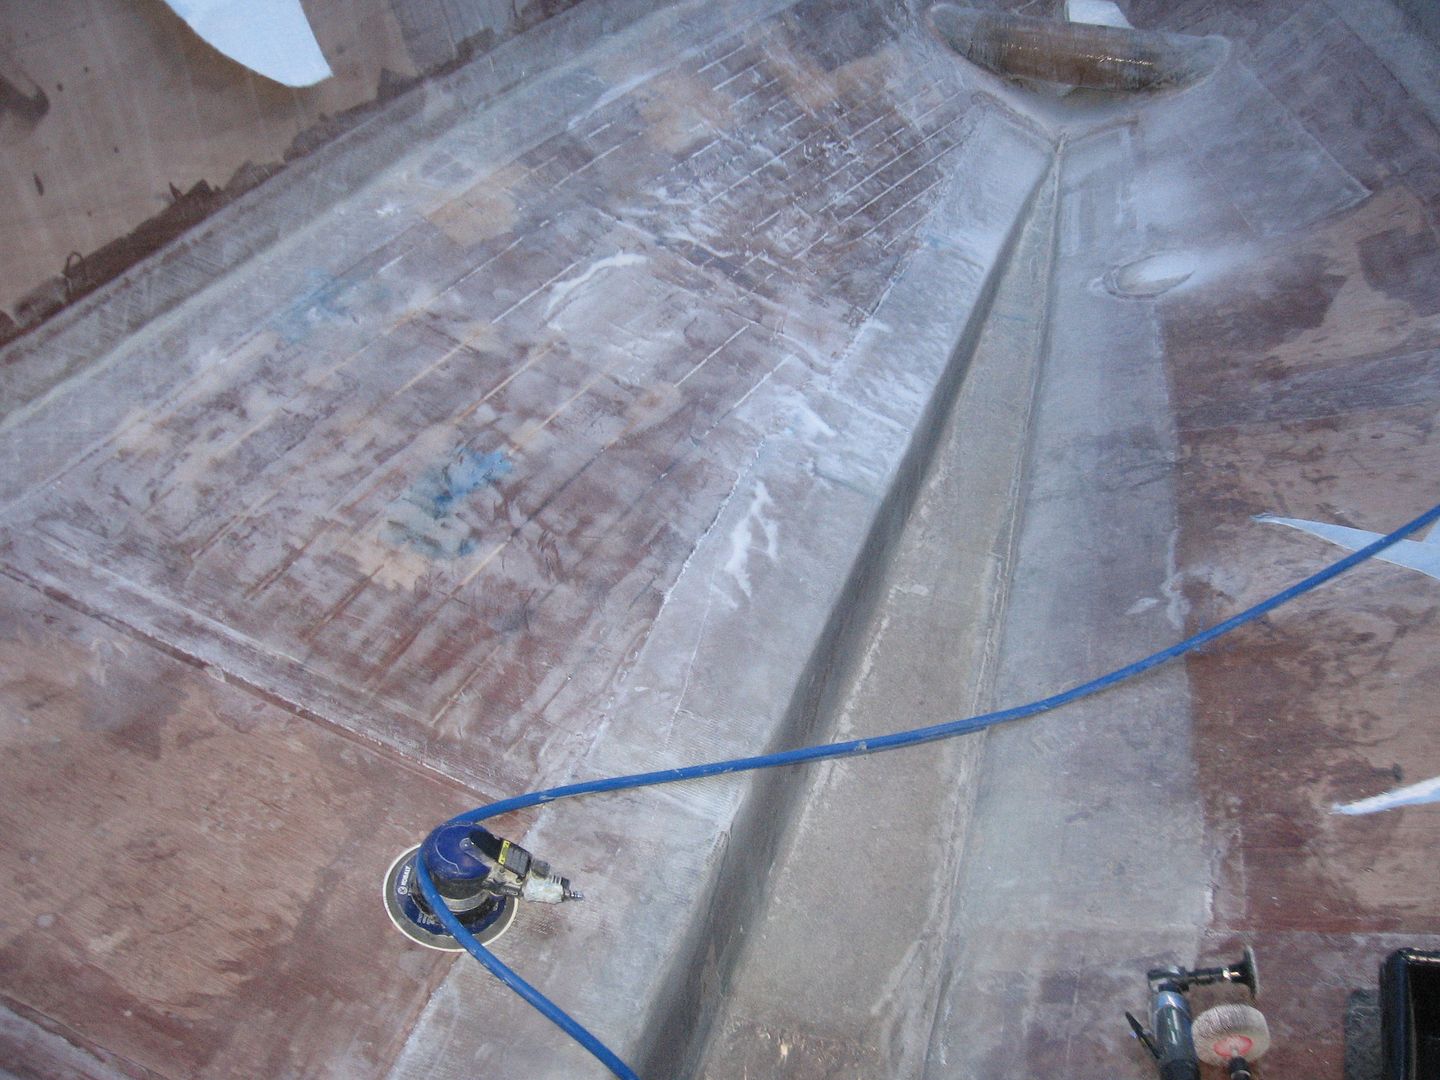
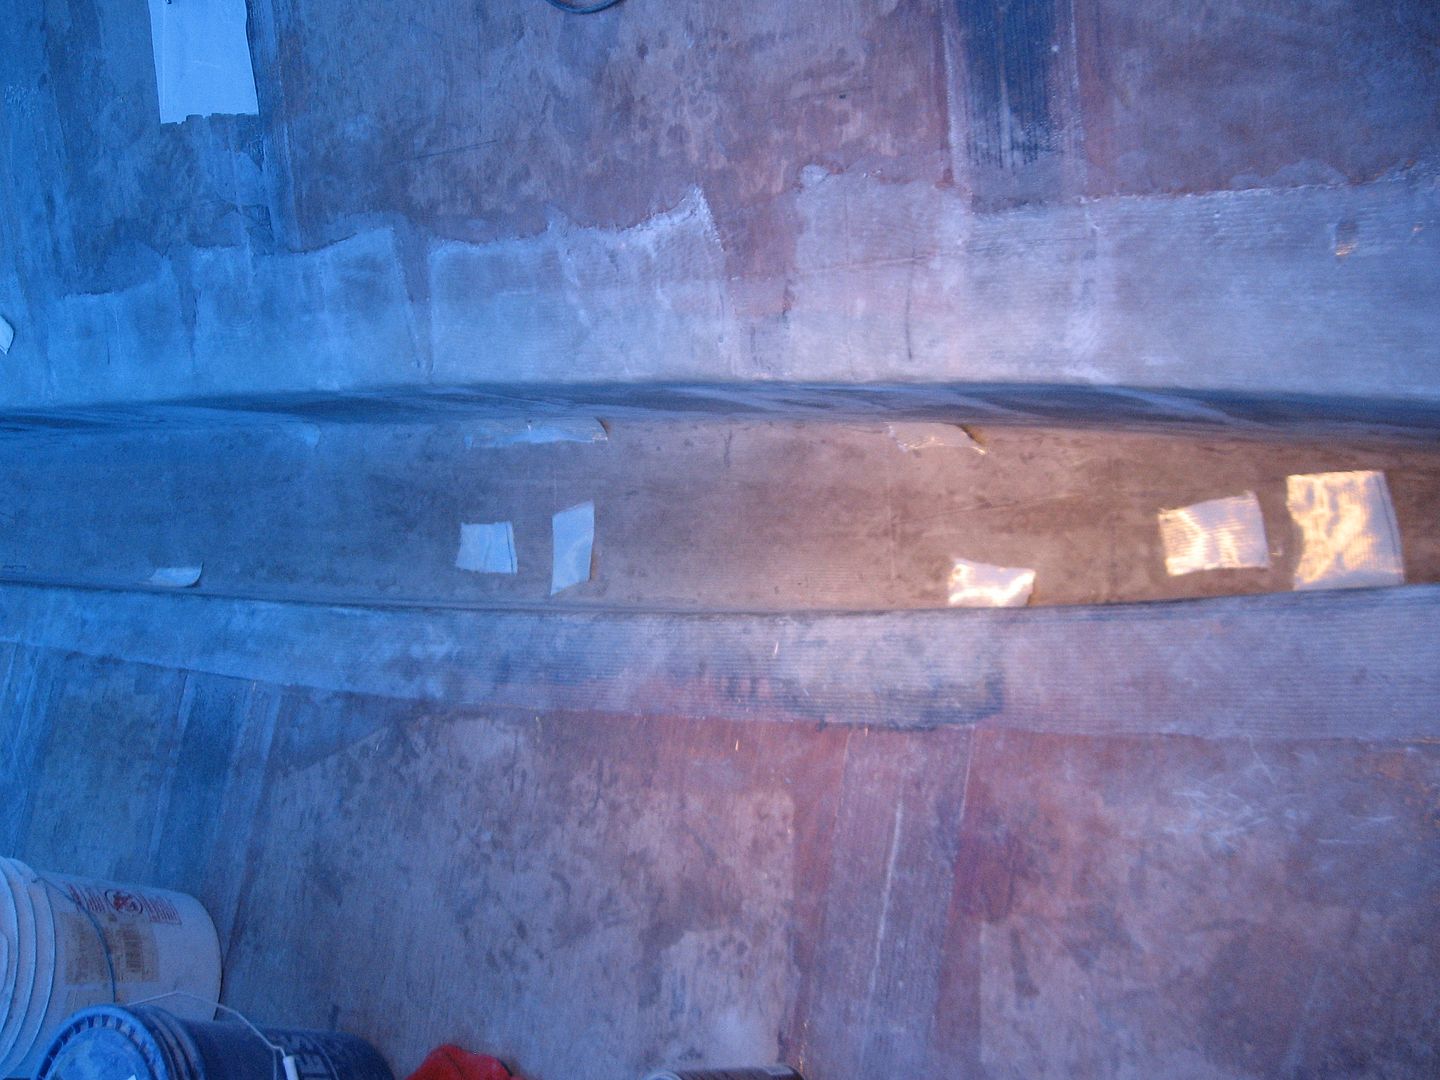
On a brighter note I did get the port side bottom panel all sanded nicely & vacuumed up.
Going to be a bit of a wait now. Likely be next Friday before I get the fiberglass order in. Dunno what I'll do till then. Sleep maybe!
So I've got a full week of uninterrupted (I hope) boat building ahead. Should be able to make some decent progress.
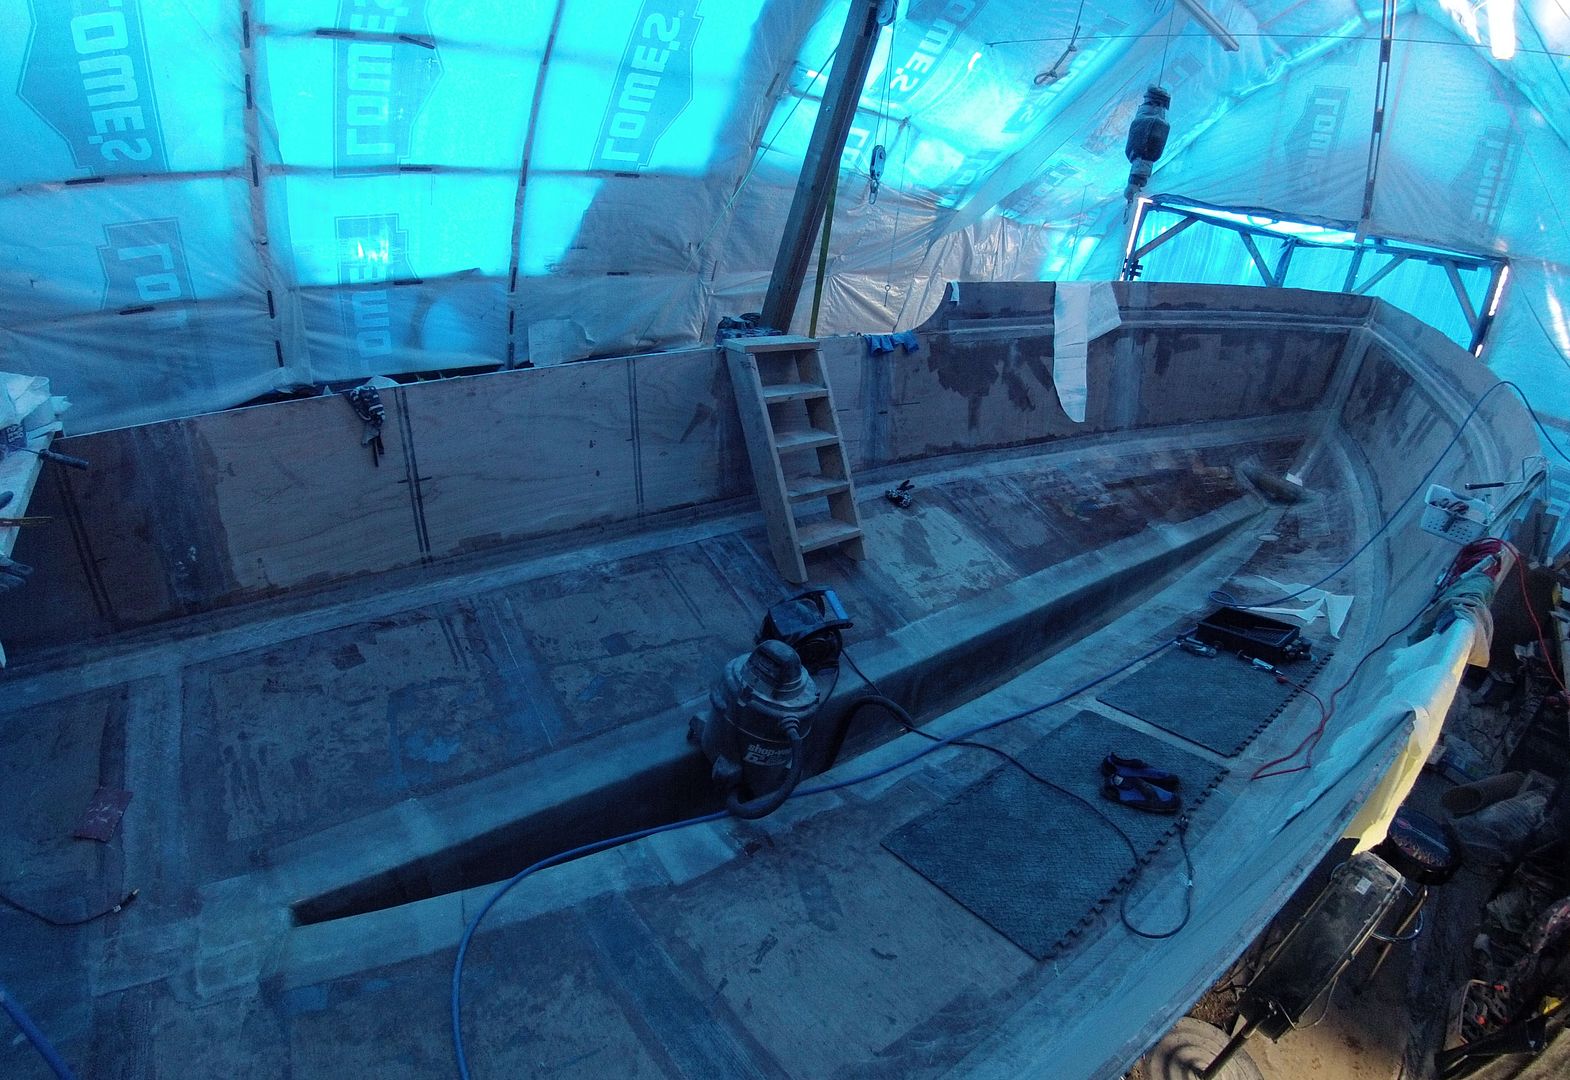
In prep for the bottom glassing I had to remove a lot of stuff from the boat. Amazing how quickly it accumulates 'Stuff'. :-) Took off the horizontal and vertical sections of the rolling frame that aren't needed anymore.
It'll be nice to 'Not' smash my head into the 2x6's that crossed the boat. ;-) Took me about an hour to remove all the bolts & screws that held it together. The boat is now resting comfortably on the portion of the rolling frame that's left.
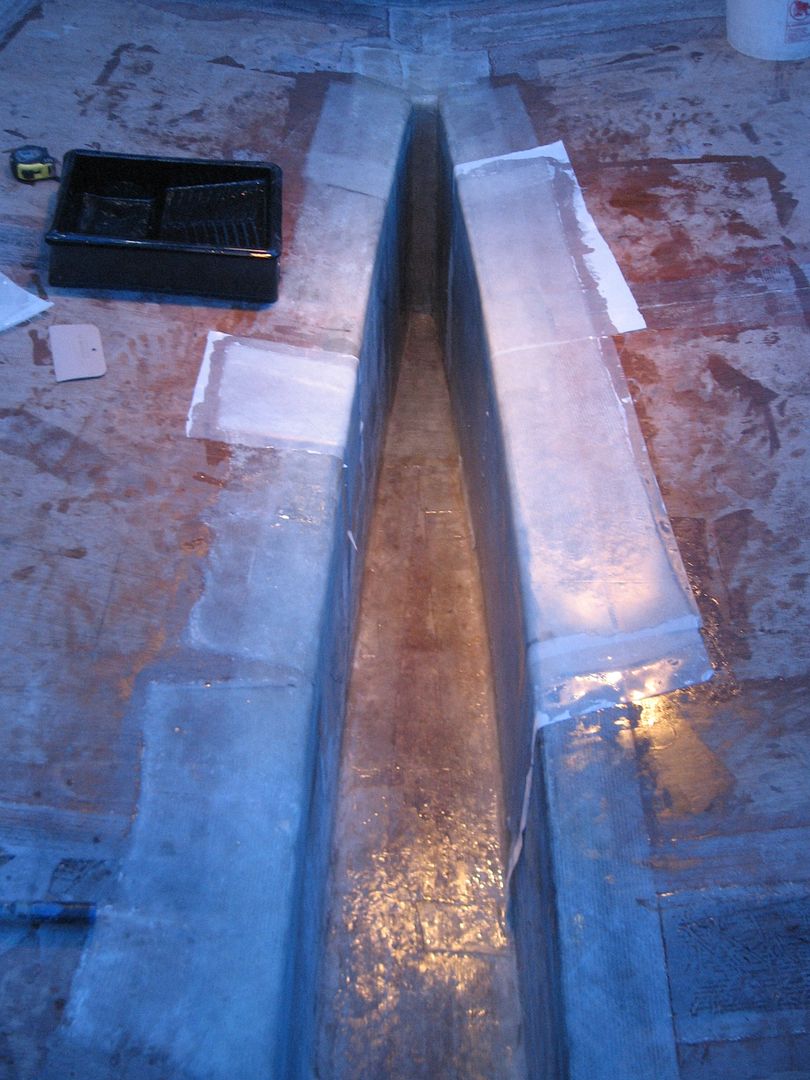
Here's a 'birds eye view' of what's in there now. The port side will get glassed first. I have the fabric all pre-cut and ready to go in.
A days worth of sanding first to clean up all the fabric edges & shiny spots. I have to go back and find when we did the outside bottom panel. IIRC it took me 11 hrs or so with a helper mixing epoxy & 3 1/2 gallons of epoxy. I should be able to get similar results this time I hope.
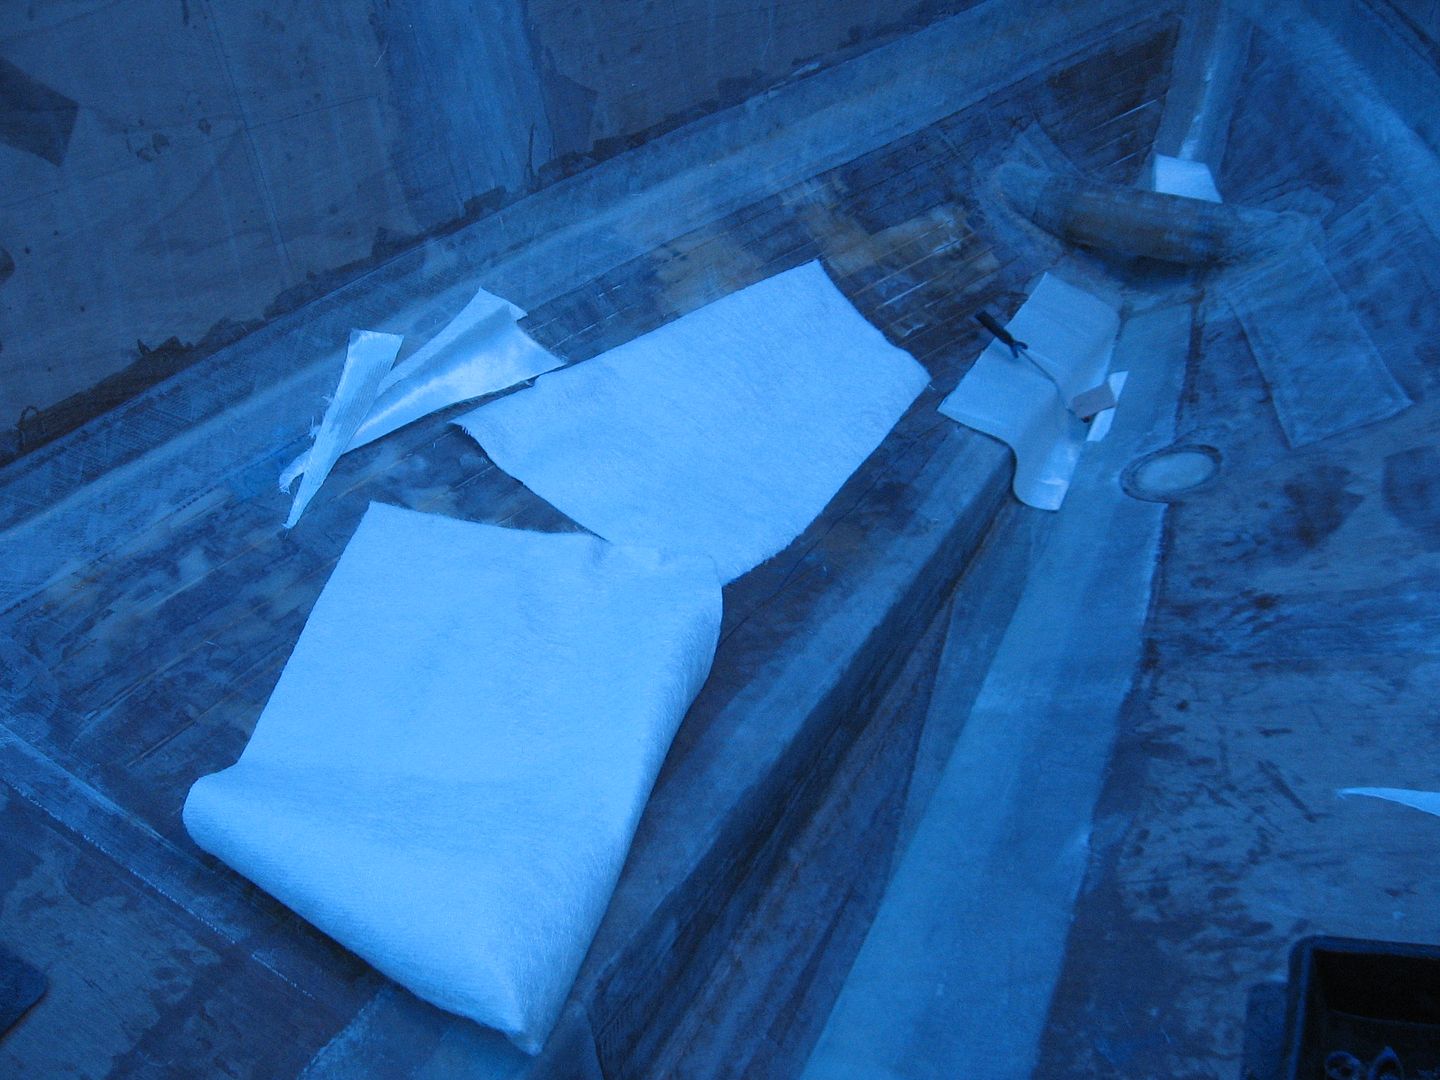
Bought some cheap peel ply. Airtech Econoply J. It's the cheapest they offer. It's extremely light material and tears easily. I've used two other types Airtech sells and they work great. This stuff I'm not too sure about. We'll see how it does on the bottom panels.
That's it. Gotta go wash the car for cruise night.
Been running a friends cat to the vet in O'burg for surgery & follow up. Two more trips, Saturday and Thursday. Hopefully that'll be it. Today our Ginger Moggy goes to the vet for a checkup! *sigh* Anywho, between all that I managed to get some work done on the forward end of the box keel.
Glass laid out ready for goop!
The forward end is a b*tch to work in especially with epoxy all over the place. If I'm not sliding around I'm rolling in the stuff! *sigh* Anywho, soldiered on and got it done.
Not pretty but it'll have to do.
Peel ply is a real b*tch to get on small sections. It doesn't flex or fit the curves very well. I guess to get that feature you have to buy the real expensive stuff. Above my pay grade for sure. Oh well, RO sander will fix whatever bubbles I get.
Yesterday before the run to the vet I got the starboard side done.
Starboard side glass laid out ready for goop!
Not much different to report other than this side was done as one piece. The port side was 3 pieces with significant overlaps.
Gooped & Plied.
One small bubble had to be ground out and patched. Other than that I'm happy with it. That's the first layer, of three, finished. The other layers will be easier as they're much lighter fabrics that wet out and conform to the curves a lot better.
Tomorrow I'll start sanding again. *Groan* Just to clean up the messy work on the box keel. I'll start on the port side getting it ready for bottom glass. That'll be a chunk of work. Almost 32' of 33 oz triaxial fabric. IIRC it took me almost 11 hours to do the bottom side and that was with someone mixing epoxy for me. *Sigh*. Don't know what I'll do on the other side. I'm 15' short of fabric and the supplier doesn't have any more. I might have 'nuff 'off cuts' to do the rest. Dunno.
Decided I needed to make the days projects a lil' bit smaller so I can handle them easier. Big sheets o' glass take big effort. These fabrics are heavy and stiff and take a lot of muscle to wrangle into position & wet them out.
But before I get to that here's what I did yesterday. All the bubbles were ground out and patches laid in them.
Patches laid out
Those got epoxied into place and sanded out once the epoxy cured.
Patched & Sanded
I started smaller pieces on the back end of the box keel. You can see the two sides here.
Glass laid in, epoxied & peel plied
This morning I removed the peel ply and had great results so I carried on to do the back end of the keel and another 4' section along the starboard side.
Box keel getting fiberglassed
High temp today is forecast at 33C and it's already that in the boat shed by 11:00 hrs so I called it a day. Supposed to be a wee bit milder tomorrow and I hope to get three 4' sections done.
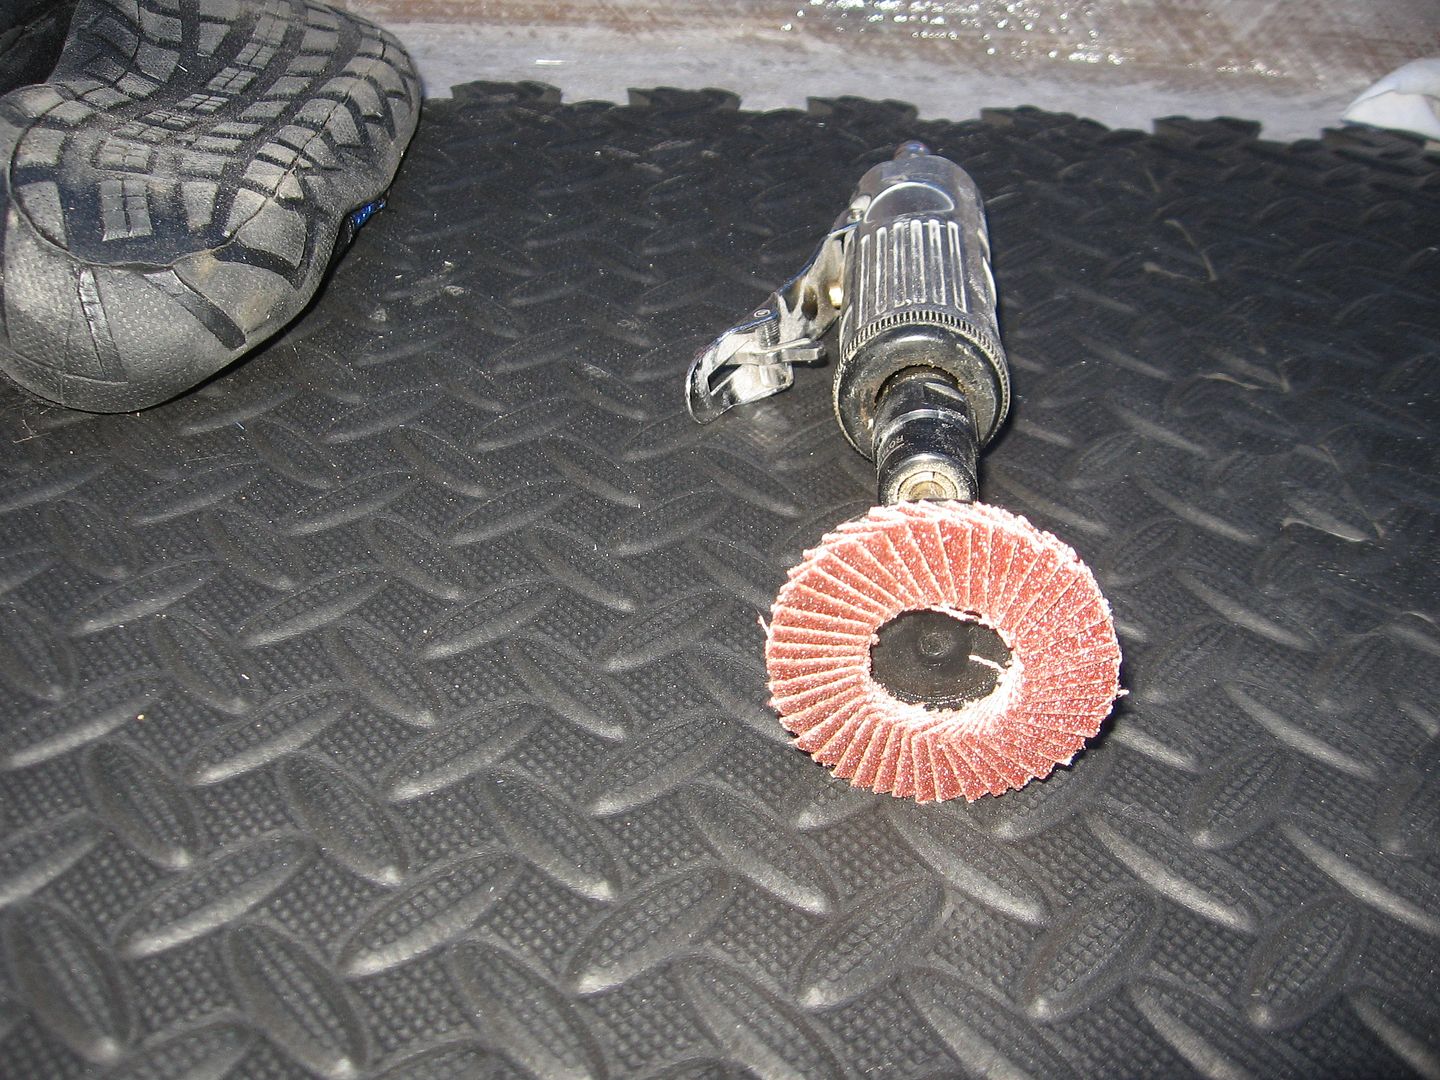
Just like his big brother on the 4" grinder this 2" Mini WMD is a wonder! It chews up bad fiberglassing like there's no tomorrow! :-)
Mini WMD! Wow!
Spent about 2-1/2 hrs grinding out all the bubbles that needed to be fixed. Twelve in all. There are some really small ones that I will just leave alone unless anyone thinks they're an issue. Most are the size of a fly or smaller.
All my sins sanded away!
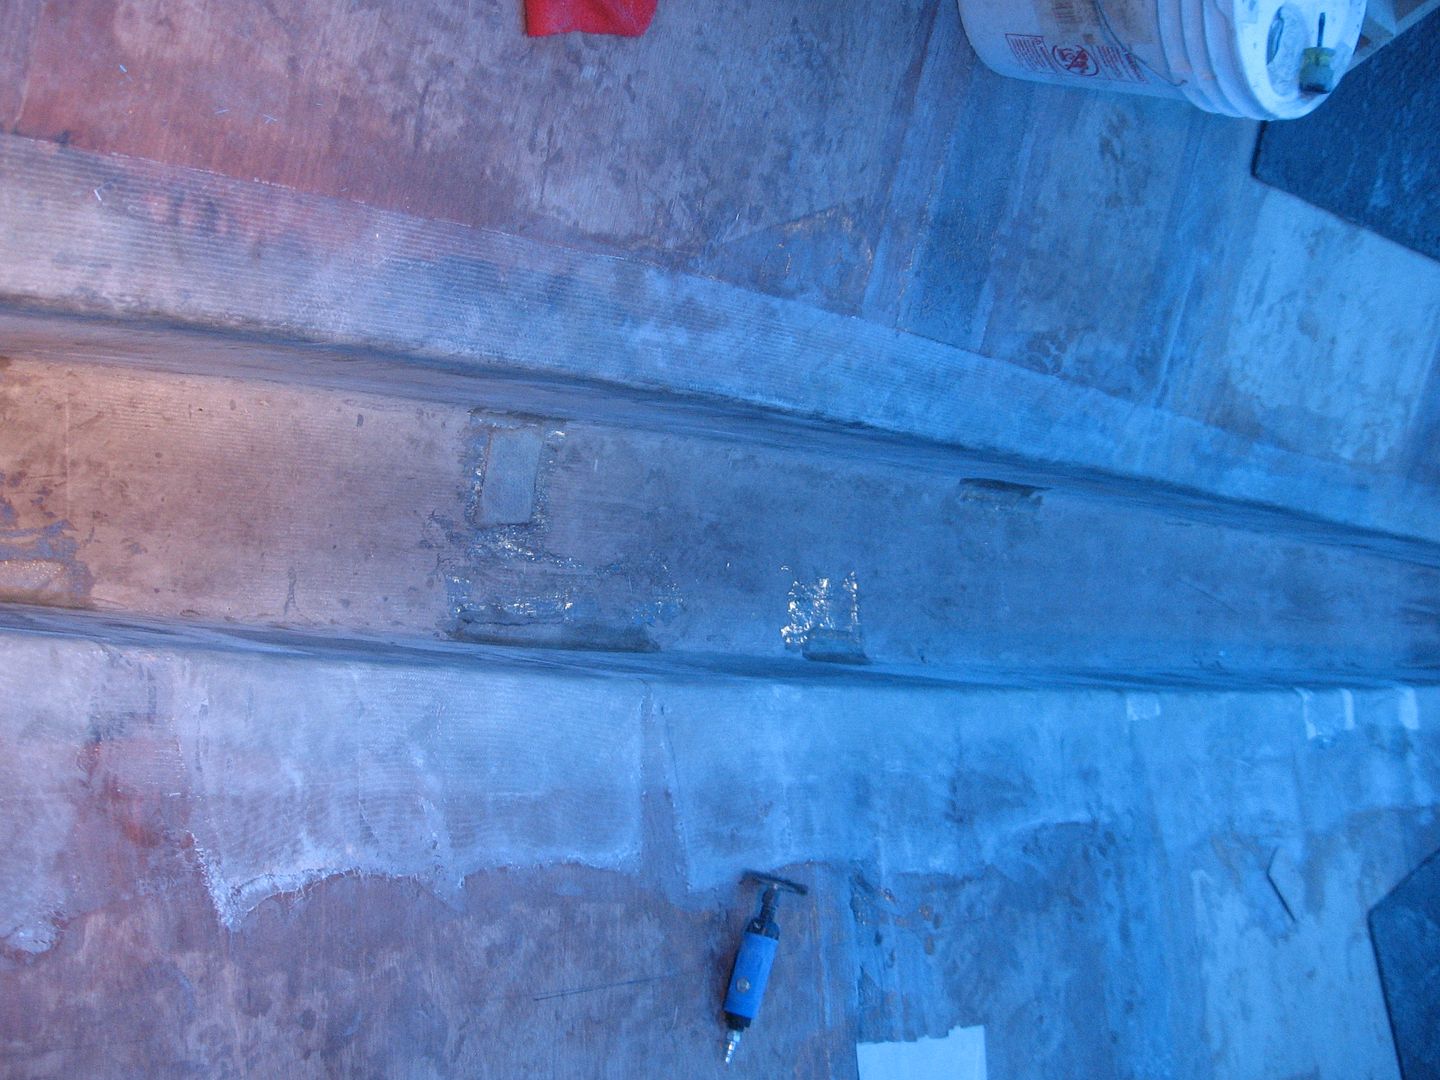
Patches laid out ready for epoxy. These will get sanded flush once cured (Friday).
Patches laid out
And all soaked in goop! I had to use some peel ply on the bottom/keel side joints to get the glass to lay down properly. The others I skipped the peel ply. They'll get sanded flush later.
Patched & Curing
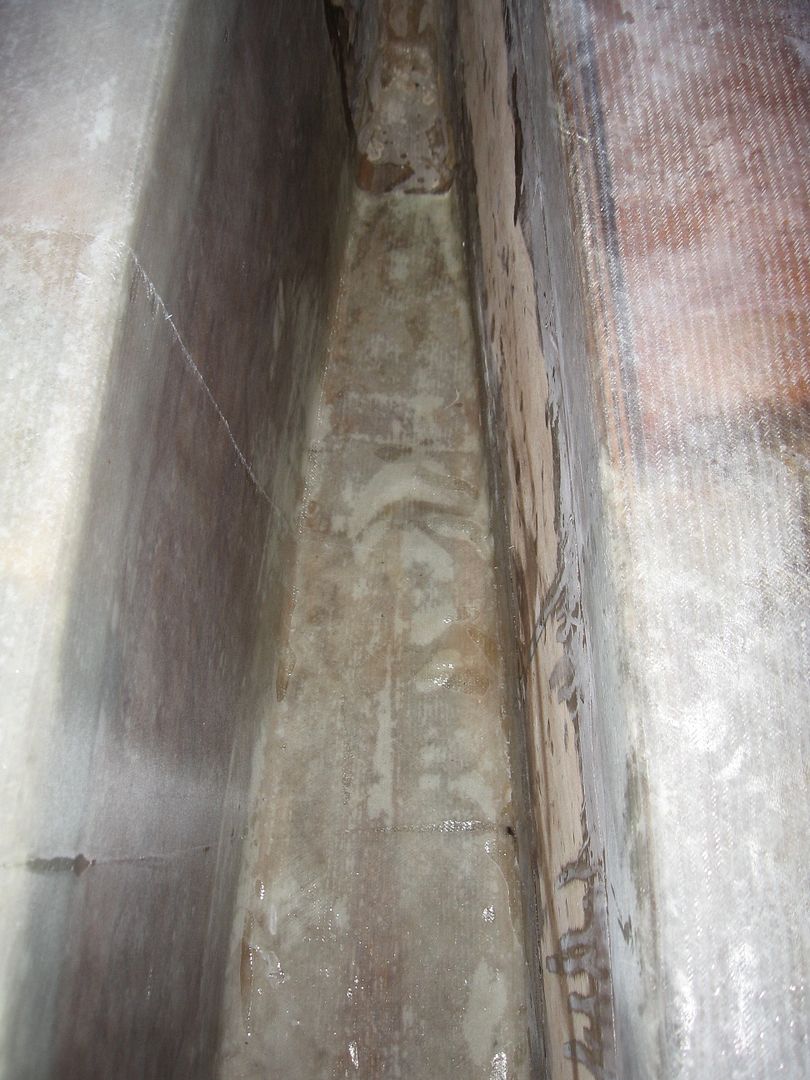
Thinking about it now I believe I had so many problems with this particular lamination because I was trying to make the fiberglass, 1808, do too much at once. It had to form over the bottom/keel bend then back around the keel/bottom of keel bend then back up the other side. That's three 90 deg bends in a very stiff fabric. You can see it in the second picture from the top.
I'm going to split up the other side into 48" sections with only one bend. The bottom of the keel will be done with a separate piece that will cover the bottom and go up both sides of the keel. Smaller sections are more manageable for me but means more overlaps. I can live with that. It won't affect the structure at all. The 12 oz layer that goes over top of this can go on in one piece. It conforms to curves much better than the 18 oz fabric.
Found the tiny 'Dixie Cups' at Canadian Tire. They're for jello shots I think! ;-) Work great for mixing up 2 oz batches of epoxy though! Also got some fatigue foam mats. You can see them in the first picture. These will come in handy and are much easier on my poor ole' ass!
Have to take Dan's cat back to vet tomorrow so the boat won't get any attention till Friday.
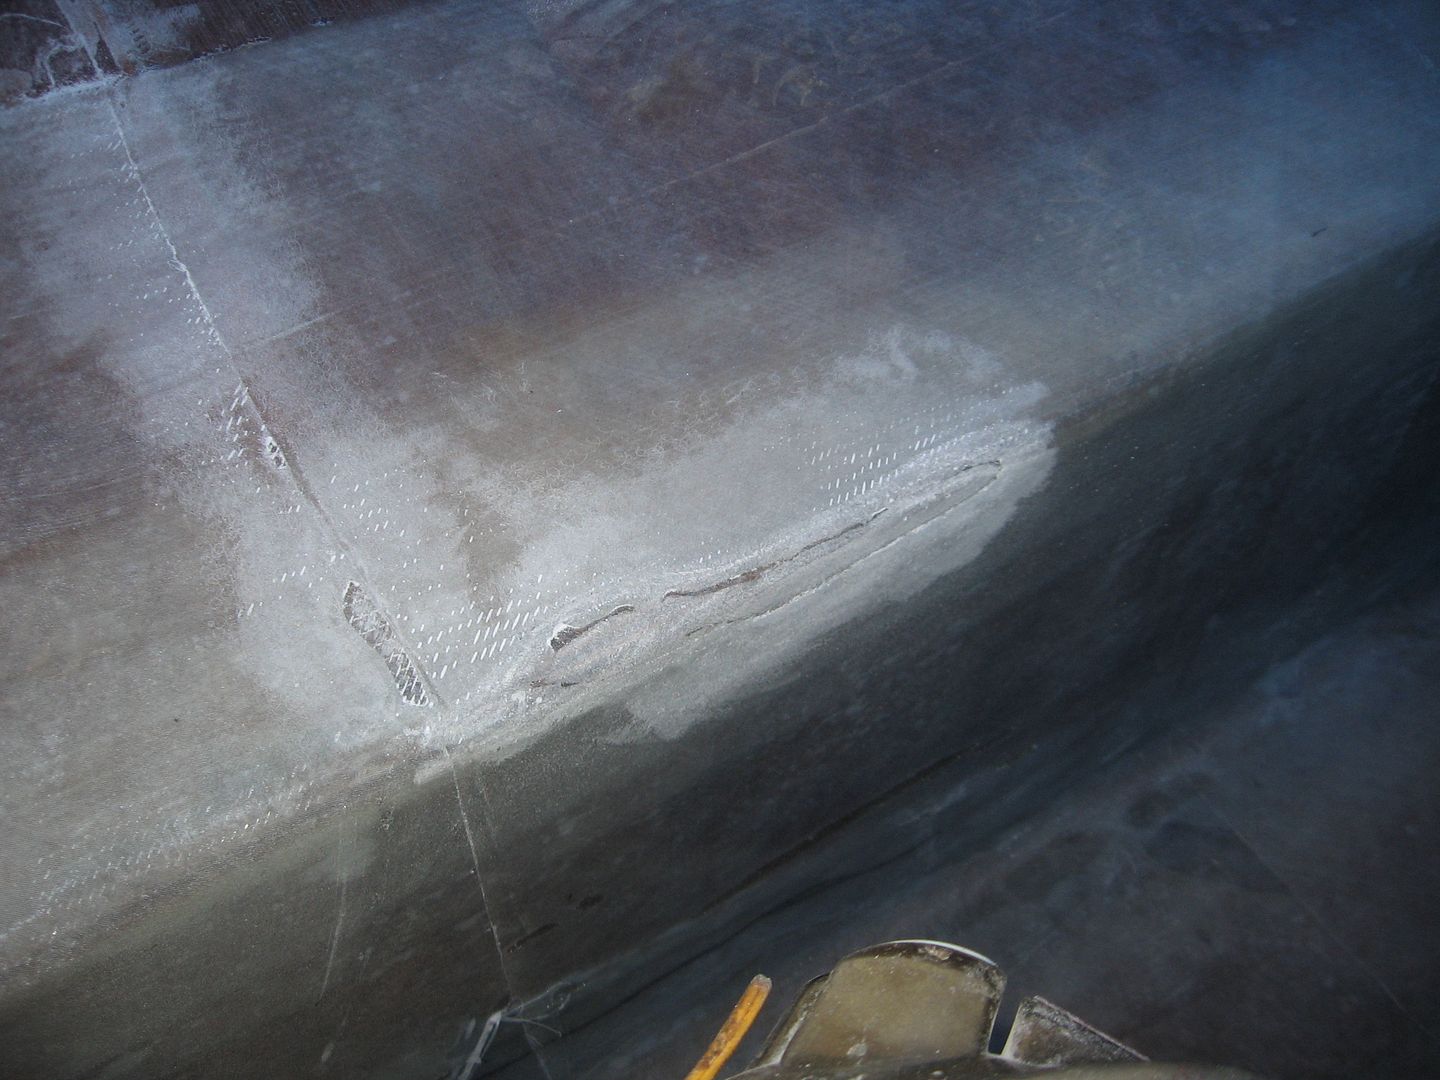
in your fiberglass laminate SUCK! Sometimes no matter what you do or how well you think you did it, you get bubbles in the glass. I promised this blog would show not only the good stuff but the ugly side of building your own boat as well. Well here's some ugly stuff.
That's a pretty big bubble right along the keel/bottom joint. It'll have to be ground out and a patch piece put in before any more glass goes on over top.
More bubbles along the keel bottom to side joint. "Bridging" I guess you'd call it. These too will get the grind/patch before more glass goes on.
The worst of it. This was my fault. A piece of crap fell under the fabric and I didn't see it until I had rolled the epoxy on. Instead of making a small slit to remove the POS I lifted the entire wetted out fabric to get it out. Big mistake! Again, all will get ground down to good glass then patched.
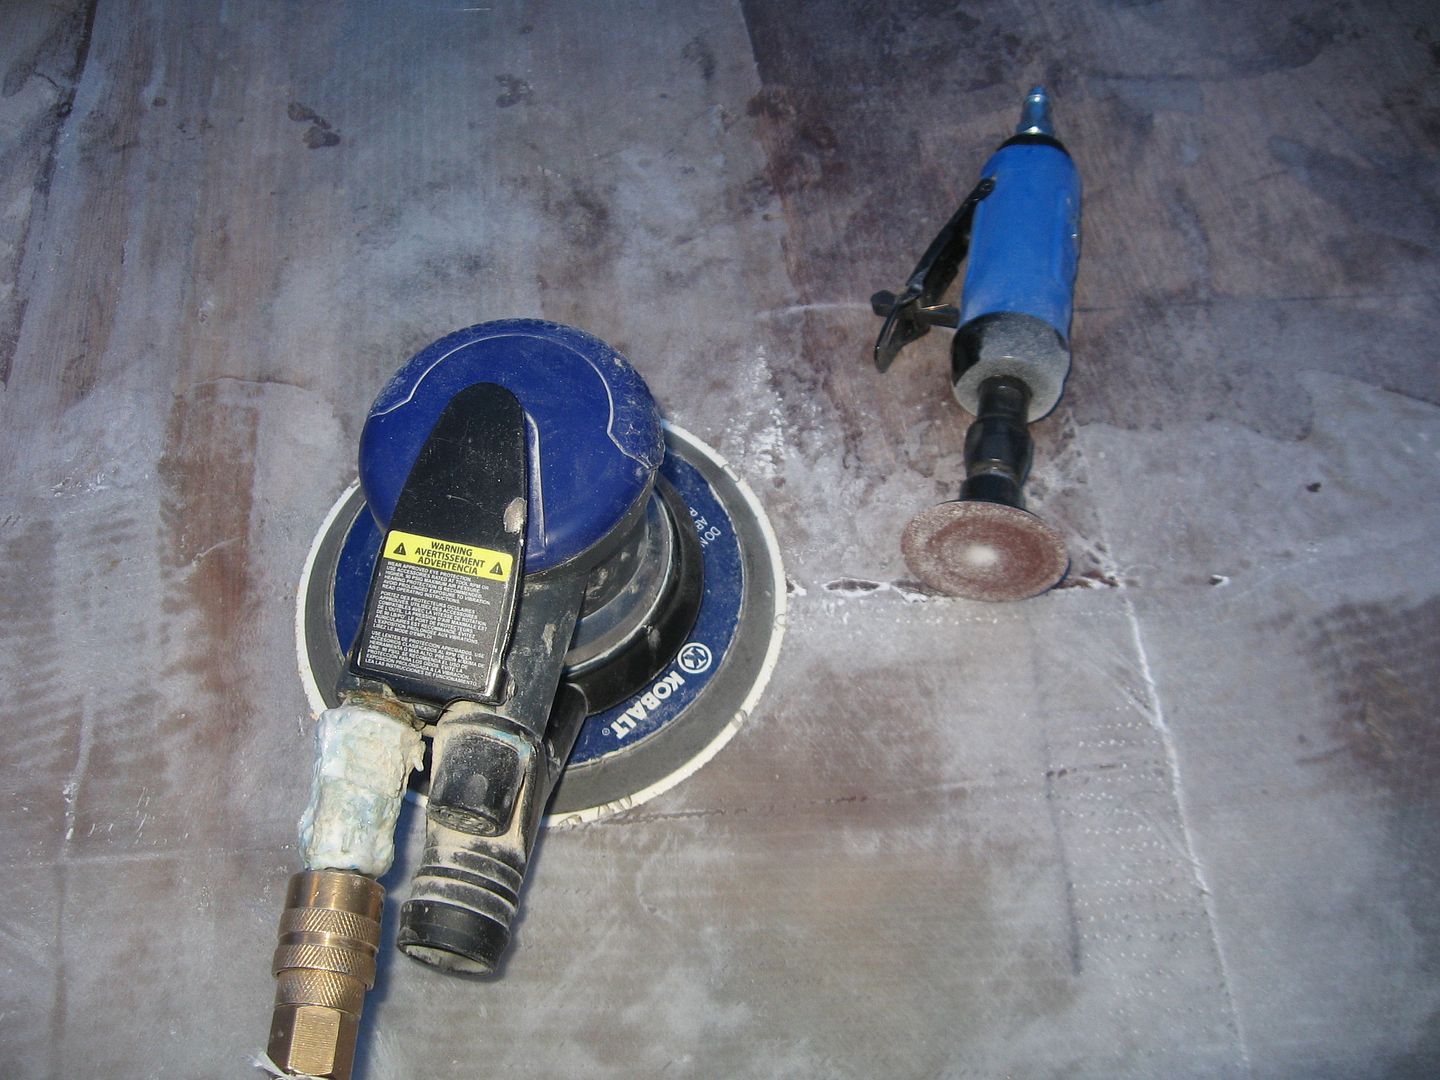
The first bubble ground down. A bit more feathering required of the RO air sander and it'll be ready for a patch.
The two main tools in this process. The little disc sander works wonders but it's a bit of a beast to hang onto. It gets the rough work done good enough.
I also used the stainless steel wire brush for ripping the tops off of the bubbles. It's pretty good at it too!
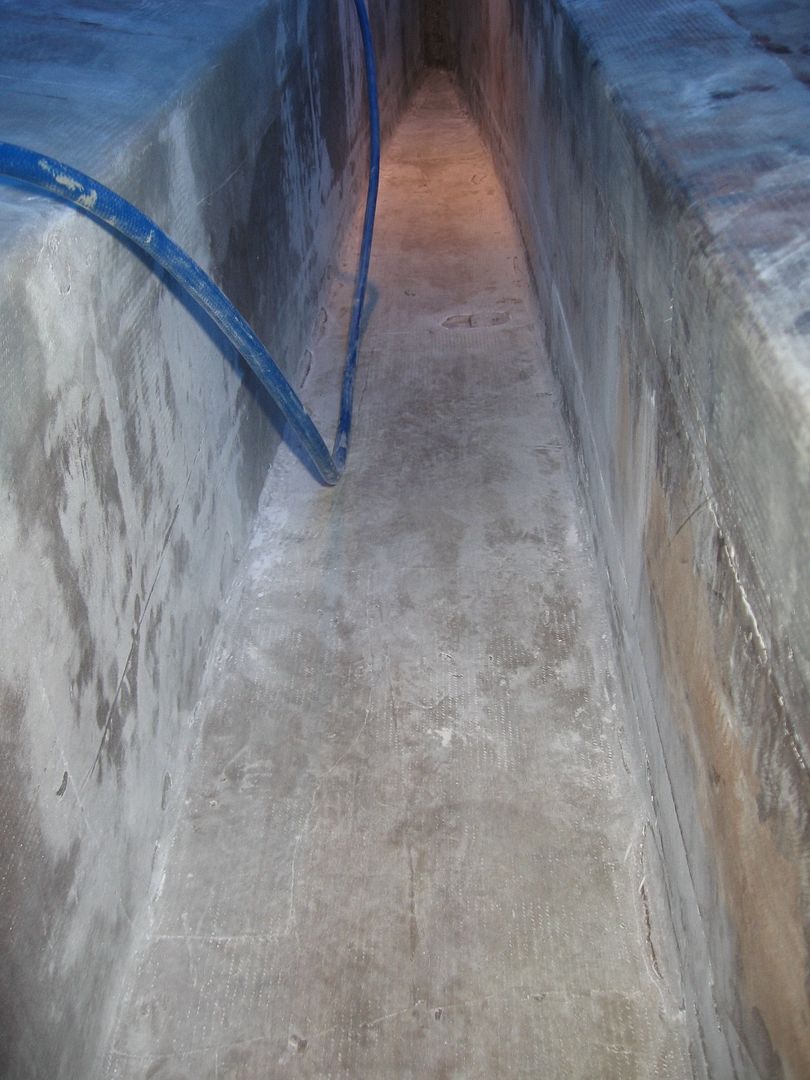
Sanding progressing down the keel towards the stern. A light sanding is required where the peel ply overlaps. I managed to get 3 hrs of sanding in today before the temps drove me out of the shed. Another 3 hrs tomorrow and I should be ready to lay in the patches and move on.
The next layer of glass for the keel is this 12 oz 0/90 biaxial fabric. This stuff is much nicer to work with than the 1808. It will conform to the curves of the keel & joints much easier. Also have more peel ply on order that should be in soon.
Tomorrow's screwed with a mission of mercy for a buddy's cat. Will be back at it on Wednesday.
"I used to rock and roll all night and party ev-er-y day. Then it was
every other day. Now I'm lucky if I can find half an hour a week in
which to get funky." - Homer Simpson
That's 'bout right. I'm an old fart. Don't have much stamina anymore. Seems 4 hrs in the boat shed is about all I got. That means breaking a lot of big jobs down into much smaller components. Result is a lot more work in the long run peel plying or sanding. The price I pay for not doing this 20 yrs ago.
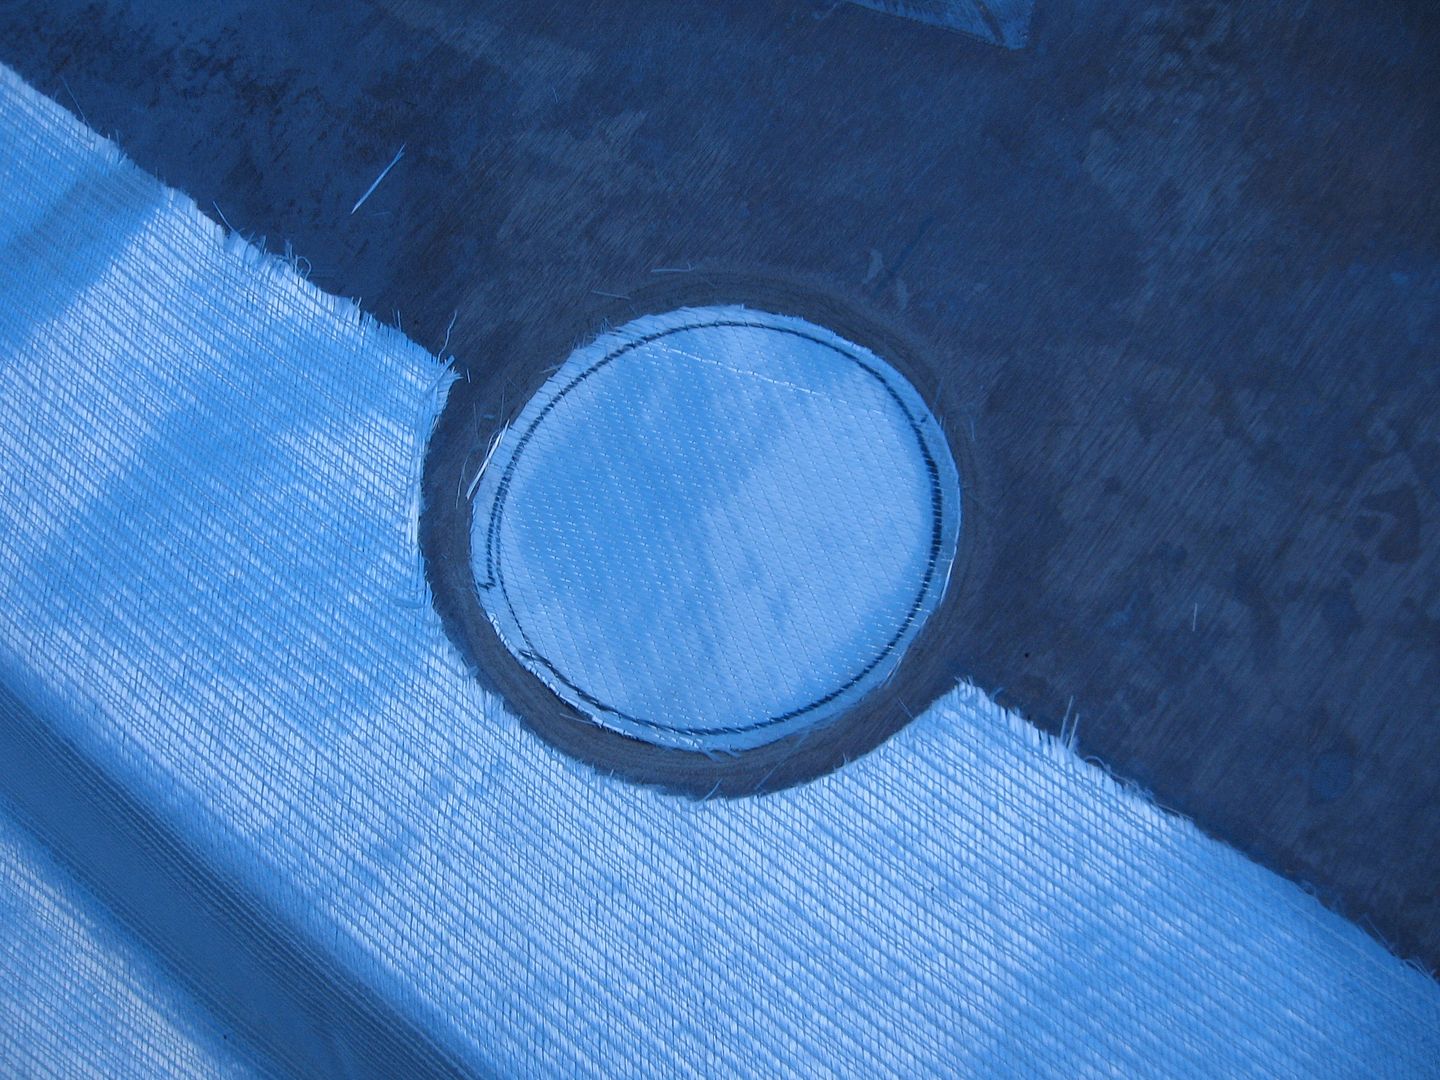
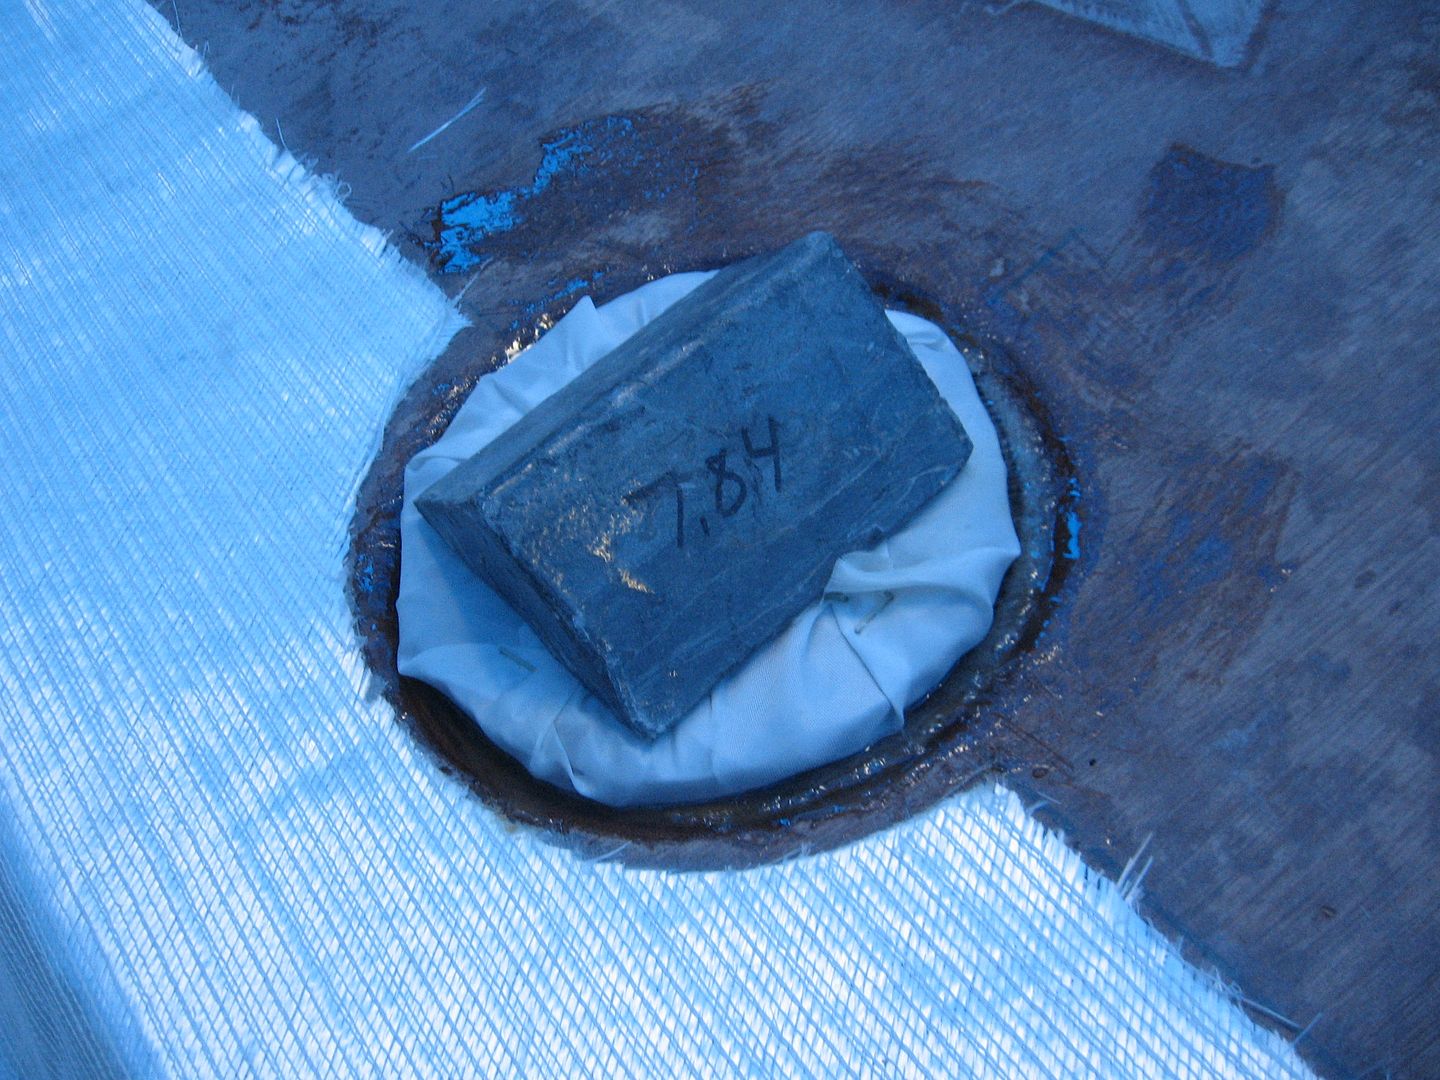
Anywho I managed to get a few minor things done while waiting on supplies to arrive. The depth sounder hole got two more layers of fiberglass.
Depth Sounder Hole
I cut out a plywood circle and covered it with plastic and peel ply. That provided the clamping pressure. A bead of thickened epoxy went around the outside of the hole and the glass was laid in and wetted out.
Weight added to hold the glass down till it cures
That seemed to work pretty well. Pulled it off the next day and it's perfect. There'll be three more layers of glass go over top of the hole.
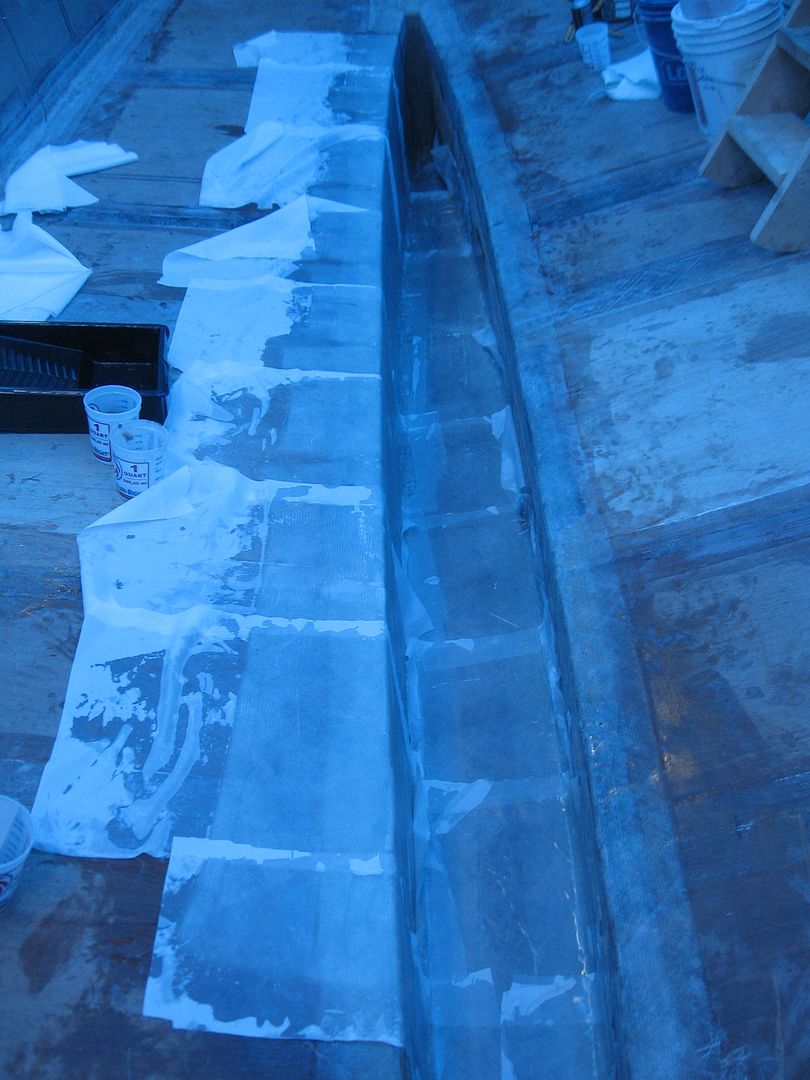
So given my physical limits in the shed I started glassing the starboard side of the keel with the first layer of glass (1808).
Starboard side getting glassed
I know there's no way I can work wet on wet with multiple layers on a boat this size so I set out to do 18' of it. It took almost exactly 4 hours and just a little over a gallon of epoxy. The peel ply doesn't like to go around corners or complex curves no matter how subtle so I cut it into narrower strips (2 feet). Started at the stern and worked my way forward. Wetting, squeeging & peel plying as I went. I'll turn around and do the other side tomorrow or the day after. See how I feel. Working pretty much on my hands and knees the whole time my left shoulder took a beating today.
That's it for now I guess. Fiberglass & peel ply order should arrive by Monday.