Monday, June 30, 2014

More hands make light work

A couple weeks ago I put an ad on some Facebook pages. It went something like this.

"Do you have an able bodied teenager sitting in your basement playing video games all day and raiding your fridge?  I have need of one to help me with a project."

I got a response back within' 10 minutes. "You've described my kid to a Tee!" "When can he start?"

The deal was struck. The kid was conscripted into sanding service. A date was set and today was that day! Welcome Thomas my new boat shed helper.

I gave him a 5 minute intro into the fine art of sanding fairing compound and let him loose! He jumped right into it. A little awkward at first getting used to the ole' electric RO but he caught on pretty quick. There was no mercy. It was hot when we started and only got hotter. We did manage to work almost 5 hrs on the boat before it was too hot to spread more compound so we called it a day. He'll be back on Wednesday for more sandinsanity!

Standby...

Sunday, June 29, 2014

I just couldn't do it

Just couldn't get up 'nuff gumption to work on the boat today. I tried. Lasted about an hour and I was done. Maybe 'cause I know I got help coming tomorrow or maybe because it's just hot outside, I dunno.

One thing I did was start a blog for my bestest buddy in the whole world. You've seen him here before, the Project Manager. Here's his story on how one day he was a scruffy ole' Tom Cat wandering the neighborhood and the next day my best friend.

http://bootstheoldtomcat.blogspot.ca/

Enjoy.

Saturday, June 28, 2014

Now this really blows

Literally! So I'm sanding away yesterday and by noonish the temp in the shed reaches 85 F. Add another 10 degs up on top of the boat and that's pretty warm. So I thought to myself, it'd be nice to have a fan up here. I've done it before with the large shop fan but that was overkill. So online shopping I go at lunch time and Canadian Tire, Lowes, Home Depot etc. Found this lil' character and others exactly like it under different brand names.

They sell in the States for $50 USD at Lowes. We cross often so that's an option. Browsed over to Canadian Tire and they had them on sale for $63 Cdn. If you figure in the gas, bridge toll, NYS sales tax and exchange rate (plus you pay HST tax on it coming back across the border) the difference was negligible buying it at Canadian Tire so off I went.

I read all the online reviews. It rates pretty high in most cases. Good airflow. Quiet. Durable. After having used it in the shed while sanding on top of the boat today I'd say it's a good choice. You can tag it along behind you and it keeps you cool and blows the sanding dust away from you. We'll see how well it lasts in that environment but I think it'll work well.

The bottom panels have all been fill/faired once. I think one more go-ground with the Flexicats and that will be done and ready for primer. My lil' buddy shows up day after tomorrow to sand the keel. One step closer!

Standby....

Thursday, June 26, 2014

Mystery Tool. Any ideas what it might be?

My Dad picked this up with a box of old woodworking tools. Absolutely no idea what it is or for. It says The "Gipe" Patent. Google turns up nothing. My only guess is maybe a swaging tool or something to do with rigging cables etc.


Of course none of us are likely old enough to have any idea what it was for! :-)  If I were to hazard a guess I'd say 1920's or 30's vintage.


Update: Mystery solved!  http://www.ids.u-net.com/cash/gipe.htm


Wednesday, June 25, 2014

Added a few features

I added a Wishlist for the boat the other day. Not everything on this list will be required before the boat goes in the water. Just some forward thinking and dreaming. We'll outfit the boat as we go and get what we need when we can afford it. I found a way to embed an online (Google Docs) spreadsheet in a blog page.

http://she-kon.blogspot.ca/p/shekon-wish-list.html

This got me thinking. I had a spreadsheet online for a couple of years before the company pulled the pin and was looking for a solution. I followed the same process as the wish list and was able to import my "Spent to Date" and publish it on the blog.

http://she-kon.blogspot.ca/p/spent-to-date.html

The 'Spent to Date' spreadsheet is more complex and has a number of tabs broken out by category. You can see the links for the tabs at the bottom of the spreadsheet. In a lot of instances these are estimates of what we spent. I never originally intended to keep a spreadsheet, it just sort of evolved that way. I do have all the receipts and import docs showing tax paid etc. but used a formula to calc average associated costs. There are also instances (many) where I entered costs in USD and then added the exchange rate later so the total cost is going to be somewhat lower than the figure indicated.

I'm sorry, the 'Spent to Date' spreadsheet isn't very pretty right now but I'll work on that.

Standby....

Monday, June 23, 2014

Reminds me of an old tune

I remember watching these video's a few years before we started our project.

74' Home Made Boat - Burden of Dreams

It really got me thinking of our dream and what, if anything, we could realistically achieve with my meager skills, meager funds and general lack of functioning brain cells. It reminded me of the song:

The dream never dies just the dreamer
the dream never dies if it's strong.

by The Cooper Brothers

After watching those vids and thinking hard about what it meant I scaled back our dream. Think we found the project that was right for us and that's what you see us doing in this blog. 

Anywho, I know you've been waiting for another sanding video so here it is! Enjoy! Remember this is my life right now!  ;-)

Later gator's!


Sunday, June 22, 2014

Took the day off

Yesterday I took the day off. Went to Timmies for a coffee. Drove down by the river and watched some ships go up bound. Picked up some groceries. Did the dishes. Made the Admiral her dinner and just vegged. Dunno why just wasn't really motivated to work on the boat. It was a nice day just to do nuttin'!

Back at it today though. This morning started with an hour and a half sanding the stbd side (aka The Landing Strip) of the bottom that I didn't get finished the other day. After that was done I cleaned off the port side bottom panel (aka The Bowling Alley) and spread out just over a half gallon of Quikfair. I'd guess the total area was about 80 sq ft. This will cure today and get sanded down tomorrow.

I finished up this section about noon and headed in for lunch. It was about 90 degs in the shed when I quit. I know, I'm a pussy.

Standby....

Friday, June 20, 2014

Just a brief update

Yesterday I Quikfair'd the stbd side bottom panel from just behind the bow thruster to the end of the keel. That area is pretty freakin' big. I had originally intended to do the entire side but by the time I got to the end of the keel (about 95 degs in the shed) the Quikfair was kicking off on the mixing board so I called it a day.

Today I sanded the fabric edges along the port side of the keel in prep for Quikfair on that bottom side panel. Weather seems to have cooled a little bit so I'll take advantage of that and try to get it all done. The rest of the day I sanded the Quikfair I put on yesterday.

The tools of the trade (sorta).


Standby......

Wednesday, June 18, 2014

Not a whole lotta action

in the ole' boat shed this week. A bit of fairing & sanding etc. Then today my buddy Peter showed up all the way from Montreal for some nostalgic boat sanding. It was very very nice to have company in the shed for a change (other than a cat or two that is). With little fanfare and little chit chat he got right to work sanding! First out he hit the sides with the Flexicat and when that was done he jumped right up on top of the boat and started sanding the bottom! :-)  The man is a sanding machine!

I even tried to coax him down with medicinals and tributes of tobacco but he would have none of it till the job was done!
Thought to myself I just have to capture some of this action and preserve it for future generations. This is a true craftsman plying his trade! At least he said he was having fun.

By 13:00 hrs or so it reached 95 degs and we had to pull the pin. Sanding was done but too warm to spread Quikfair. It was only then he relaxed and enjoyed a cool brewski.

Many thanks to Peter. People like you are too rare and too far between.

Yours Aye!

Brother in sanding dust


Sunday, June 15, 2014

Happy Father's Day

Happy Father's day to me! :-)  Miracle of Miracles the Princess Auto Father's Day flyer finally showed up in my email. Went to see the Admiral and said: "I been thinkin'!"  This usually results in her replying: "Uh oh!"  To which I replied: "Seeing as it's Father's Day and the Princess Auto flyer just happened to arrive I think I should treat myself to a quick trip to see what they got!" To which she replied: "You're not going unsupervised."  So away we went!

The intent was to pick up an inline air dryer (desiccant) and some gizmo's for my primer rig.
I got this HVLP spray gun from TCP Global on eBay. It was the only one I could get with a 2.0 nozzle suitable for the primer. Every place I looked around here topped out at 1.5 which is just a wee bit too small for the high build epoxy primer I will be using. It wasn't overly expensive. With shipping and taxes probably $70. The sprayer stand was another $15.

An while wandering the many isles of manly man cave stuff I spotted this lil' gem. Made in China (figures) and will likely die a horrible death at my hands but..........
Now I had not originally intended to buy it, honest but the sale price of $40 was too good to pass up. A small gamble at this point in the game. If it's a POS well I won't loose much. I can probably get half that back at the 'End Of Boat Building Shed Sale'.  :-)  We'll see how it does. It'll max out my compressor so duty cycle will probably be pretty short, couple of minutes tops before I'll have to pause for the compressor to charge up again. I've got enough pressure just not quite enough volume of air to keep it moving constantly.

I've dress the fabric edges where they overlap the chine onto the bottom panels. I've got a bit more sanding to do along the keel overlaps and I'll be ready to spread the rest of the Quikfair on the bottom. I picked up my order of 3 gallons on Saturday. That stuff is spendy but I'm paying for the convenience I guess.


Thursday, June 12, 2014

Production TW28 in Turkey

Was shown this link today. A company in Turkey is producing the TW28.

Kuzey Ege Yatç

Here's the brokers listing.

NORTH AEGEAN TRAWLER 30 - WEEKENDER

At today's exchange rates it works out to:

$74,400 USD
$80,750 Cdn

Of course I had to photochop the picture of it to see what it would look like with the hull extension I did on our hull.


I'm liking that!

Tuesday, June 10, 2014

So maybe that wasn't such a good idea

The rattle can primer as guide coat may not have been the best solution. It is horribly messy, seems to have penetrated deep into the Quikfair and gums up the sand paper. Oh well, live and learn. I've already got it on the other side of the boat but not near as heavy as the first so hopefully that'll be better.

Today was more sanding. Working my way down the port side doing the big X's as recommended which leave a cross hatch pattern in the fairing compound.

I have been in touch with the makers of the Flexicat sanders in Europe. I mentioned my issue with Carpal Tunnel Syndrome and told them I was gripping the sander in different ways. They wanted pictures so I sent them some.

I switch hand positions quite frequently trying to avoid the strain that's put on my wrists. I do have to say these are a vast improvement over other sanders I have and I can get by without having to wear braces on my wrists at night (mostly). They also featured my video's on their Facebook page.

http://www.facebook.com/pages/FLEXICAT/

I made a few suggestions that they're going to pass onto their designers. Who knows, maybe my ideas will see it in the next generation of their sanding tools.

I figured you guys were due for another sanding video so I geared up! (Hold the Teletubbie jokes please).

I thought this was just about the goofiest thing I've ever seen! But hey, that's what it takes to bring you all these exciting sanding videos! :-)  Try to contain yourselves and turn off all cell phones and electronic devices (except your computer that you're watching right now) while the show is in progress. So without any further ado, here it is.........

Cheers!


Sunday, June 8, 2014

The Pro's vs The Amateurs

This job is 100% amateur. Although I've read tons and studied tons and followed dozens of blogs & web forums I am no expert. I very freely admit that. Thank the boat building gods that there are Pro's out there on the Interwebs who so graciously donate their time and expertise to help morons like my 'try to understand' all the nuances of boat building.

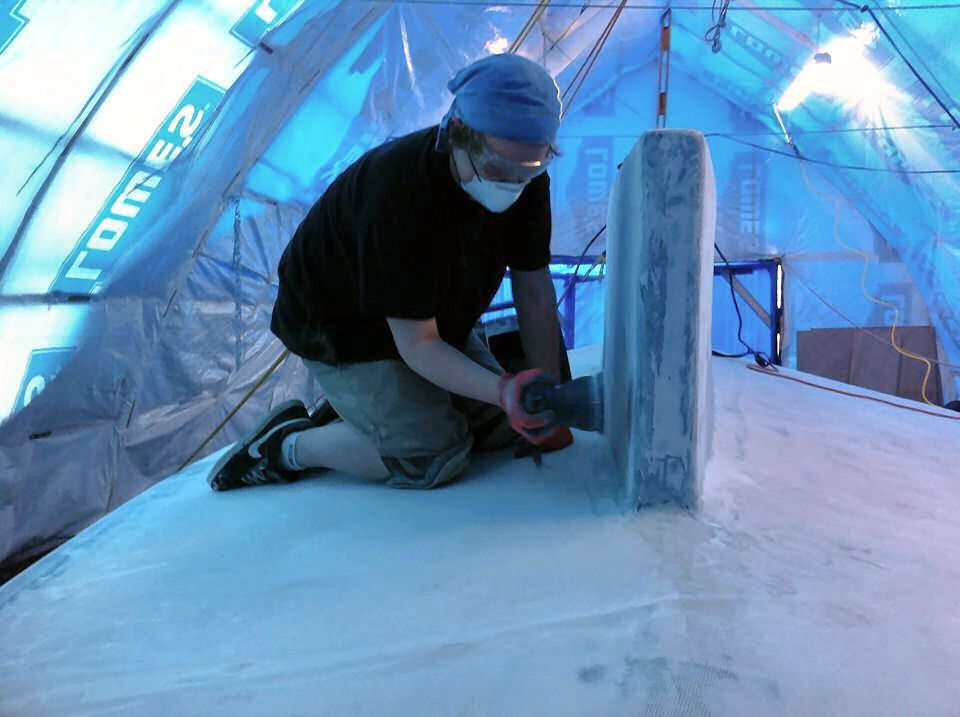
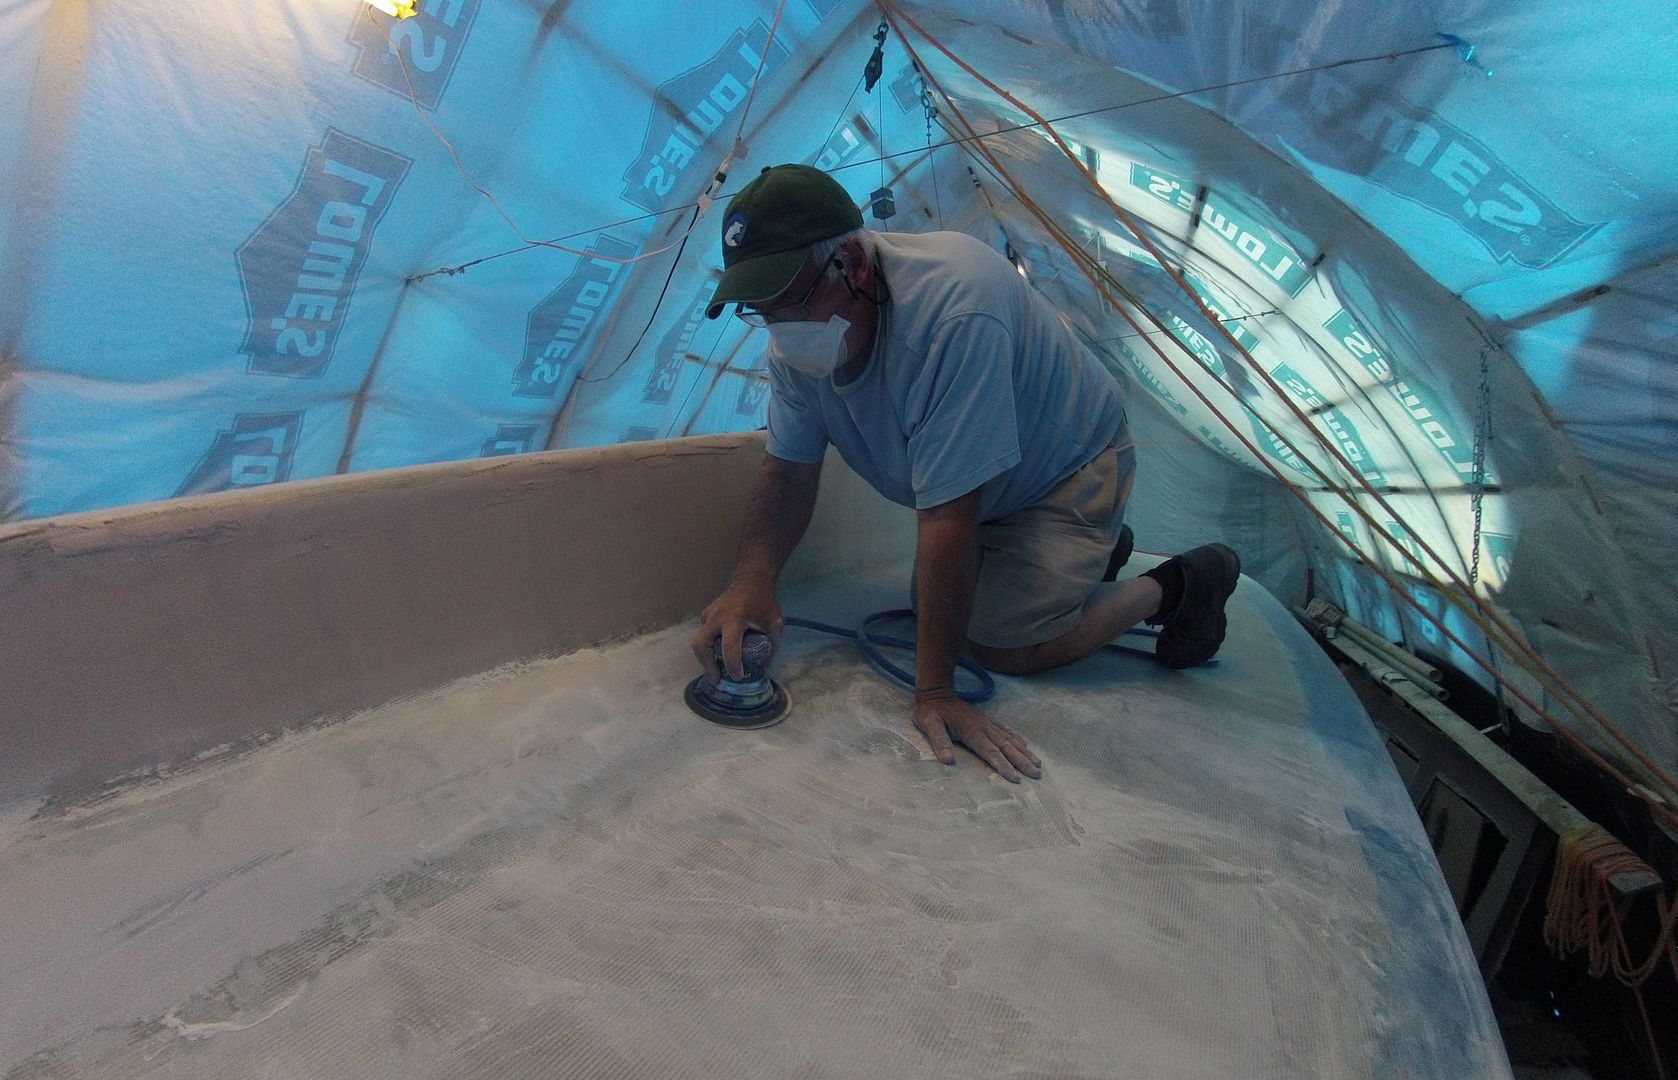
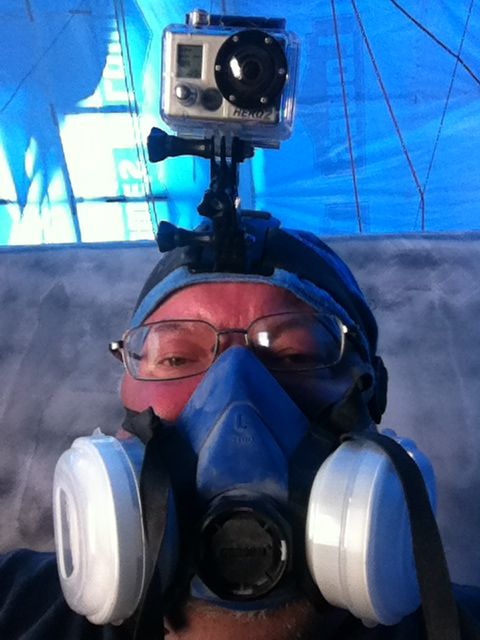
As of late it's been this whole fairing process. It seems simple. Spread some poo on, let it harden and sand it off. Easy peasy right? Well maybe if you know what you're doing it is. For the untrained (and frequently covered in sanding dust) it's a vicious cycle of fill/fair, fill/fair, fill/fair (Yeah I know, you've heard the before). It's actually more akin to a dog chasing it's own tail. So long story short, with the advice of some Pro's I think I'm actually getting closer to actually figuring this all out. (I think).

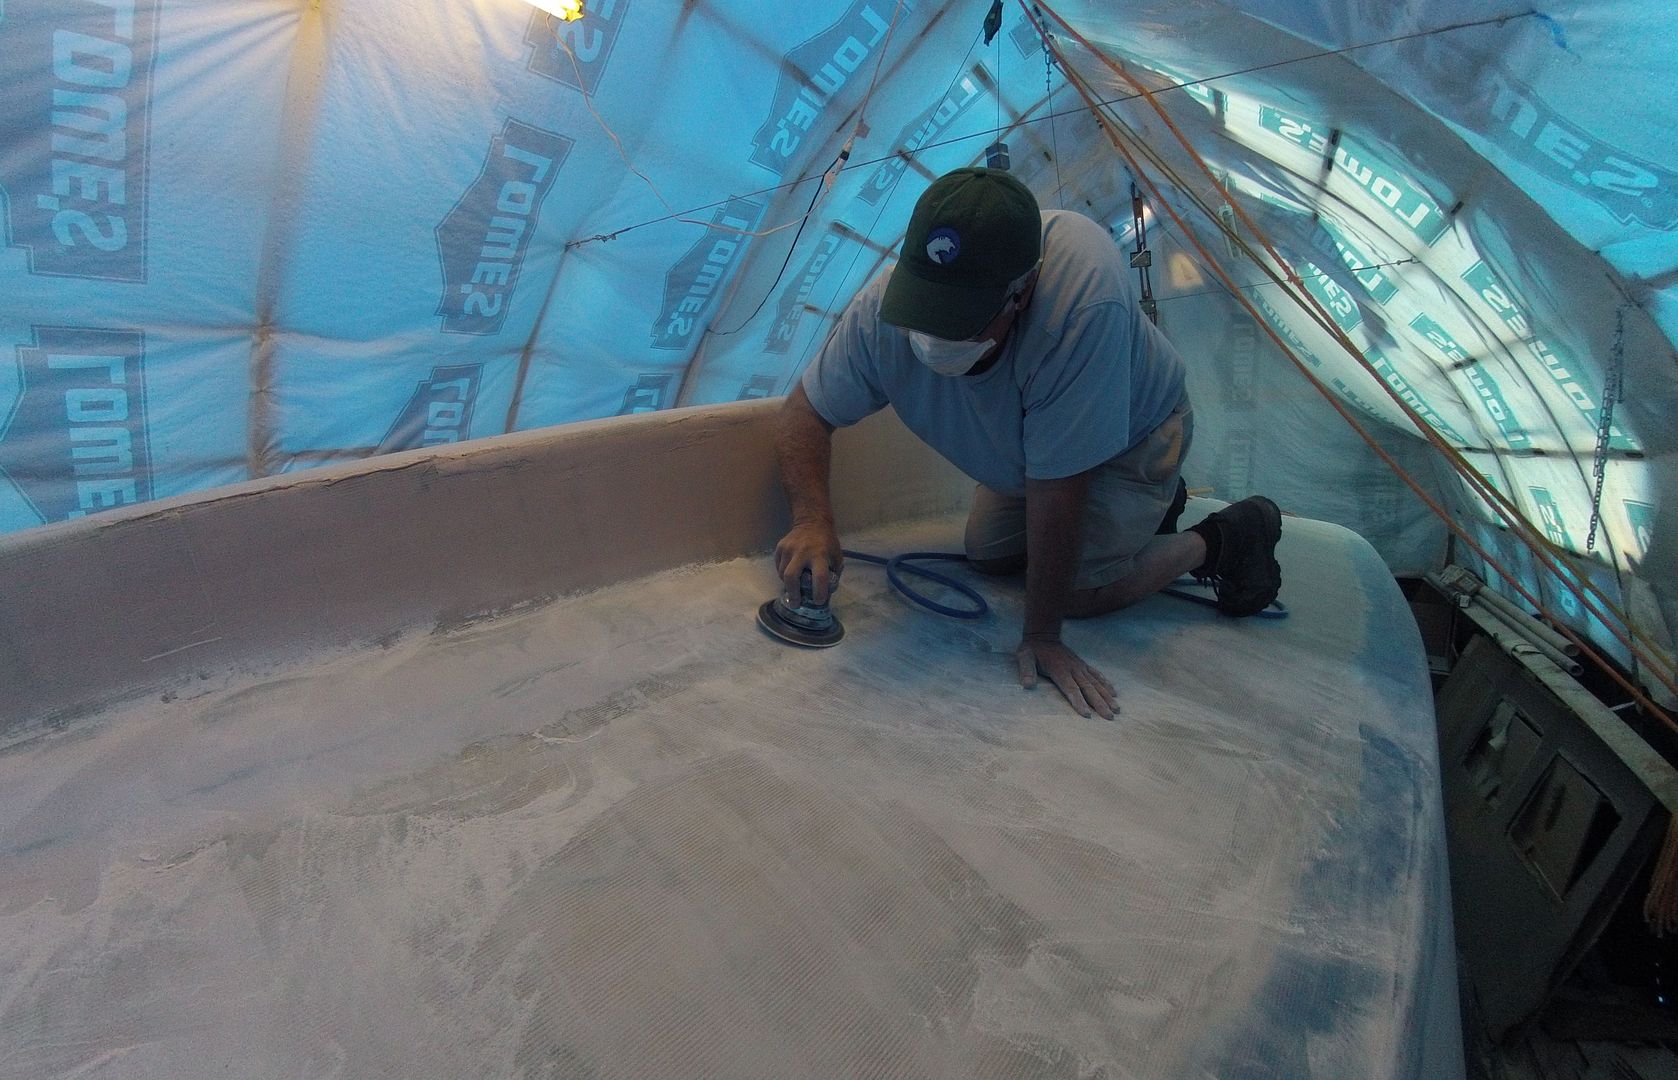
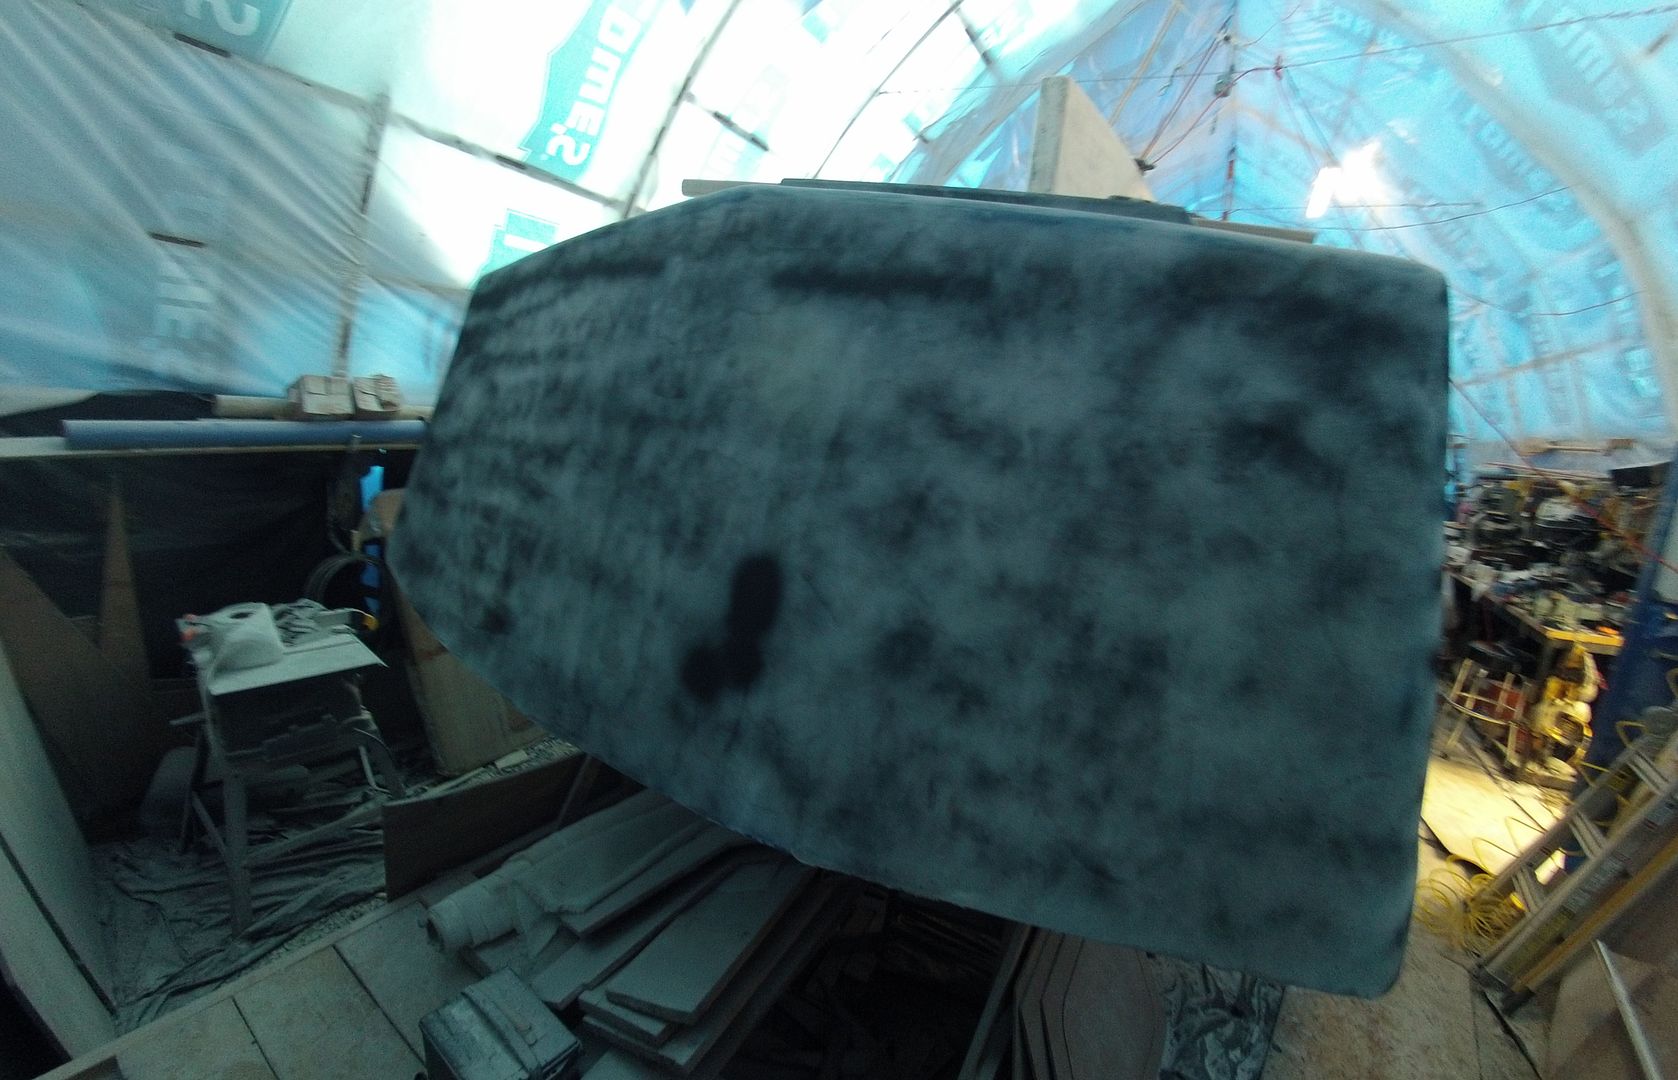
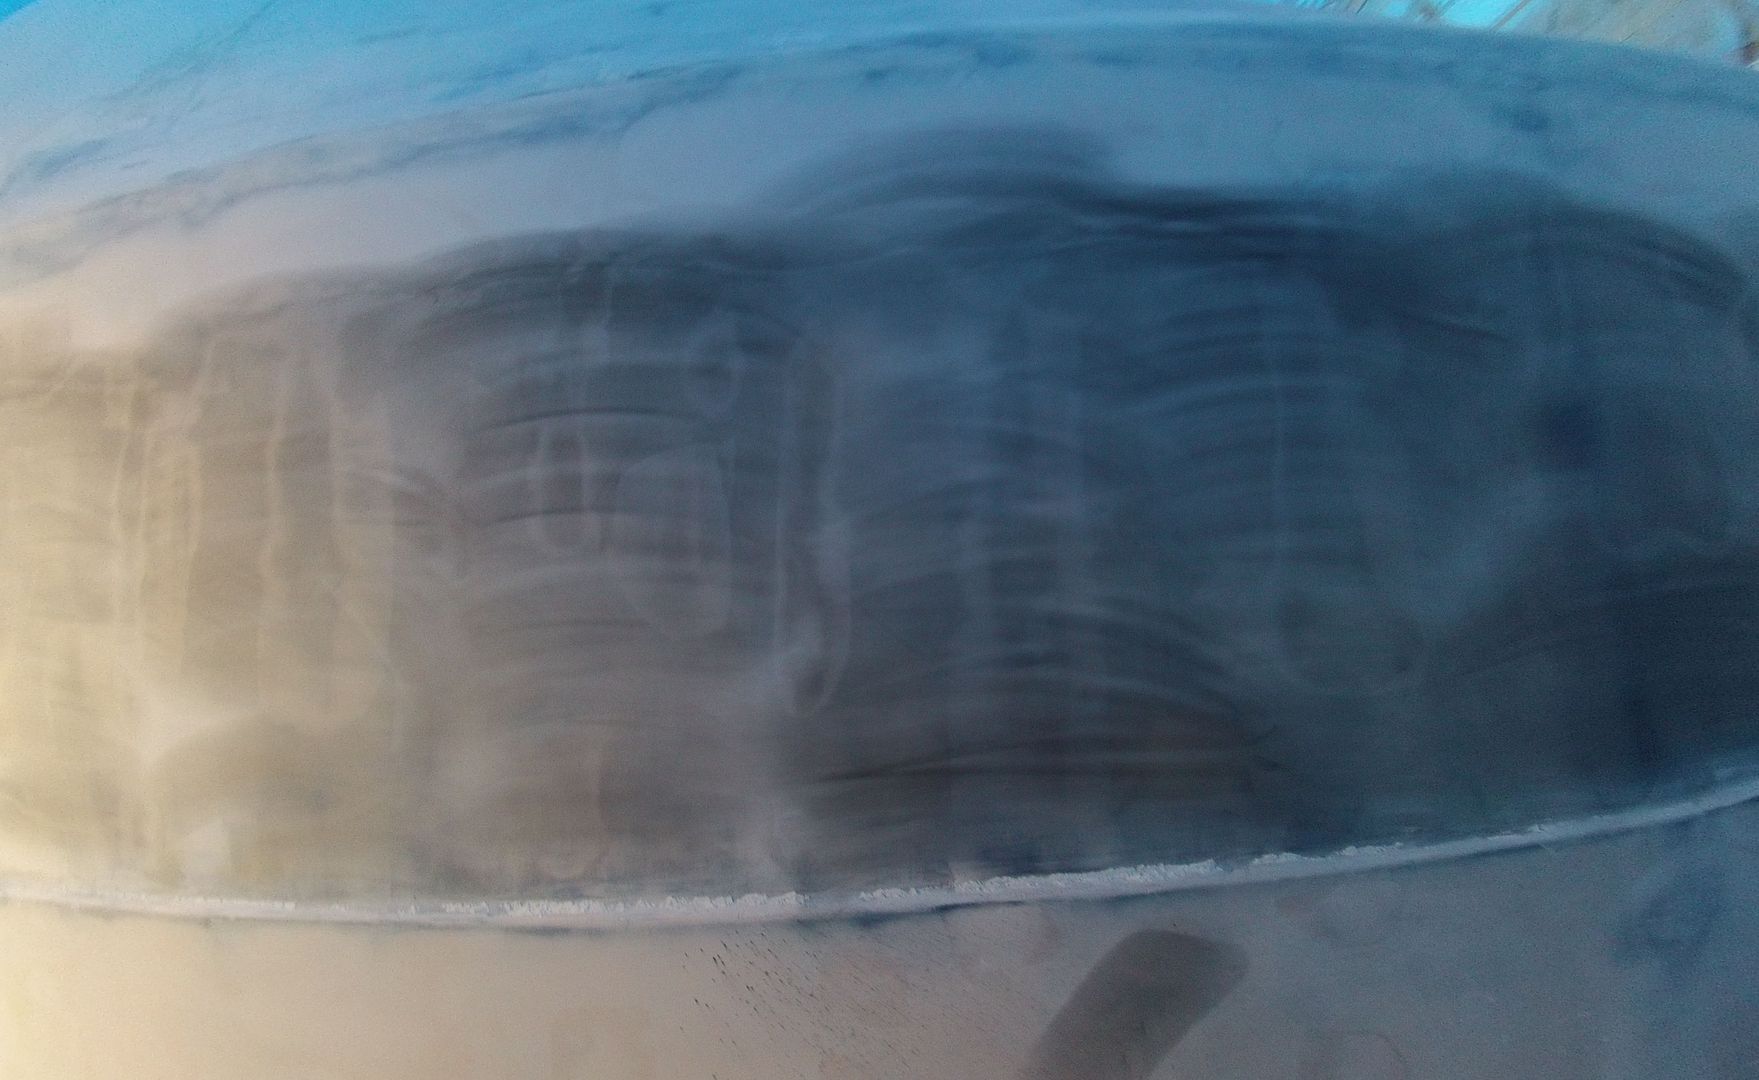
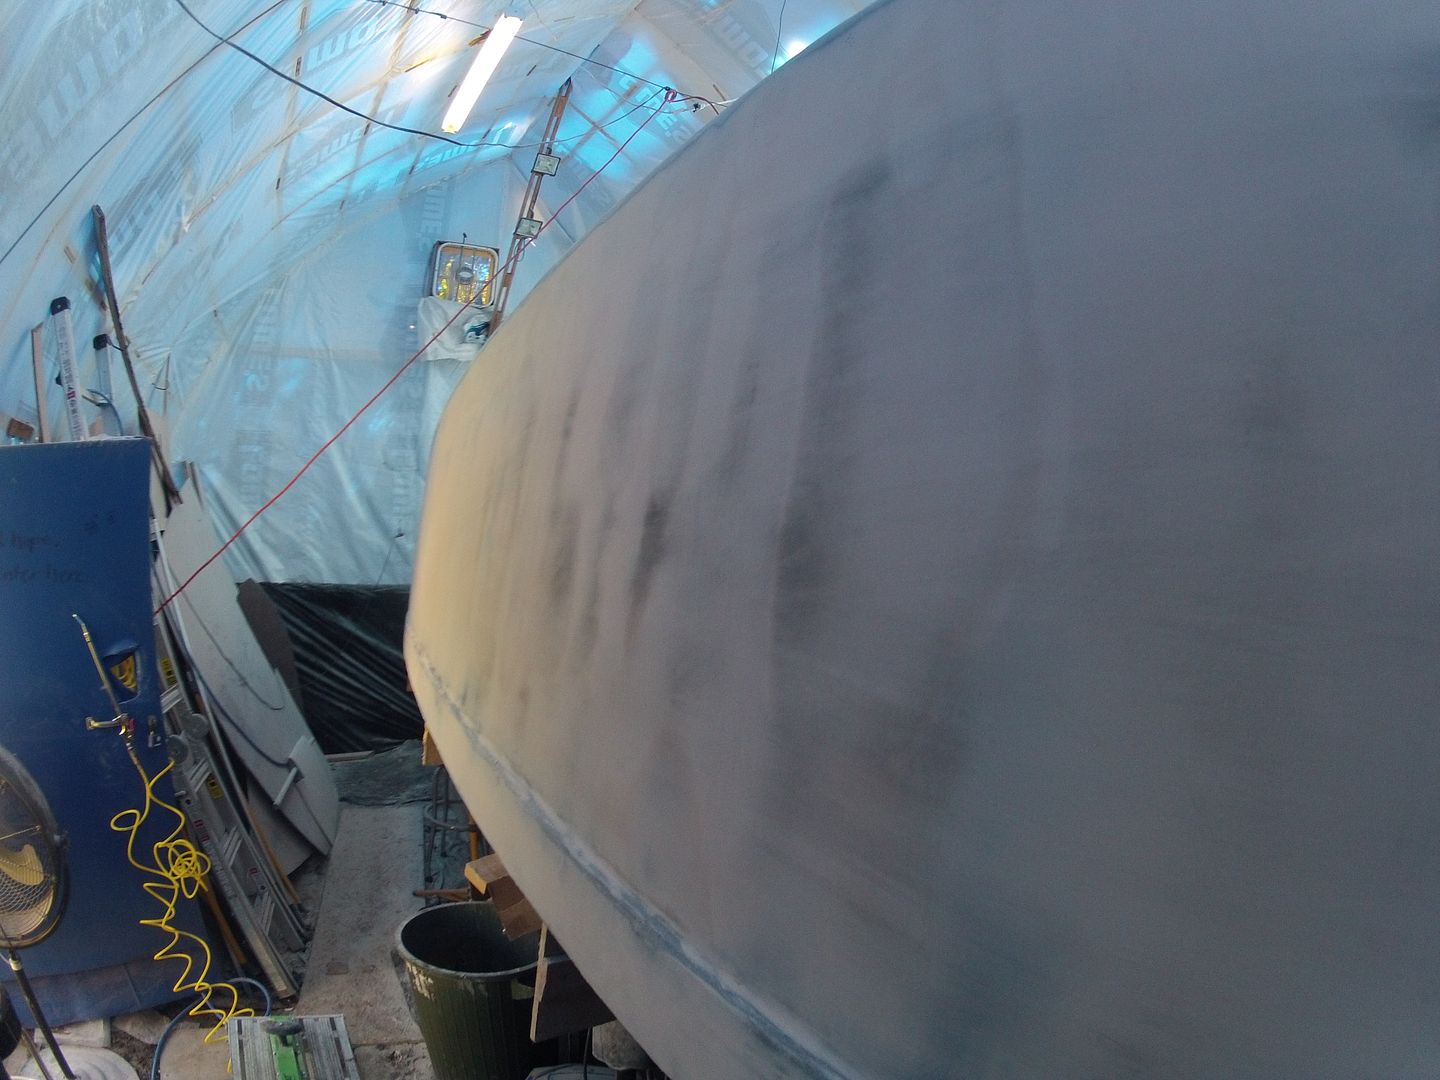
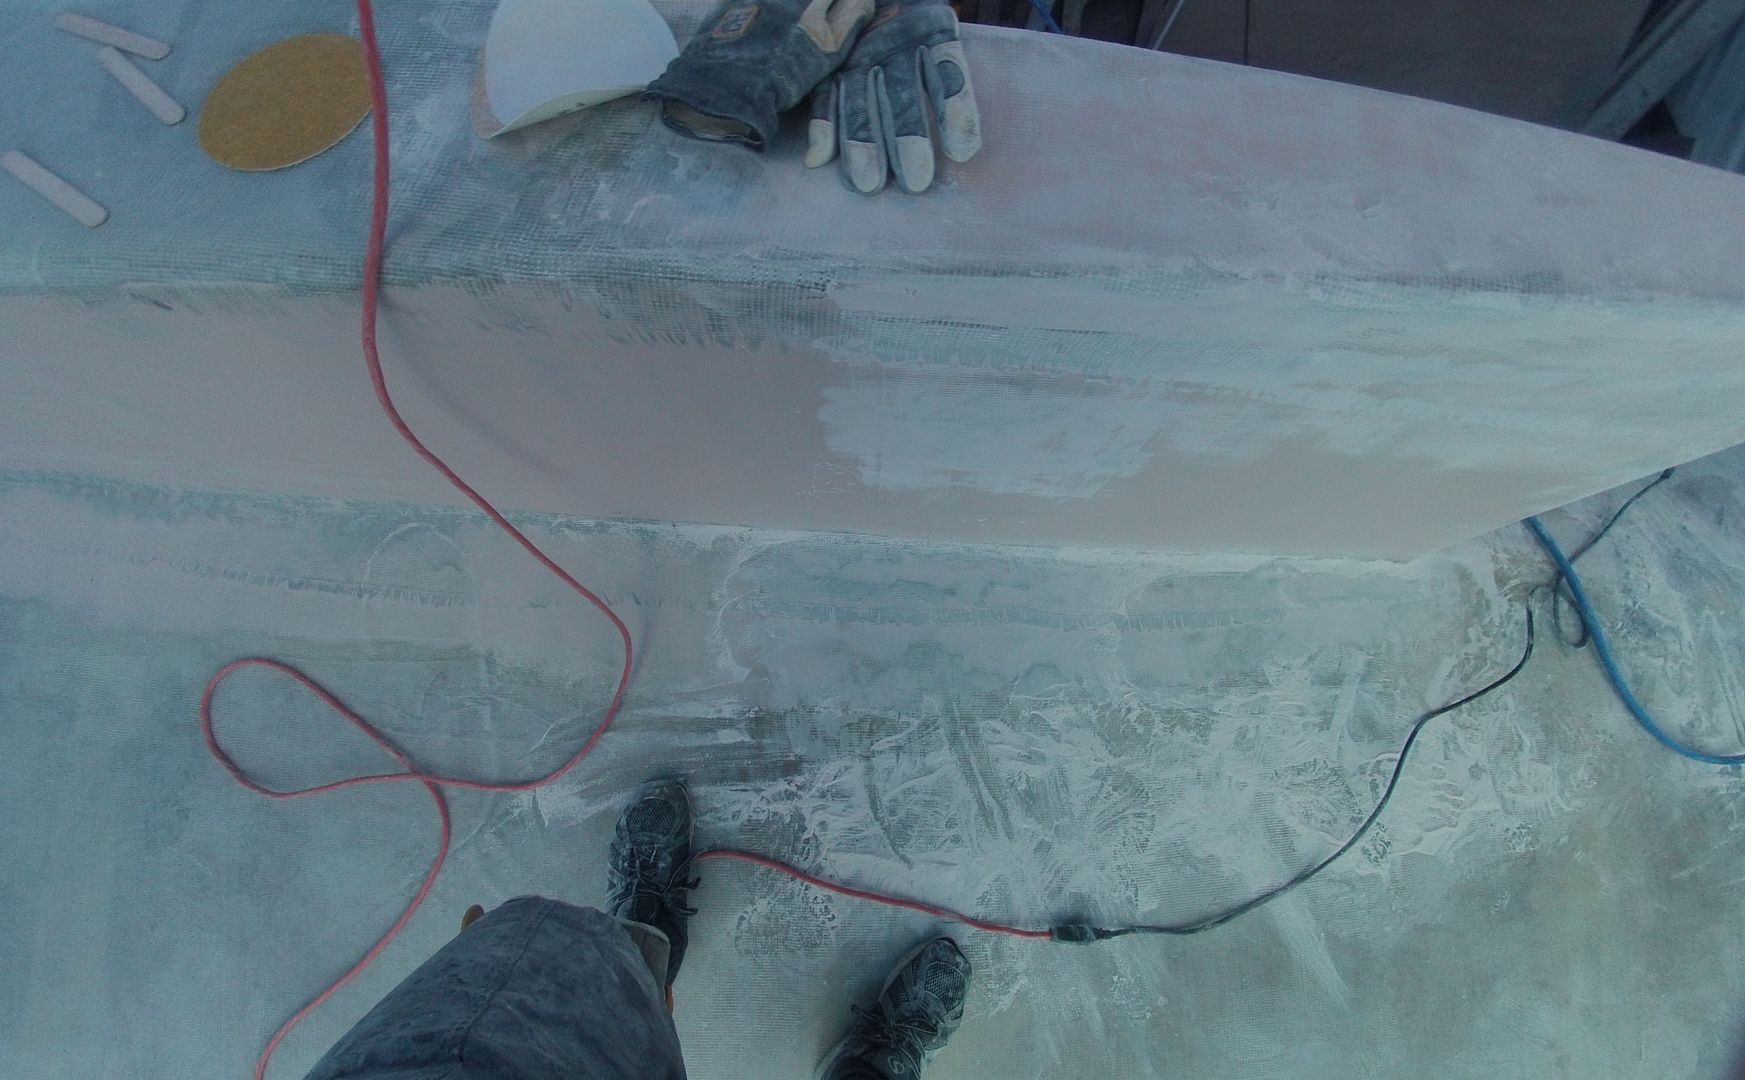
Today's job was to pick up some sandable spray primer (black preferable) and put a guide coat on the hull. A guide coat is simply paint that once sanded will remain in the low spots allowing you to more easily identify and correct them. You saw a bit of that before with the 3M dry guide coat (which is more suited to final fairing). For rough fairing a 'rattle can' (spray bomb) and flat primer works best.

So I went down one side of the boat and the transom spraying on the primer. Too much I've been told but you live and learn. All that's needed is a light dusting.

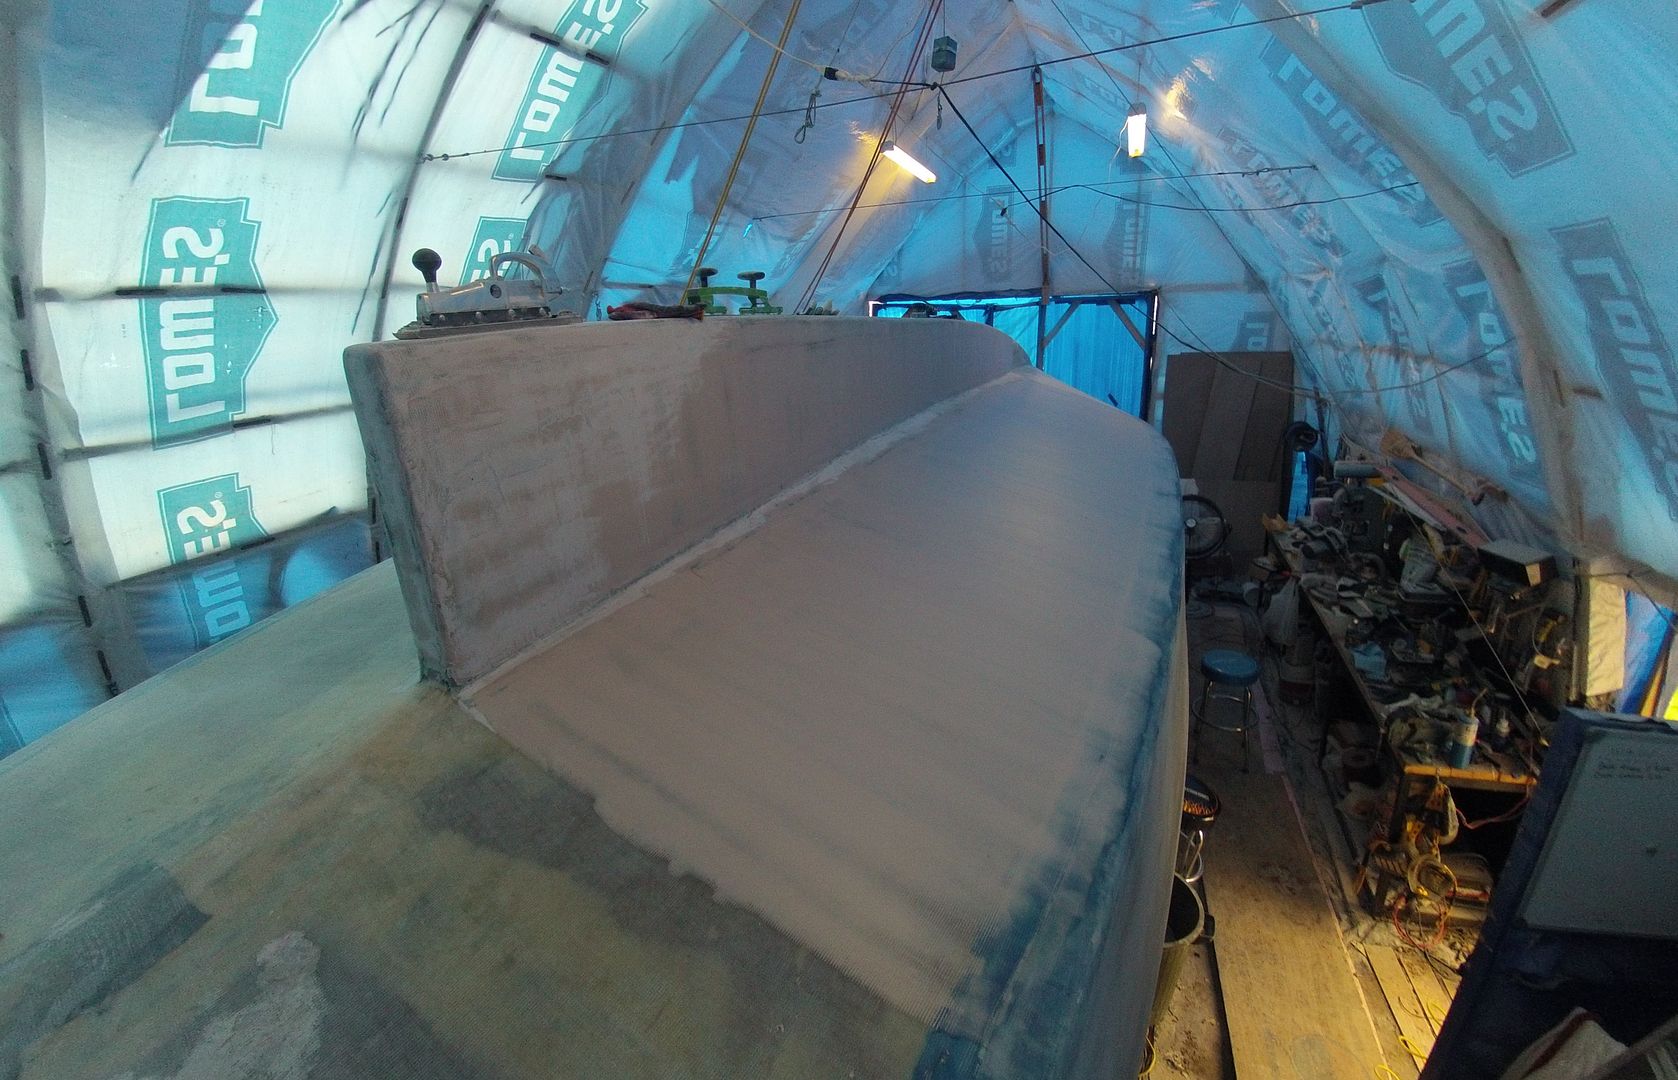
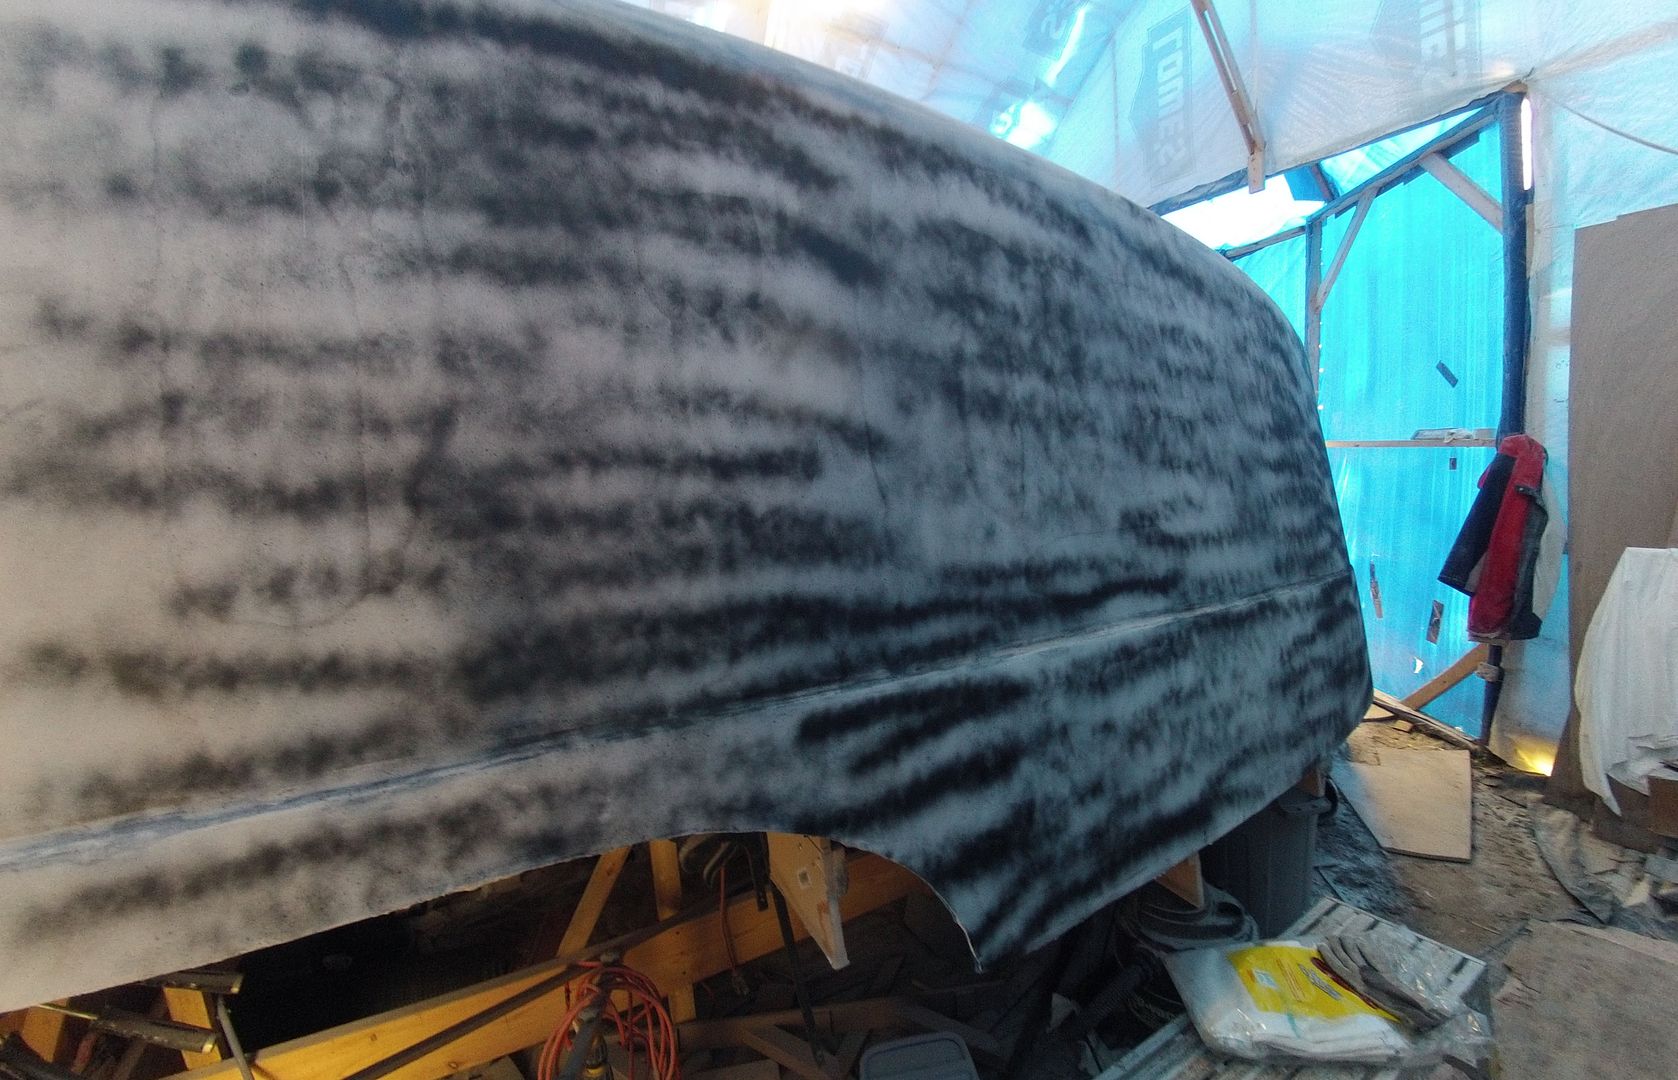
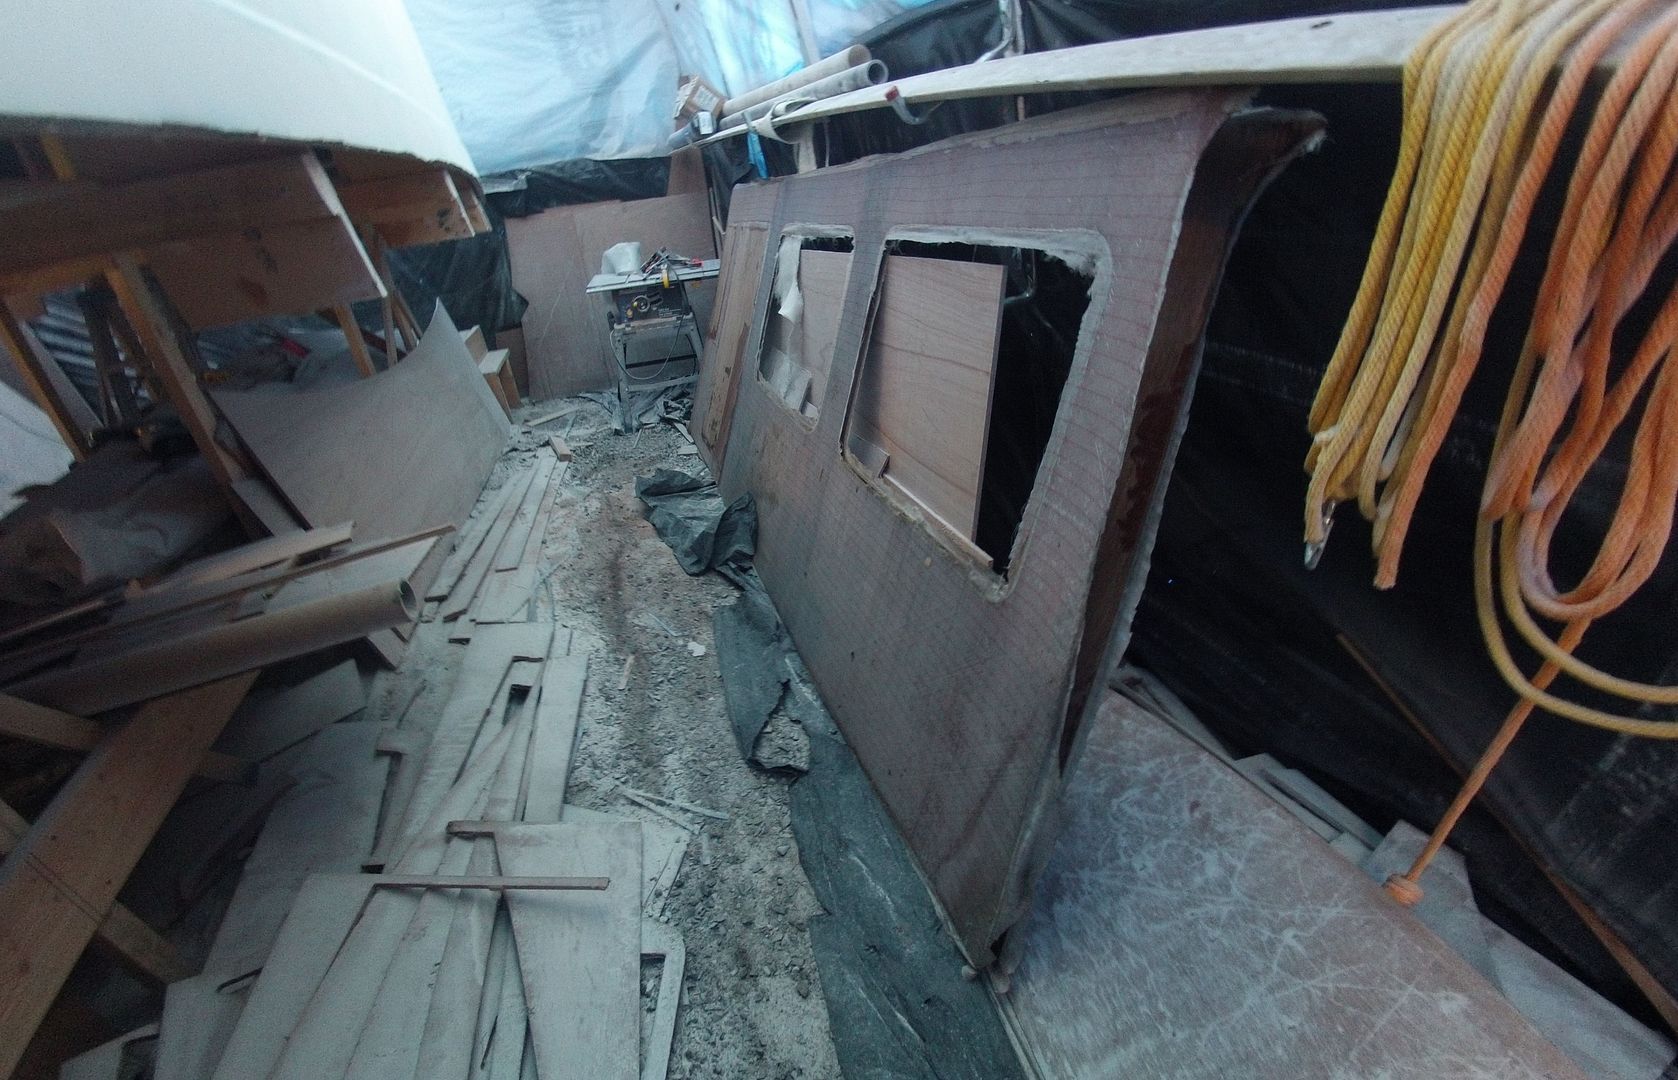
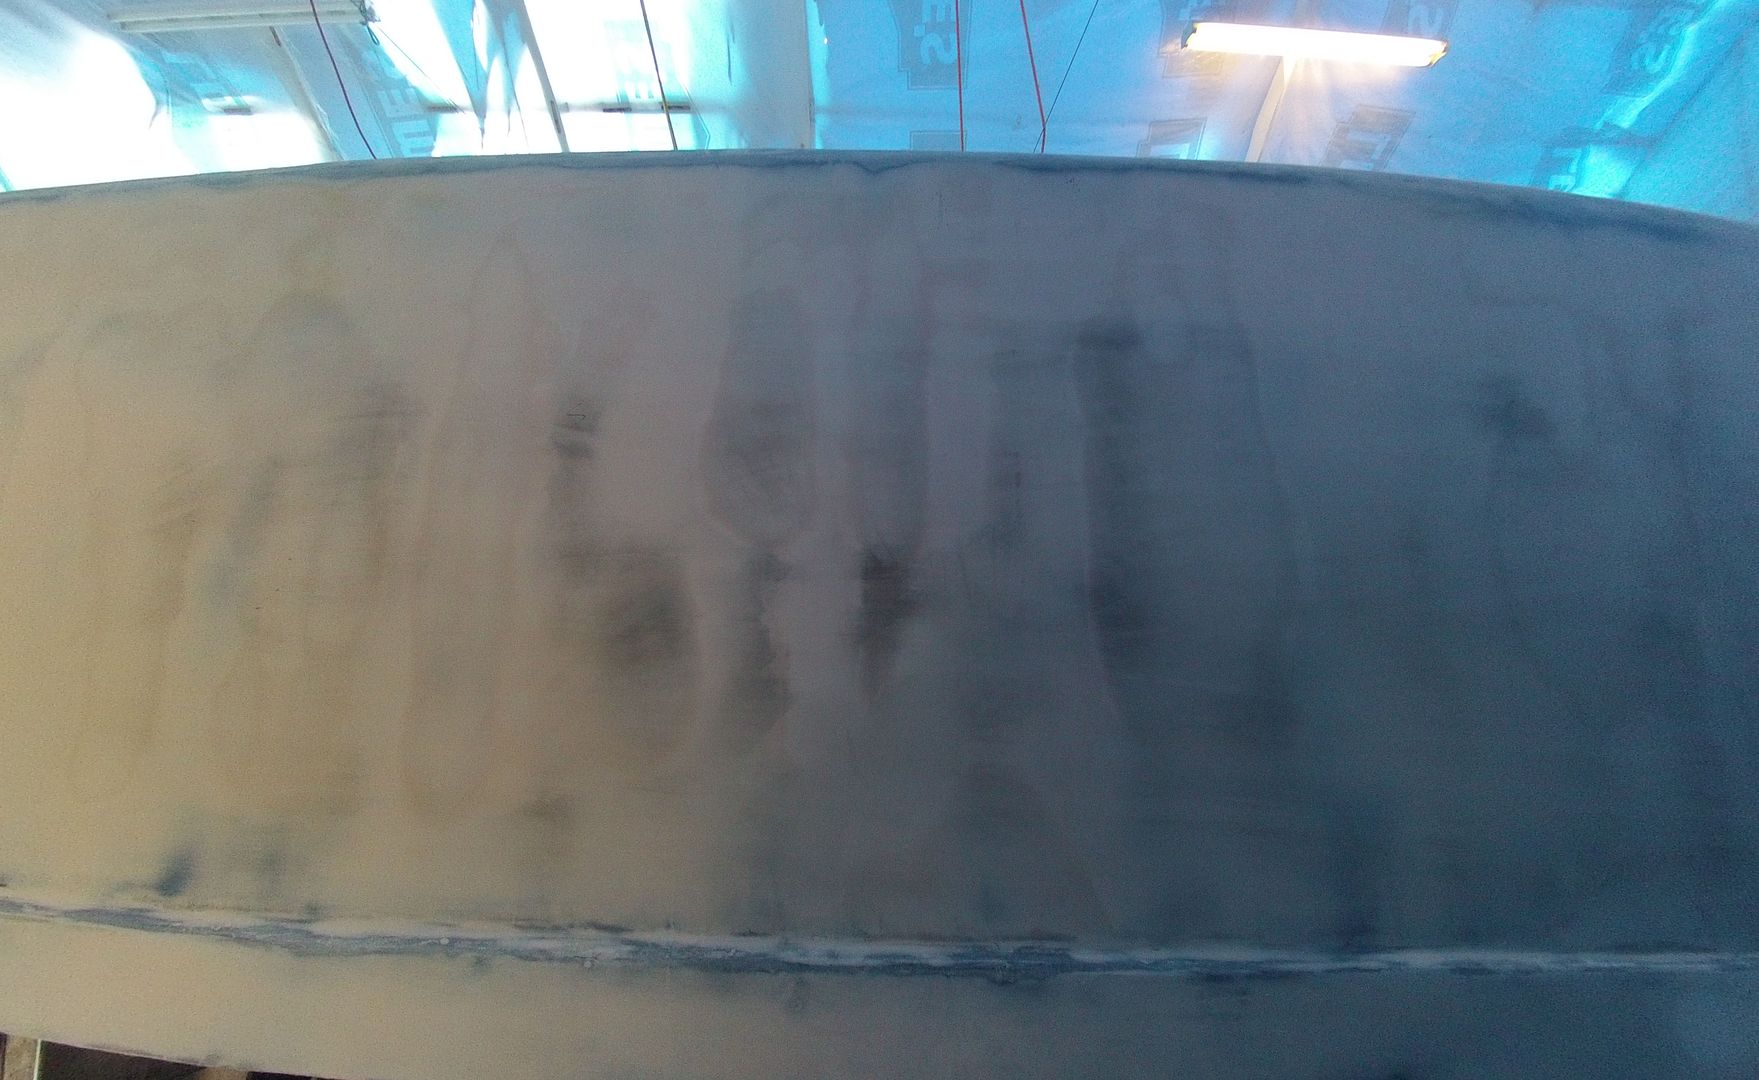
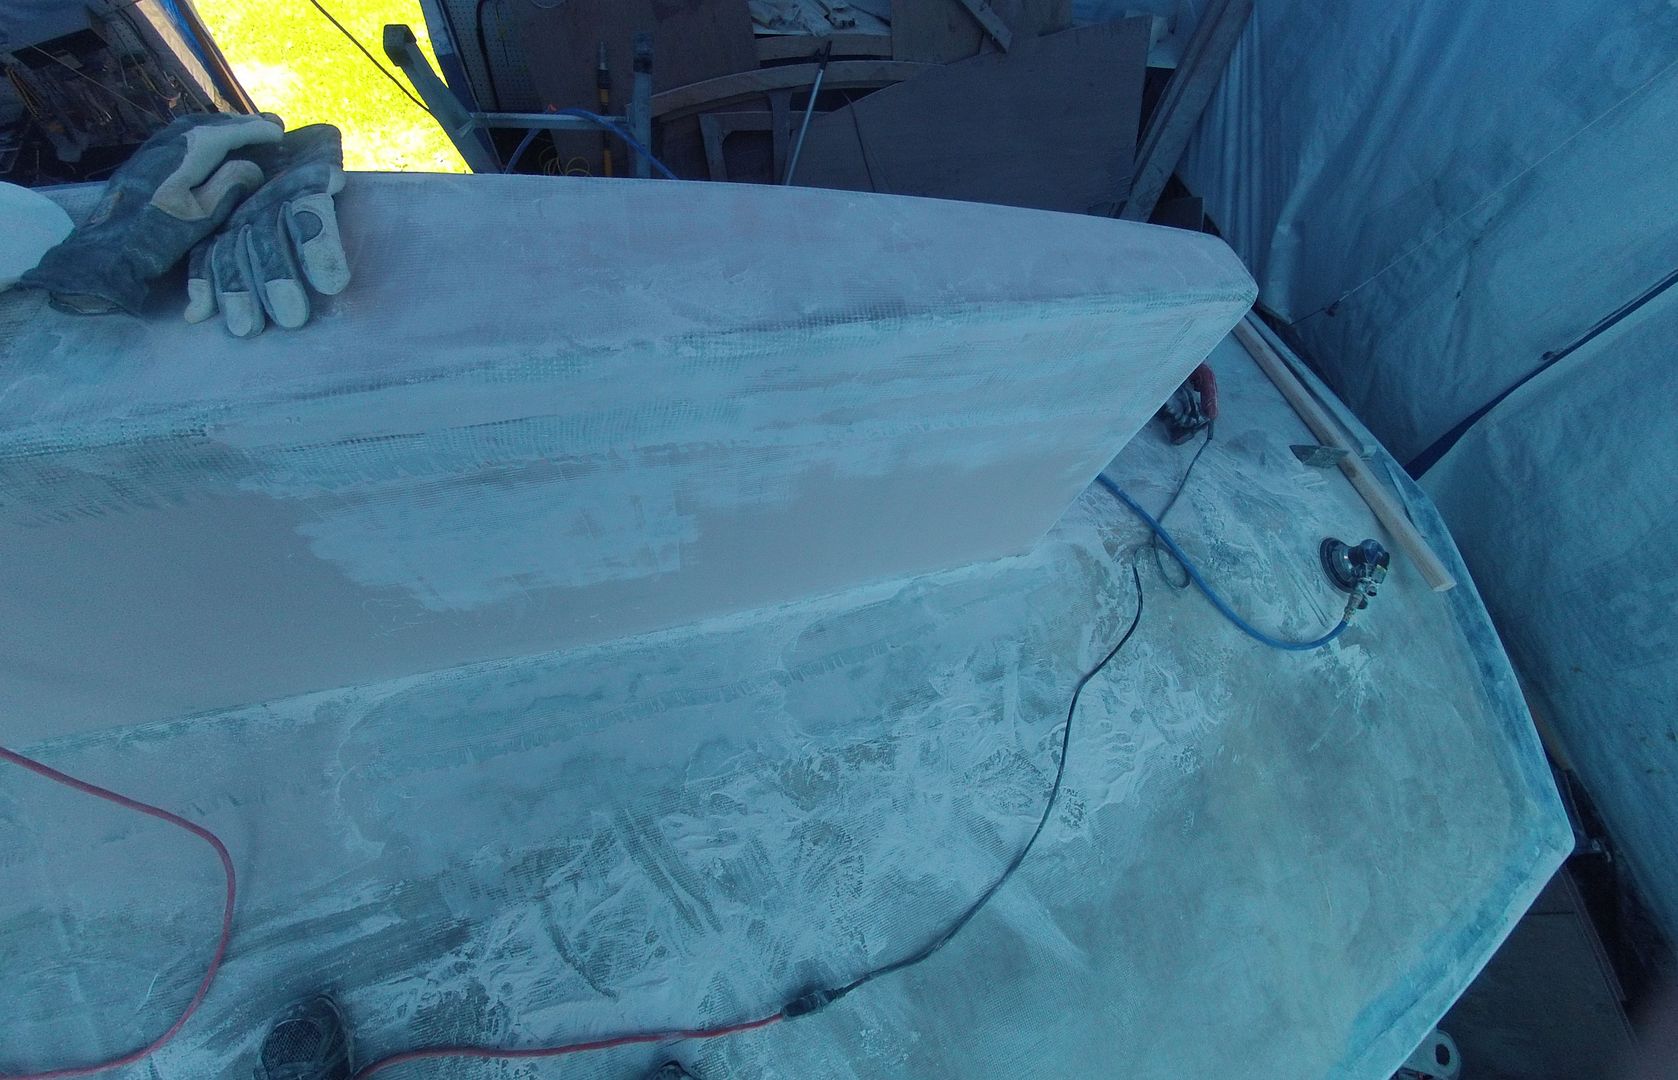
Once that was dry I started back over the areas with the Flexicat's and 60 grit paper. You can see in this pic that the bow and the bulwarks still need quite a bit of work. There's even more tape & fabric overlapping here than on the chines plus there's a heavy layer of carbon fiber fabric under there too.
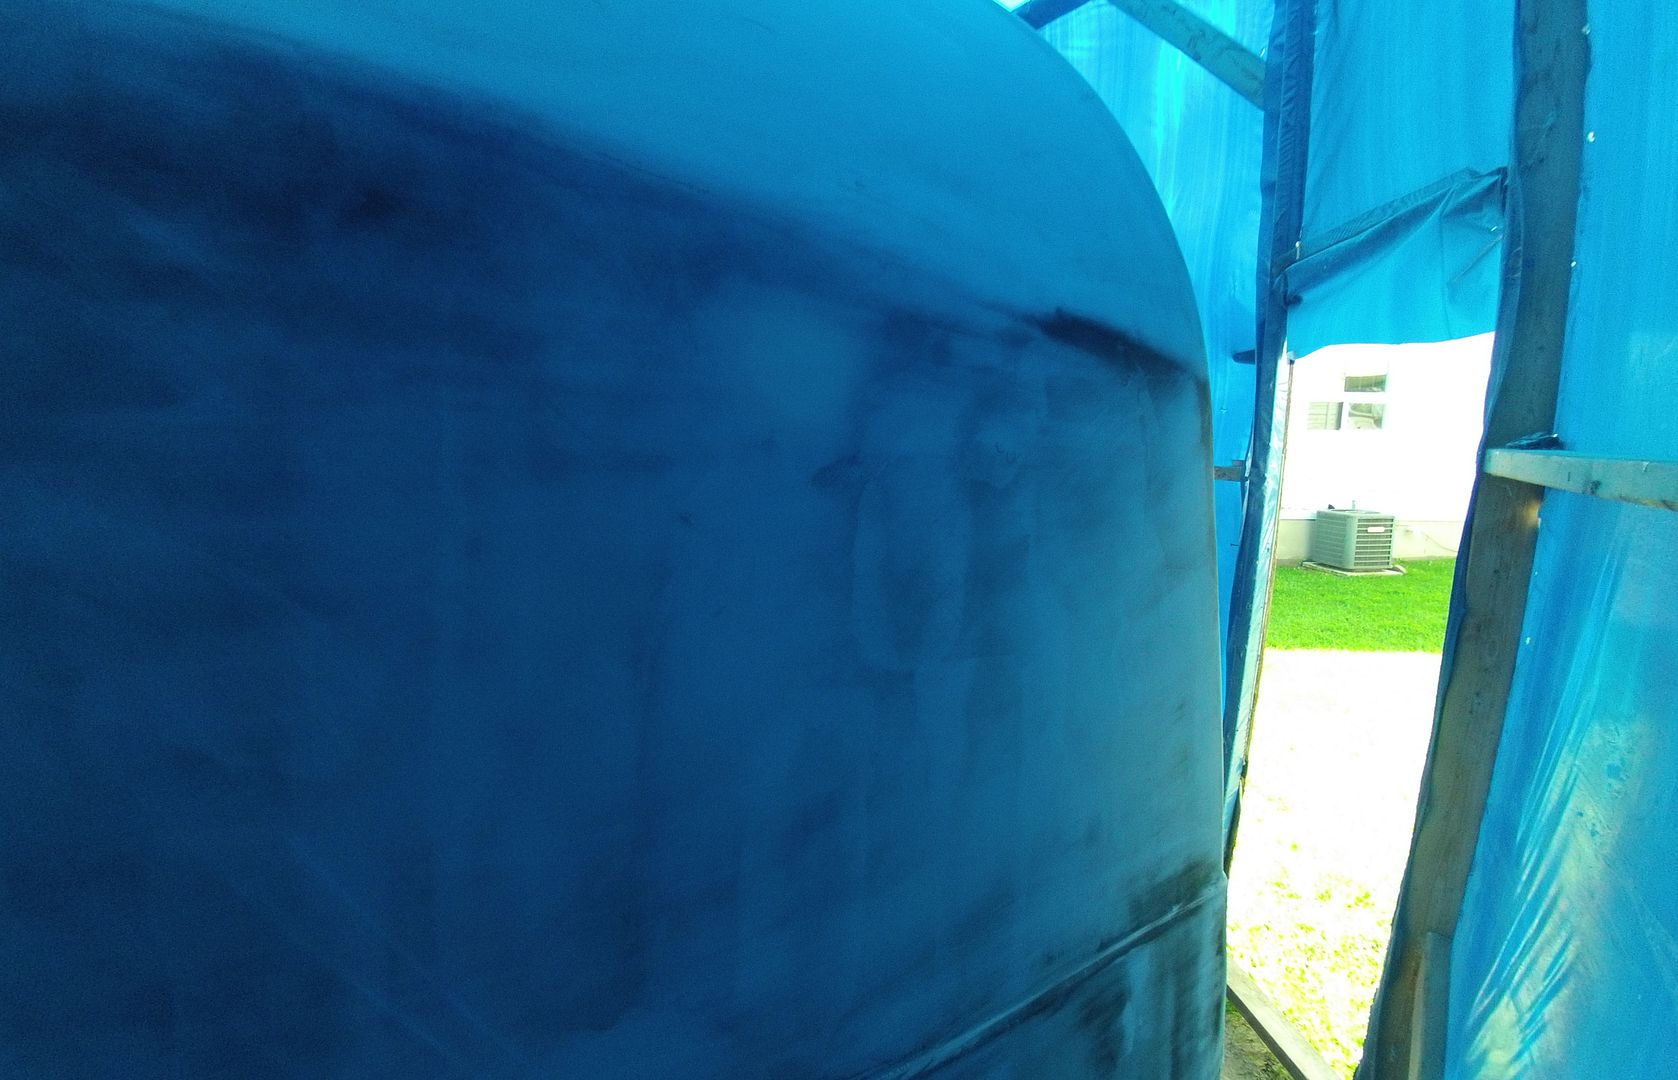
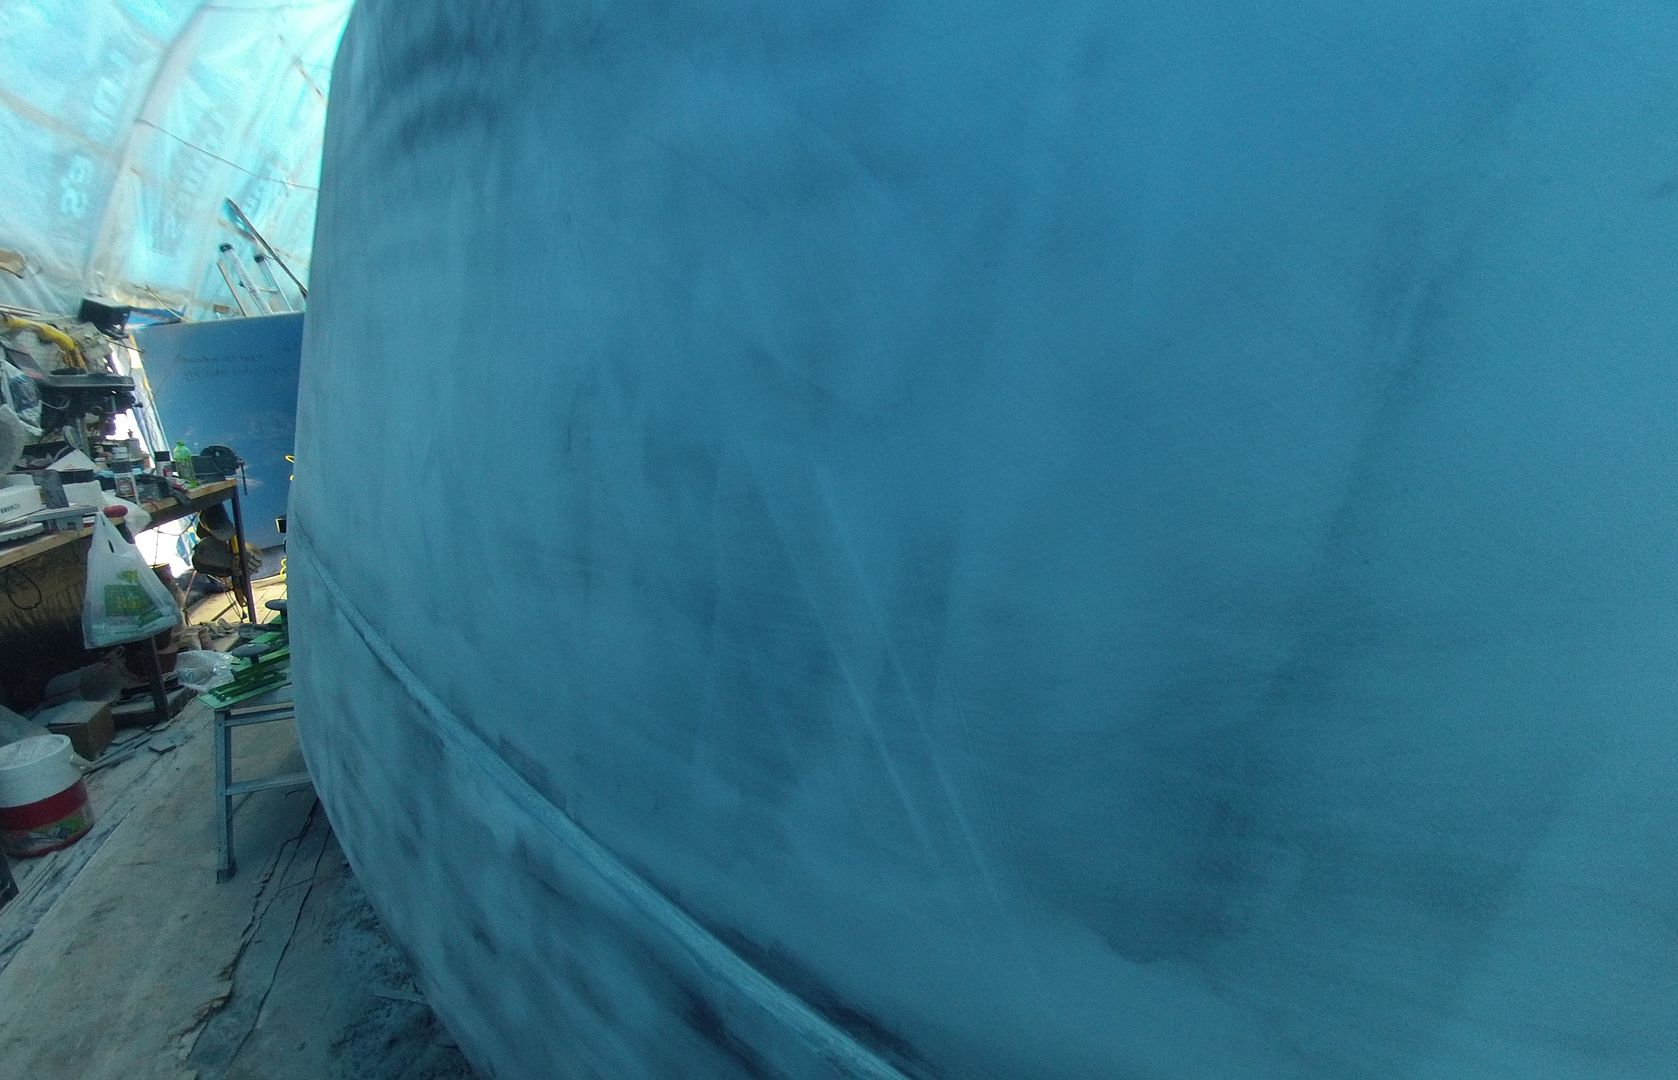
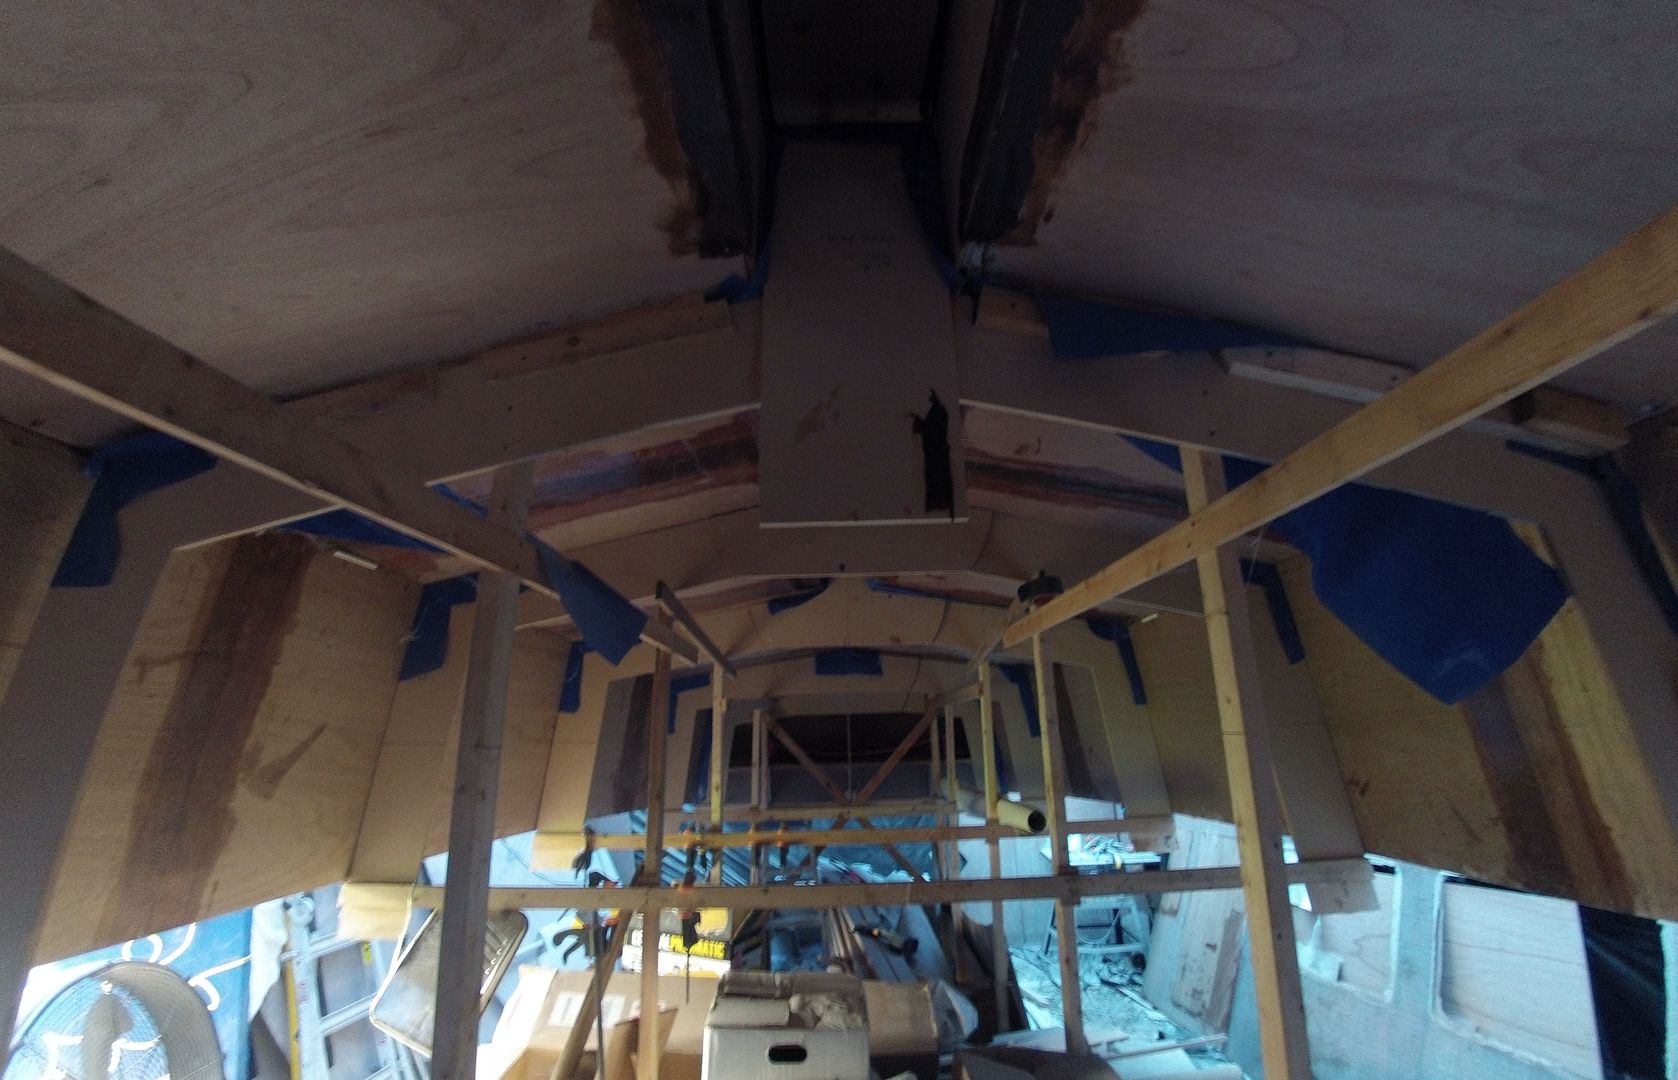
Moving aft you can see that almost all of the black is gone. There are a few minor spots but nothing major. The guide coat did show me some high spots I never noticed before and a few lows that I didn't know existed. Those defects are actually so small you can't feel them with your hands.
I know one thing I've been doing wrong is trying to fix some low spots with the Quickfair and it's way too thick for that job. I end up with a high spot that I have to sand the shit out of and the result is low spots on either side of the patch! *sigh* Remember the part about the dog chasing his tail? So tomorrow I'm going to try making up some of my own filler, ultra thin, about the consistency of mayonnaise and trowel that on. I'll also tint it our favorite colour, blue! When it sets up I'll be able to sand that and it should eliminate the very small and shallow defects. That's the theory anyways. We'll see how it goes.

I get a fair amount of advice from a fella on The Cruisers Forum (minaret) who's a pro. He frequently looks in on my build thread there and gives great feedback. Even though I can't afford or know how to use the material he chooses in his professional career I can still work out some of the details and draw advice (and courage) from him. I thank him whole heartedly.

http://www.cruisersforum.com/forums/f55/and-so-it-begins-knottybuoyz-new-project-58124.html


Friday, June 6, 2014

Feeling the affects of

advancing decrepitude. *sigh*  When I took my tumble down the stairs two years ago I also pulled something in my back. It didn't seem to be a pressing issue but it's kicking up more and more lately. I need to peel off some beef, I know that.  I dread having to climb up on top of the boat do do the fairing and sanding. It just kills my back & knees. Boy, getting old suks!

I puttered around the shed this morning. I filled some low spots and they'll be ready for sanding in an hour or so. I had to move the cabin sides into the shed. The brackets that held them on the outside of the shed broke off in the last storm we had. The panels got wet and some mold started to form on them.
I really gotta figure out a solution to my offcuts. I might build a bin of sorts on the side of the shed formerly occupied by the cabin sides. Maybe a project for tomorrow.

While I was doing the spring cleanup on the BBQ I had to go under the boat to retrieve our propane tank. Thought I'd share a couple of pics from inside the belly of the beast!

Looking forward.
Looking aft.
I can't wait to get through this fairing stuff so I can get this pig flipped over. Then the fun begins filleting and fiberglassing the insides. At least I'll have gravity working on my side.

Cheers & thanks for looking in.


Wednesday, June 4, 2014

Had to take a wee break

Saturday our Ginger Moggy, Squirt, got into some trouble necessitating a late hour trip to the animal hospital. I had noticed he was acting strange and caught him earlier in the day trying to take a dump on the front porch. I though he was just being a jerk. Later on I saw him again hiding in the basement acting strange. I mentioned to Lori to keep an eye on him. She later found him upstairs frothing at the mouth and poop coming out of him. We rushed him to the vet where the Doc determined he had a bowel obstruction. Long story short, two days in animal hospital, multiple enema's, Xrays & 'The Flying Fickle Finger of Fate' procedure and $1100 later he's back home, almost normal.

I took some more time to deal with a few issues I've been putting off. Rearranged some finances and paid off the Jeep. This will free up some cash flow for boat stuff etc. Managed to get back to the boat this morning. I picked up some 3M dry guide coat and gave it a try.
The stuff is a bit messy. I'm guessing but I'd say it's nothing more than carbon black applied with a sponge applicator. It does do what it claims to do. Once sanded it'll highlight the low spots.
In some areas you can read it fairly well and keep sanding till it's gone. In others you can also tell if it needs more filling. I used my straight edge & feeler gauges and found most of these low spots to be less than .001" deep. You can't see them with the naked eye without the guide coat nor can you feel them .
I've moved onto the next smallest grit, 80,on the Flexicat's. It means a bit more sanding but the surface is getting smoother and smoother all the time. And now for your viewing enjoyment, I know you're sitting on the edge of your seats holding your breath so here it is, another sanding video! Yeah! Let 'er rip!
Cheers!


Sunday, June 1, 2014

Movin' on up

to the top of the boat!

So being pretty much done with the sides & transom till I get the 3M dry guide coat I ordered I moved on up on top (actually the bottom) to start sanding the poo I laid on there a week or so ago. It seems a whole lot harder having cured for that long! Yikes!

The keel & bottom panels won't get near the treatment the sides & tansom got as virtually no one, other than Lori when she dives down to scrape the barnacles off, will ever see it!  :-)
The idea here is to knock down the shiny stuff and feather out the fabric edges in prep for another layer of poo along the keel and bottom panels.
Like I said before it's tough going on this stuff. I broke out the belt sander and it chews it up real good! Too good I think. I've got a 40 grit belt on there now so I think I'll get an 80 or 100 grit belt to see how that does. "The proper tool for the proper job" Scottie used to say!

It was 80 degs in the lower part of the shed and 95 degs on top of the boat. This took the starch outta my shorts in about 3/4's of an hour and I had to call it a day. I'll get right back on it tomorrow morning while it's still cool.

Update:  Video clip o' the day!


Standby, more to come.