Saturday, August 30, 2014

Dismantling the forms

Today I continued dismantling the forms. There were five left. One will stay as part of the rolling frame. It's a little eerie being under the boat with only two frames holding it up in the air. ;-)  No creaking or cracking or moaning or groaning. It appears to be fairly solid but I don't think I'll be crawling up on top of the boat ever again! :-)

Looking forward into the bow with just the two turning frames in pace.
And looking aft.
I used my latest acquisition, a Farm Jack (Tractor Jack) that I picked up yesterday at a TSC Store in Kemptville, ON. Nicest TSC I've ever been in. Keen young kids working hard and loving their job. Store was well organized, shelves stocked and clean! :-)  Anyhow the jack was on sale so it was worth the trip.
Knew I needed some lifting power. I could have maybe struggled along with my floor jack but it's only rated at about 1500 lbs or so. The tractor jack is something like 7000 lbs. Just a few pumps of the handle and the rolling frame was free of the strongback frame.

Used my axel stands and made a few wooden legs to hold the boat up by the rolling frame. It's nice and steady on the axel stands but I felt more comfortable with a few more legs under the frames (for now).
I'd bet I took about 6 lbs of screws (drywall) out of the forms & strongback! I'd usually load them in my pockets till I jabbled myself one too many times then would have to empty them on the work bench. *lol*  Anywho, here's what's left of the forms after I got done ripping them out.
Looking back almost exactly 3 years ago this is what the forms looked like when we first set them up!
All the structural lumber, 2X3's, 2X4's, 2X10's etc. from the forms and strongback will be re-purposed into a set of steps to get up and into the boat and a few other small projects. Two of the 2X10's, which are 16' long, will be used as a track for the rolling frames to slide in. It would probably be a nightmare trying to roll this thing over on a dirt floor.

So that's it till Monday. Tomorrow I'm helping the kid move all his stuff into a storage unit before he heads out west to seek his fortune.

What's next?

1. Remove forward portion of strongback frame
2. Construct tracks for rolling frames
3. Lower the frames onto the tracks
4. Roll this whale over!

Standby...


Friday, August 29, 2014

Last iteration of my Friggin' Riggin'

I hope this is the last iteration of my Friggin' with the Riggin'! :-)
With the help of my 'Guardian Angel' friend out there on the Interwebs I was able to better understand exactly what all this hardware will do when I lift and turn the hull over. What I failed to recognize was the cable hook & pulley block will swing up and outwards away from the pole as the boat comes up and turns over.
So as they do that the hook especially needs to be able to freely rotate without getting bound up underneath the shackle on the u-bolt. It's almost over simplistic in its application in this case.

I've said it before that I don't think I would have ever tackled this project without the aid of the Internet. The web forums & blogs out there are a veritable treasure trove of knowledge just waiting to be mined. The time and effort those authors have spent in documenting their projects are what makes this all possible. I hope someone someday will look through this blog and see what has worked and what didn't and maybe avoid some costly mistakes. The single most important point of the whole thing is that the job gets done 'Safely'!

Cheers.....

Thursday, August 28, 2014

Done Friggin' with Riggin'

This mornings session I finished friggin' with the riggin' and final cross member on the rolling frames.

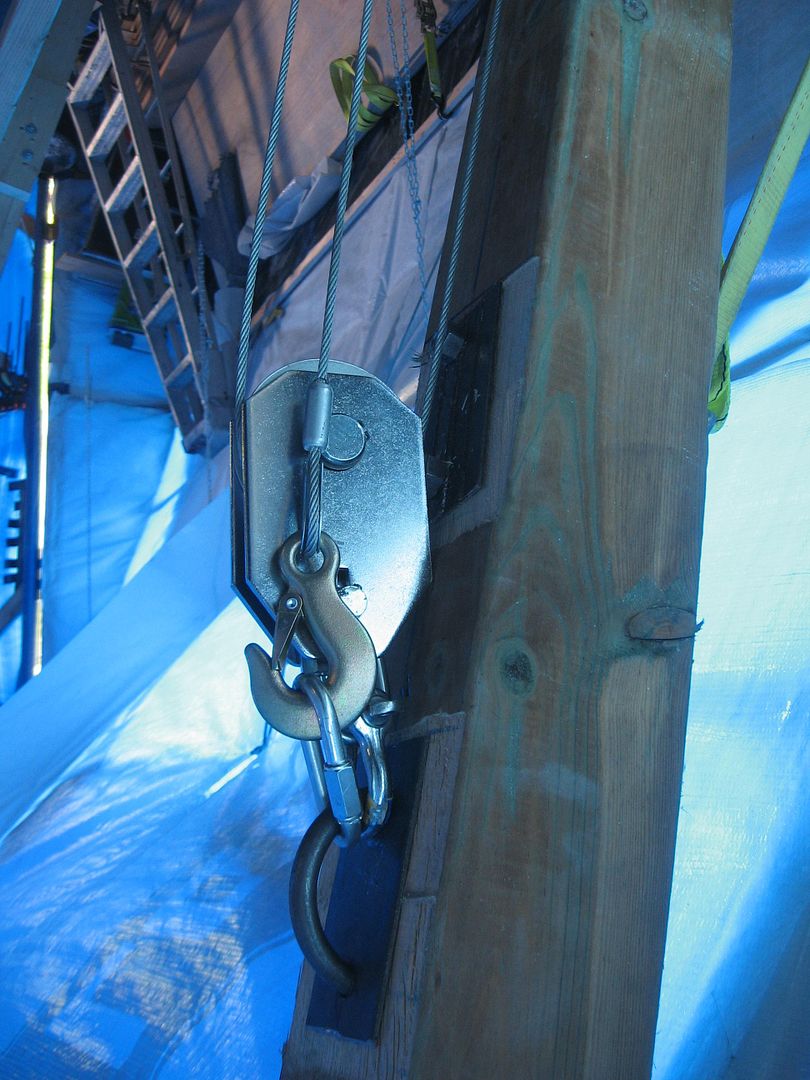
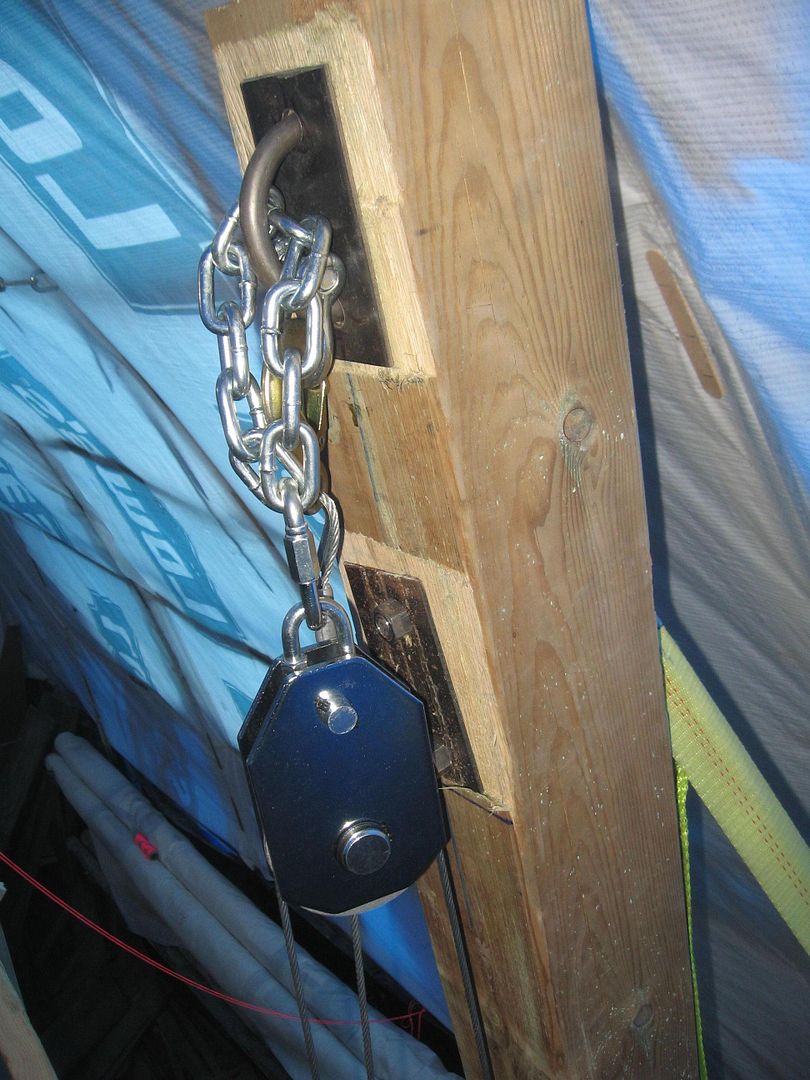
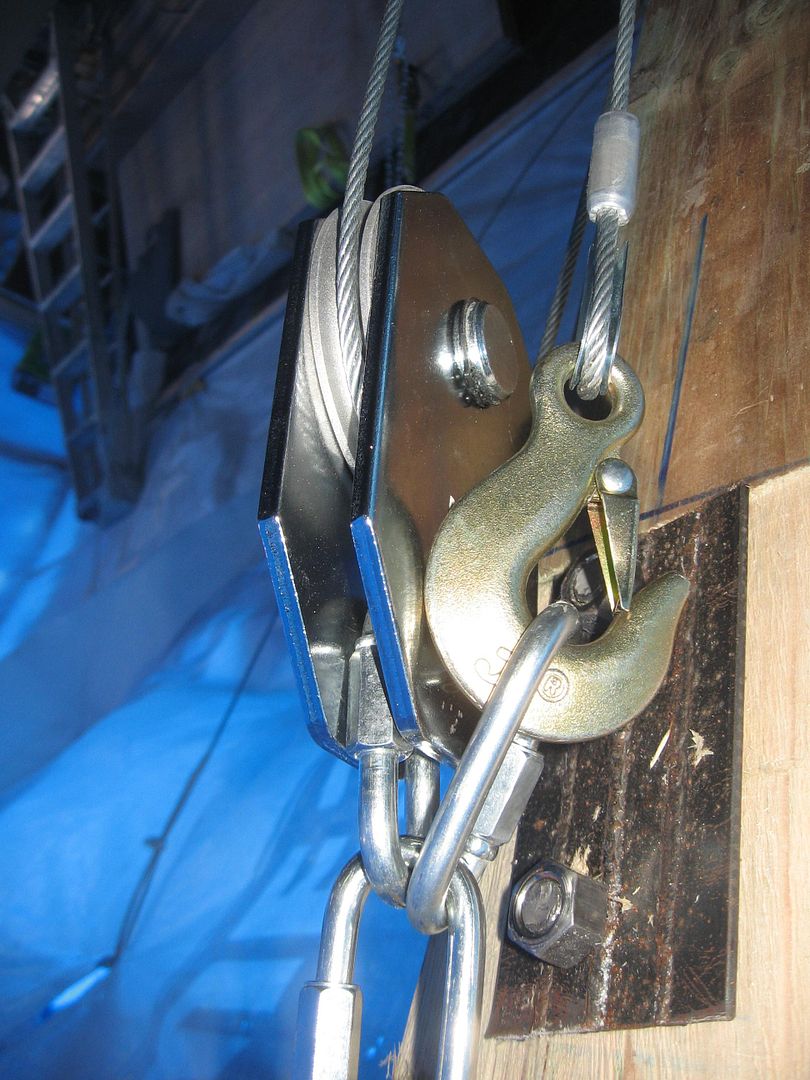
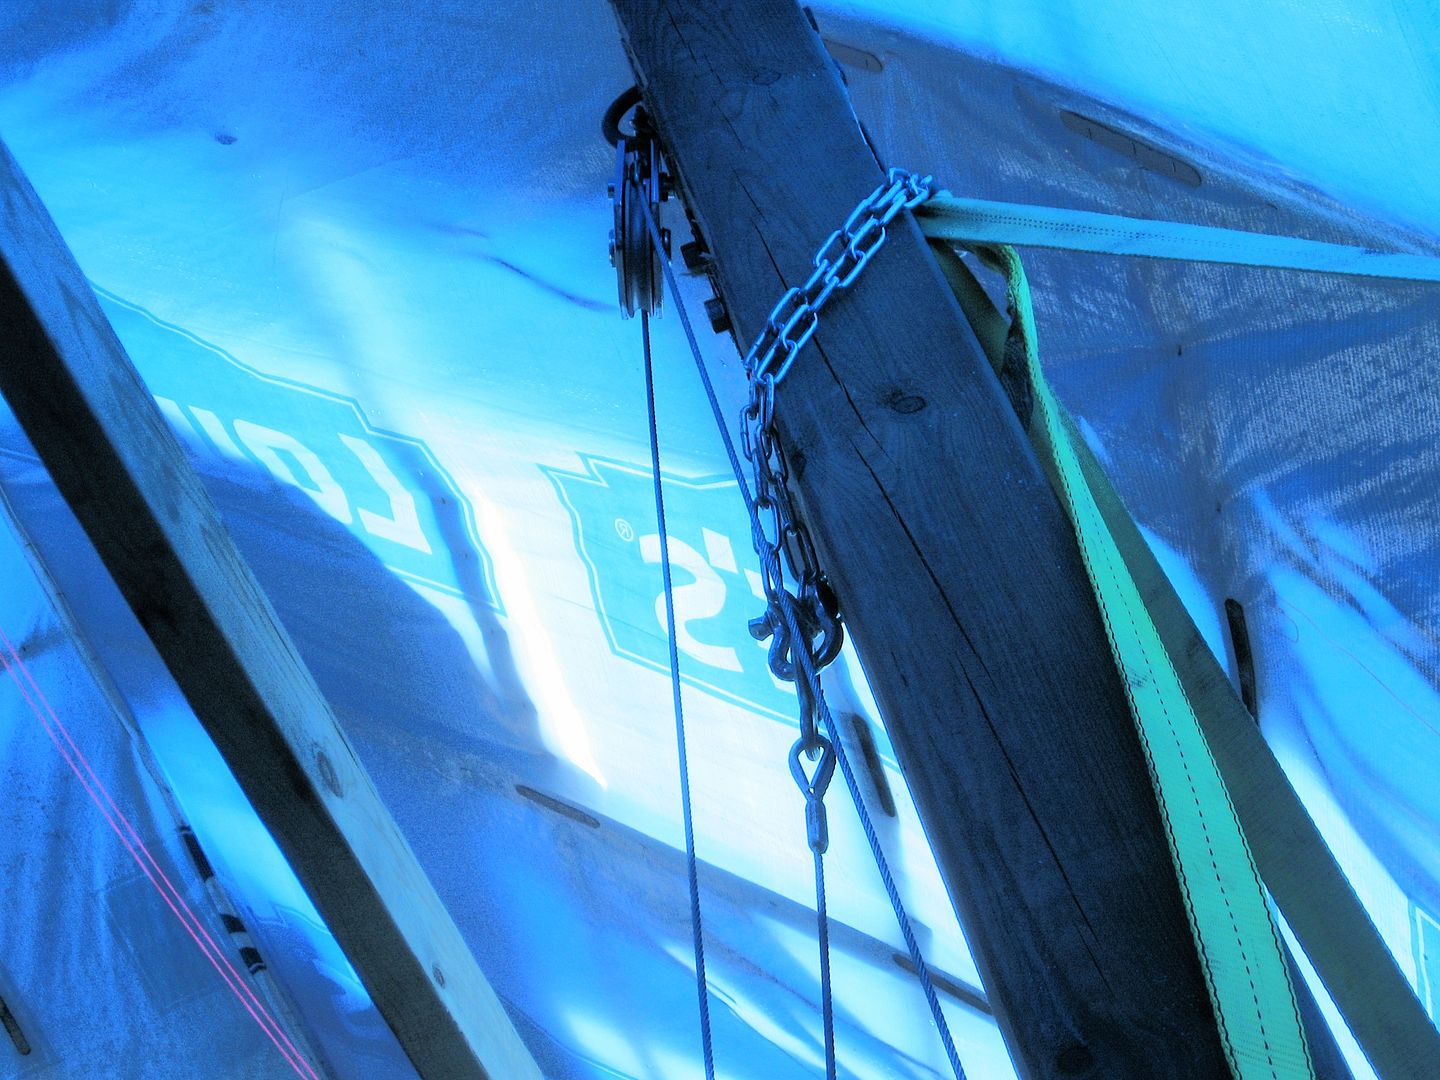
First order of business was the pulley blocks at the top of the Gin Pole. I bought a 1' length of 5/16" chain to wrap around the u-bolt. Removed the hook from the pulley and replaced that with two 5/16" QuickLinks.
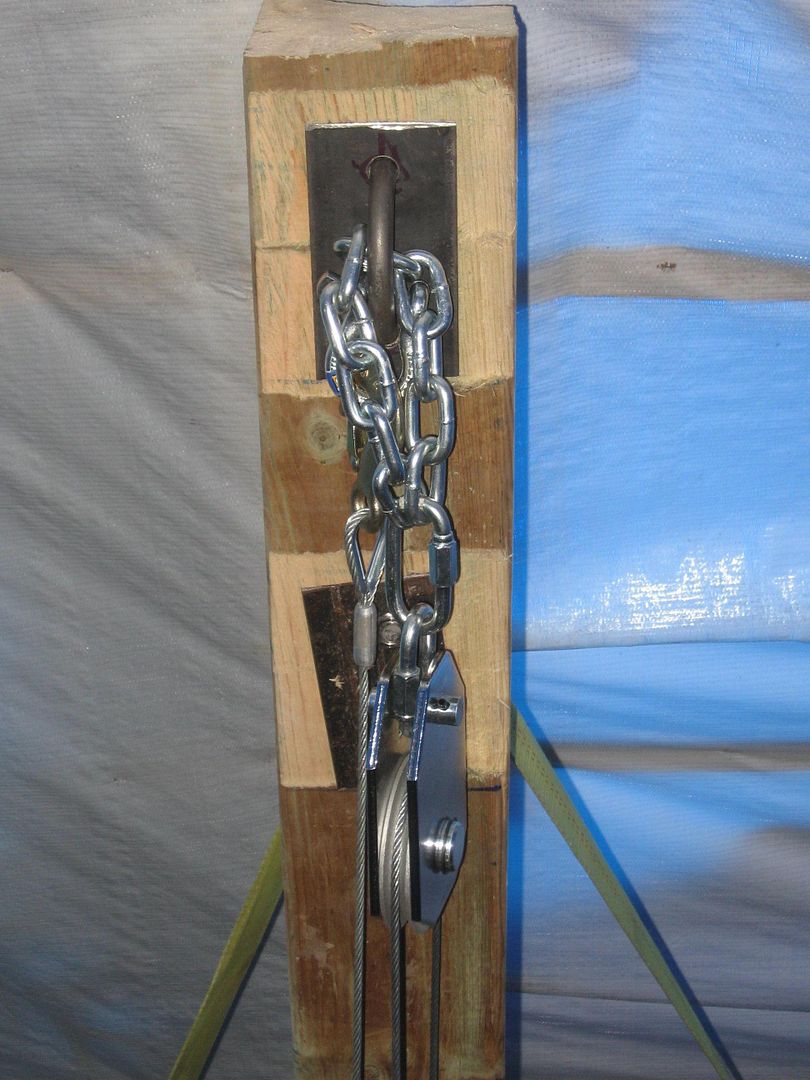
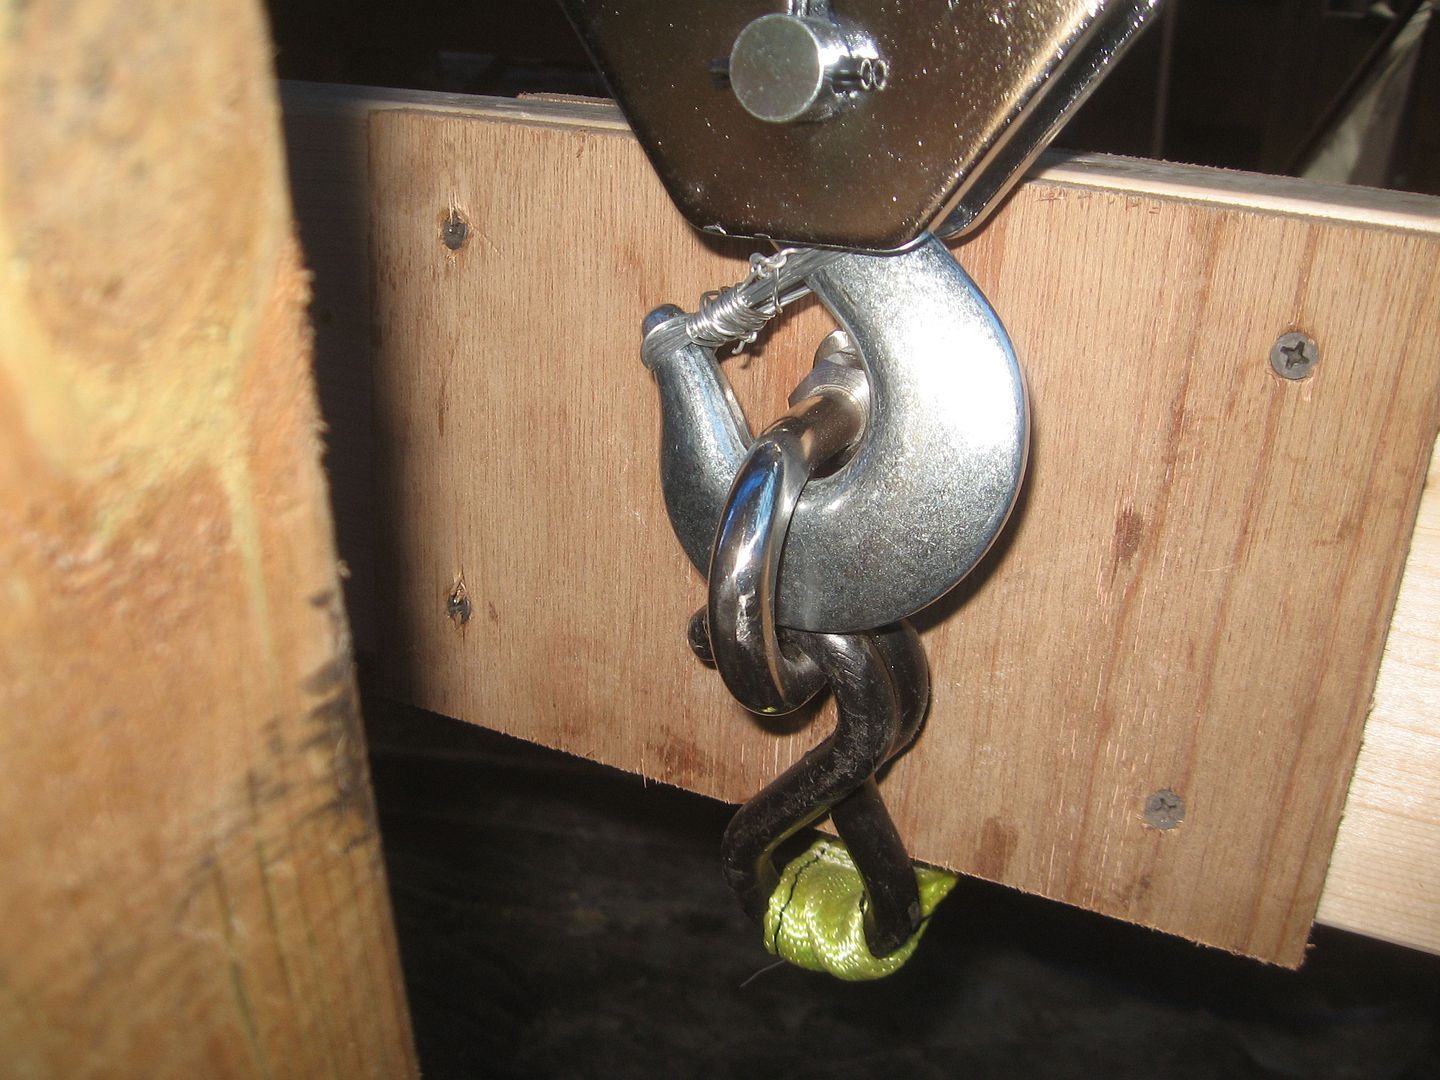
Looking from the opposite side you can see it better.
The chain allows the pulley block to rotate easily through 90 degs which it'll have to do as it lifts the boat over 90 degs and then begins to pay out the line as it lowers the hull.
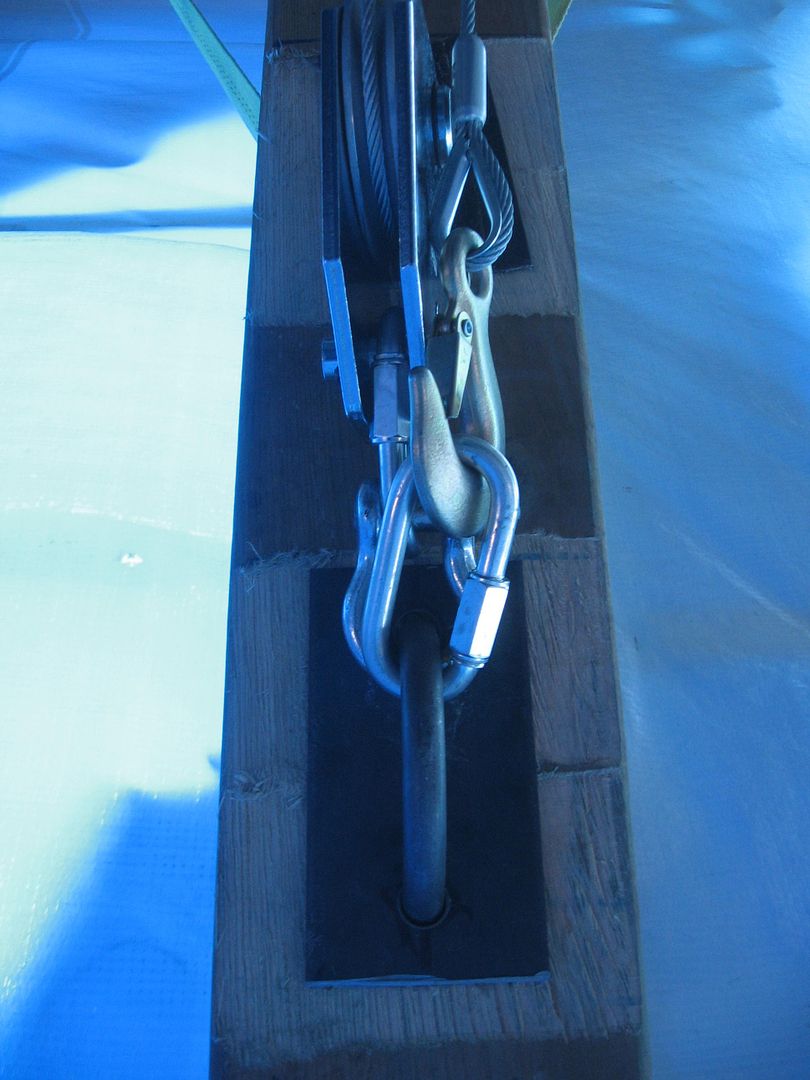
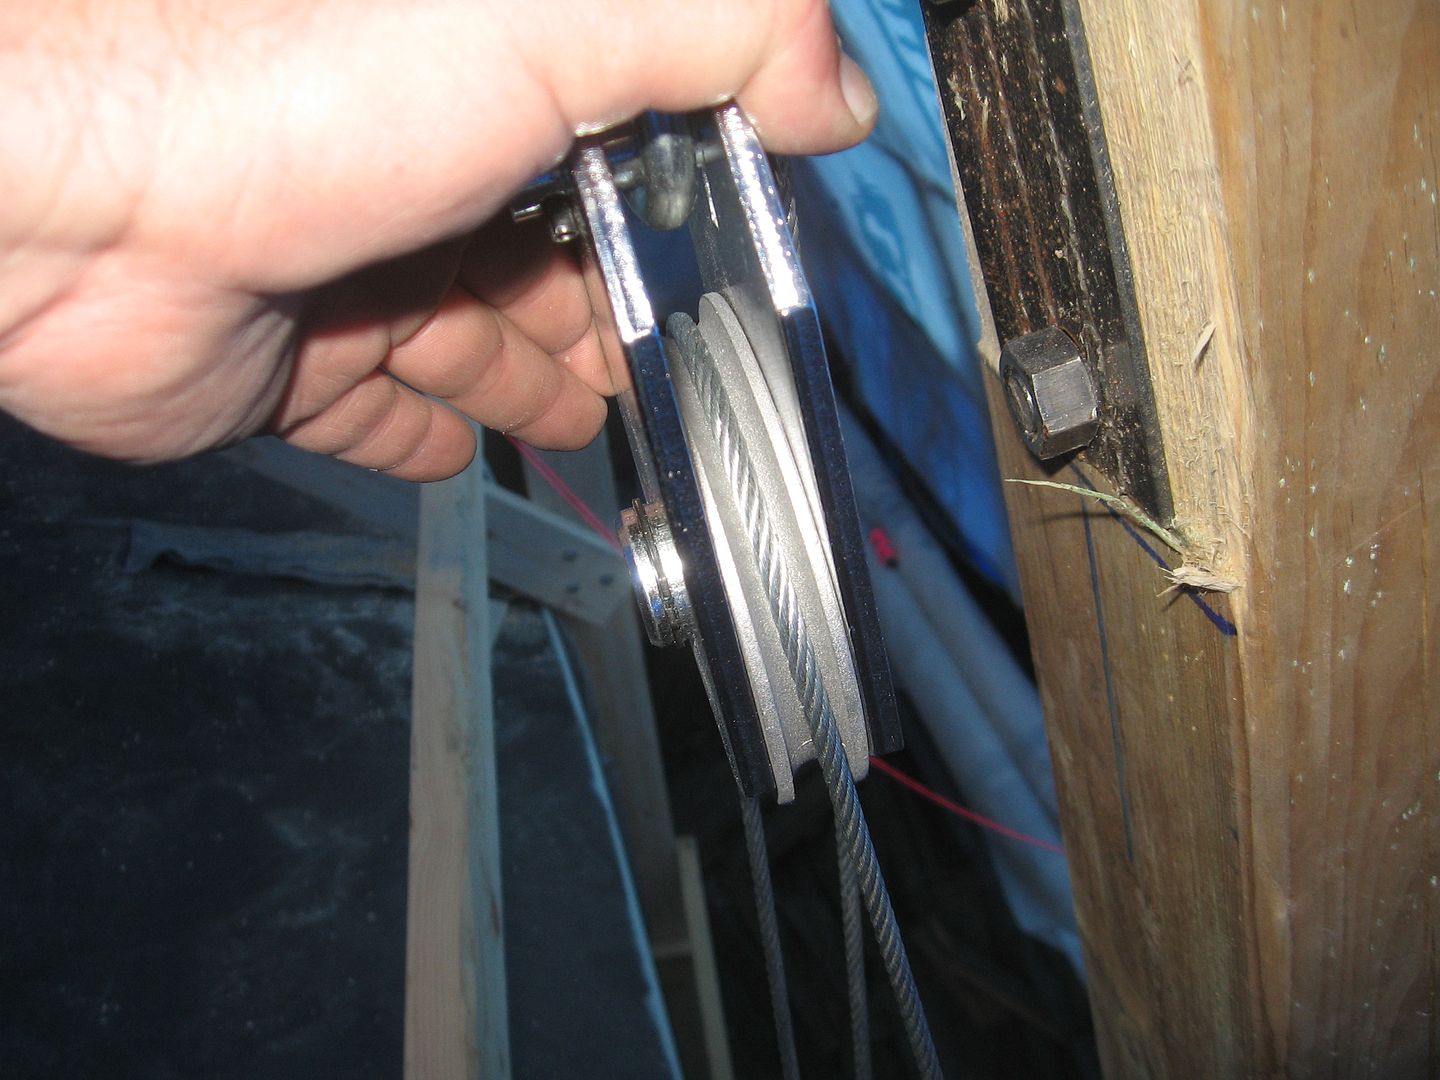
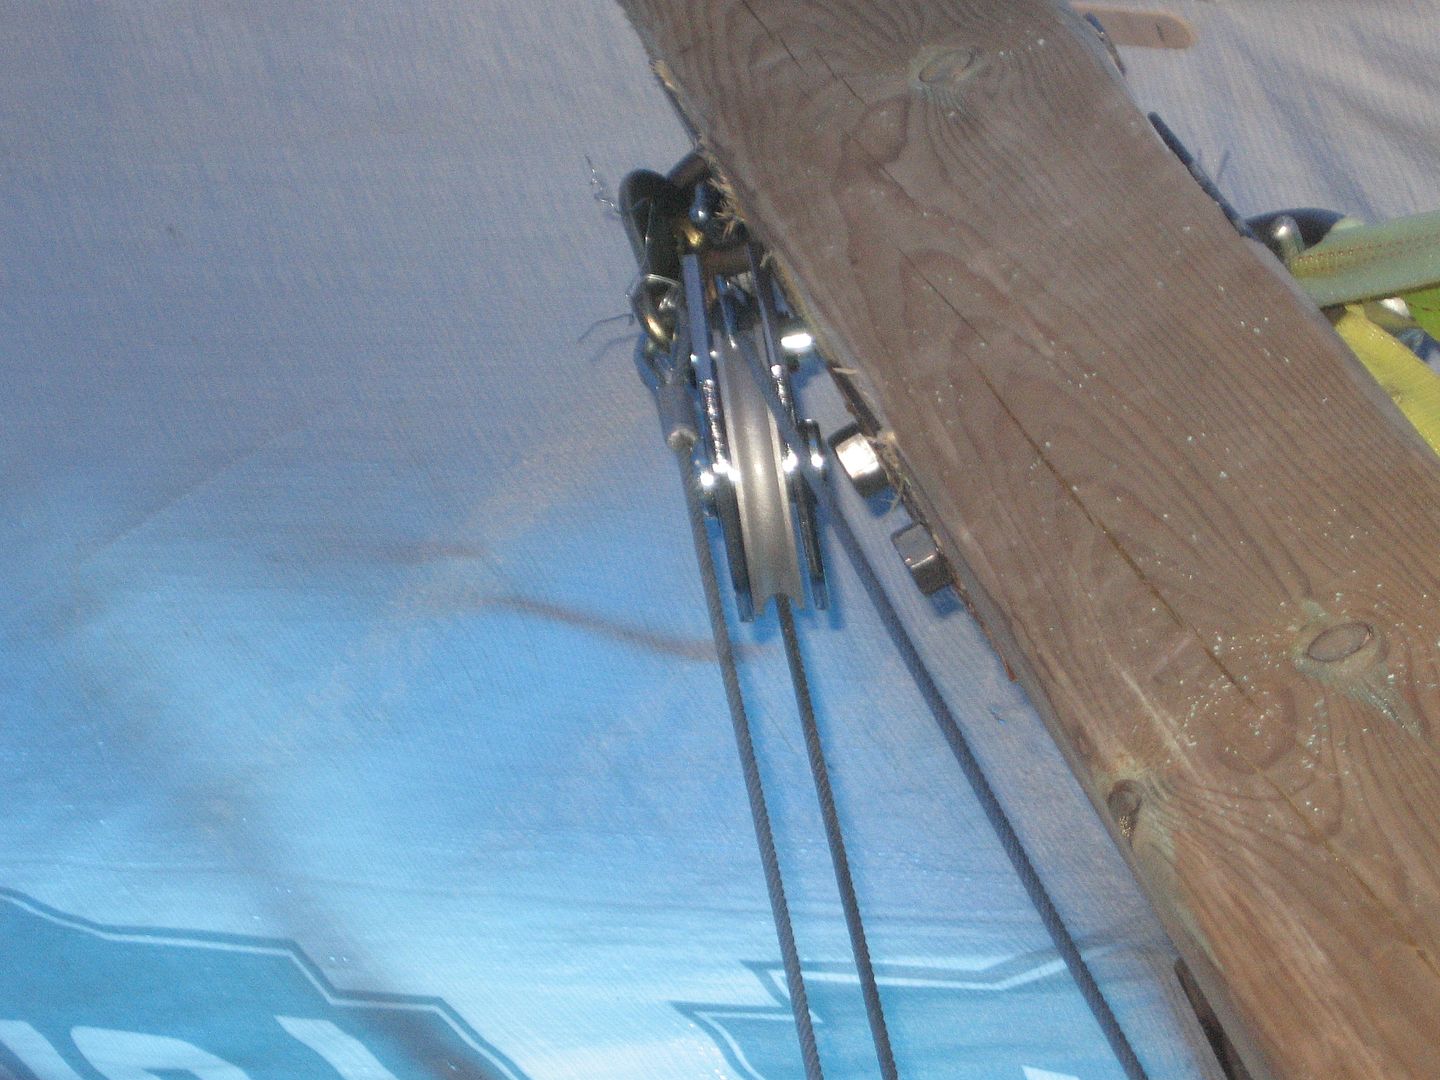
The cable now feeds directly into the sheave without rubbing on the frame of the pulley. The cables all run straight now. No overlapping or binding anywhere.
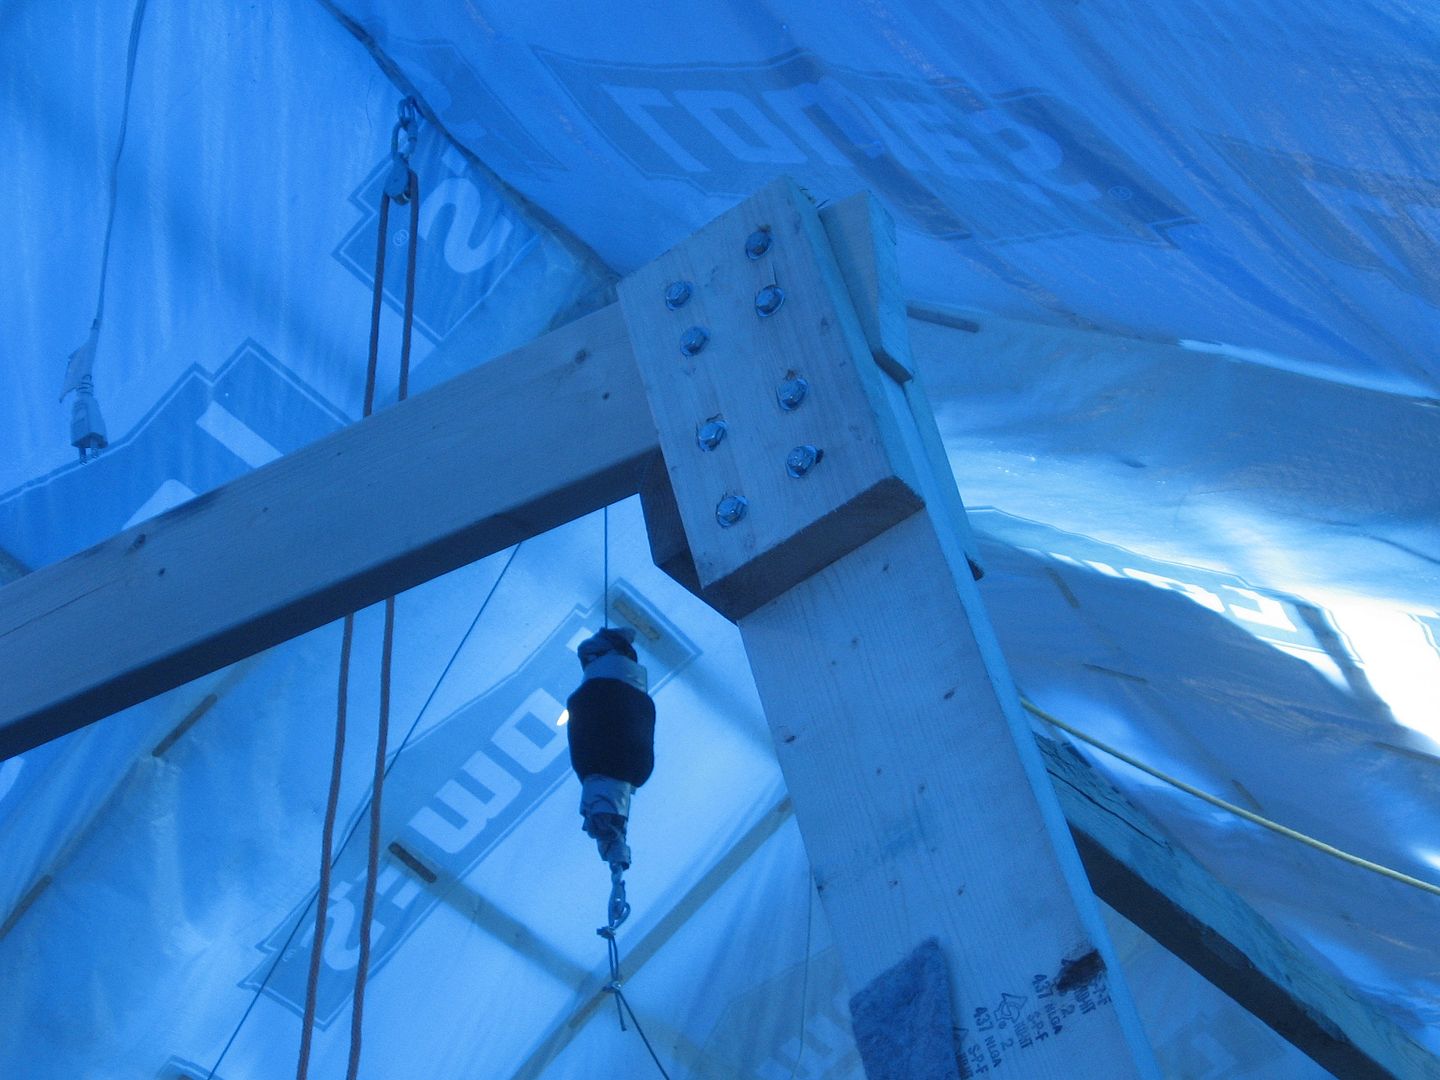
I took a good tug on the setup with the electric winch. The frame bracing held extremely well and it wanted to lift the whole side of the boat even though it's still attached to the strongback frame. I left it there for awhile and the winch held the weight with no problems. The Gin Pole hardly moved even though the third retaining strap isn't even anchored yet. I'm happy with that.

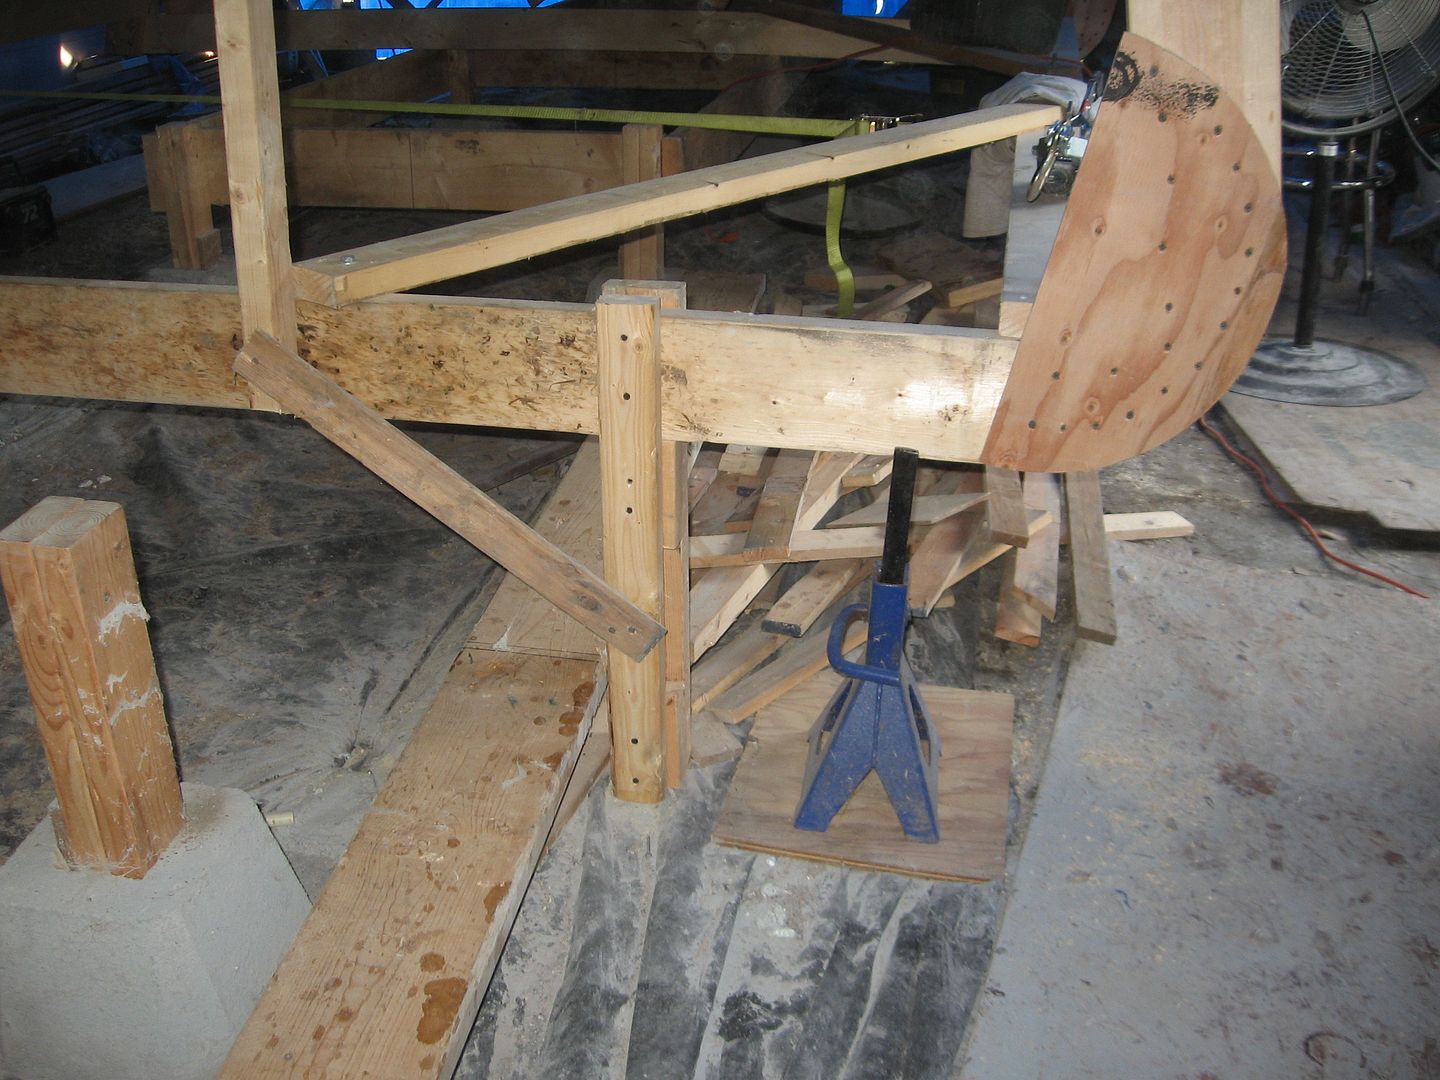
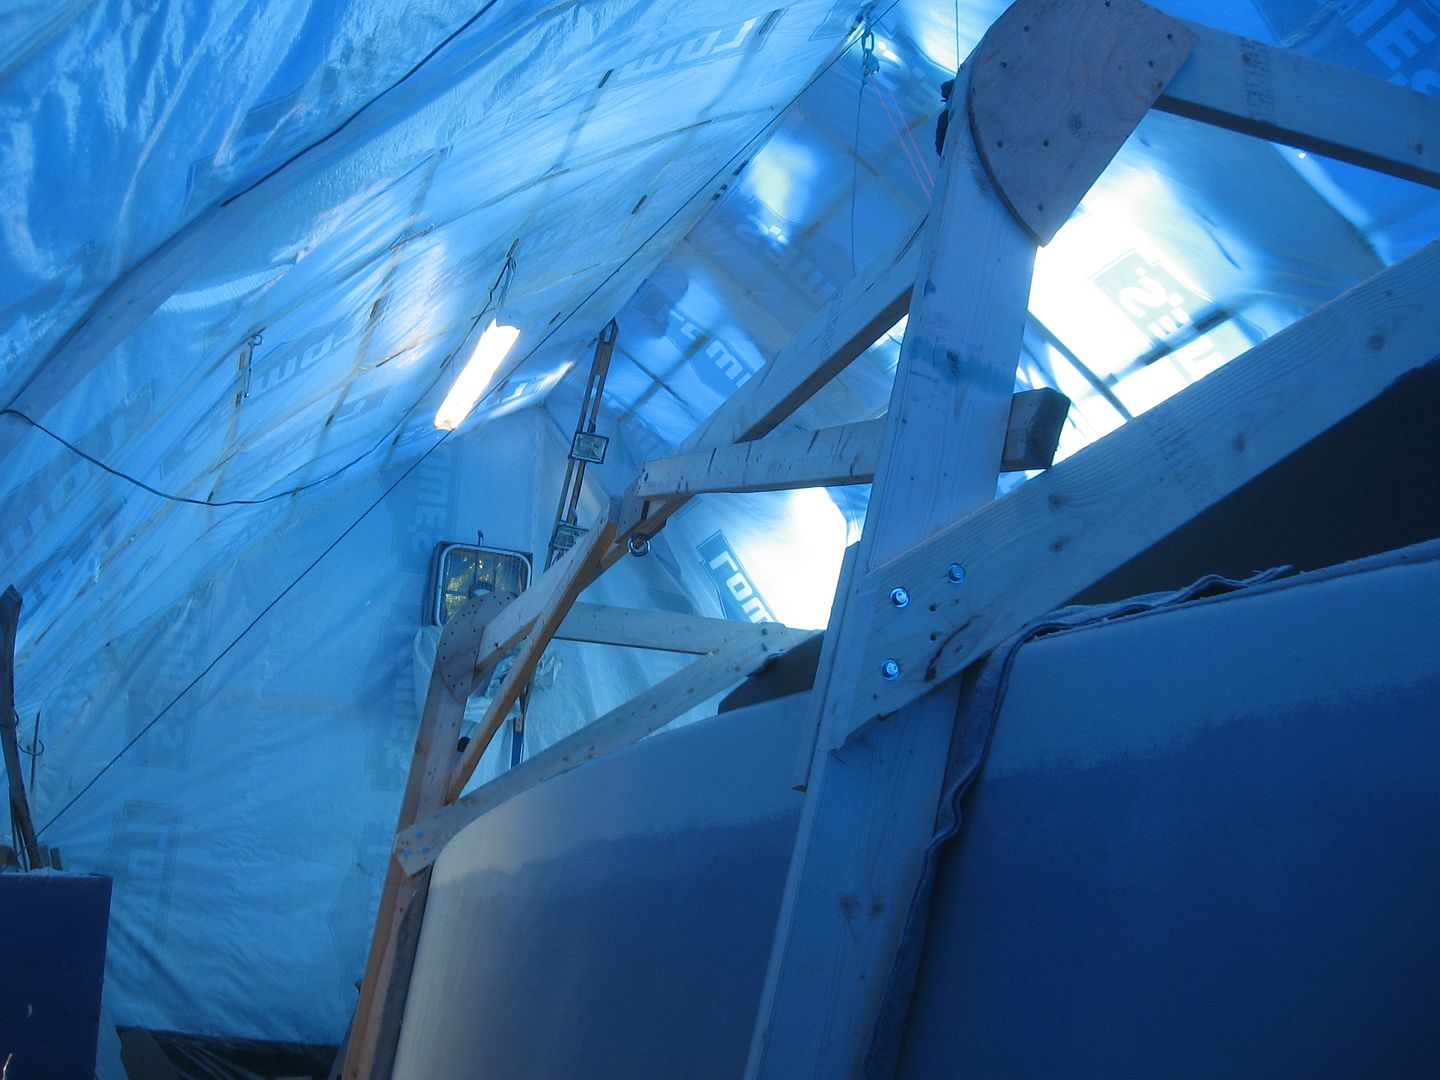
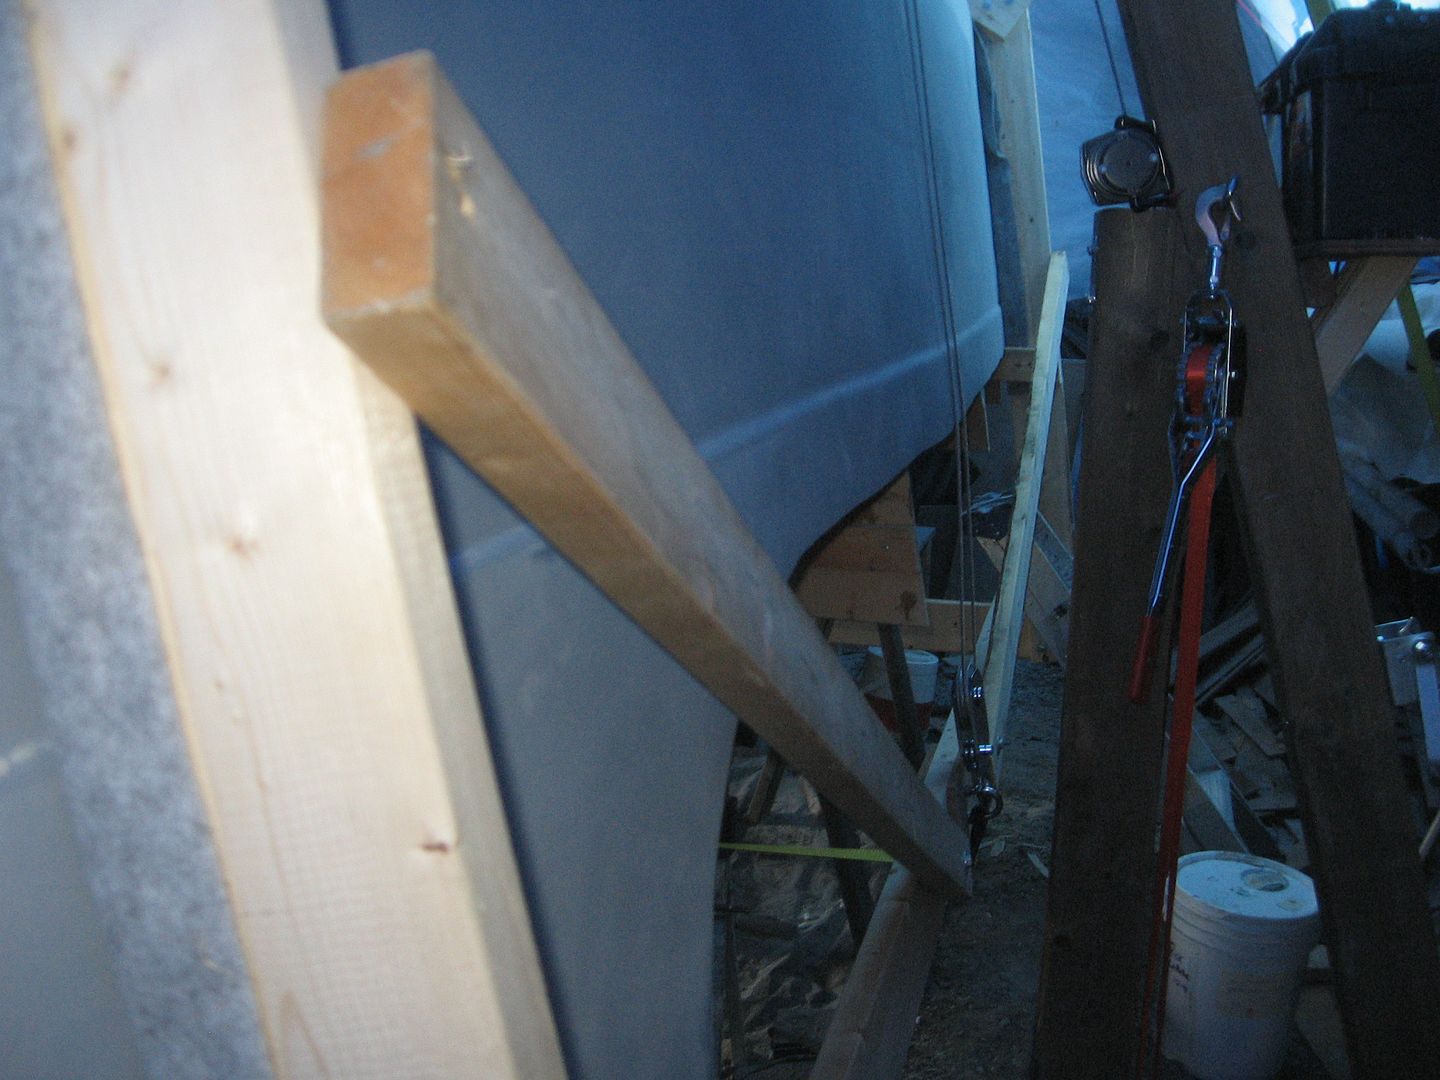
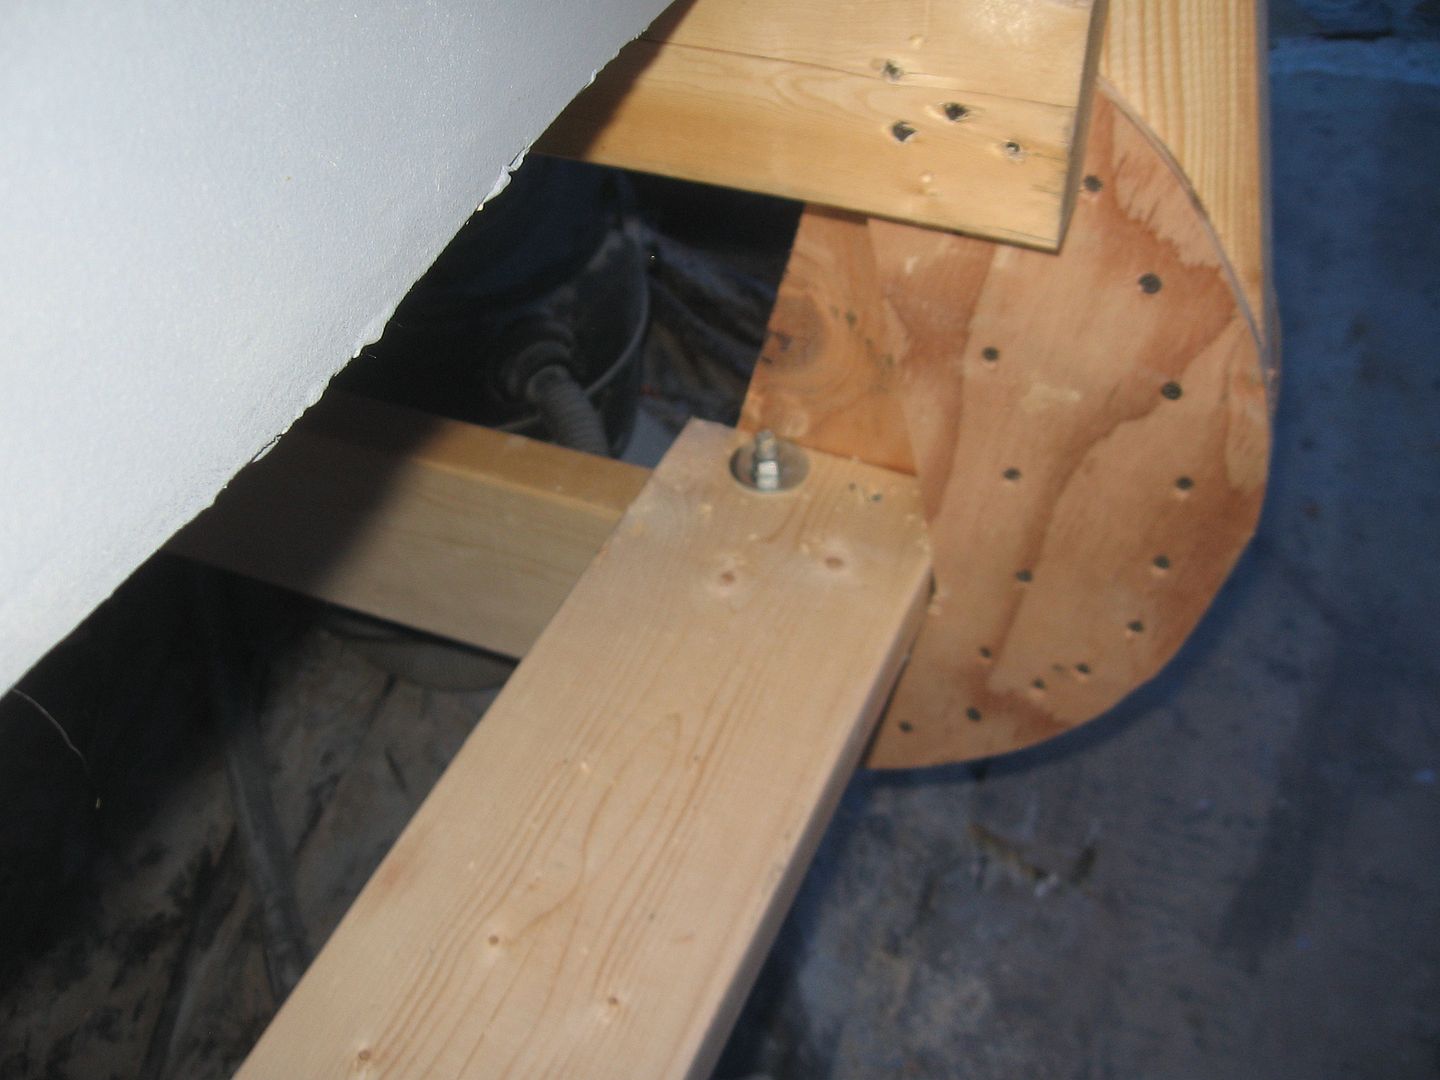
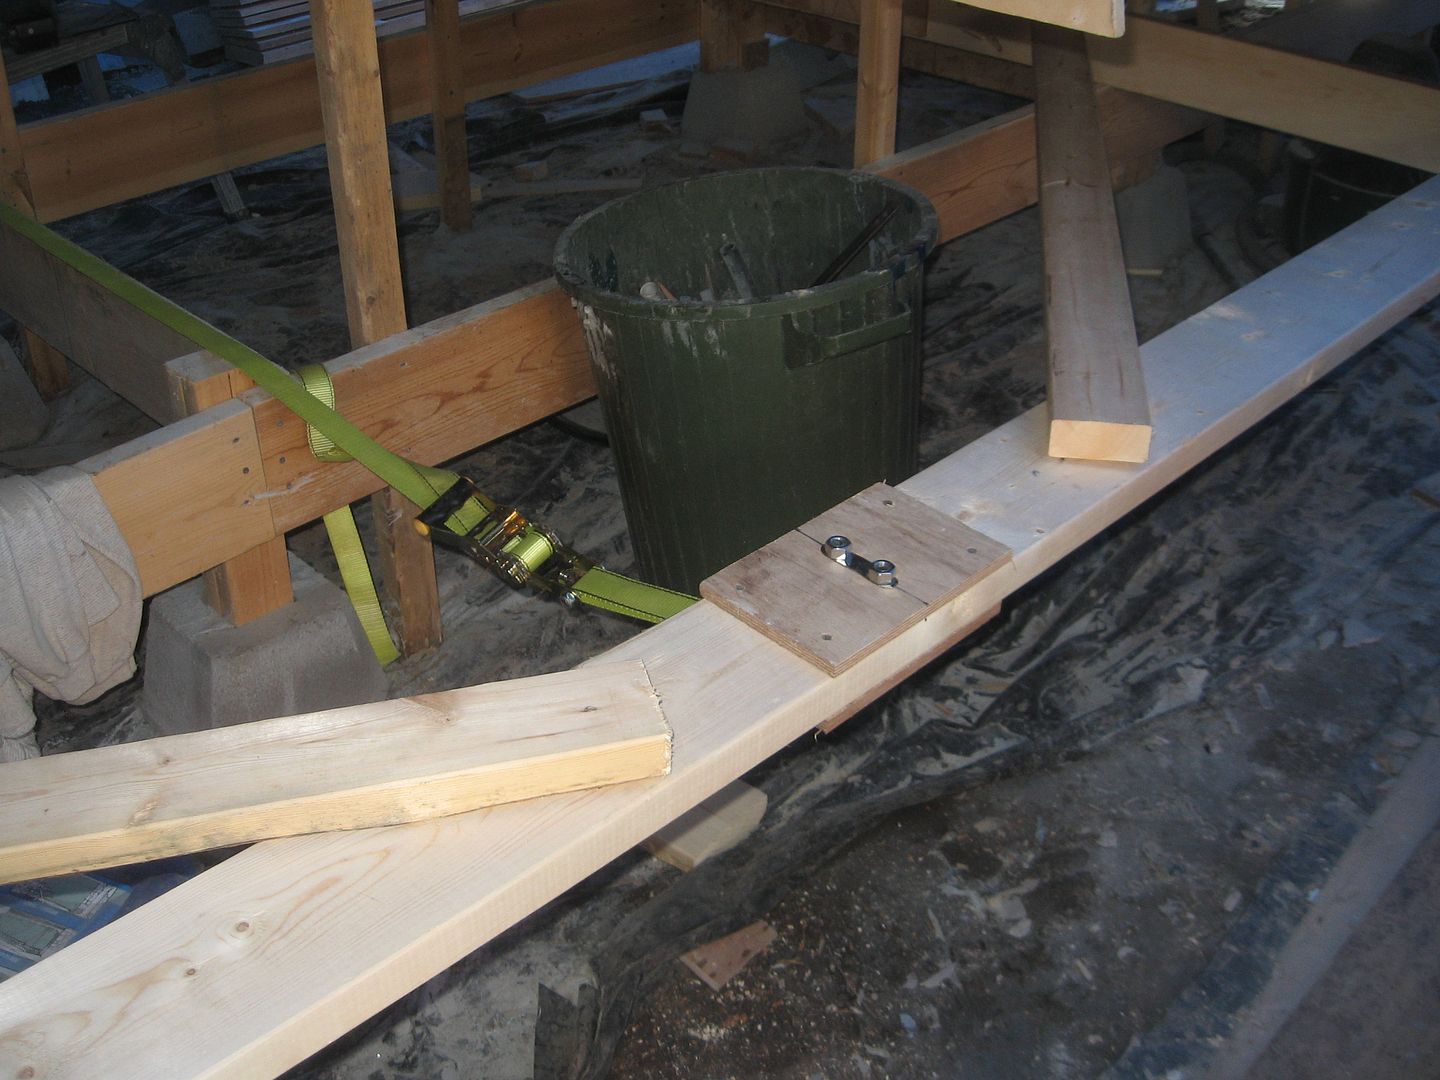
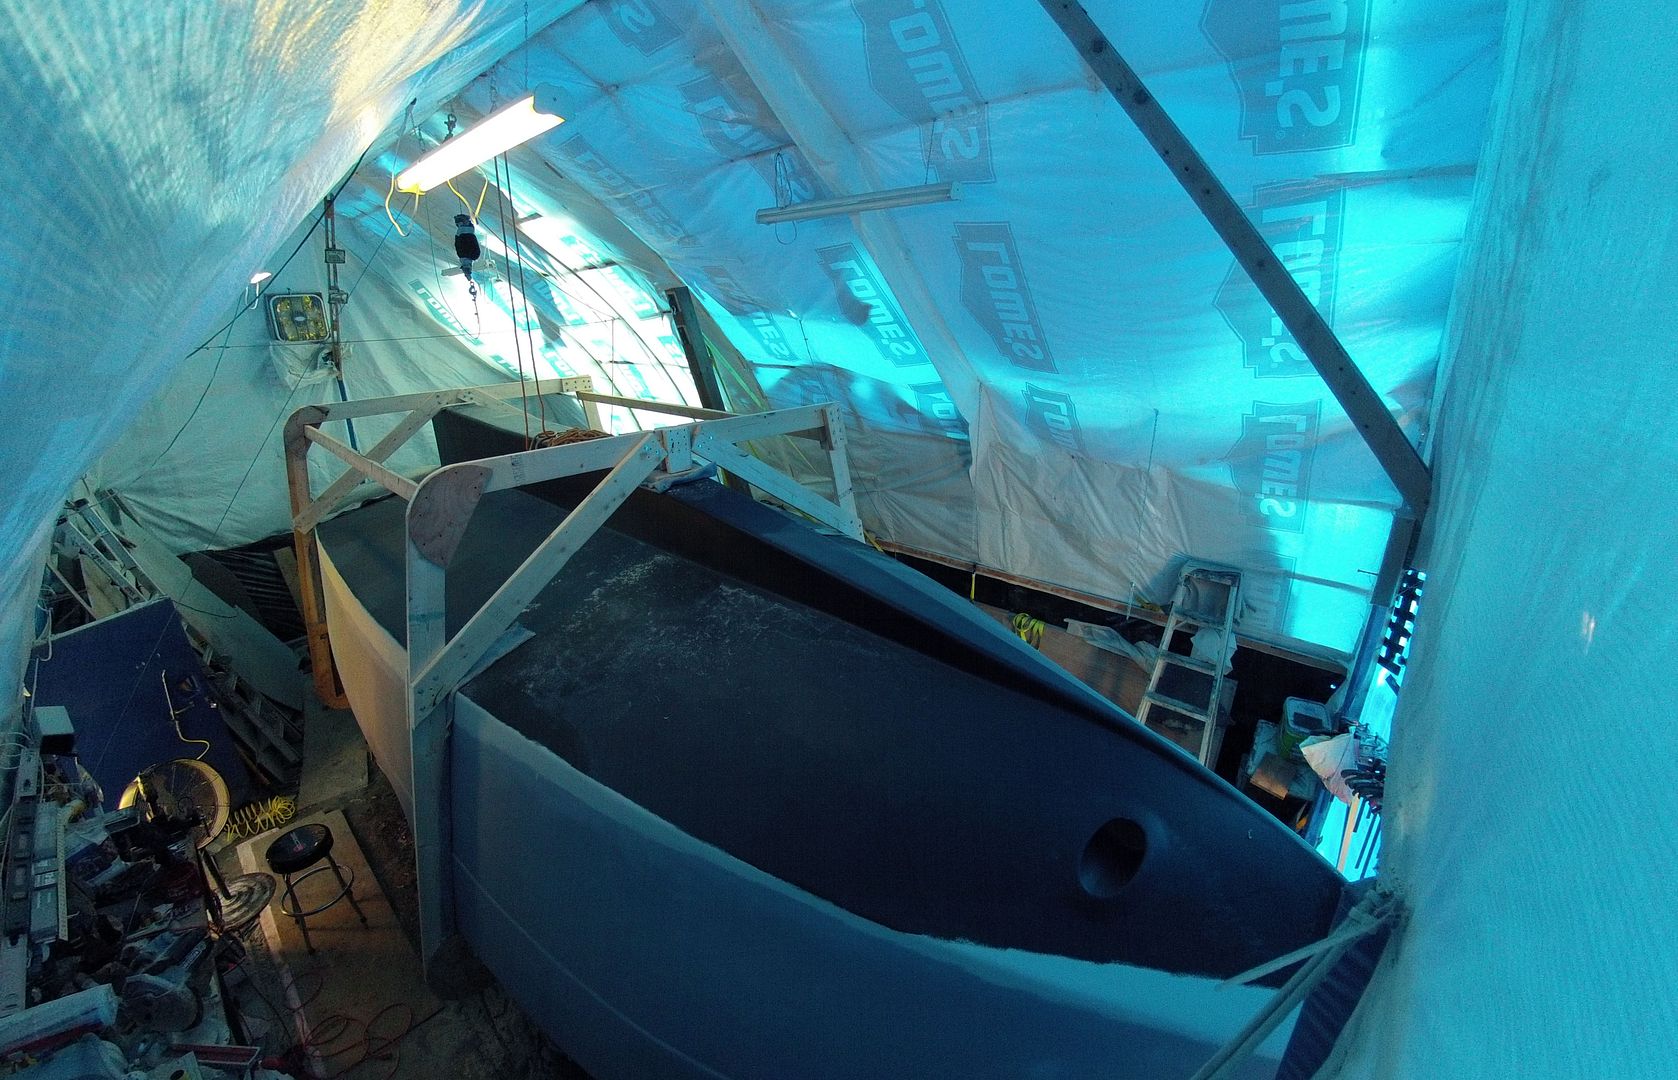
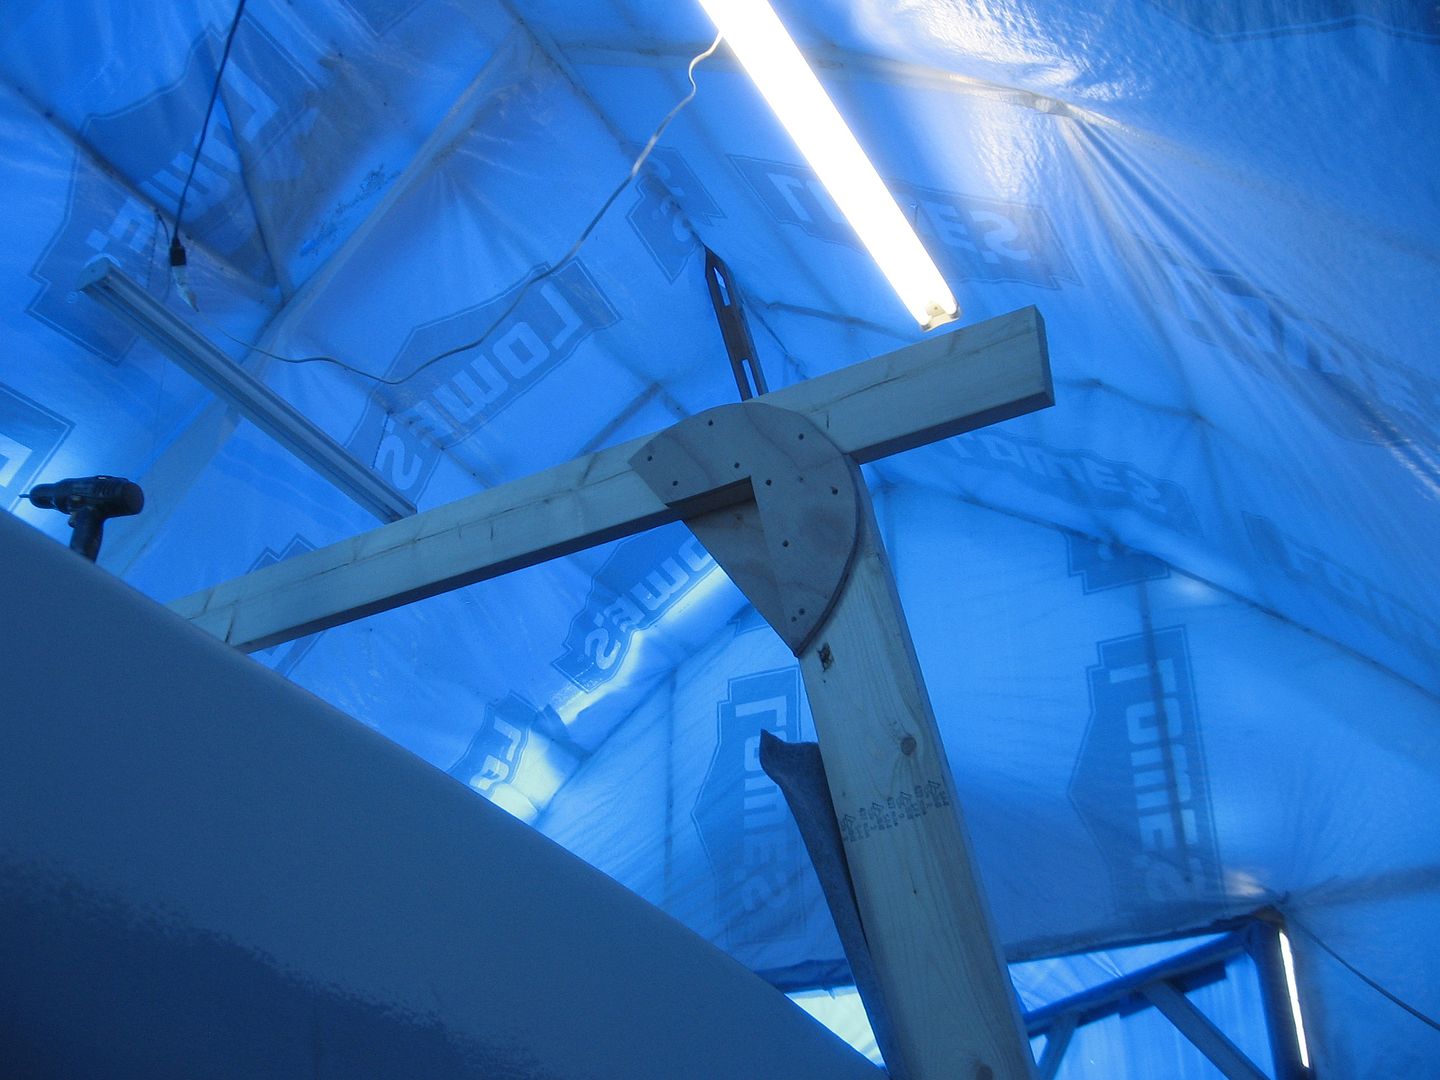
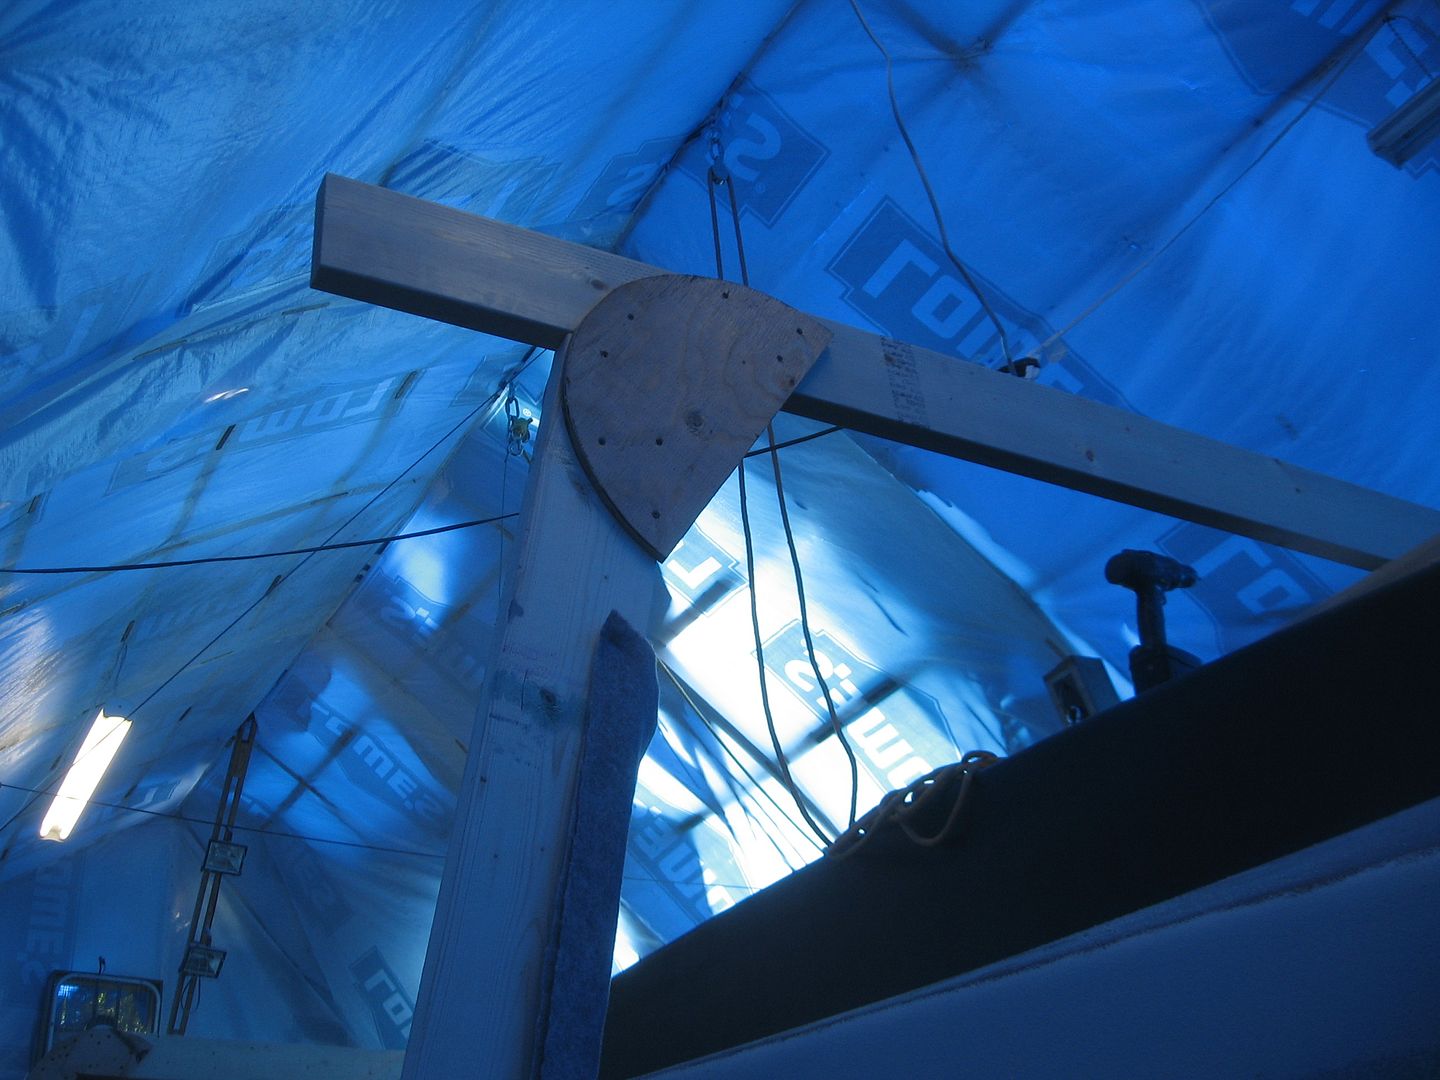
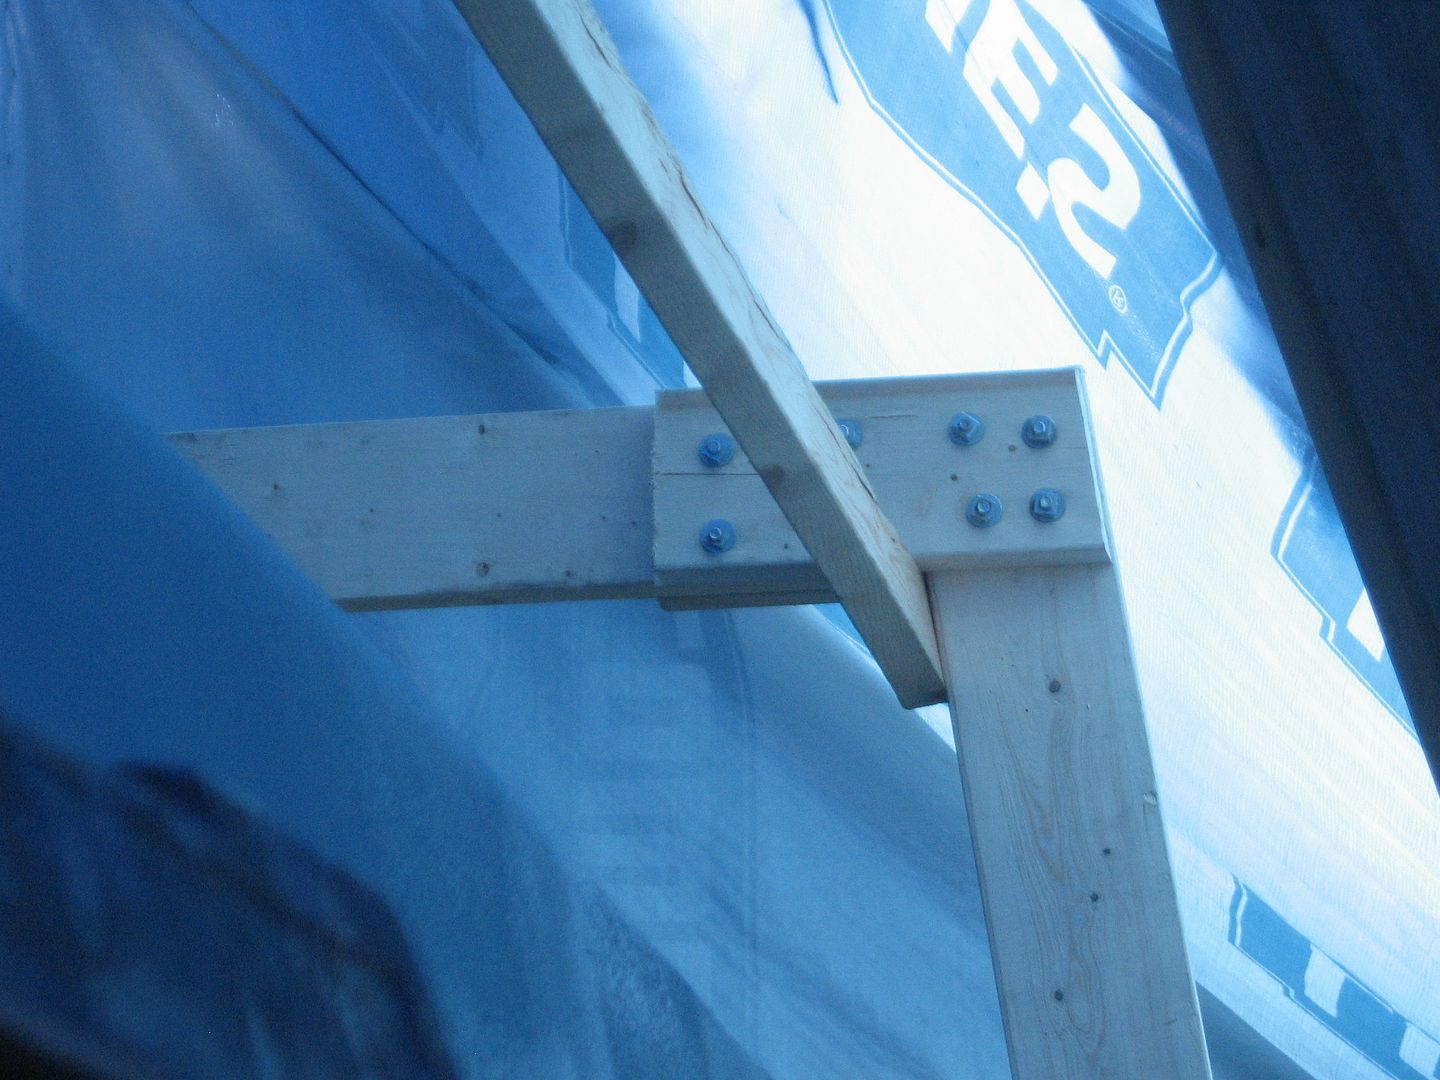
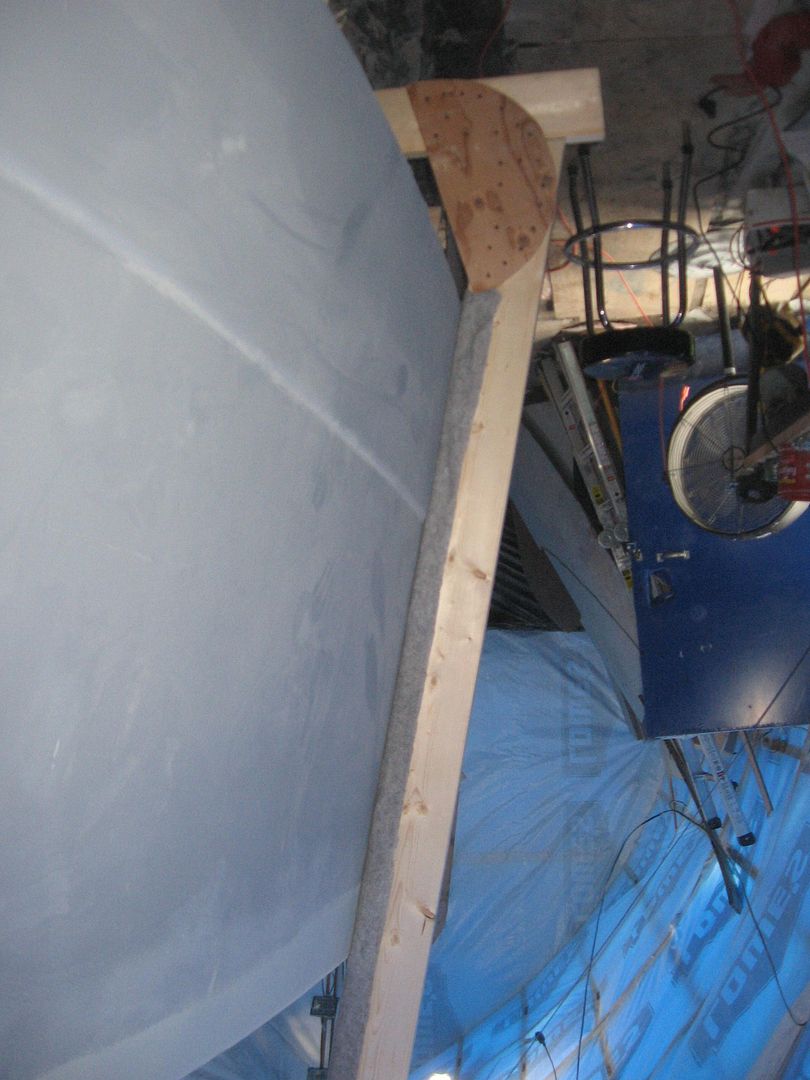
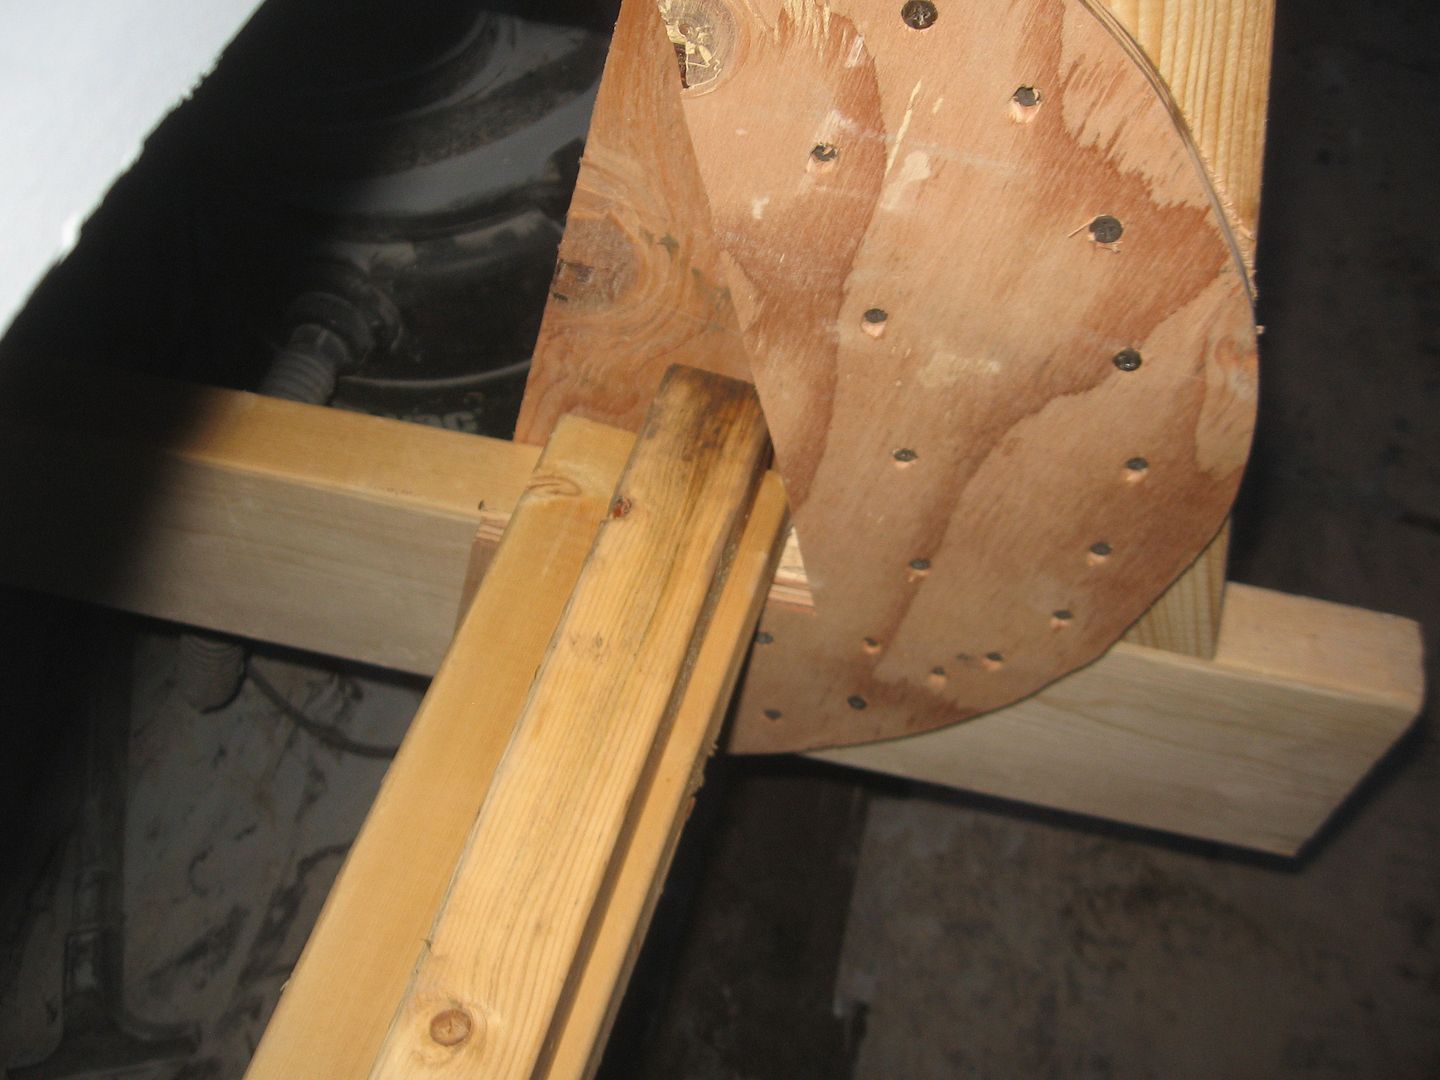
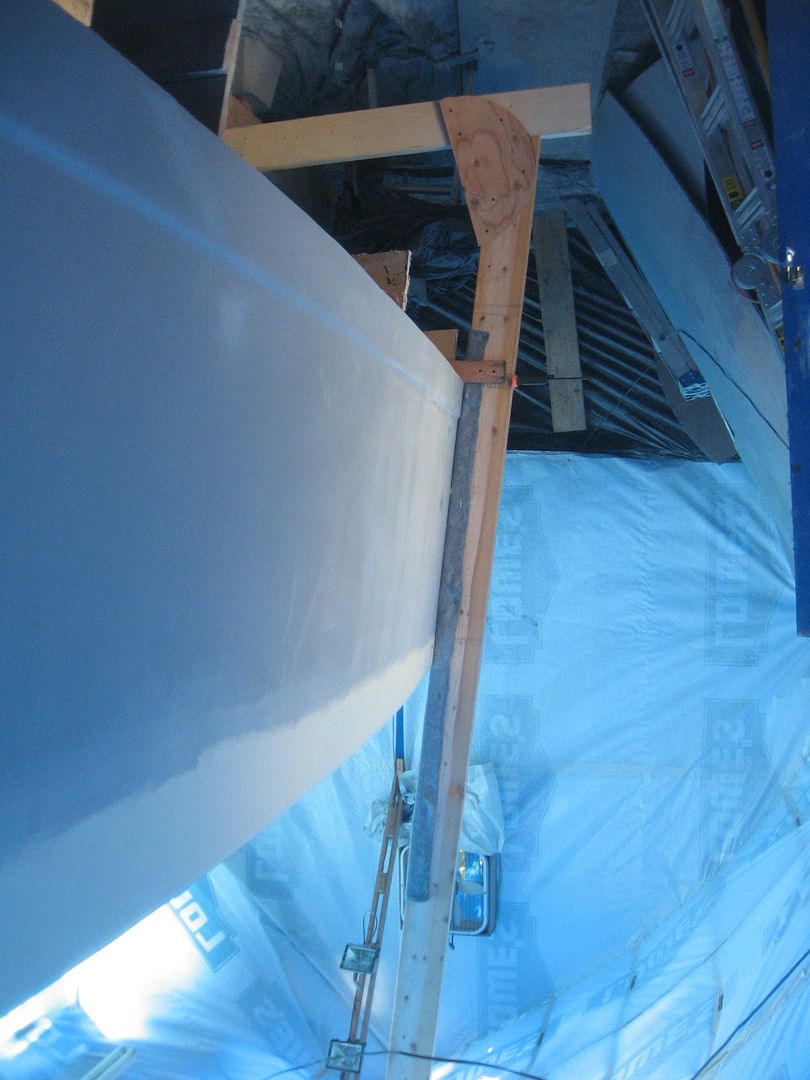
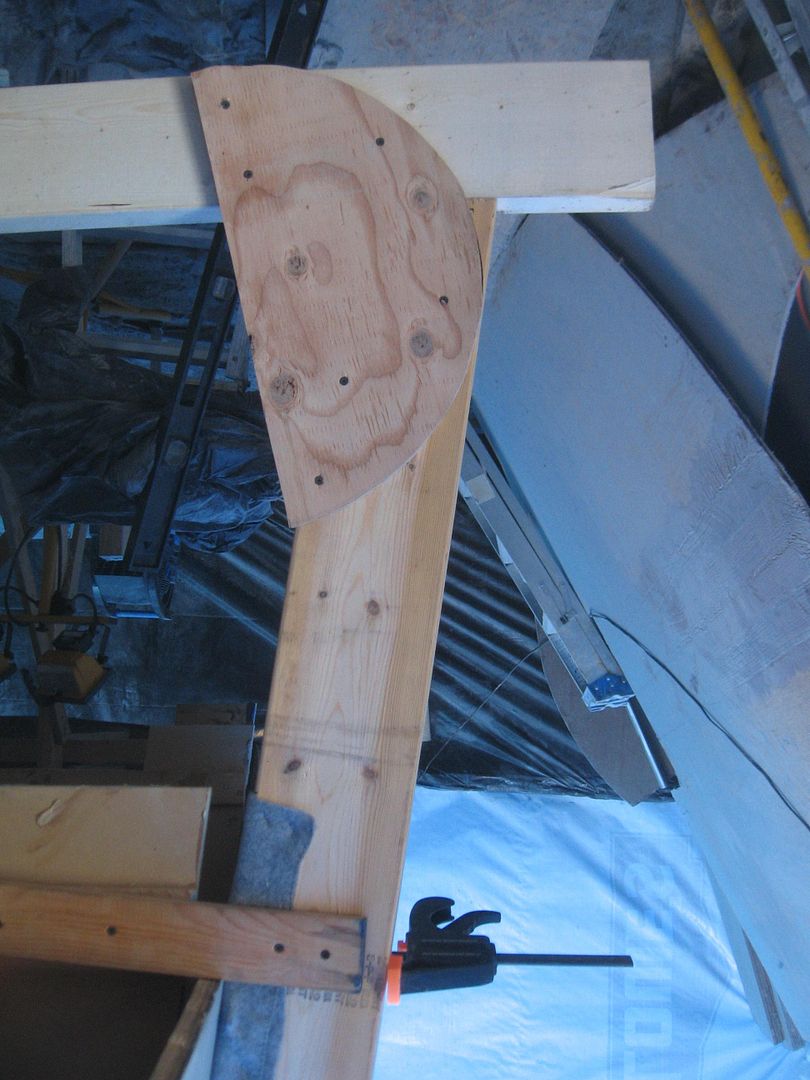
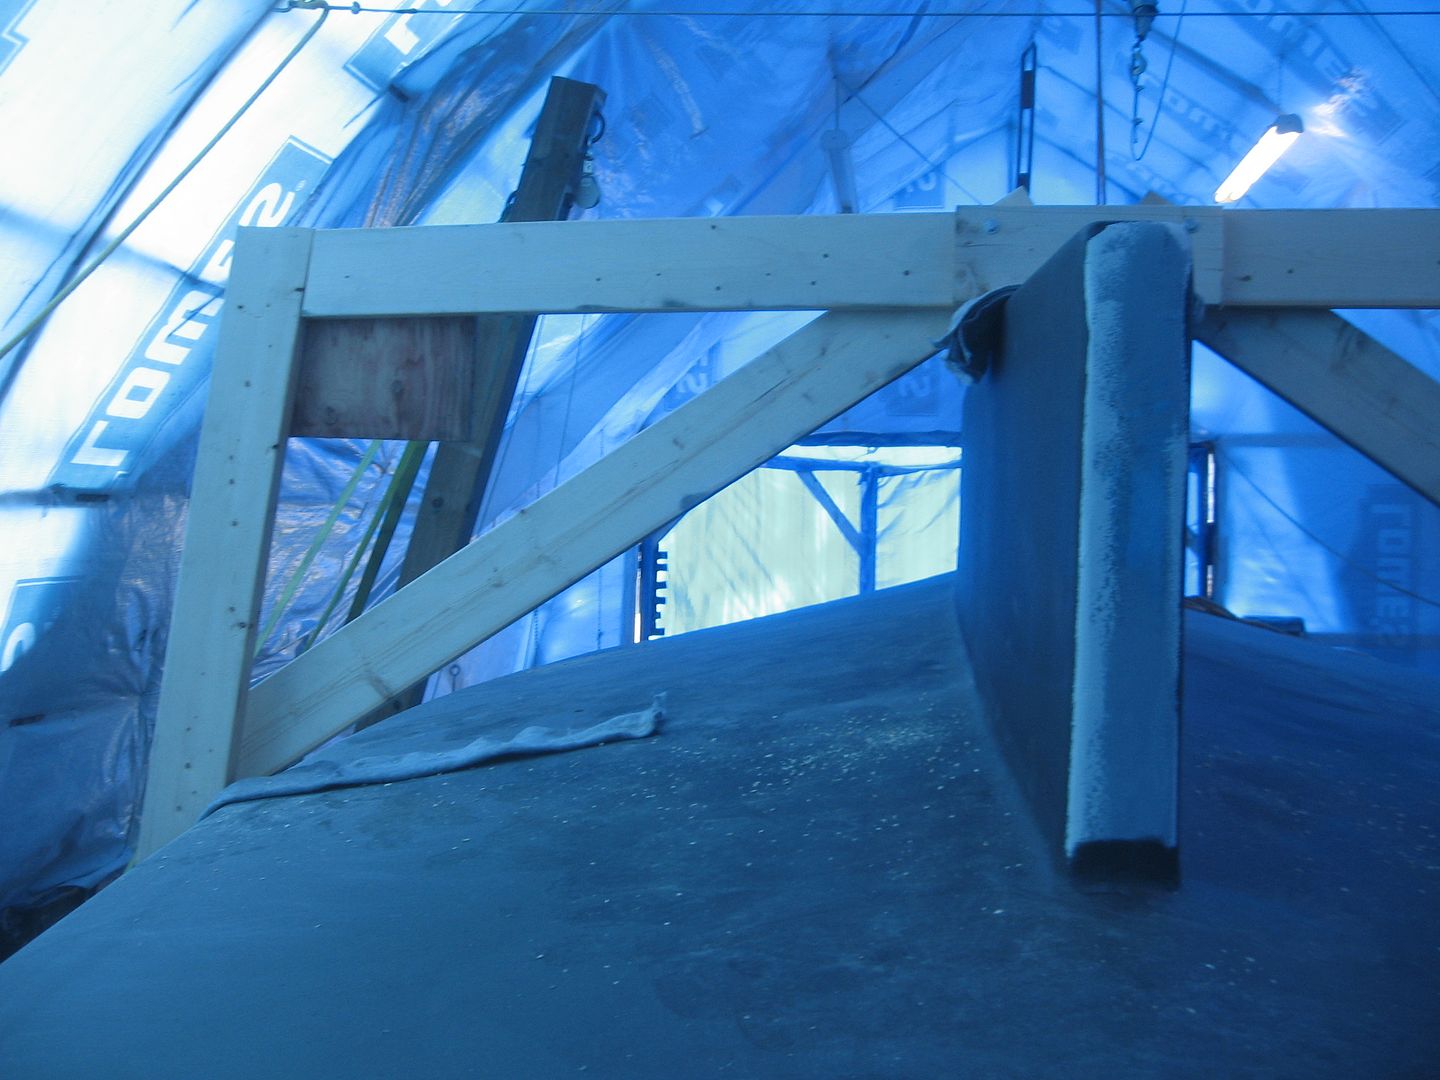
The last part of the puzzle was the final (3rd) beam (crossmember) or whatever you want to call it. It will take part of the strain from the second pull and will get pulled by the hand winch to pull the hull sideways towards the Gin Pole.
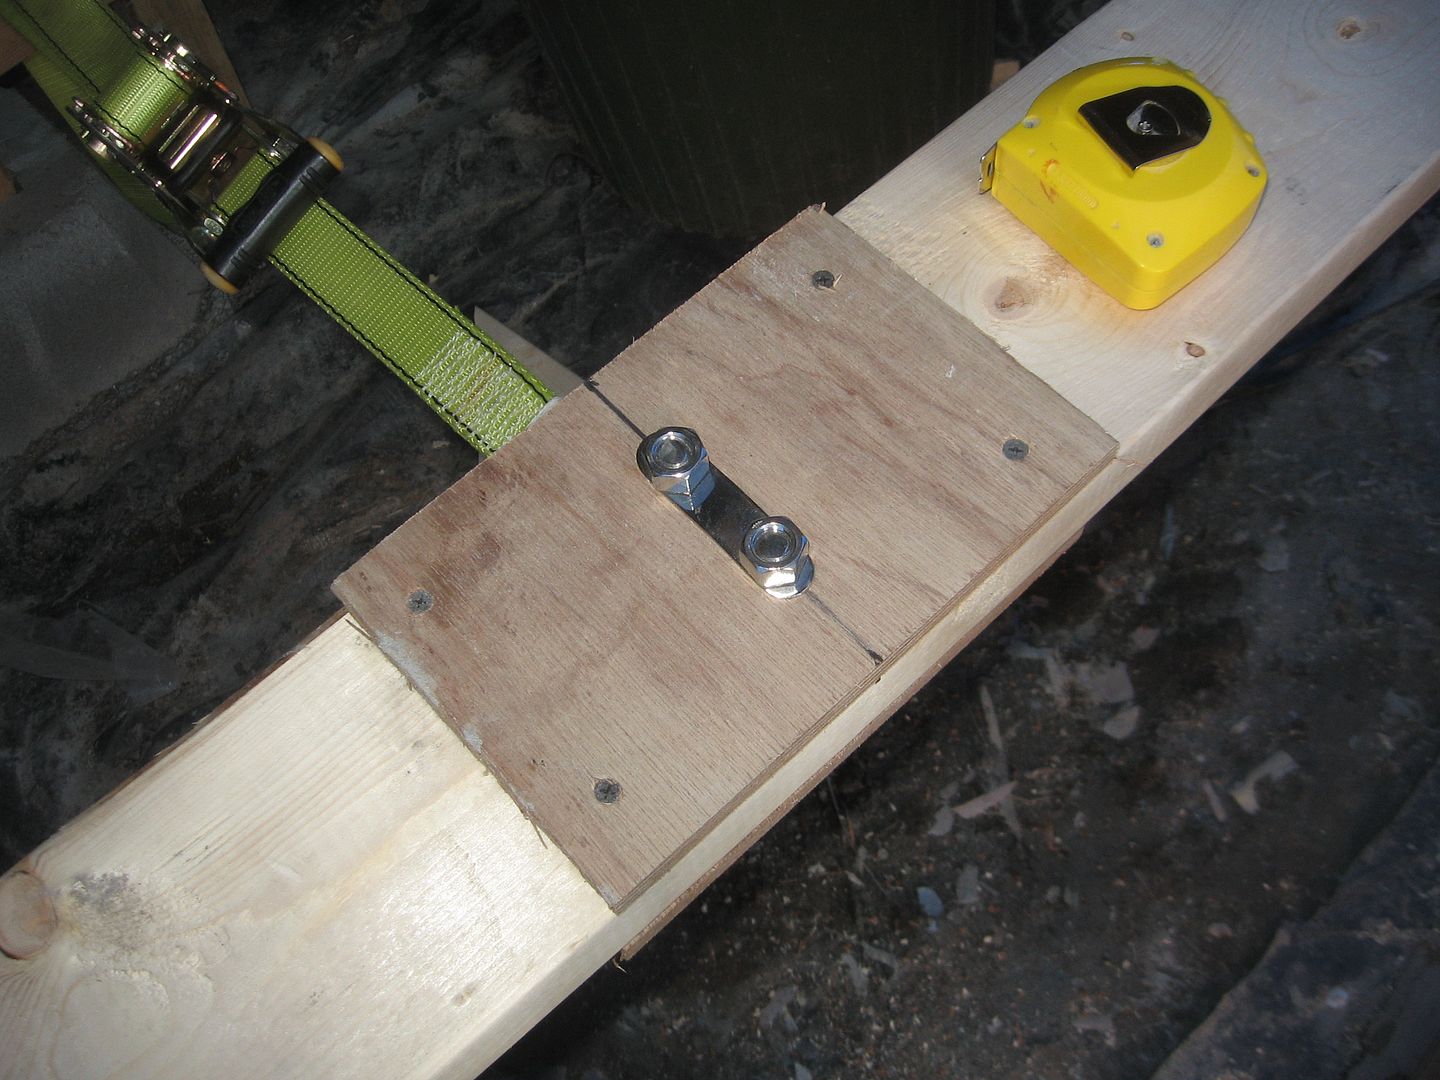
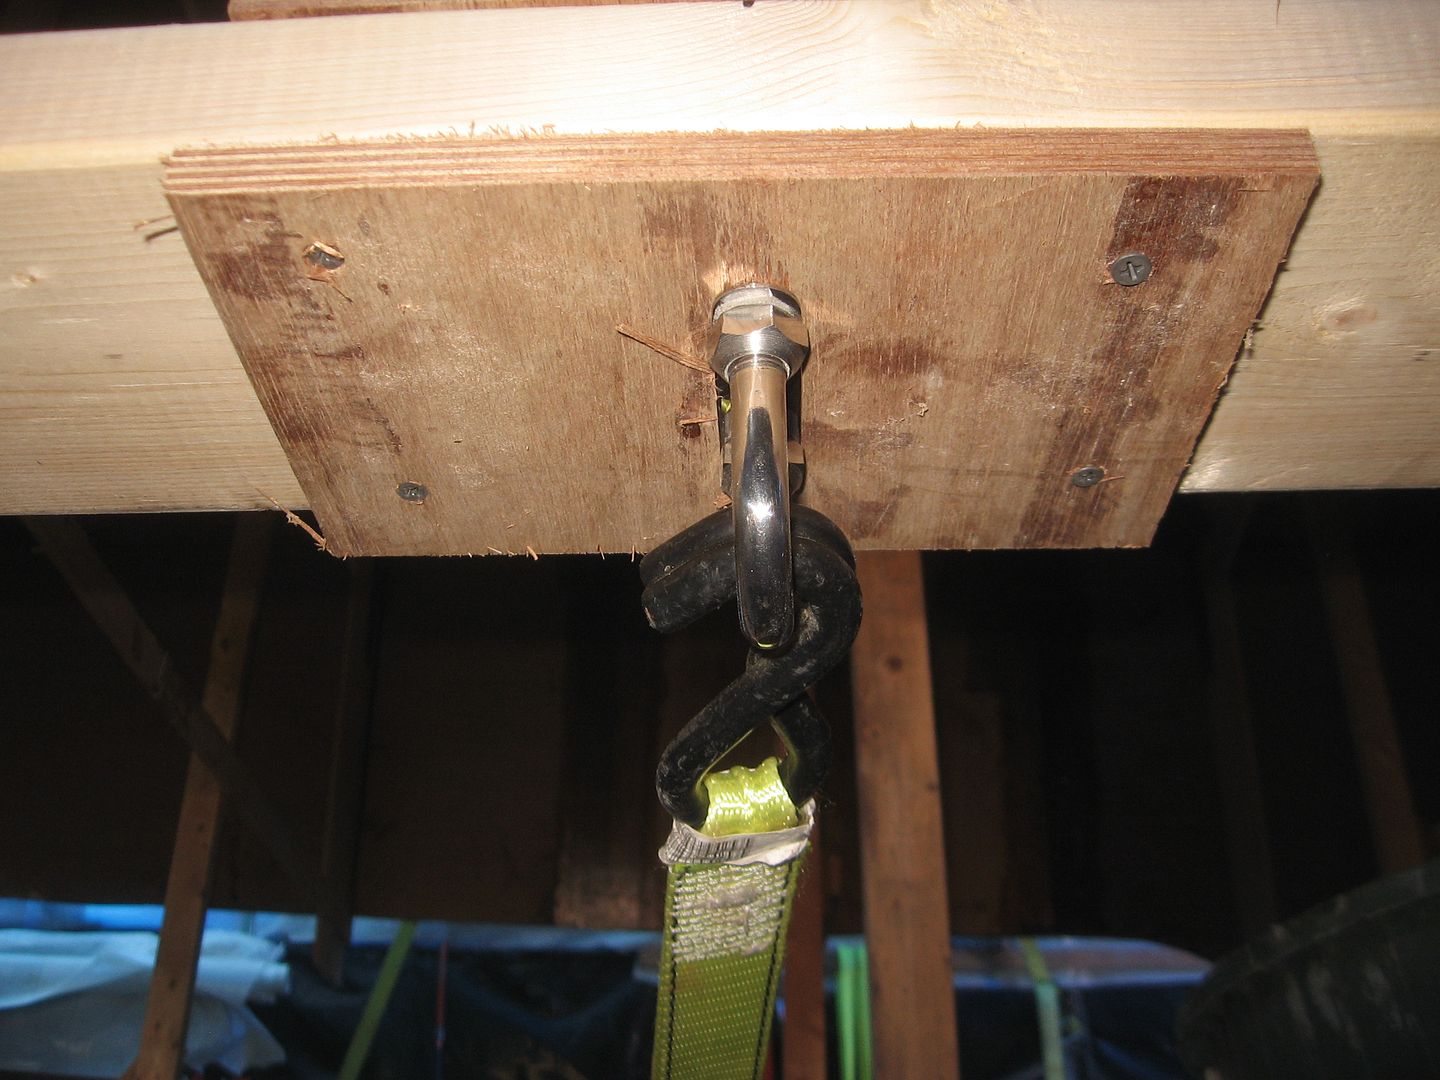
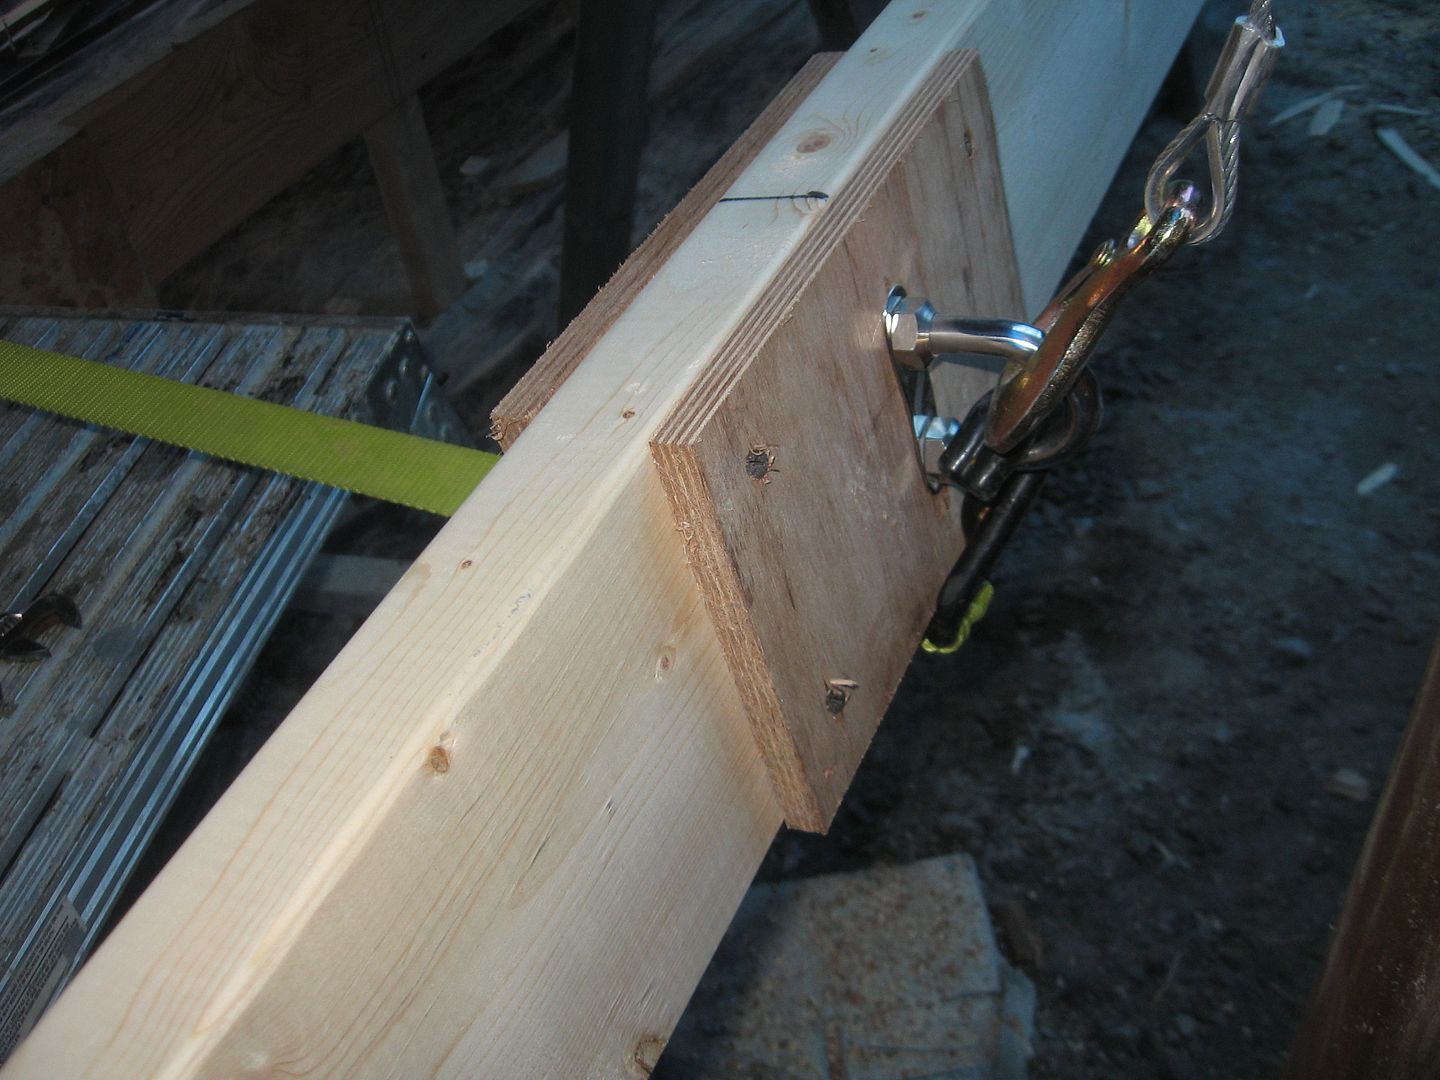
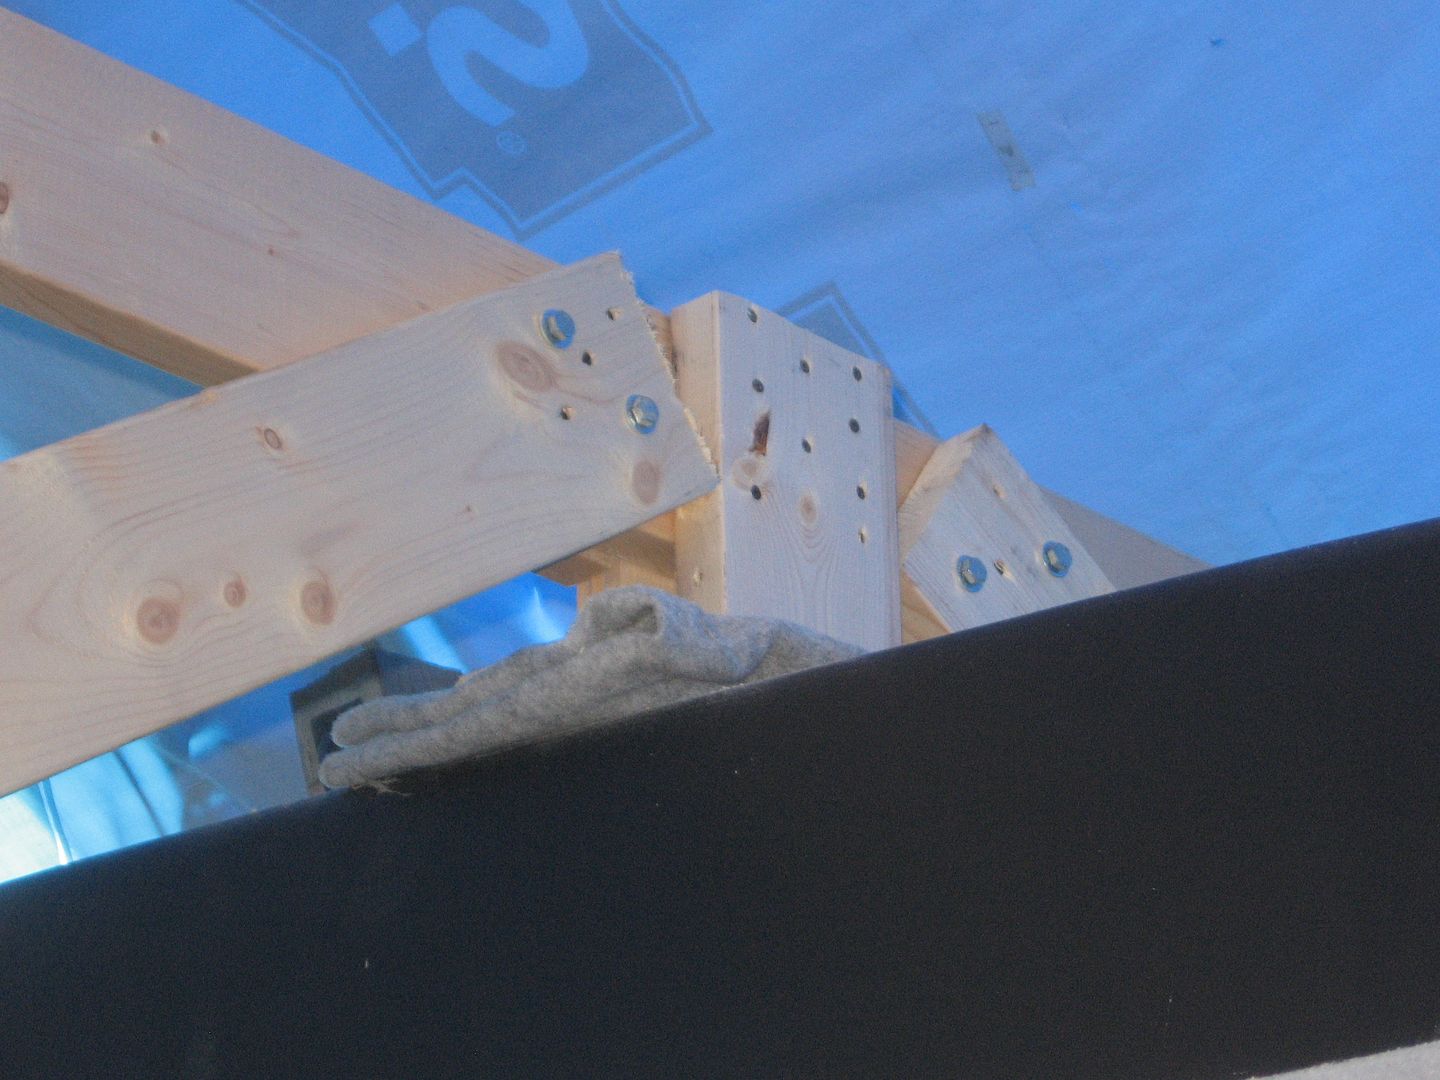
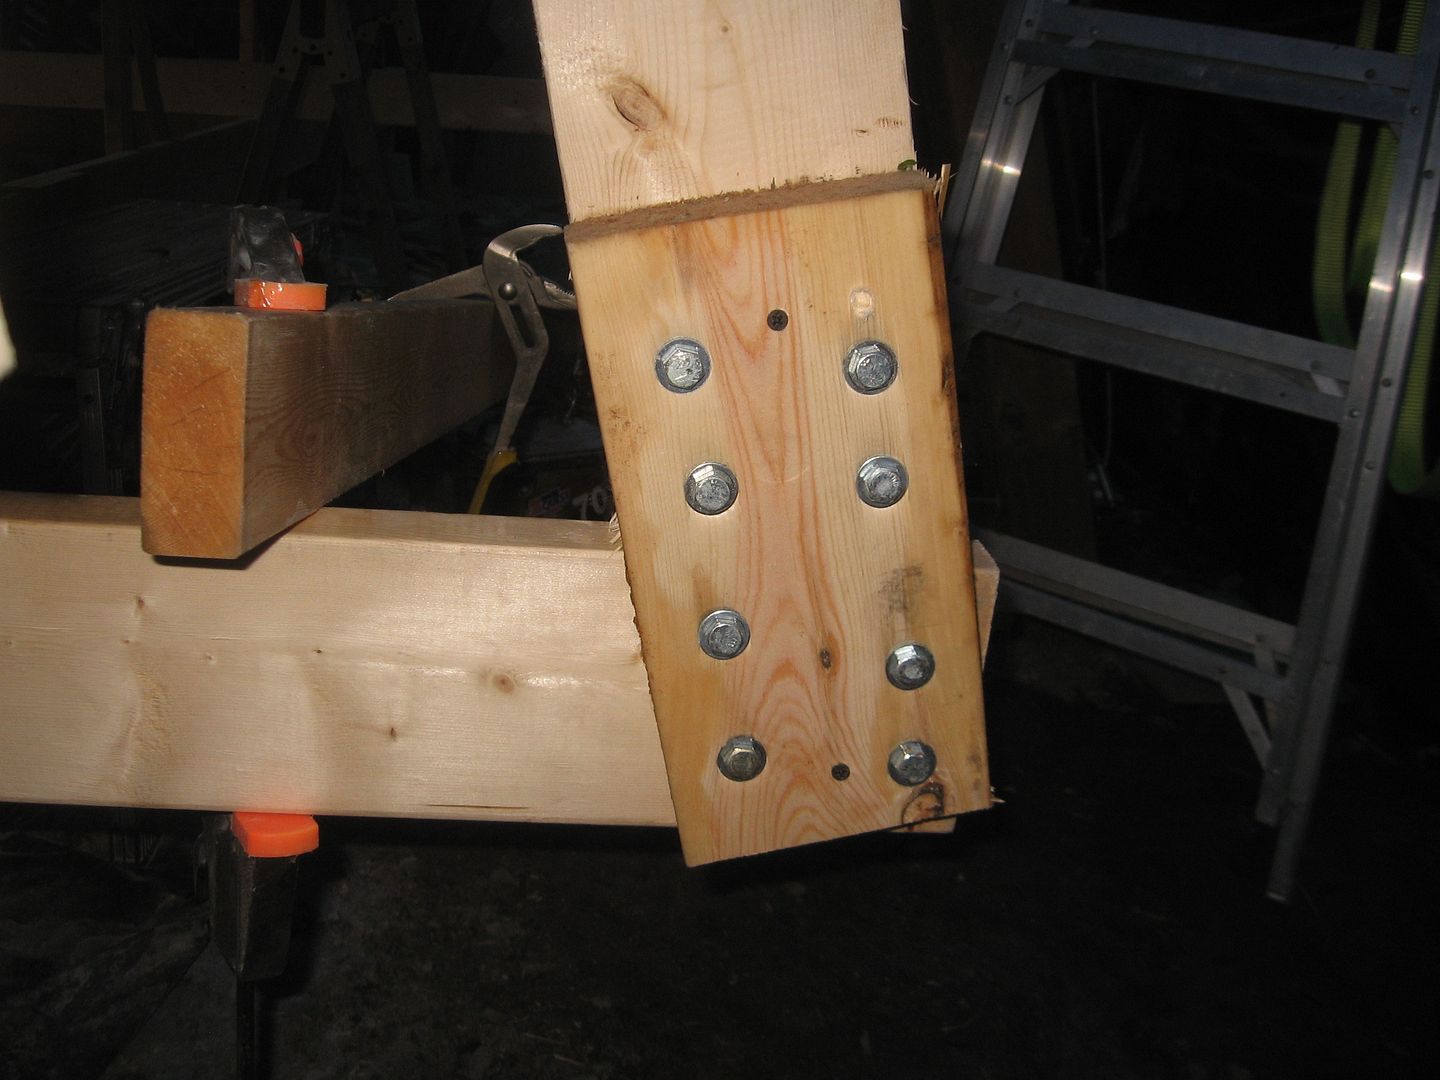
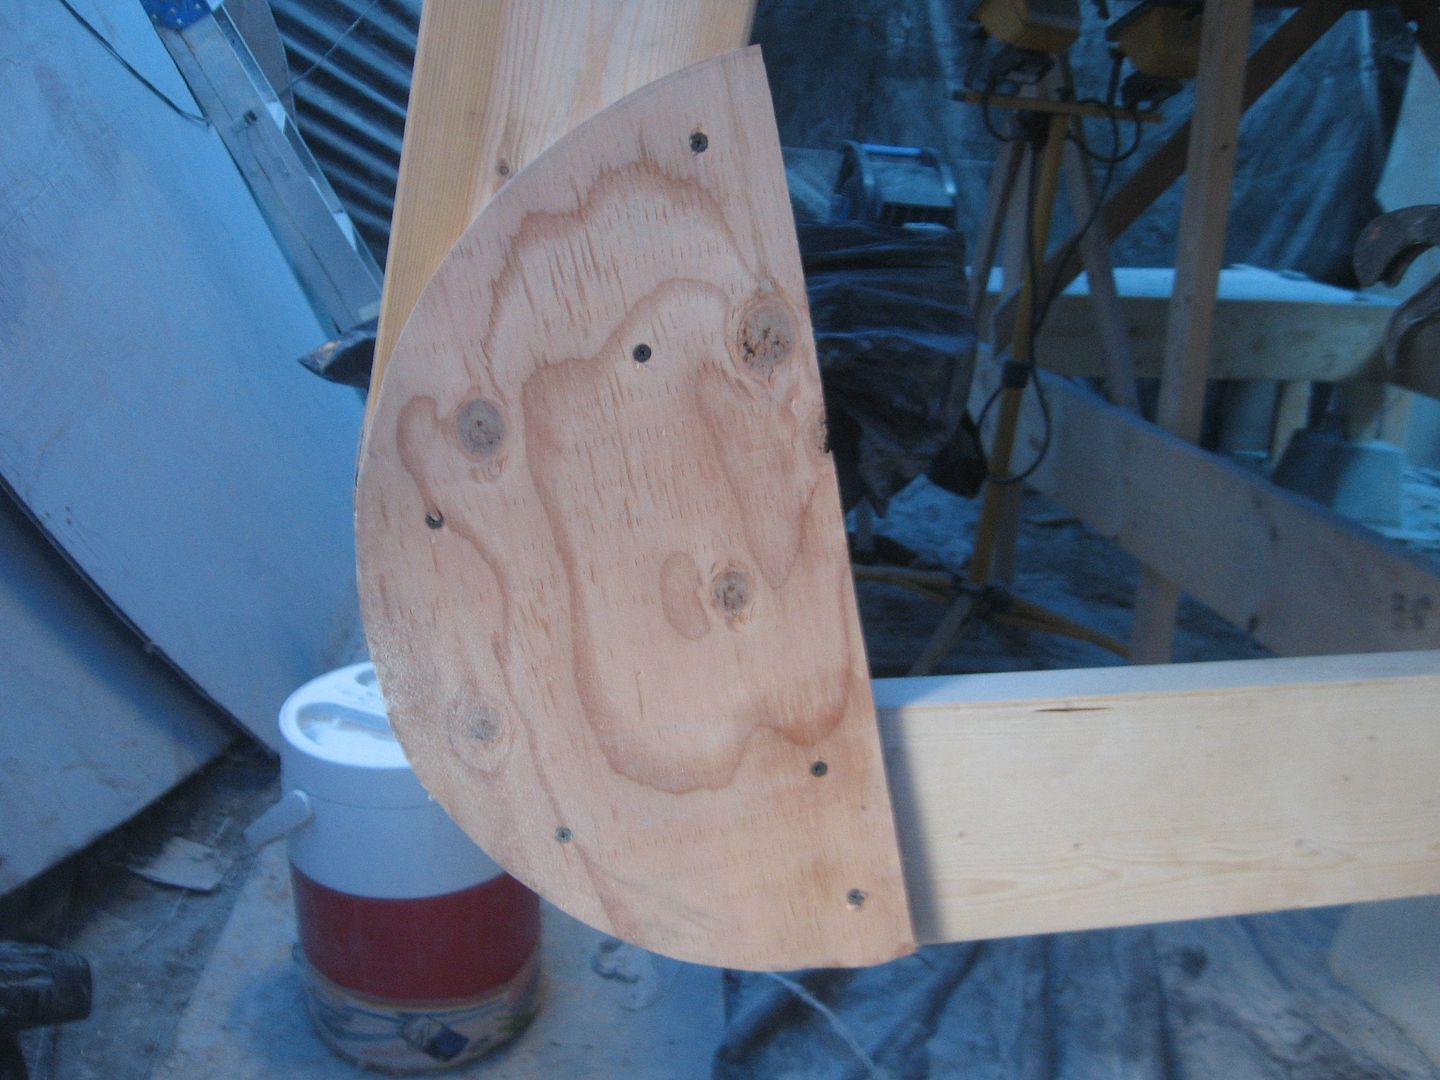
This one won't be required to take the full weight of the hull & turning frames so I used a 1/2" plain eye bolt. Drilling through the beam for the bolt I weakened the 2X6 a little bit so I scabbed on some 1/2" plywood on each side. The diagonal 2X4 braces are screwed and bolted onto the beam and frame.
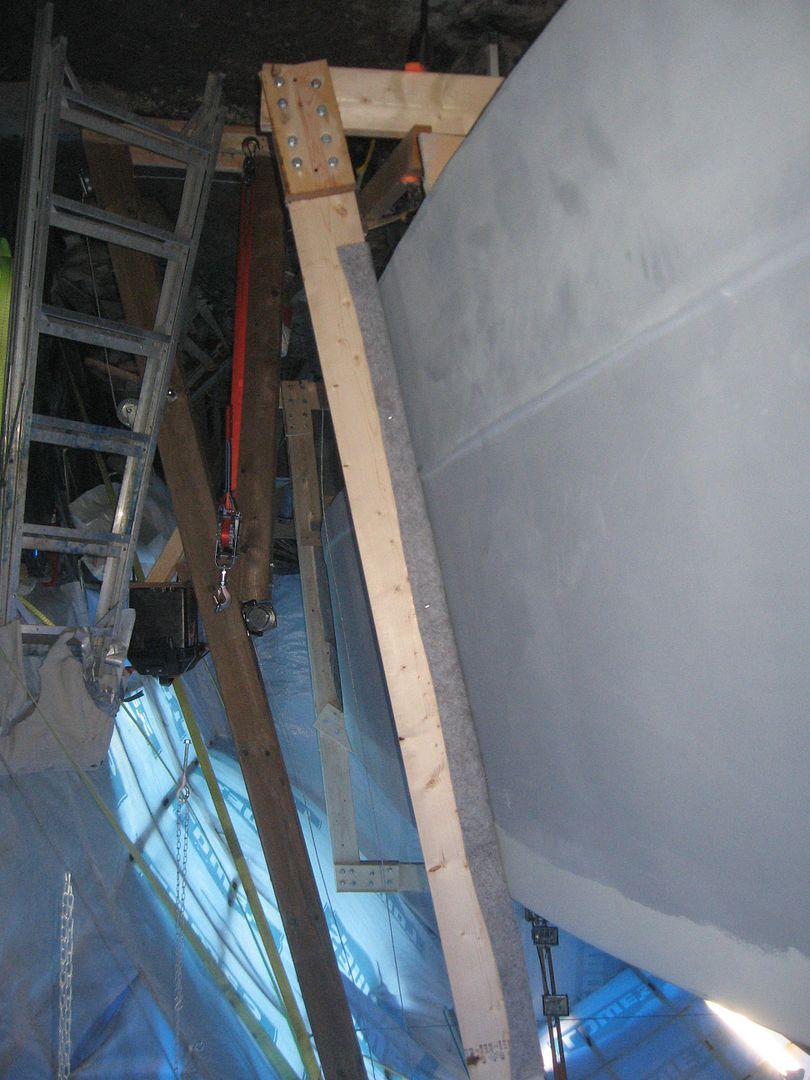
So that's it. Other than a few more screws to go in the half circles etc. the turning frame is DONE! Frigged, Rigged, Gigged and whatever, DONE!

This afternoon I'll start disassembling the strongback & forms and begin lowering the rolling frame with the hull to the floor.

Afternoon Update

After an email exchange with my buddy Jim decided to switch the cable end around a bit. It would have likely gotten bound up if I had left it on the shackle so I put another Quick Link on the second Quick Link and put the cable end on that. This way the pulley block and cable end will move together with no chance of binding up. Looks messy but I think it'll work.
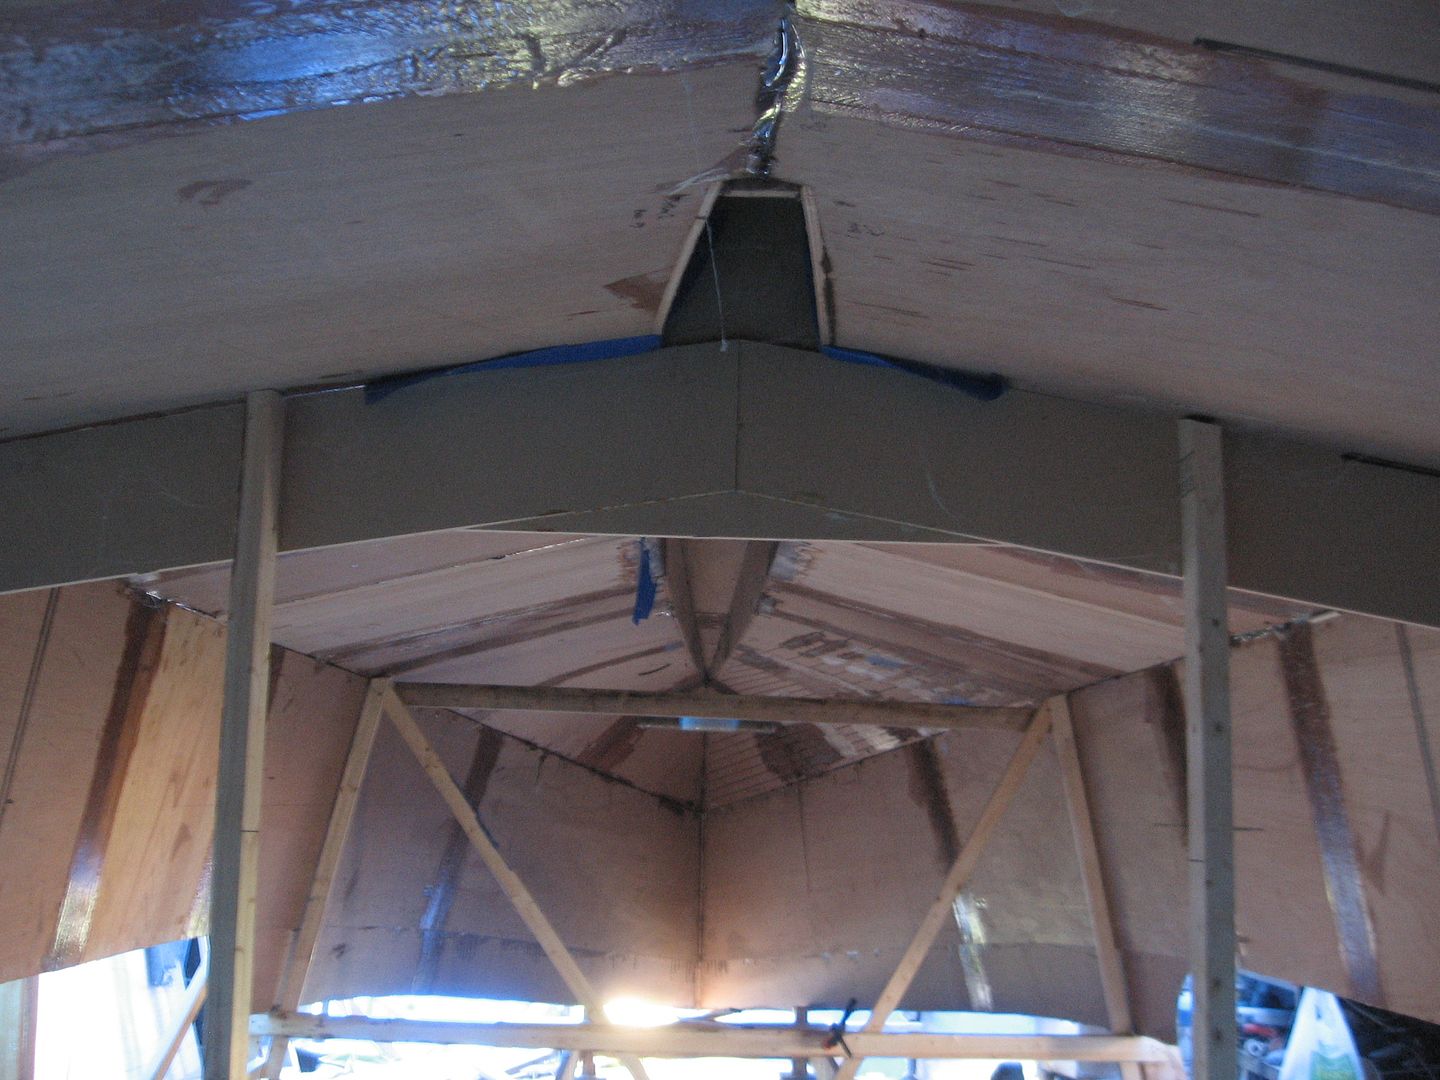
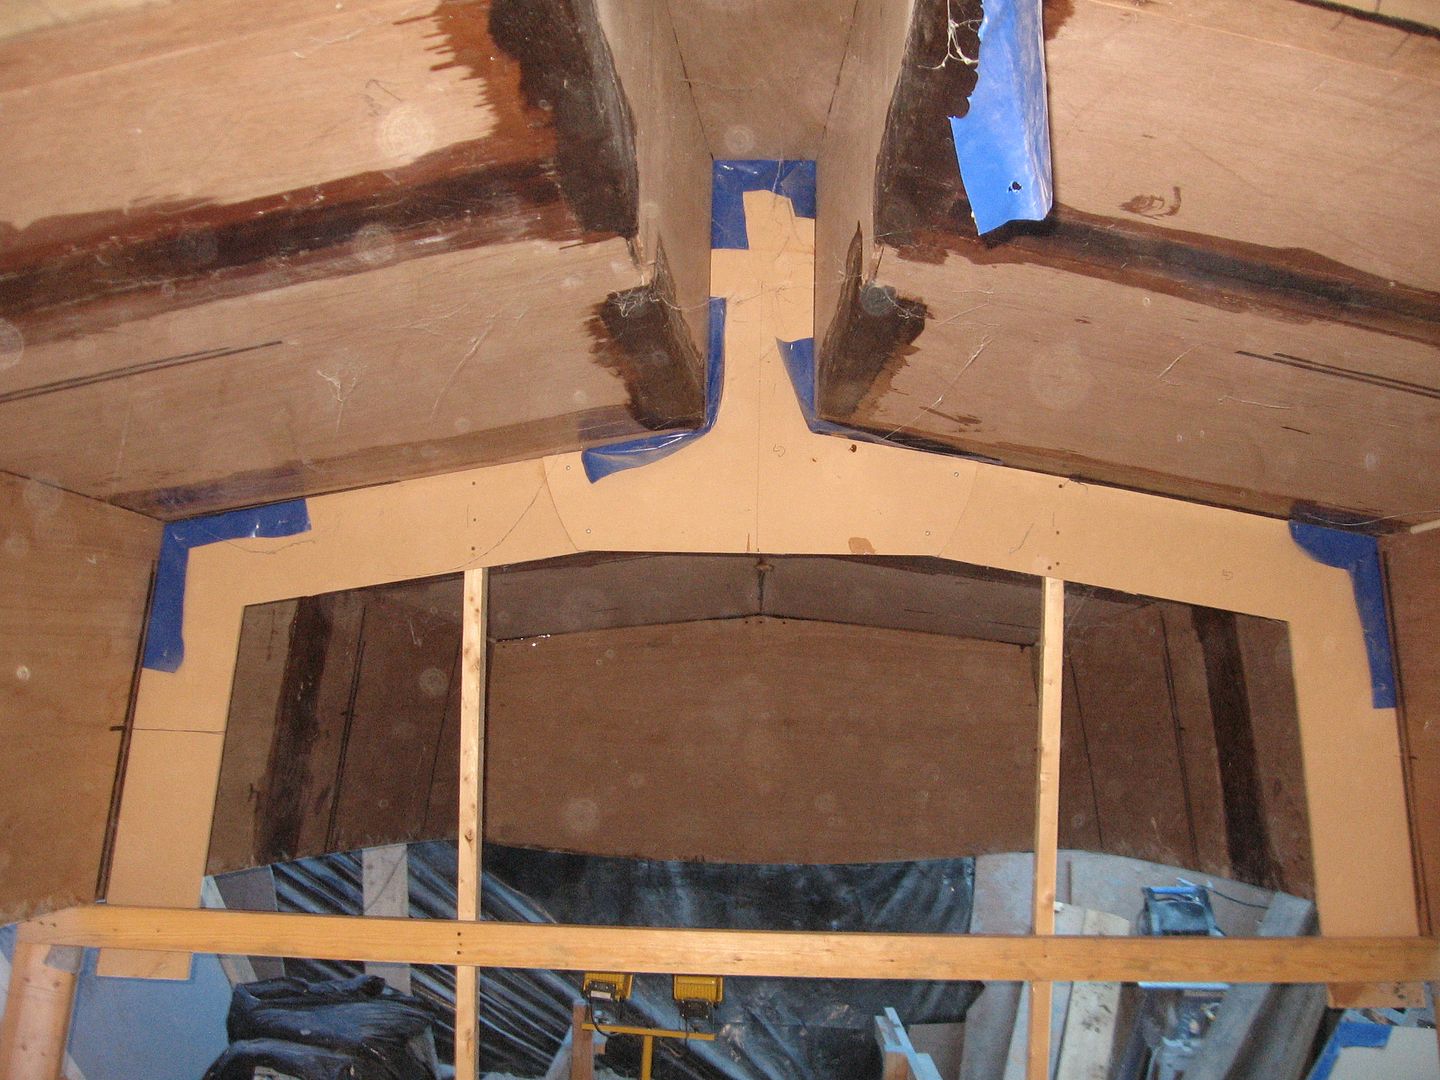
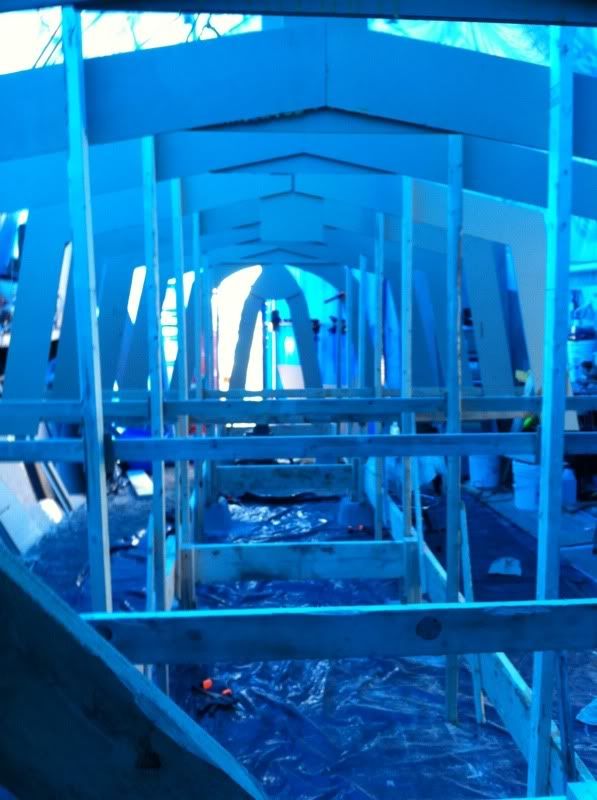
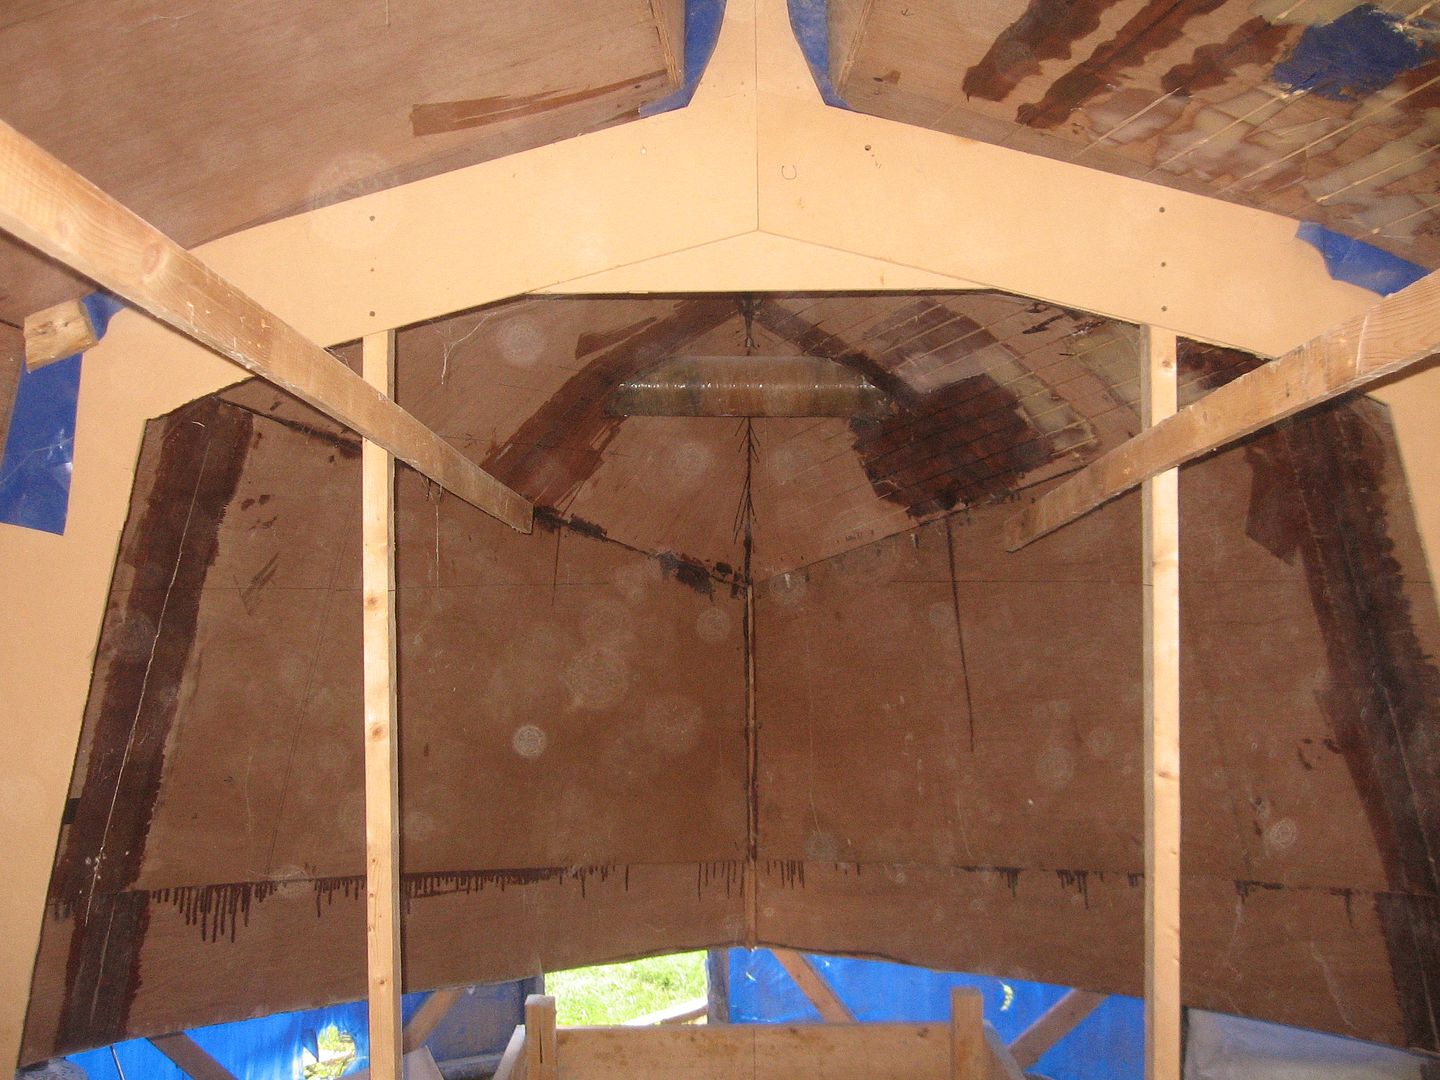
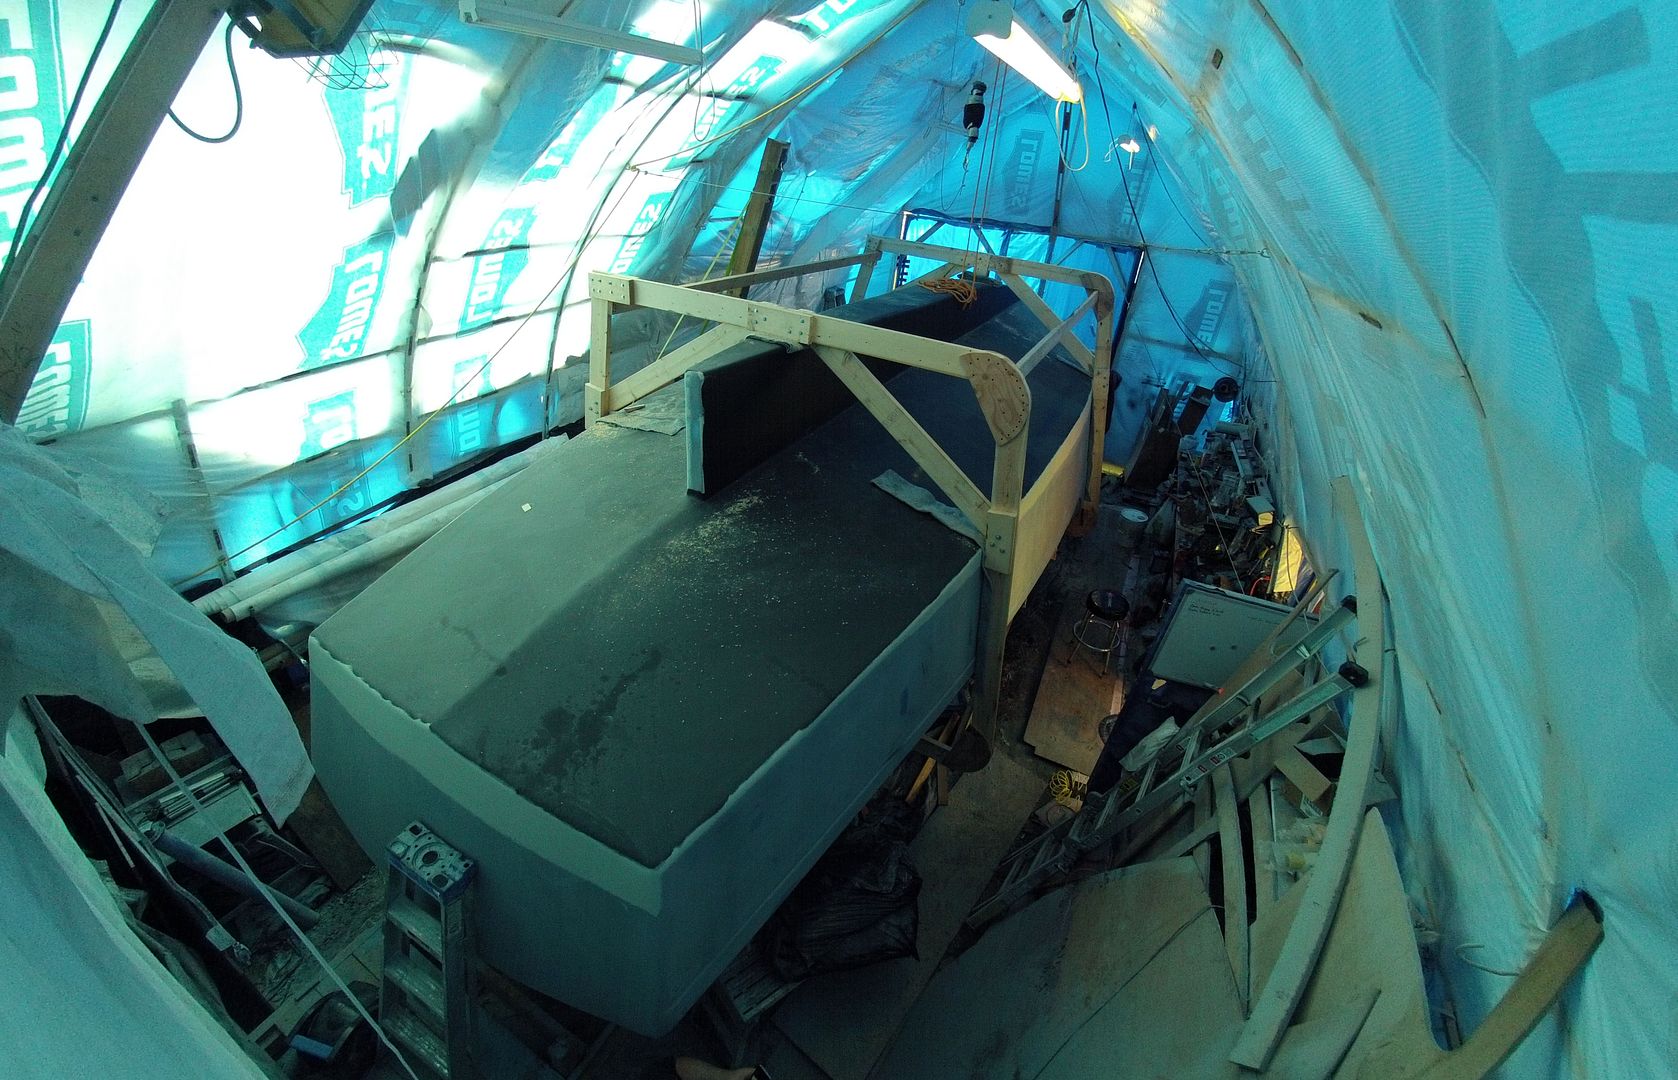
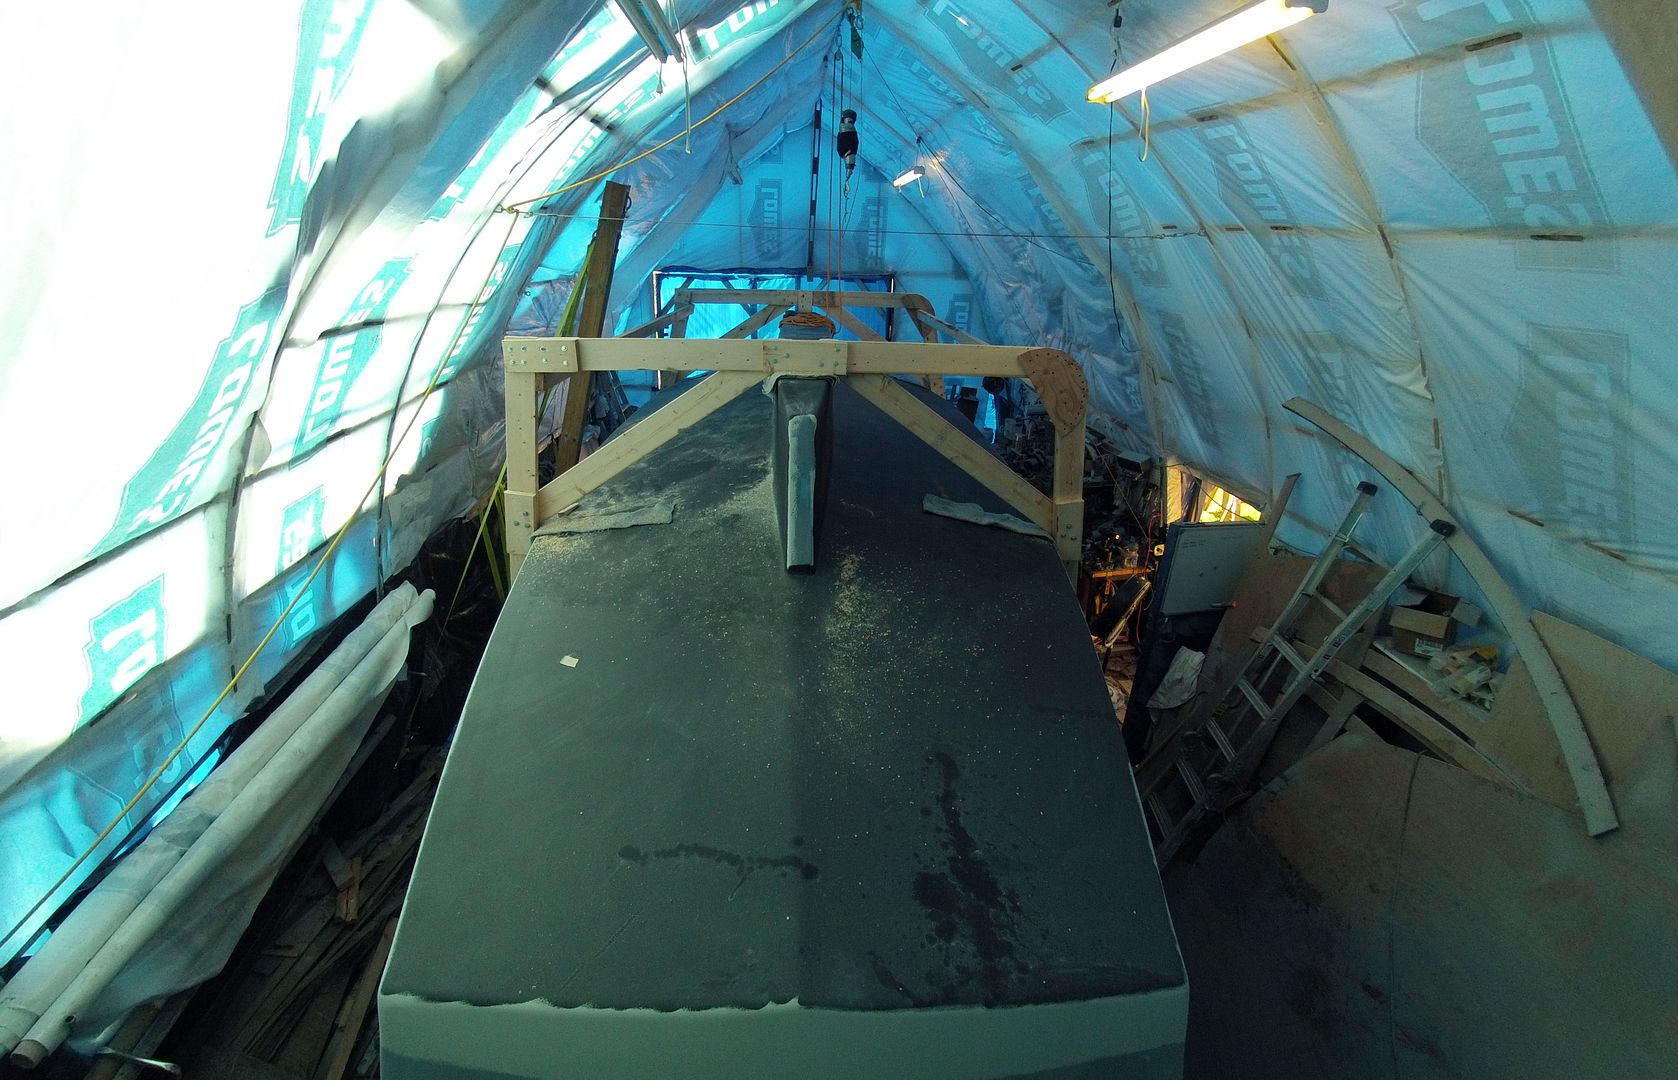
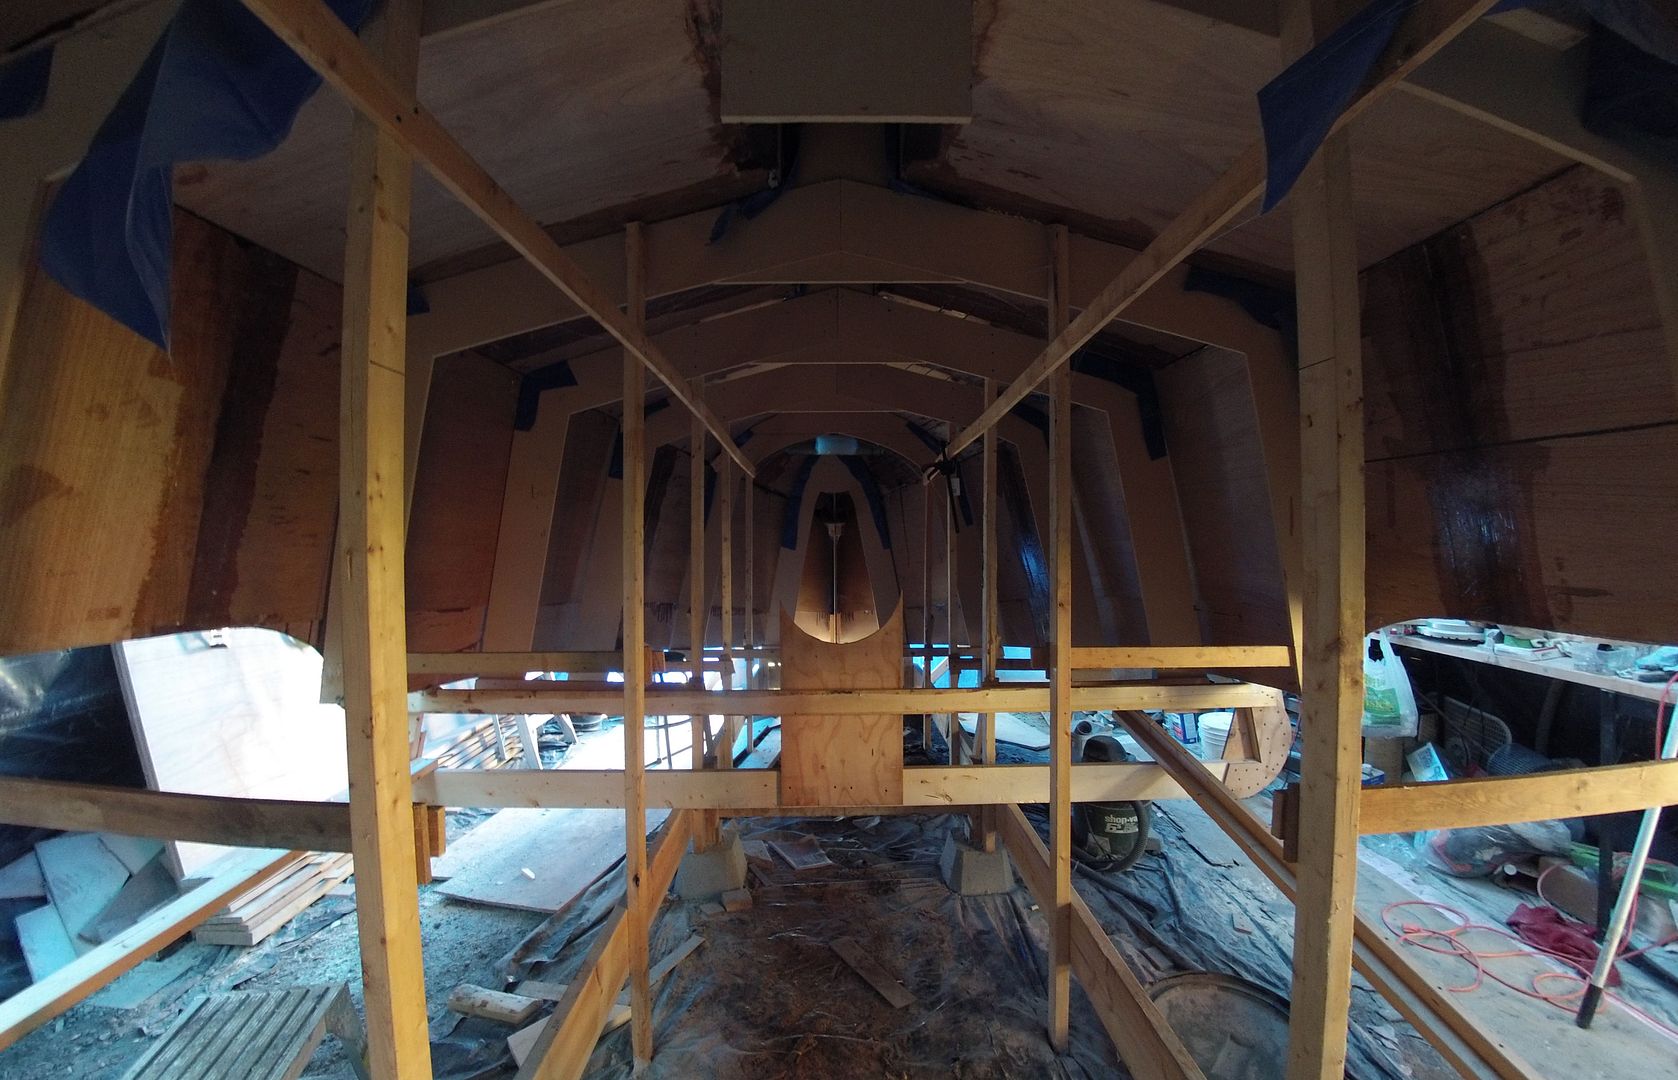
Started to dismantle the forms and strongback.Opening up the bow.
And the transom. I've never seen the inside of it before! It's been covered by the transom frame!
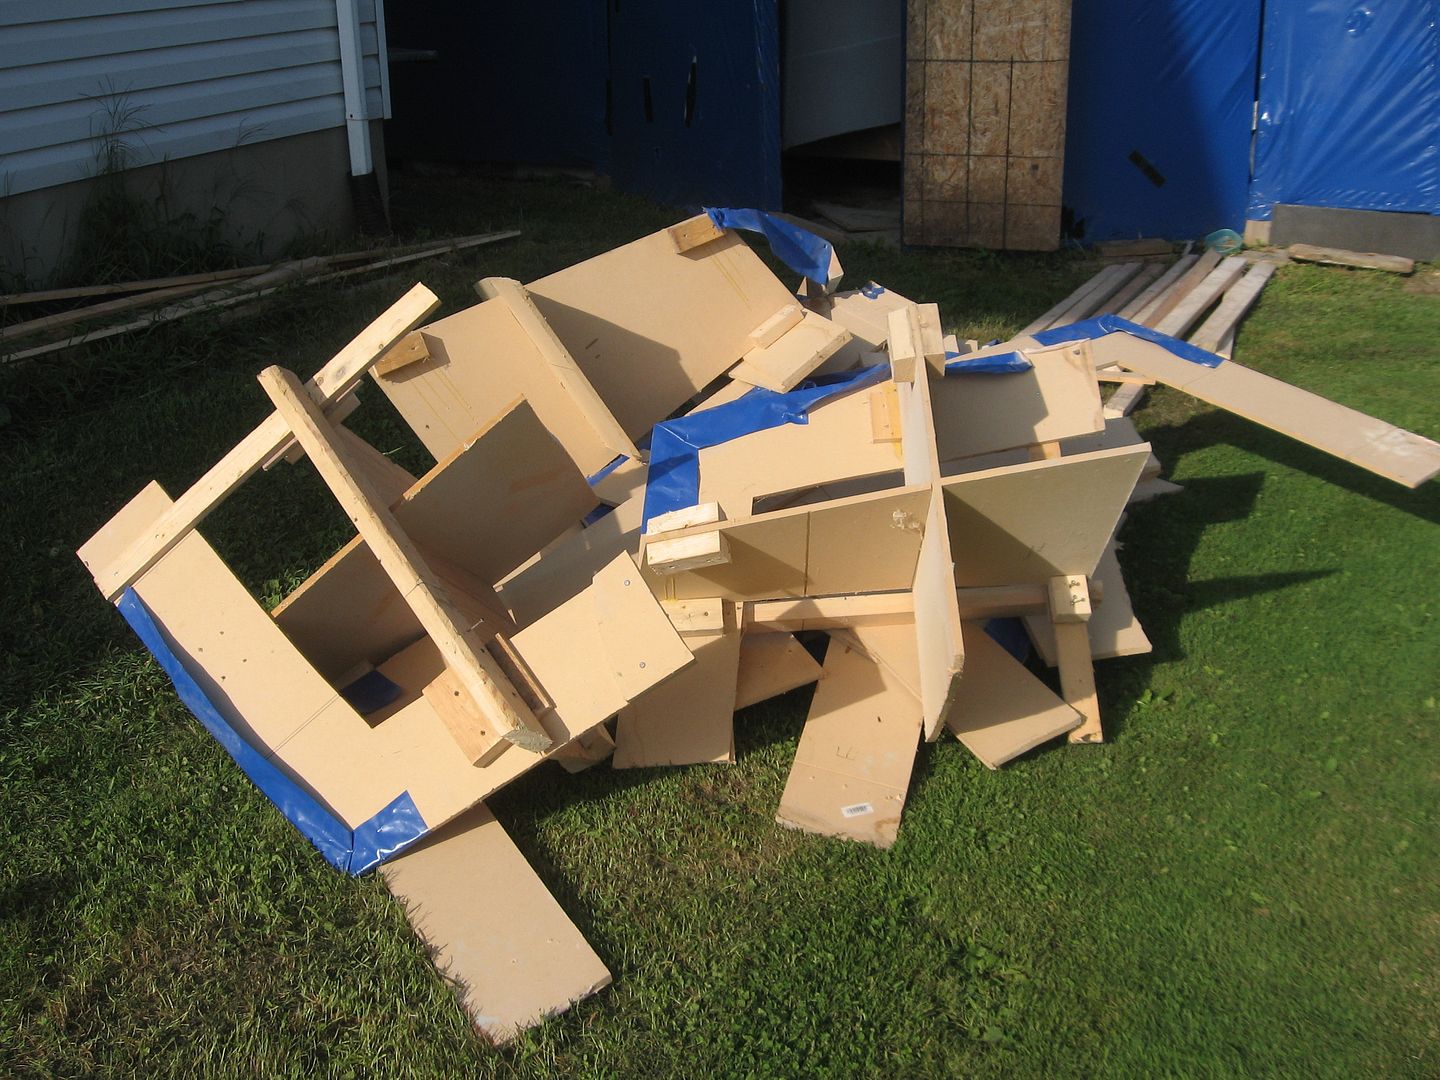
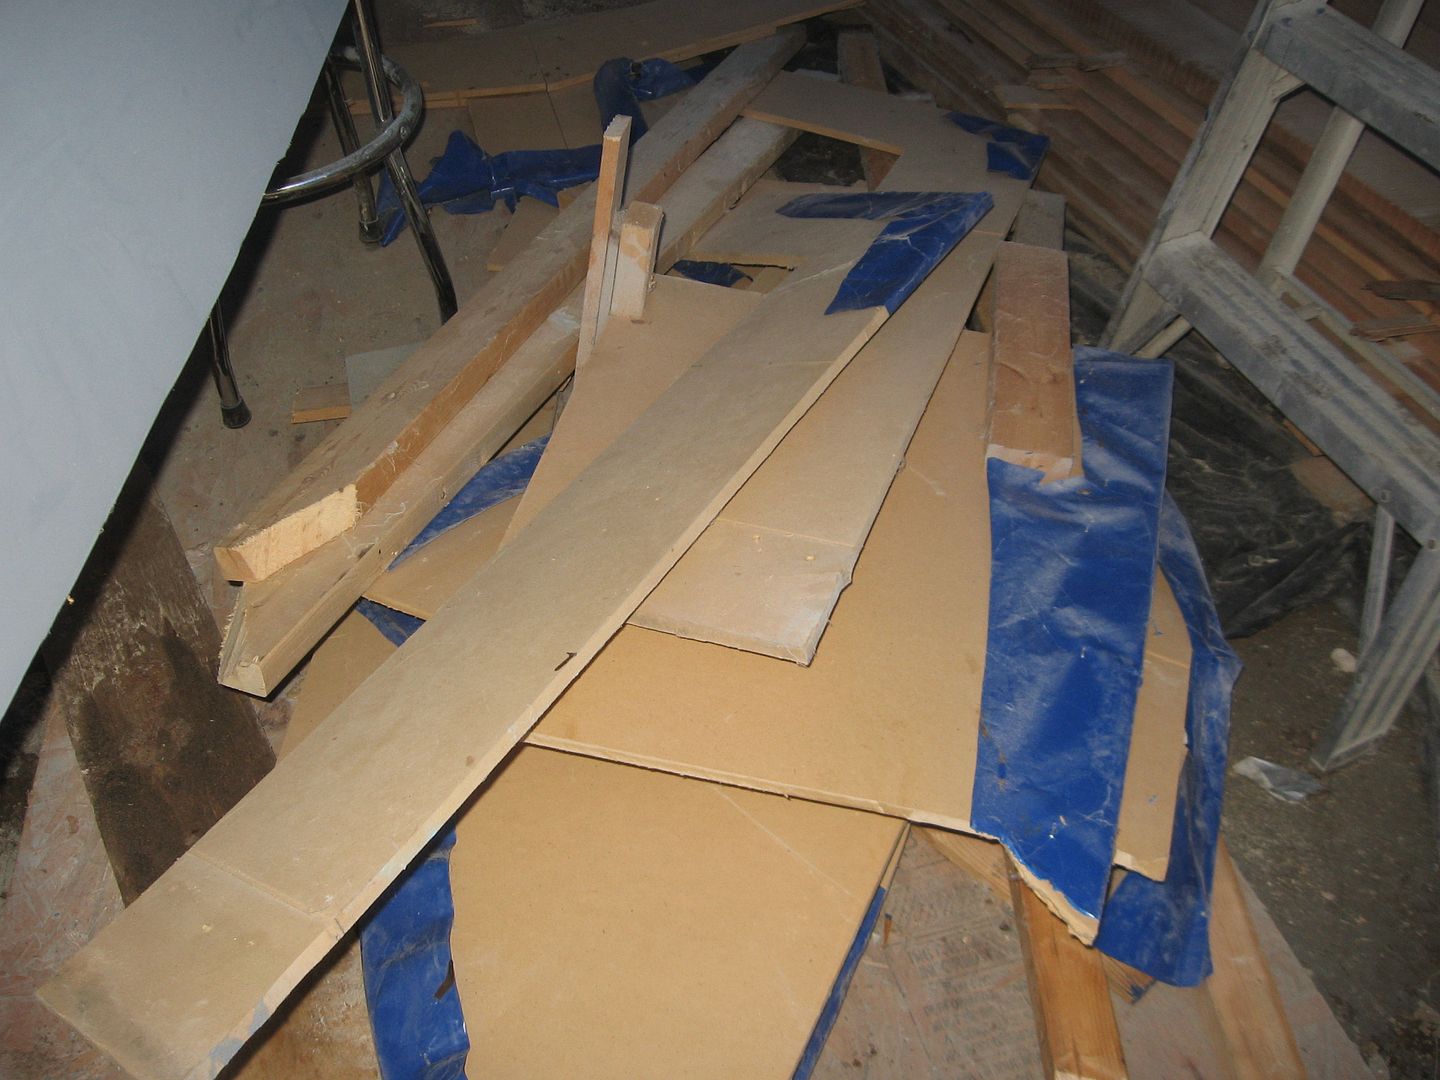
I wasn't able to save much of the MDF forms. Not likely there's anyone around my neck of the woods that wants to build a TW28. These will get hauled off to the landfill and likely burnt.
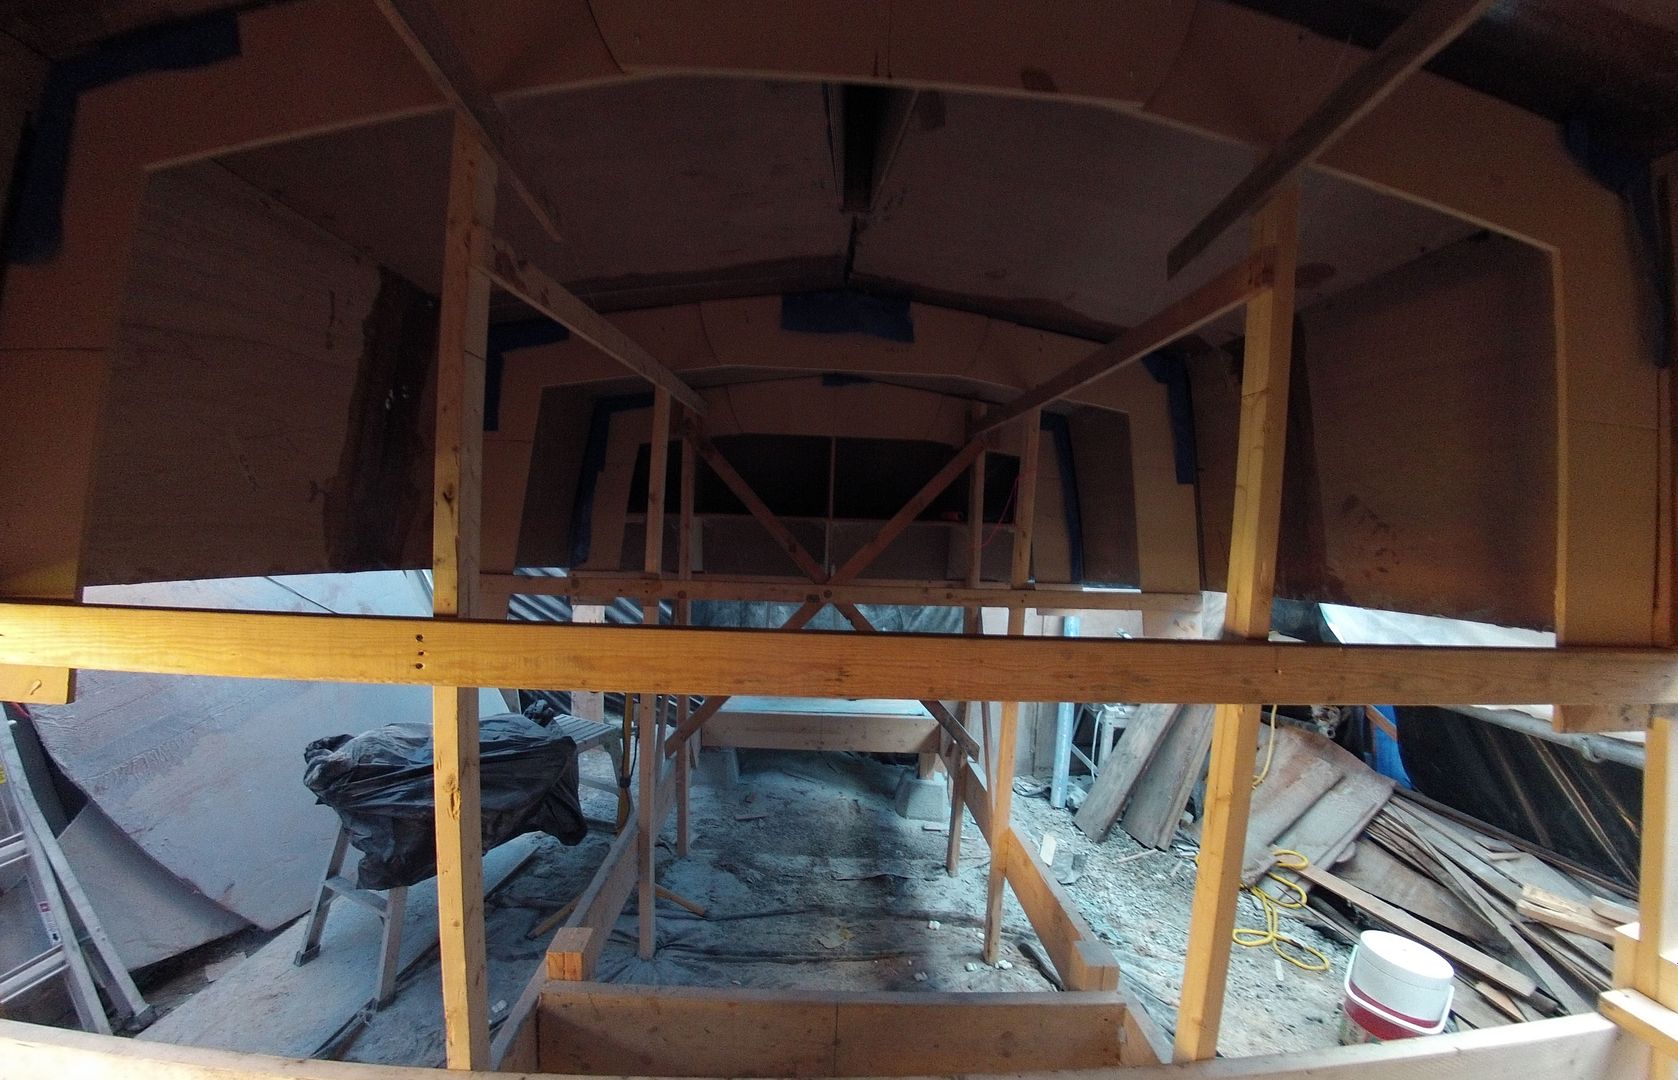
So I've got half the forms out. Took about 4 lbs of screws out as well! :-)  Tomorrow I'll finish the rest then figure out how I'm going to remove the strongback and lower this thing to the ground.


Standby.....


Wednesday, August 27, 2014

Friggin' with the Riggin' Again

I'm friggin' with the riggin' again. Sounds like a title to a Country & Western song! :-)  Sorry, no offense you C&W lovers out there. The new pulley blocks are "BEAFY". Way overkill but they should get the job done. After I switched the cables from the electric winch to the hand winch and vice versa I rigged the two blocks. Hmmm? This ain't gonna work!
That's what's known in the 'Backyard Eyeball Engineering' field as a 'Cluster F*ck!'. The end of the main hoisting wire has to be anchored as near the top of the gin pole as possible providing the most lifting height. Tried rigging a chain around the pole to attach the end of the cable. Ended up with this.
See the problem(s) here? The hoisting cable runs outside of the block before it lands on the sheave. The new pulley blocks don't swivel allowing the cable to self align. Hmmm? Now what the heck am I gonna do? The chain anchoring the end of the cable isn't gonna work for me either. I'll switch the u-bolt back around to the front and use the chain around the pole for the supporting straps instead.

The lower pulley works perfect. Well almost. This block will take most of the strain of the flip. First lifting then paying out as the boat is lowered. I am afraid the block could fall out of the u-bolt as the transition from pulling to paying out happens so I used some mechanics wire to 'mouse the hook'.
This will prevent the hook from falling off the u-bolt. The cheep Chinese made hooks don't have enough curve in the tip of the hook to hold the seizing wire so I had to Dremel out a groove to allow the wire to stay in place.

What else did I get done today? Oh yeah, I added a couple of diagonal braces to the main lifting side of the frame. This will greatly increase the strength of the 2X6. Without the braces the strength of the 2X6 is about 450 lbs and with them about 1650 lbs or so.
I'll do the same on the other tow lifting/pulling points.

More 'Friggin' with the Riggin' tomorrow.

Standby.....


Tuesday, August 26, 2014

37 C or 99 F

Just got back from my run to Princess Auto. Opened the shed and it's 37 C (99F) in there. It's usually another 5-10 degs warmer up on top of the boat which is where I'd need to be today so I'm gonna call it quits and have a nice cooling beverage.

Upsized the pulley blocks to 16,000 lb capacity and Plan B in case the electric winch isn't up to the task is a 2 Ton cable winch. I think I have all the bases covered now.
Afternoon Update.

One of the problems with not being able to work on the boat is you have more time to think. Sometimes more time to think is a good thing and sometimes it's not. I have a tendency to 'over think' a lot of things. That's where they ole' Interwebs are a boon to anyone considering building their own boat. There's a veritable treasure trove of knowledge out there and people willing to share it. A couple good discussions on the boat builder forums got me to thinking (in a good way I hope) about all the hardware etc. that'll be used to turn the boat. I think I have everything covered with hardware etc. that's up to the job. I put together this lil' sketch.
Some of the other key parts not show are the Gin Pole and on the wooden rolling frames. The gin pole is a 6X6 has a compressive strength of 26,000 lbs and a buckling force of 7600 lbs. The 2x6 longitudinals (I'll be lifting on these) have a buckling strength of about 400 lbs in a 12' unsupported span, they'll be diagonally braced reducing the actual unsupported span to about 1' for 4400 lbs capacity. 

I figure the boat is 1300 lbs with the rolling frames. It will not leave contact with the ground. Once the boat gets to the position shown above (45 degs) it'll be putting the most strain on the Gin Pole & winch cable. There are a couple of things that can go wrong at this point, first the frame can skid towards the Gin Pole causing the boat to fall and secondly the electric winch might not be able to hold the weight of the boat in a controlled manner allowing me to slowly lower it to the ground.

To address point number 1 the 4 ton cable ratchet winch I bought today can be used to replace the electric hoist. Point number 2 I'll add two tag lines that'll run out to the frame of the boat shed to control the bottom of the frames as they're winched towards the Gin Pole. That'll mean a couple extra hands needed for the process.


Standby....

Monday, August 25, 2014

Should have paid better attention

Should have paid better attention in those engineering classes. Doh! The more I work on this whole 'rolling the boat over' challenge the more I realize I know absolutely nothing about what I'm doing. Trying to wrap my head around the forces that'll be applied to the whole structure and how to design/build it to meet those demands is a bit of a noodle bender.

So I've increased the size of the longitudinal beams (for lack of a better term) that'll I'll actually be tugging on to 2X6's. Screwed & bolted to the lifting frames.
Three of the four corners will have force applied to them at some point in the whole procedure so they'll all be built the same.
1/2' plywood backers on both sides of the beam. U-bolt is 1/2" 316 Stainless Steel with a SWL of over 17,000 lbs.
And on the other side. This is the beam that'll actually do most of the lifting.
I did a test pull with the electric winch just to take a strain on it so I could see how it would react. I noticed a lot of twisting in the 2X6 so I used the ratchet strap to connect it to the beam on the other side of the boat.
I need this beam to lift without twisting. Once I tightened up the ratchet strap it was fine. Originally I was thinking of diagonal bracing from the center of this beam to the rolling frames but the hull sticks out too far. I don't have a Plan B yet if this won't work.
The other side will definitely get some diagonal braces to help keep this beam from bending. It'll have a lot of force applied to it during the whole turning process. This beam will also be the primary point of lift on the second pull to bring the hull upright.

I'll have to climb up on top of the boat day after tomorrow and rig the third beam. Tomorrow is the run to Princess Auto and their 'End of Summer Sale'!  :-)

Standby...


Sunday, August 24, 2014

Inching ever closer

More roller frame assembly today. Almost there! I have to buy some more material tomorrow and it'll be done except for the cable rigging etc. That'll require a trip to Princess Auto (Dammit!) :-)....

Overview looking forward. You can see how tight it is in here. There's some stuff I can move but a lot of it has to stay where it is.
I thought I had more bolts but came up just two short. I screwed the crap outta the forward brace as best I could. The boat won't sit long on these so it should be Ok.
Diagonal bracing on the forward frame.
Aft looking forward again. Not a whole lot of room to work with here.
Forward looking aft.
On the inside looking forward. I've started to disassemble some of the strongback framing which we put together just over 3 years ago. That's a nice feeling! :-)
And looking aft.
I was going to use 2X4 plus a 2X2 laminated to it for the longitudinal braces but I don't think they'll be strong enough so I'm going to get some 2X6's for that tomorrow. All of this lumber will be re-purposed once the boat is flipped into a set of stairs up and into the boat! :-)

I'm hoping my friend Peter will be available the first or second week of September for the flip. I can rig the GoPro camera up in one corner with the same angle as the first picture above and record the whole operation as a video. Success or failure, crash & burn or fall down and go boom, I promise I'll publish it without any editing or CGI special effects!

Standby....


Saturday, August 23, 2014

Rolling frames continued...

More work on the rolling frames today. The forward frame is coming together now. I used the laser level to mark the vertical 2X6's and trimmed those then added the cross piece.
The backside of the same section.
And the opposite side without the half circle. I think I have 'nuff bolts in it! :-)
Here you can see a 2X4 running horizontally from the aft turning frame to the forward frame. This is just to control the spacing of the frames and keep them from wandering out of position during the lift. There won't be any lifting force applied to this section.
The two parts of the lifting frame that will be lifted on will be made with 2X6's and braced diagonally to the rolling frames to distribute the load. It looks like I'll be using automotive style u-bolts again for the pulling points. They're extremely strong and inexpensive.

It was 95 F in the shed when I quit at about 1:30 this afternoon and probably another 10 F higher up on top of the boat! Where's this Polar Vortex I hear everyone talking about?  ;-)

Standby...


Friday, August 22, 2014

Cat Emergency

Sorry for the delay in posting. We had a cat (four legged furry kind) emergency that had to be dealt with. The Princess (aka Shadow) decided all of a sudden to quit eating. She squirreled herself away in the basement and barfed up pretty much everything she ate or drank for the last three days so it was off to the Vet. Two days later, X-Rays, blood tests & $850 later still no idea what's up. Anyhow that's what I've been dealing with.

Back to the boat. Started to assemble the forward rolling frame. Stbd side
Port side.
Trying to figure out how to tie the two frames together. I have to keep in mind that I'll be pulling the weight of the boat over with these cross bars (for lack of a better term).
Think I'll laminate a 2X2 to a 2X4 as shown and screw them into the frame at the end. I'll cross brace to take the load and transfer it to the middle of the frame.

Think I got 'nuff bolts in it! :-)
All the corners without the half circles are bolted the same. That old bucket of bolts I bought all those years ago are certainly coming in handy. With the price of hardware now a days that'd likely be another $100 just to bolt this thing together.

In order to get the boat as close to level as possible when I flip it I have to keep the bottom (currently on top) of the frames (fore & aft) level with each other. I set my handy dandy laser level on the aft frame and it shows me where I need to trim the forward frames. I'll get to that tomorrow.
Other than nursing a sick cat that's about all the updates I have. Progress is slow but it's still progress none the less.

Thanks for looking in.


Monday, August 18, 2014

Lotta Ponderin' and a lil' workin'

Today was one of those days I pretty much had no idea what I was gonna do first when I walked in the shed. Just picked up a 2X6 and started at it.

First I laid out the two 2X6's that will form the top (right now they're on the bottom) of the rolling frames 12' apart. This gives me a decent starting point on one of the frames near the stern. I'll tie that form into the rolling frame.
You can see the 2X6 on the bottom and one rigged vertically up the side of the hull. I've wrapped part of a felt moving blanked around the edge of the 2X6 to cushion the hull. The plywood half circle is part of the rolling frame. There's one on each side. This is what joins the two 2x6'S together. I won't be gluing them as I eventually have to take them apart to remove the frame later.

A closer look at the corner of the rolling frame with the half circle in place.
And after the 2X6 was trimmed to the radius of the circle.
This should allow the frames to roll nice and easy during the flip. There won't be any sudden transition from one side of the frame to the other so hopefully it'll go over as one fluid motion.

The other side won't roll so it doesn't need a radius. I'll replace the plywood seen here with a chunk of 2X6 screwed securely on both sides.
The forward most rolling frame will be a bit more involved. It doesn't fall on a form so I'll have to build one as part of the frame. It will also get the radius'd corners like the other side. The two frames will be tied together with 2X4's. That'll come later.

This whole thing has been a bit of a puzzle. I can picture it in my head and it's pretty much coming out as I thought it would. Based on some good advice from a fella on the Woodenboat forum I'm going to upgrade the size of the wire on the main lifting winch and increase the capacity of the main pulley block. Thanks Jim.

Afternoon Update:

Managed to get the rest of the aft turning frame pretty much figured out. Port side.
Stbd side.
I've still got some drilling & bolting to do. The plywood brace on the port side will get replaced with 2X6, drilled & bolted. It was 95 degs on the floor of the shed and about 100 on top of the boat! I was melting even with the fans going full blast! I've got enough materials to finish the aft frame and not enough to do the forward one. I'll have to wait about a week & a bit for the ole' pension cheque to arrive before I buy more materials. :-(


Standby....