
She:Kon, pronounced "Say-go" traditional Iroquois greeting meaning "Do you still have the Great Peace?"
Monday, September 16, 2013
Once side down
One more to go. 4 hrs, 4.5 litres of epoxy, 24' of peel ply, one roller and about a dozen latex gloves. Sorry no pics. Too sore. Got back spasms right between the shoulder blades about 3/4 of the way through but couldn't quit. I'm gonna be sore tomorrow! :-( I think it'll turn out just Ok. I still got a lot of tiny bubbles. Will be out there for a few hrs bubble busting! Standby.


Sunday, September 15, 2013
Twas the night before
Twas the night before Epoxy Day, when all through the boat shed,
Not a creature was stirring, not even a lazy ass'd ole' Tom Cat.
The fiberglass was hung on the boat sides with care,
Not a creature was stirring, not even a lazy ass'd ole' Tom Cat.
The fiberglass was hung on the boat sides with care,
In hopes that St Epoxy soon would be there.
Oh Gawd someone help me. I think (know) I'm loosing it! :-)

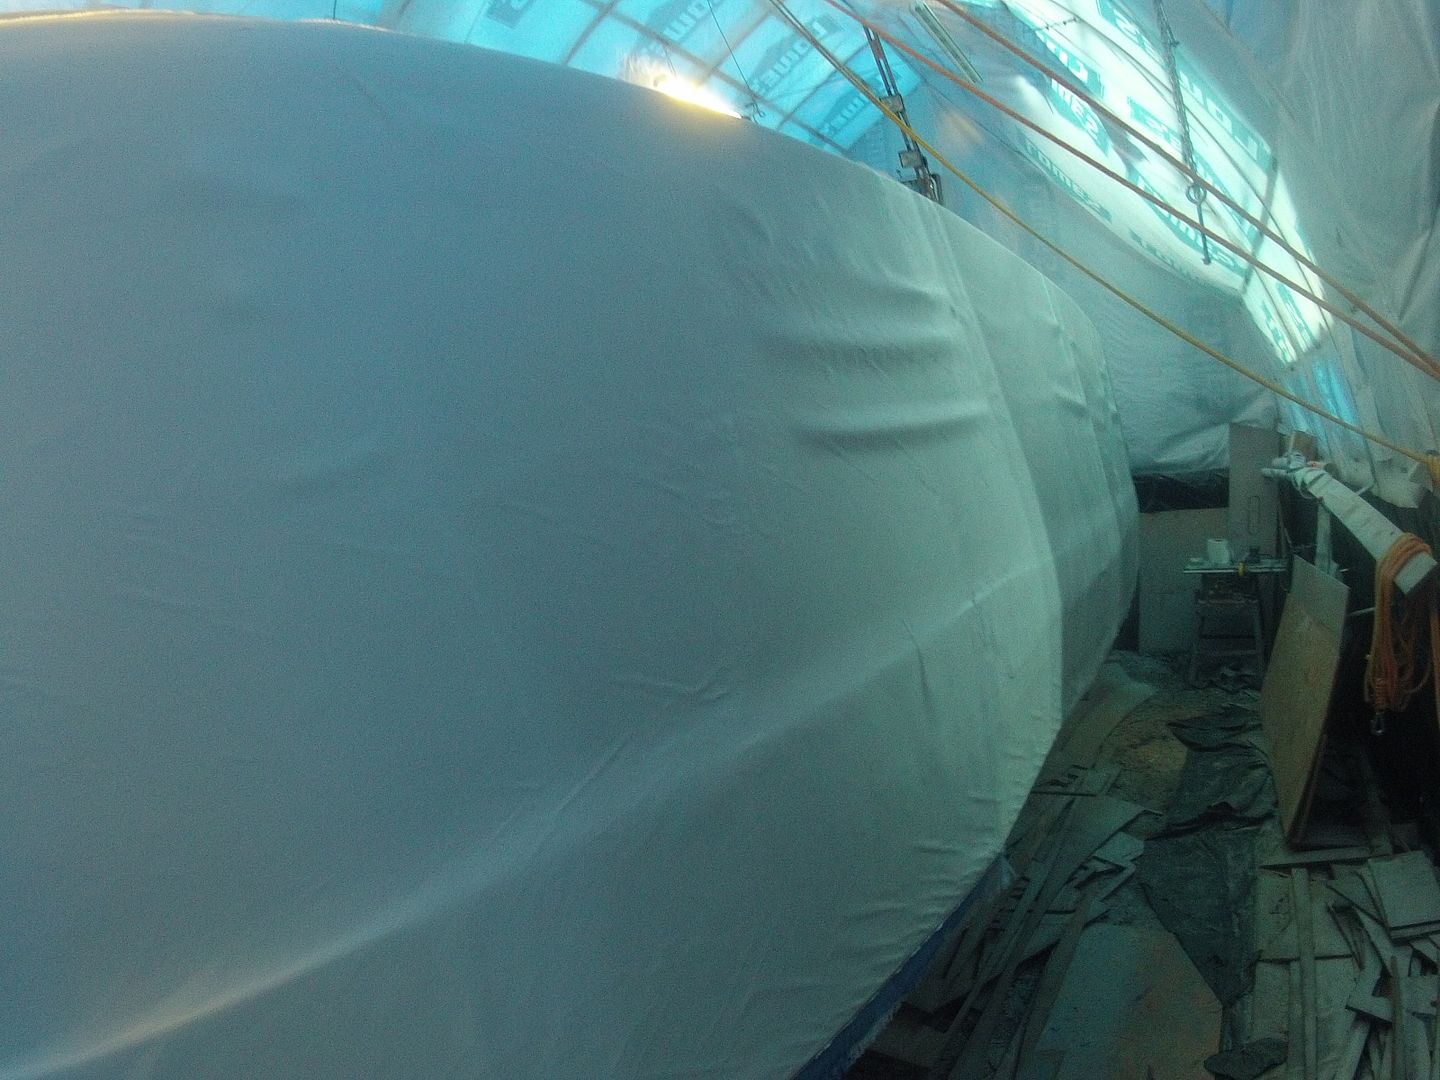
This is the glass hung on the other side. I hadn't smoothed out the wrinkles yet.
Saturday, September 14, 2013
Sandinsanity & Acetone
So that whole going to work thing kinda got in the way of my boat building project. I apologize for that. Anywho, the project I was working on at CCG is set back so it doesn't like I'll have to go back into work for awhile (if ever). I'm not heartbroken over that. The extra money would have been nice but I can get along without it.
So today I hit the sander hard to clean up the very very sloppy job I did last week on the keel. I can't believe the drips & runs I left. What a mess. The sander made pretty short work of it though. Once that was cleaned up around the bow I wiped the sides down with acetone. Yes I wore a respirator and had all the fans going. I've have to protect the few remaining functional brain cells I have left ya know. :-) I've kinda been dreading doing the 10 oz fiberglass, based on my experience on the transom, but I gotta get it done while the weather is cooperating if I'm going to have any chance of flipping this whale over in the spring.
Didn't take any pictures today so here's a random one from the photo album.

I don't know if I posted this one before. Never mind the 'what's this?'. I know what it is now! That's the 'fugly' Yanmar stock engine control panel. I've got it stripped down and am going to make my own control panel this winter. I bought a complete set of 'Faria Chesapeake' guages.
 Been looking at other TW28 control panels and there's a few I like and might follow the same path.
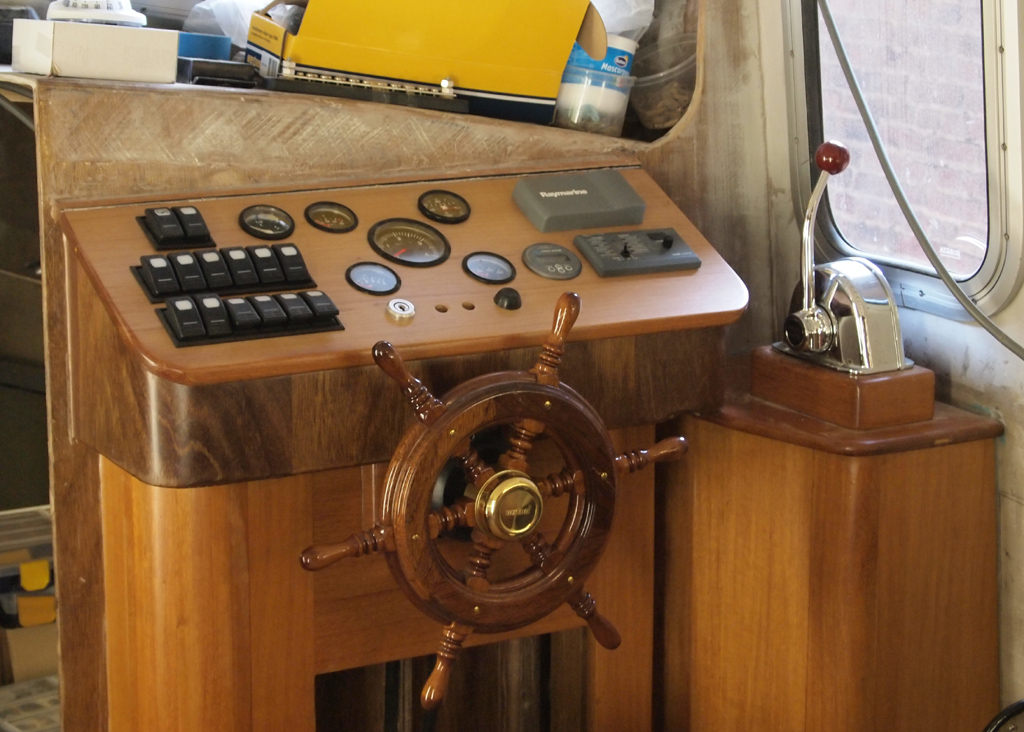
 This is almost without a doubt the finest I've seen on a TW28. It was done by a gentleman in Belgium. There's a few design changes I'll make. I intend to incorporate a 12" Chartplotter in the dash panel and move all the switches to an overhead console. My engine controller will be tucked up farther forward because we're adding sliding doors to the sides of the main cabin. I think my wheel is a bit bigger than this one so that's an issue I'll have to deal with. Probably a good idea to build a mock-up this winter to see how it'll all come together.
Tomorrow's task to hang the glass on the sides and get ready for some more epoxy work. Weather is looking pretty good to get it done this week. Standby...
So today I hit the sander hard to clean up the very very sloppy job I did last week on the keel. I can't believe the drips & runs I left. What a mess. The sander made pretty short work of it though. Once that was cleaned up around the bow I wiped the sides down with acetone. Yes I wore a respirator and had all the fans going. I've have to protect the few remaining functional brain cells I have left ya know. :-) I've kinda been dreading doing the 10 oz fiberglass, based on my experience on the transom, but I gotta get it done while the weather is cooperating if I'm going to have any chance of flipping this whale over in the spring.
Didn't take any pictures today so here's a random one from the photo album.
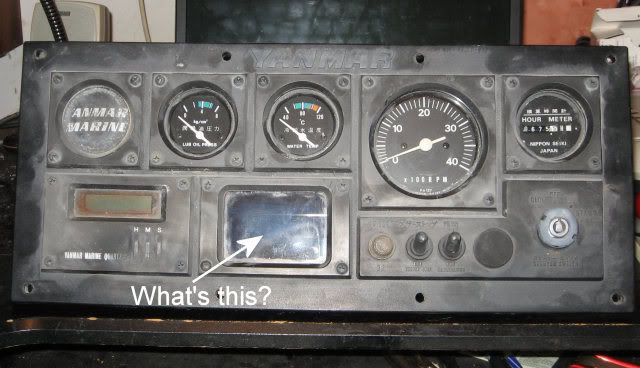
I don't know if I posted this one before. Never mind the 'what's this?'. I know what it is now! That's the 'fugly' Yanmar stock engine control panel. I've got it stripped down and am going to make my own control panel this winter. I bought a complete set of 'Faria Chesapeake' guages.

Tomorrow's task to hang the glass on the sides and get ready for some more epoxy work. Weather is looking pretty good to get it done this week. Standby...
Sunday, September 8, 2013
My ole' Grandpa
was a wise ole' fella. Always used to tell me: "Never trust a guy with a clean workshop, he's not busy 'nuff to be any good!" Yeah well that may well be true Grandpa but I just had to clean up my boat shed today. I made a heck of a mess building the sewing table & shelves so out comes R2D2 (Shop Vac) to clean up the sawdust. Working my way along the workbench I also found a few tools I had though long lost. :-)
So I sit there, taking a wee break and looking at my handiwork. Well sorta handiwork and ponder the enormity of the task I still have ahead of me. For one tired old fart, retired simple servant building this boat is a monumental effort. I hit it hard this summer, as much as the weather would allow and got quite a bit done but there's still a lot to do before I can flip this pig over. A thought pops into my head, something I remember from high school English class I think.
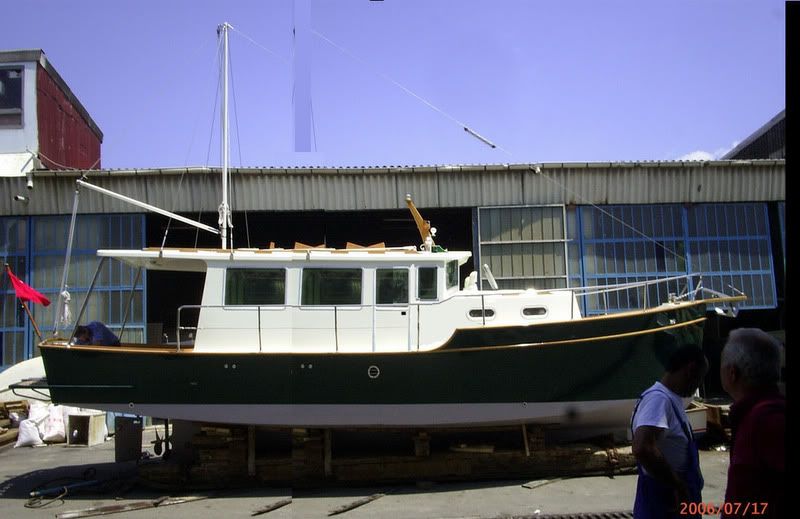
 So I wrote that on the shed door. It seems a really negative thought but it will constantly remind me to to keep my eye on the prize. Knowing that after it's all said and done we'll have a boat something like this.
 It'll be our escape vehicle. It'll have the range, endurance and amenities to take us where ever we want to go (hopefully someplace warm in the winter). It may not be the biggest or fanciest on the water but it will be ours and I will be able to proudly say to anyone that asks "I built it myself!"
Occasionally I look back through all the pictures of this project and for the life of me I can't remember doing half that stuff. It's kinda weird. I know I did that but I don't have any memories of doing it. I think it has to do with the scale & scope of this project and how much you're always thinking ahead of what needs to be done next, what needs to be done our bought for next week or next month or even next year. I see it all coming together in my head but there's no timeline associated with it. People ask me all the time: "When will it be done?" My standard answer is '2 years' but if it takes longer that's Ok. I want to take my time and make it nice. I really don't want to spend all this time, effort & money and have it coming out looking like a POS.
Ok that's 'nuff. I gotta go gather up clothes suitable to wear to work tomorrow. Thanks for looking in and standby....
So I sit there, taking a wee break and looking at my handiwork. Well sorta handiwork and ponder the enormity of the task I still have ahead of me. For one tired old fart, retired simple servant building this boat is a monumental effort. I hit it hard this summer, as much as the weather would allow and got quite a bit done but there's still a lot to do before I can flip this pig over. A thought pops into my head, something I remember from high school English class I think.

Occasionally I look back through all the pictures of this project and for the life of me I can't remember doing half that stuff. It's kinda weird. I know I did that but I don't have any memories of doing it. I think it has to do with the scale & scope of this project and how much you're always thinking ahead of what needs to be done next, what needs to be done our bought for next week or next month or even next year. I see it all coming together in my head but there's no timeline associated with it. People ask me all the time: "When will it be done?" My standard answer is '2 years' but if it takes longer that's Ok. I want to take my time and make it nice. I really don't want to spend all this time, effort & money and have it coming out looking like a POS.
Ok that's 'nuff. I gotta go gather up clothes suitable to wear to work tomorrow. Thanks for looking in and standby....
Saturday, September 7, 2013
So I'm having a little conversation
with Lori via Facebook chat. I happen to mention that she might have some extra shelf space left over. There's a silence. No response. Two minutes pass and I send her another message: "Did you fall off the chair darlin'?" Ok, still no response. I get the distinct feeling she's browsing the 'Joanne's Fabrics' web site for sales. Hmmmm? "You know, just 'cause you have more shelf space there's no need to run out and fill them up. Ya know?" "Dear?" Her response came about 5 mins later and was something like this: *giggle*
Anywho, this morning I finished the installation of the shelves. Sorta turned out the way I had envisioned them.
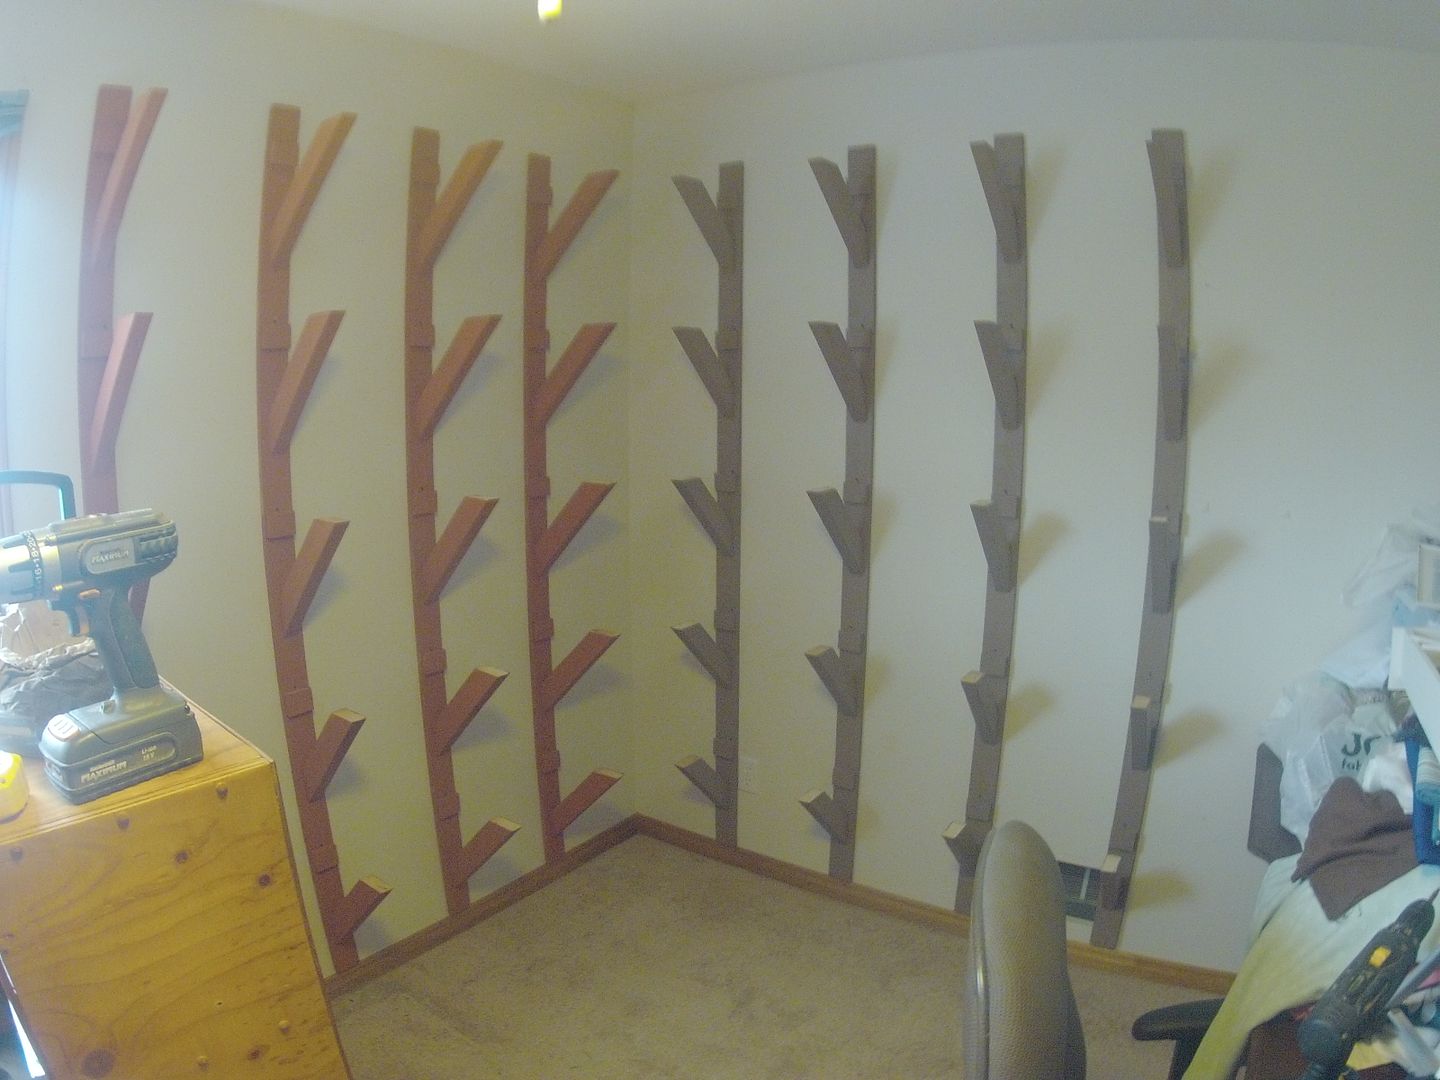
First step was mounting the shelf brackets I assembled and painted yesterday. Got them all nice & level & plumb with my handy dandy laser level. Sweet little tool.
 I know it looks kinda weird. Sorta like half pine tree's with no needles! ;-) These got firmly screwed to the studs behind the drywall. There's no way they're coming off the wall!
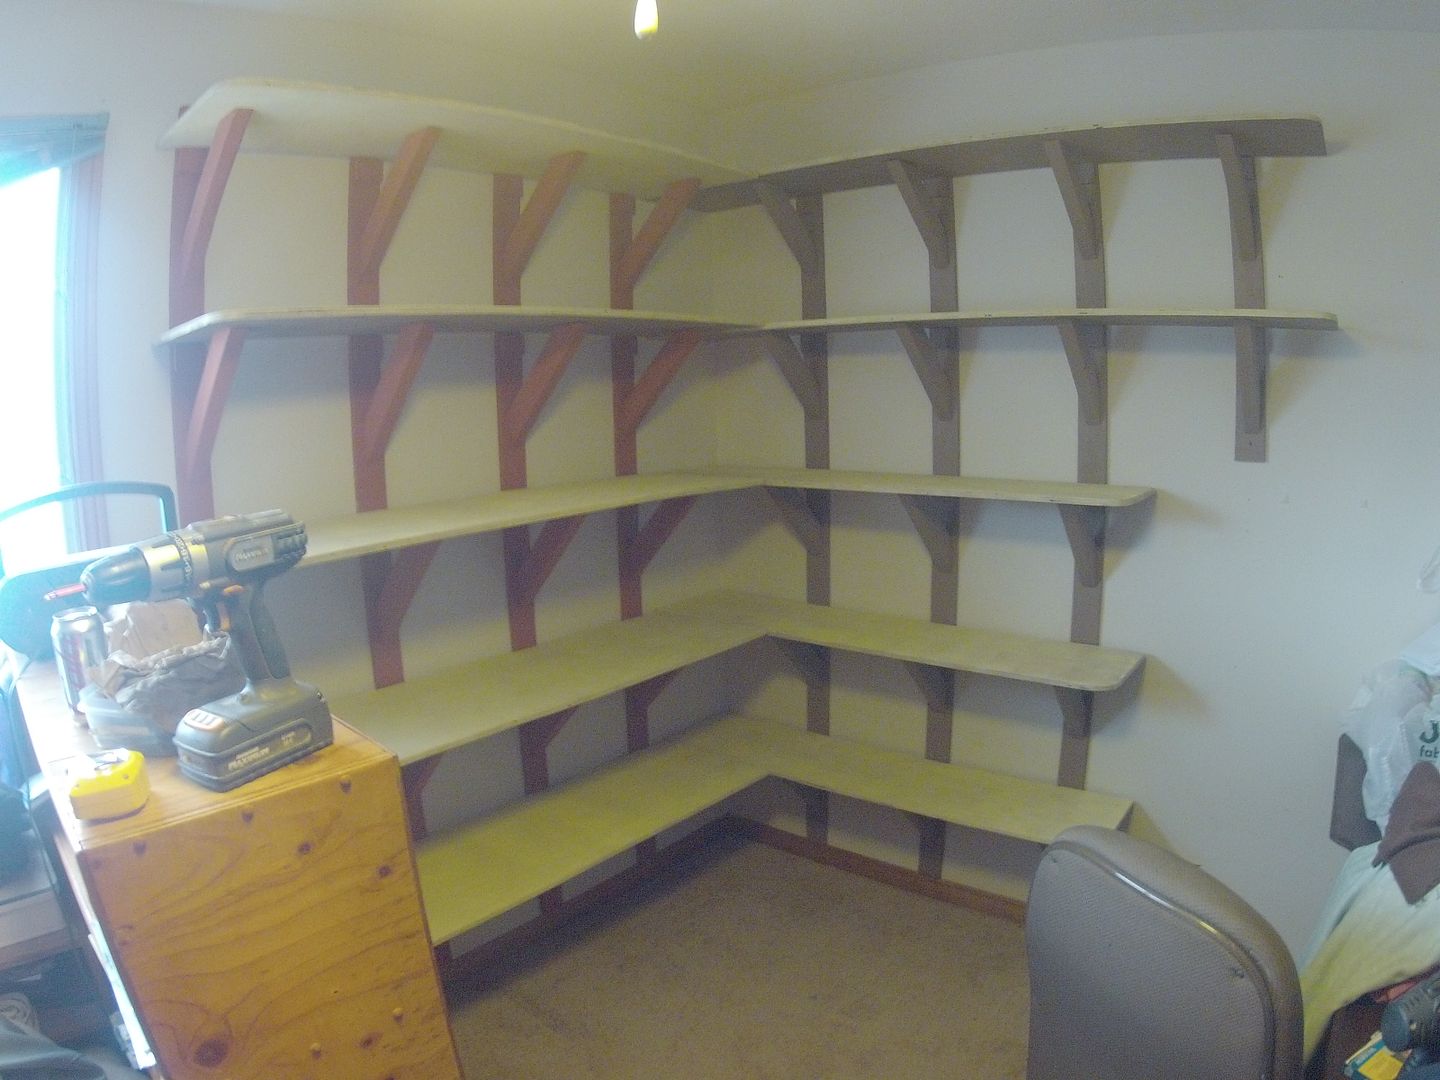
Next the shelves went on. Pretty simple stuff. Only took a half hour or so. I remembered to turn the ceiling fan off this time! ;-)
 I kinda like how they turned out. Pretty simple. Not fancy woodwork and all construction grade plywood and whatever paint I had left.
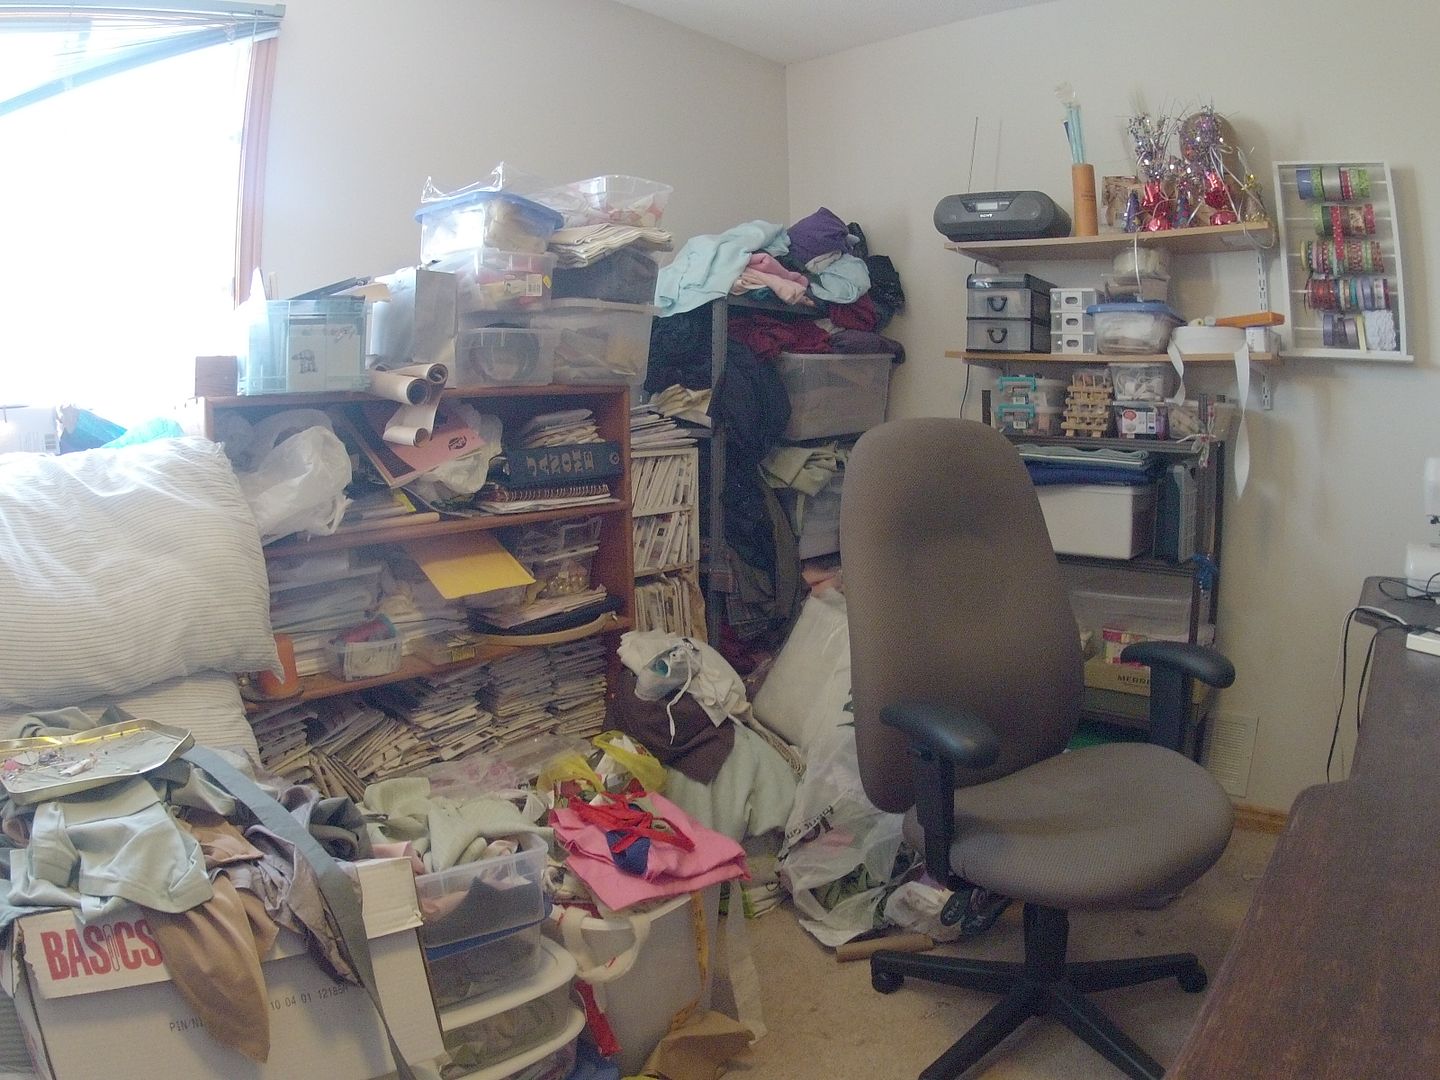
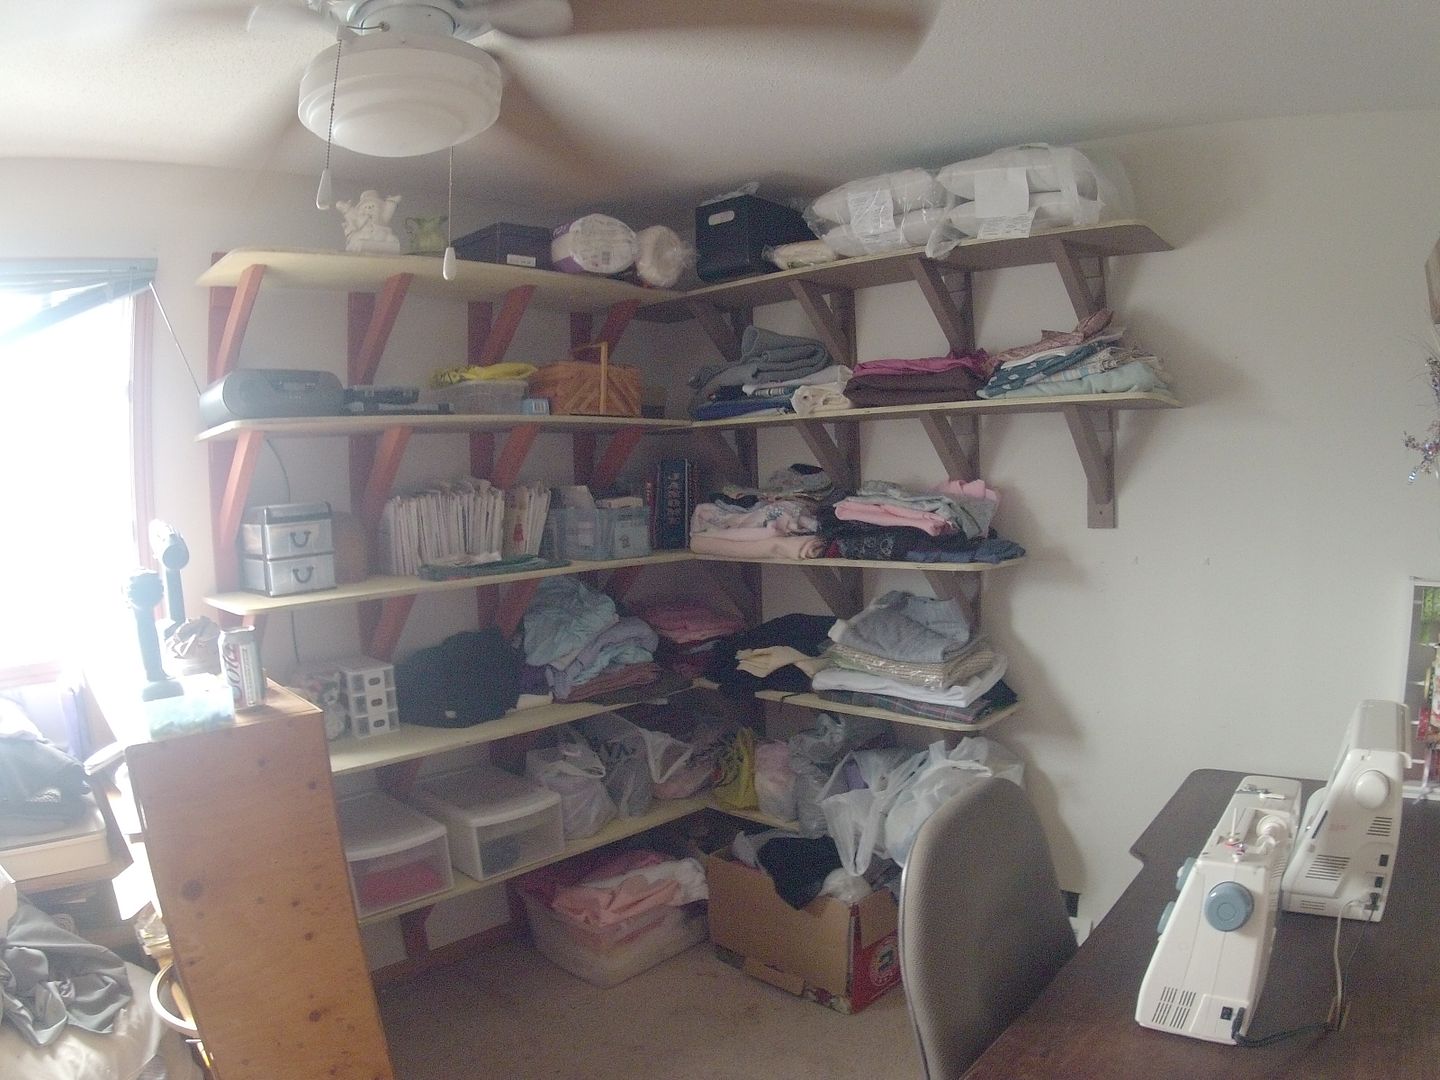
So I proceeded to unload everything I had stacked up on her sewing table to the shelves. It didn't take long to figure out there wasn't going to be a whole lot of shelf space left and she's still got tubs & tubs of stuff squirreled away to sort through.
Before:
 After:
 The cleared off Sewing table.

That's it for this project till the boss gets home and sorts it out. There's still some rearranging to be done in the corner opposite the sewing table. She has a 4 drawer dresser to go in there and I've got to figure out something for all her patterns. A trip to Joanne's or Michael's for storage boxes might be in order! *sigh*
I'd say this project too me roughly 6 days and about $250 in materials.
Anywho, this morning I finished the installation of the shelves. Sorta turned out the way I had envisioned them.
First step was mounting the shelf brackets I assembled and painted yesterday. Got them all nice & level & plumb with my handy dandy laser level. Sweet little tool.
Next the shelves went on. Pretty simple stuff. Only took a half hour or so. I remembered to turn the ceiling fan off this time! ;-)
So I proceeded to unload everything I had stacked up on her sewing table to the shelves. It didn't take long to figure out there wasn't going to be a whole lot of shelf space left and she's still got tubs & tubs of stuff squirreled away to sort through.
Before:
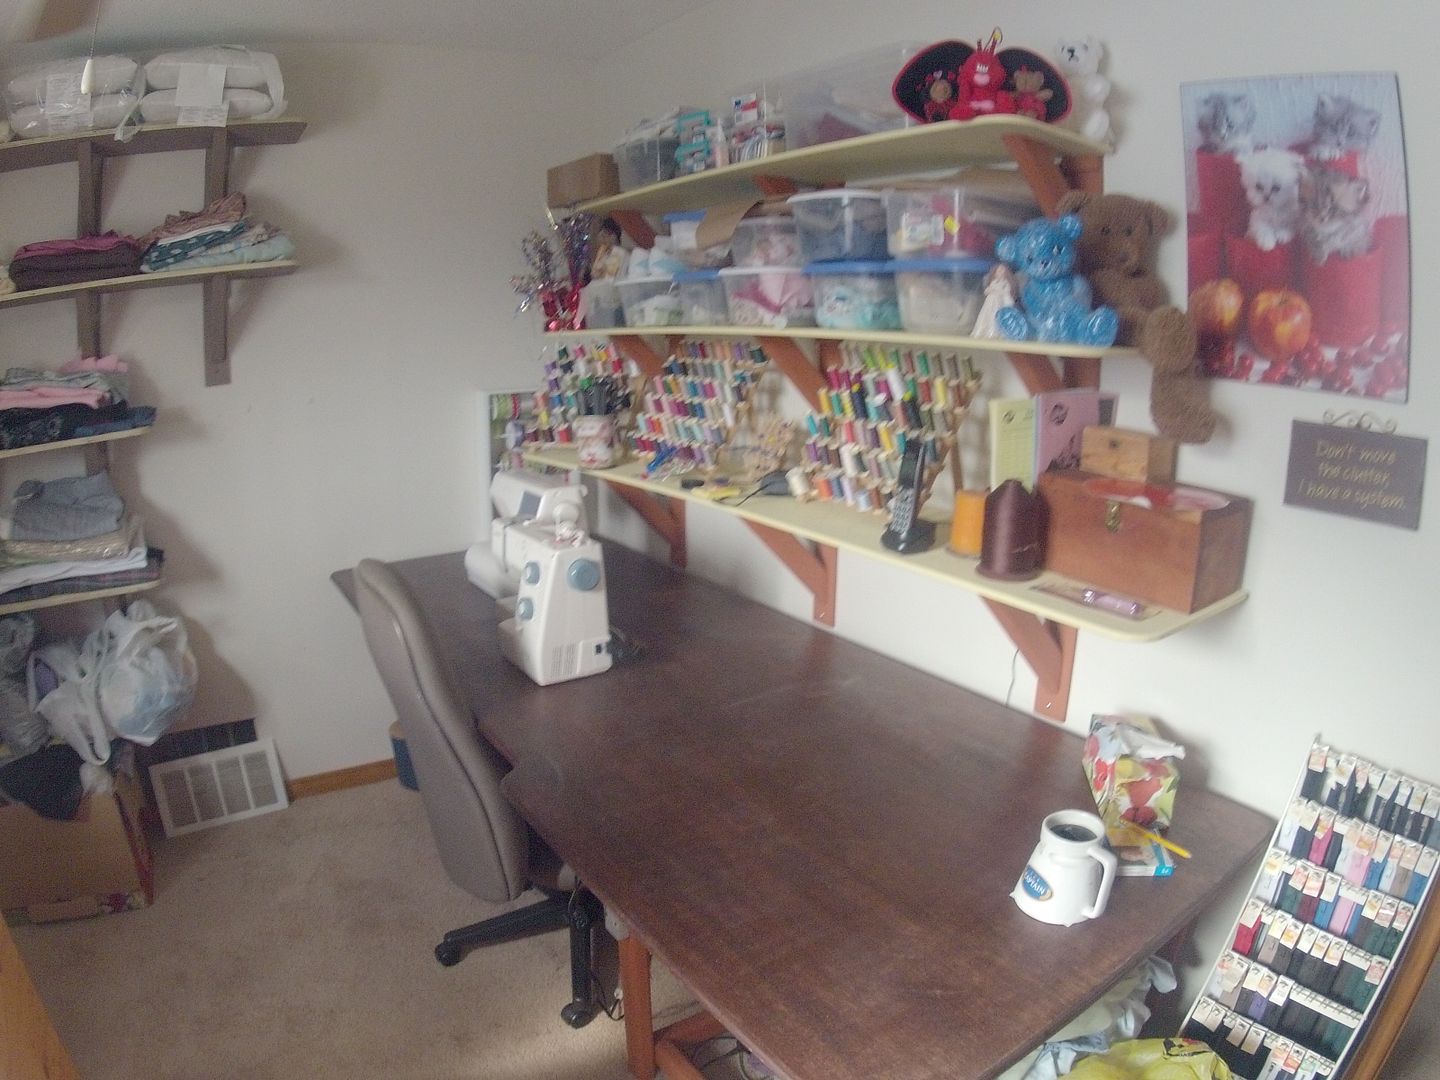
That's it for this project till the boss gets home and sorts it out. There's still some rearranging to be done in the corner opposite the sewing table. She has a 4 drawer dresser to go in there and I've got to figure out something for all her patterns. A trip to Joanne's or Michael's for storage boxes might be in order! *sigh*
I'd say this project too me roughly 6 days and about $250 in materials.
Subscribe to:
Posts (Atom)